Page 1 of 2
Building a Benofkent Props Proton Pack for fellow 'Buster
Posted: June 21st, 2022, 1:57 pm
by WShawn
Here's a thread in which I'll document the build of a Benofkent Props Proton Pack I've decided to build for an acquaintance, Wes Cronin. We're both members of the Portland Ghostbusters. I scratch-built my Proton Pack in 1984, as documented here
https://shawnmarshallmakes.com/1984-proton-packs/.
Wes bought this kit in 2015 but got stuck. Initially I was just going to help get the Heavy Props electronics sorted out, but as Wes gave me the whole kit back in 2019 I thought it would be a fun distraction from reality to just build the whole thing, pro bono. I hope to get it done in time for a screening of Ghostbusters that the Portland Art Museum film program (PAM CUT) will be holding on July 29. My other goal is to put as little money into completing the prop as possible, so I'll be using a lot of whatever I have kicking around.
6/14/22 My first task was disassembling the parts Wes had already glued onto the main shell with E6000. It took 2-3 hours using acetone and careful prying with a sharp putty knife to remove all of those parts.
Re: Building a Benofkent Props Proton Pack for fellow 'Buster
Posted: June 21st, 2022, 2:01 pm
by WShawn
Re: Building a Benofkent Props Proton Pack for fellow 'Buster
Posted: June 21st, 2022, 2:10 pm
by WShawn
Re: Building a Benofkent Props Proton Pack for fellow 'Buster
Posted: June 22nd, 2022, 12:03 pm
by WShawn
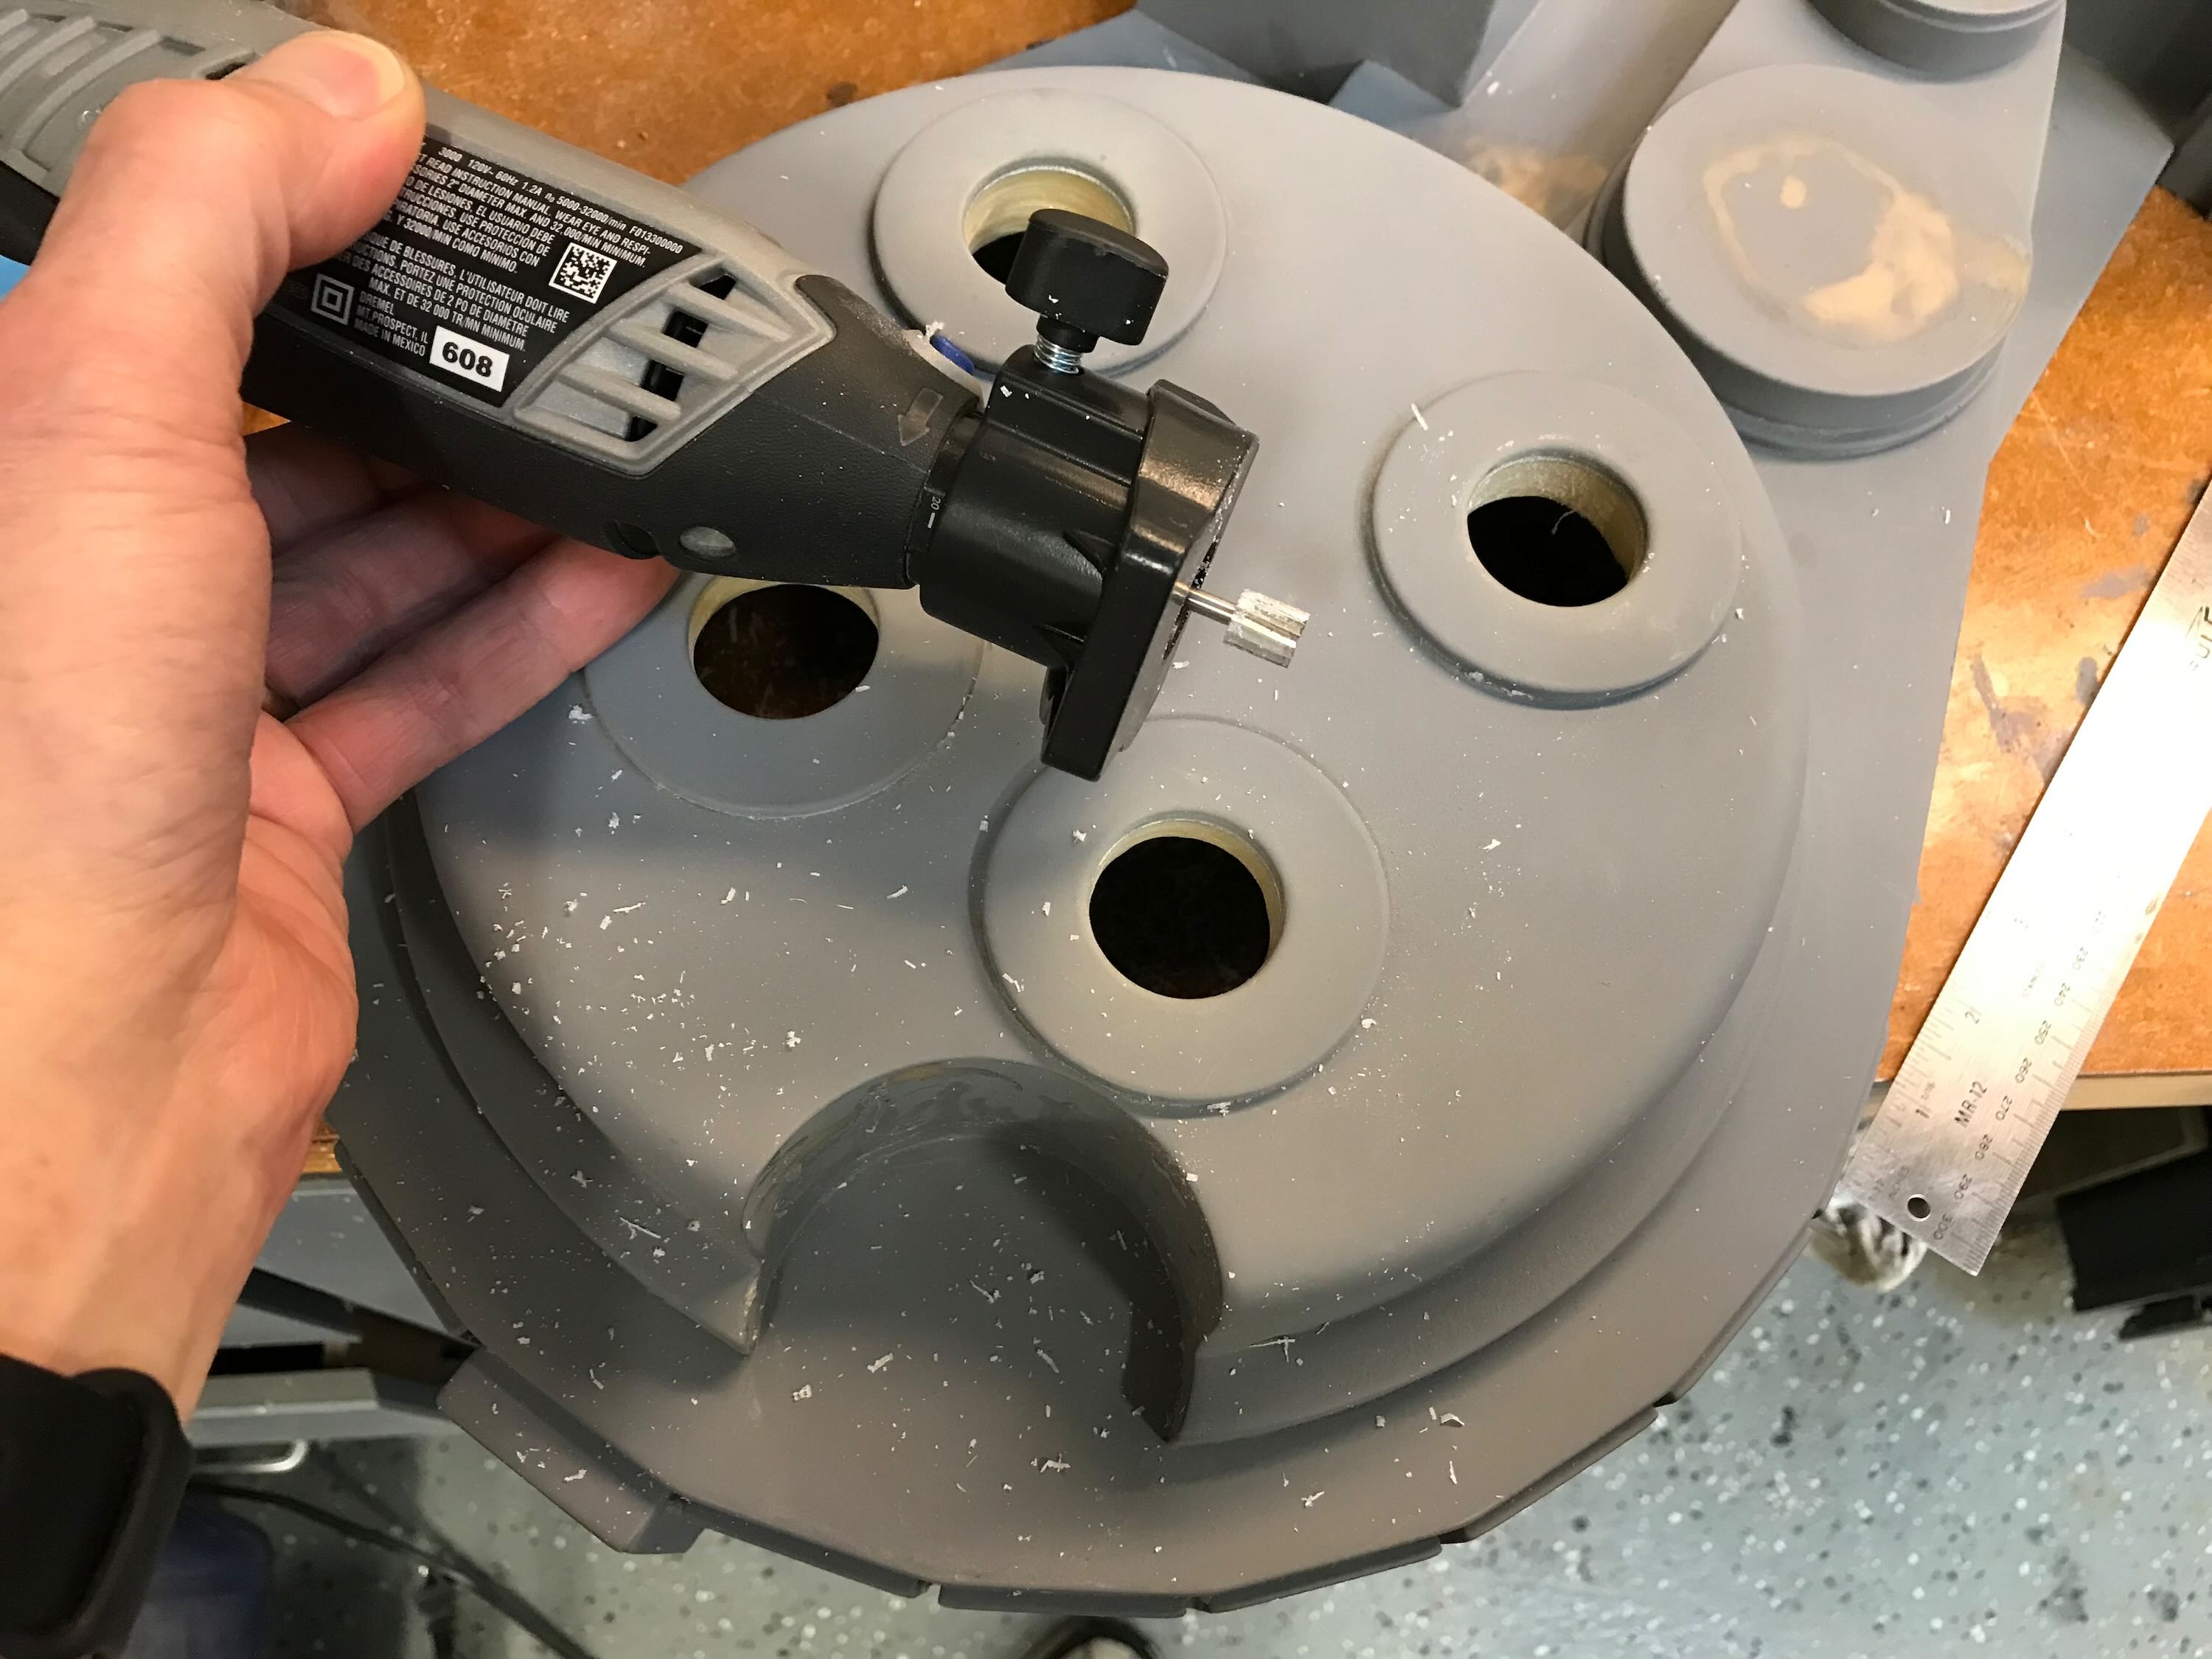
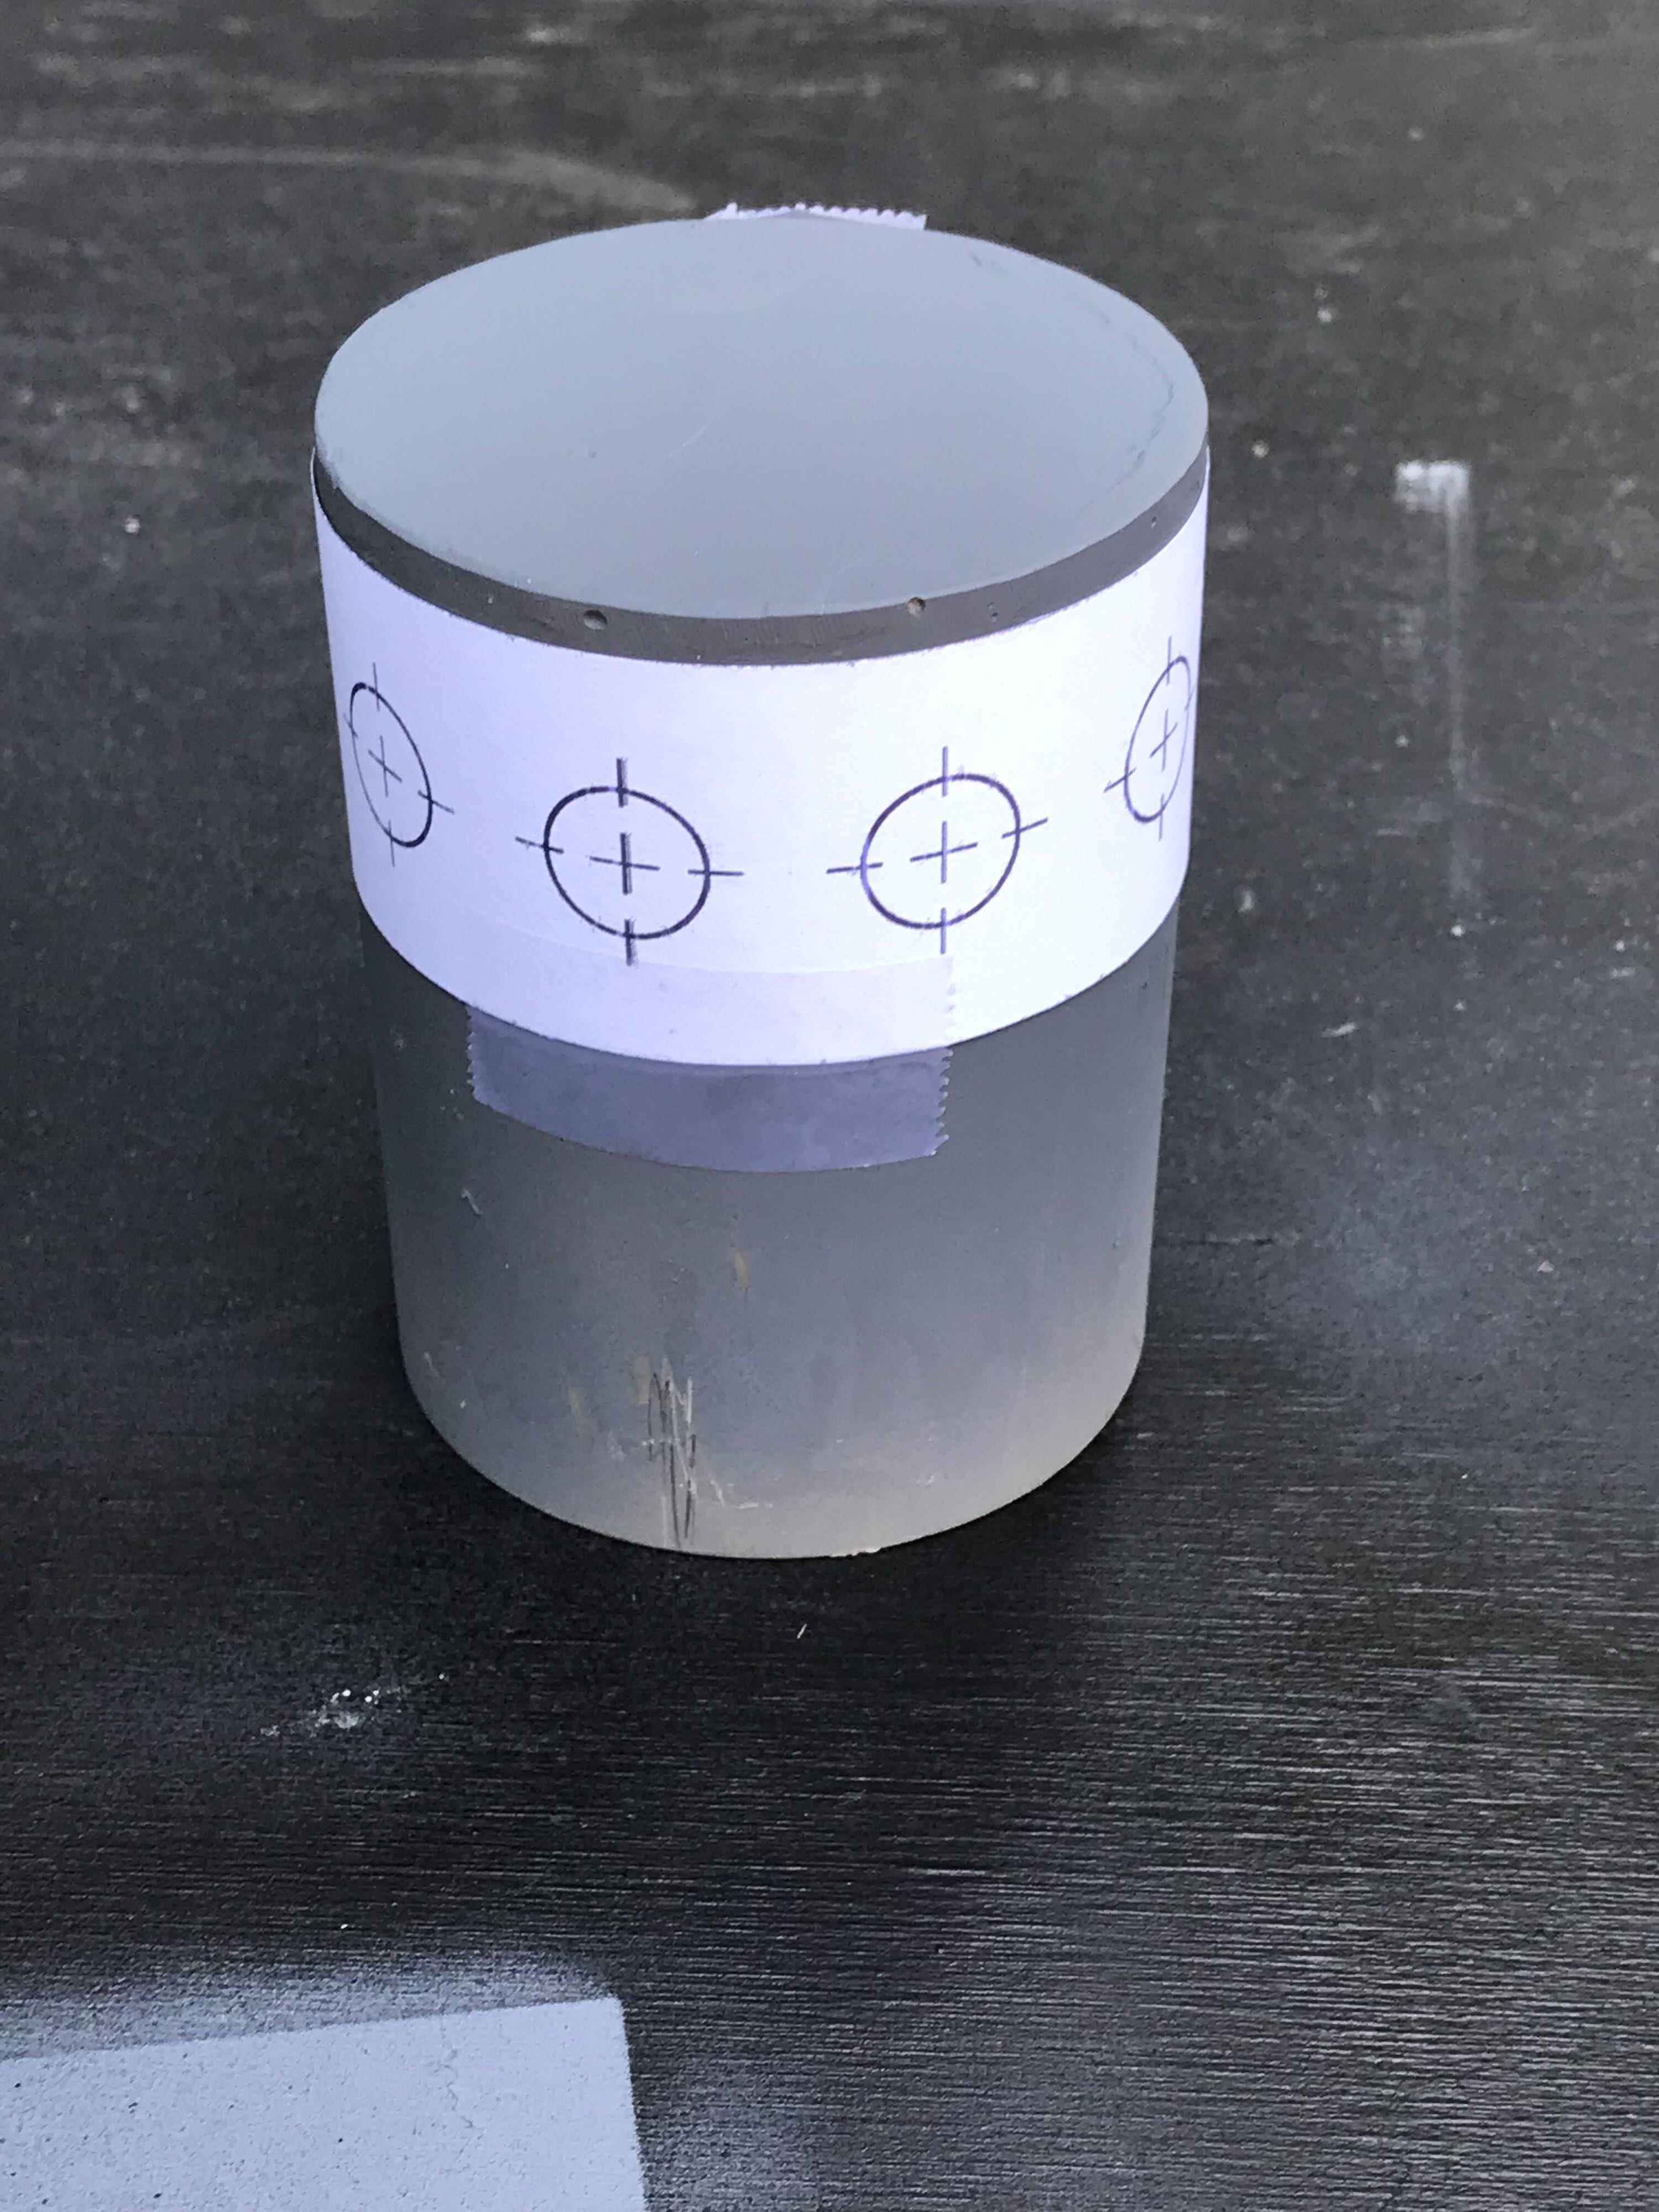
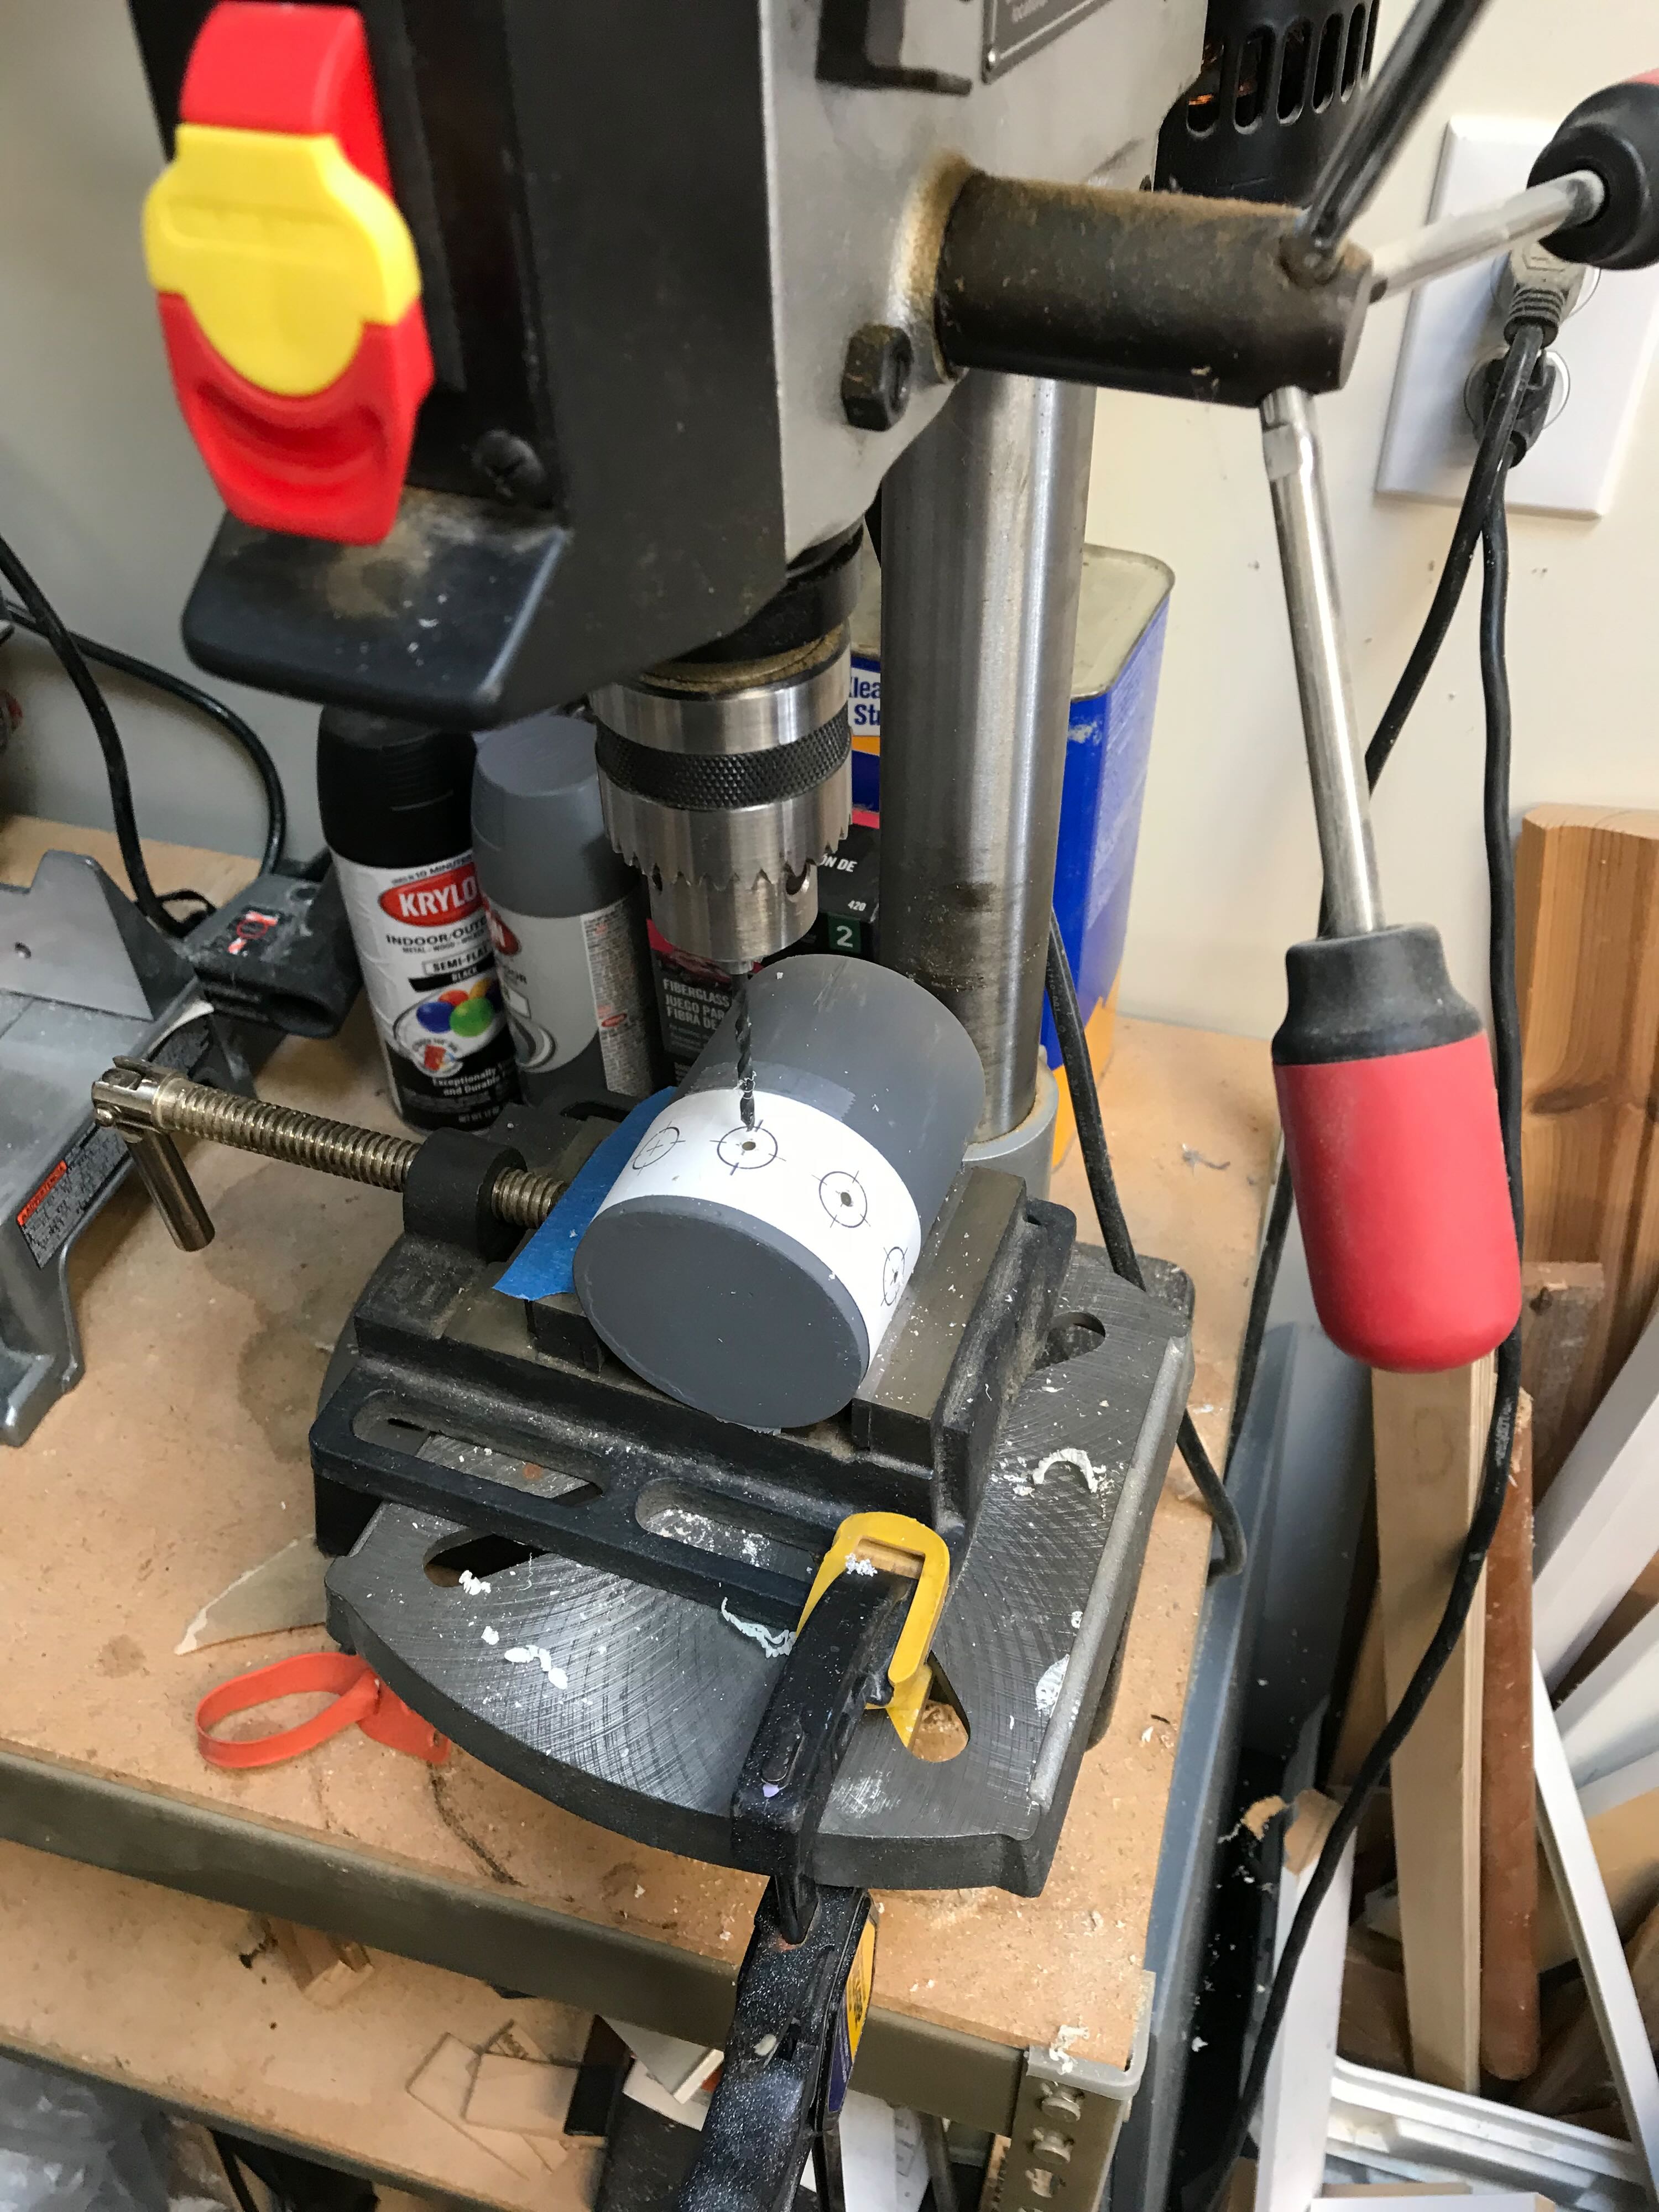
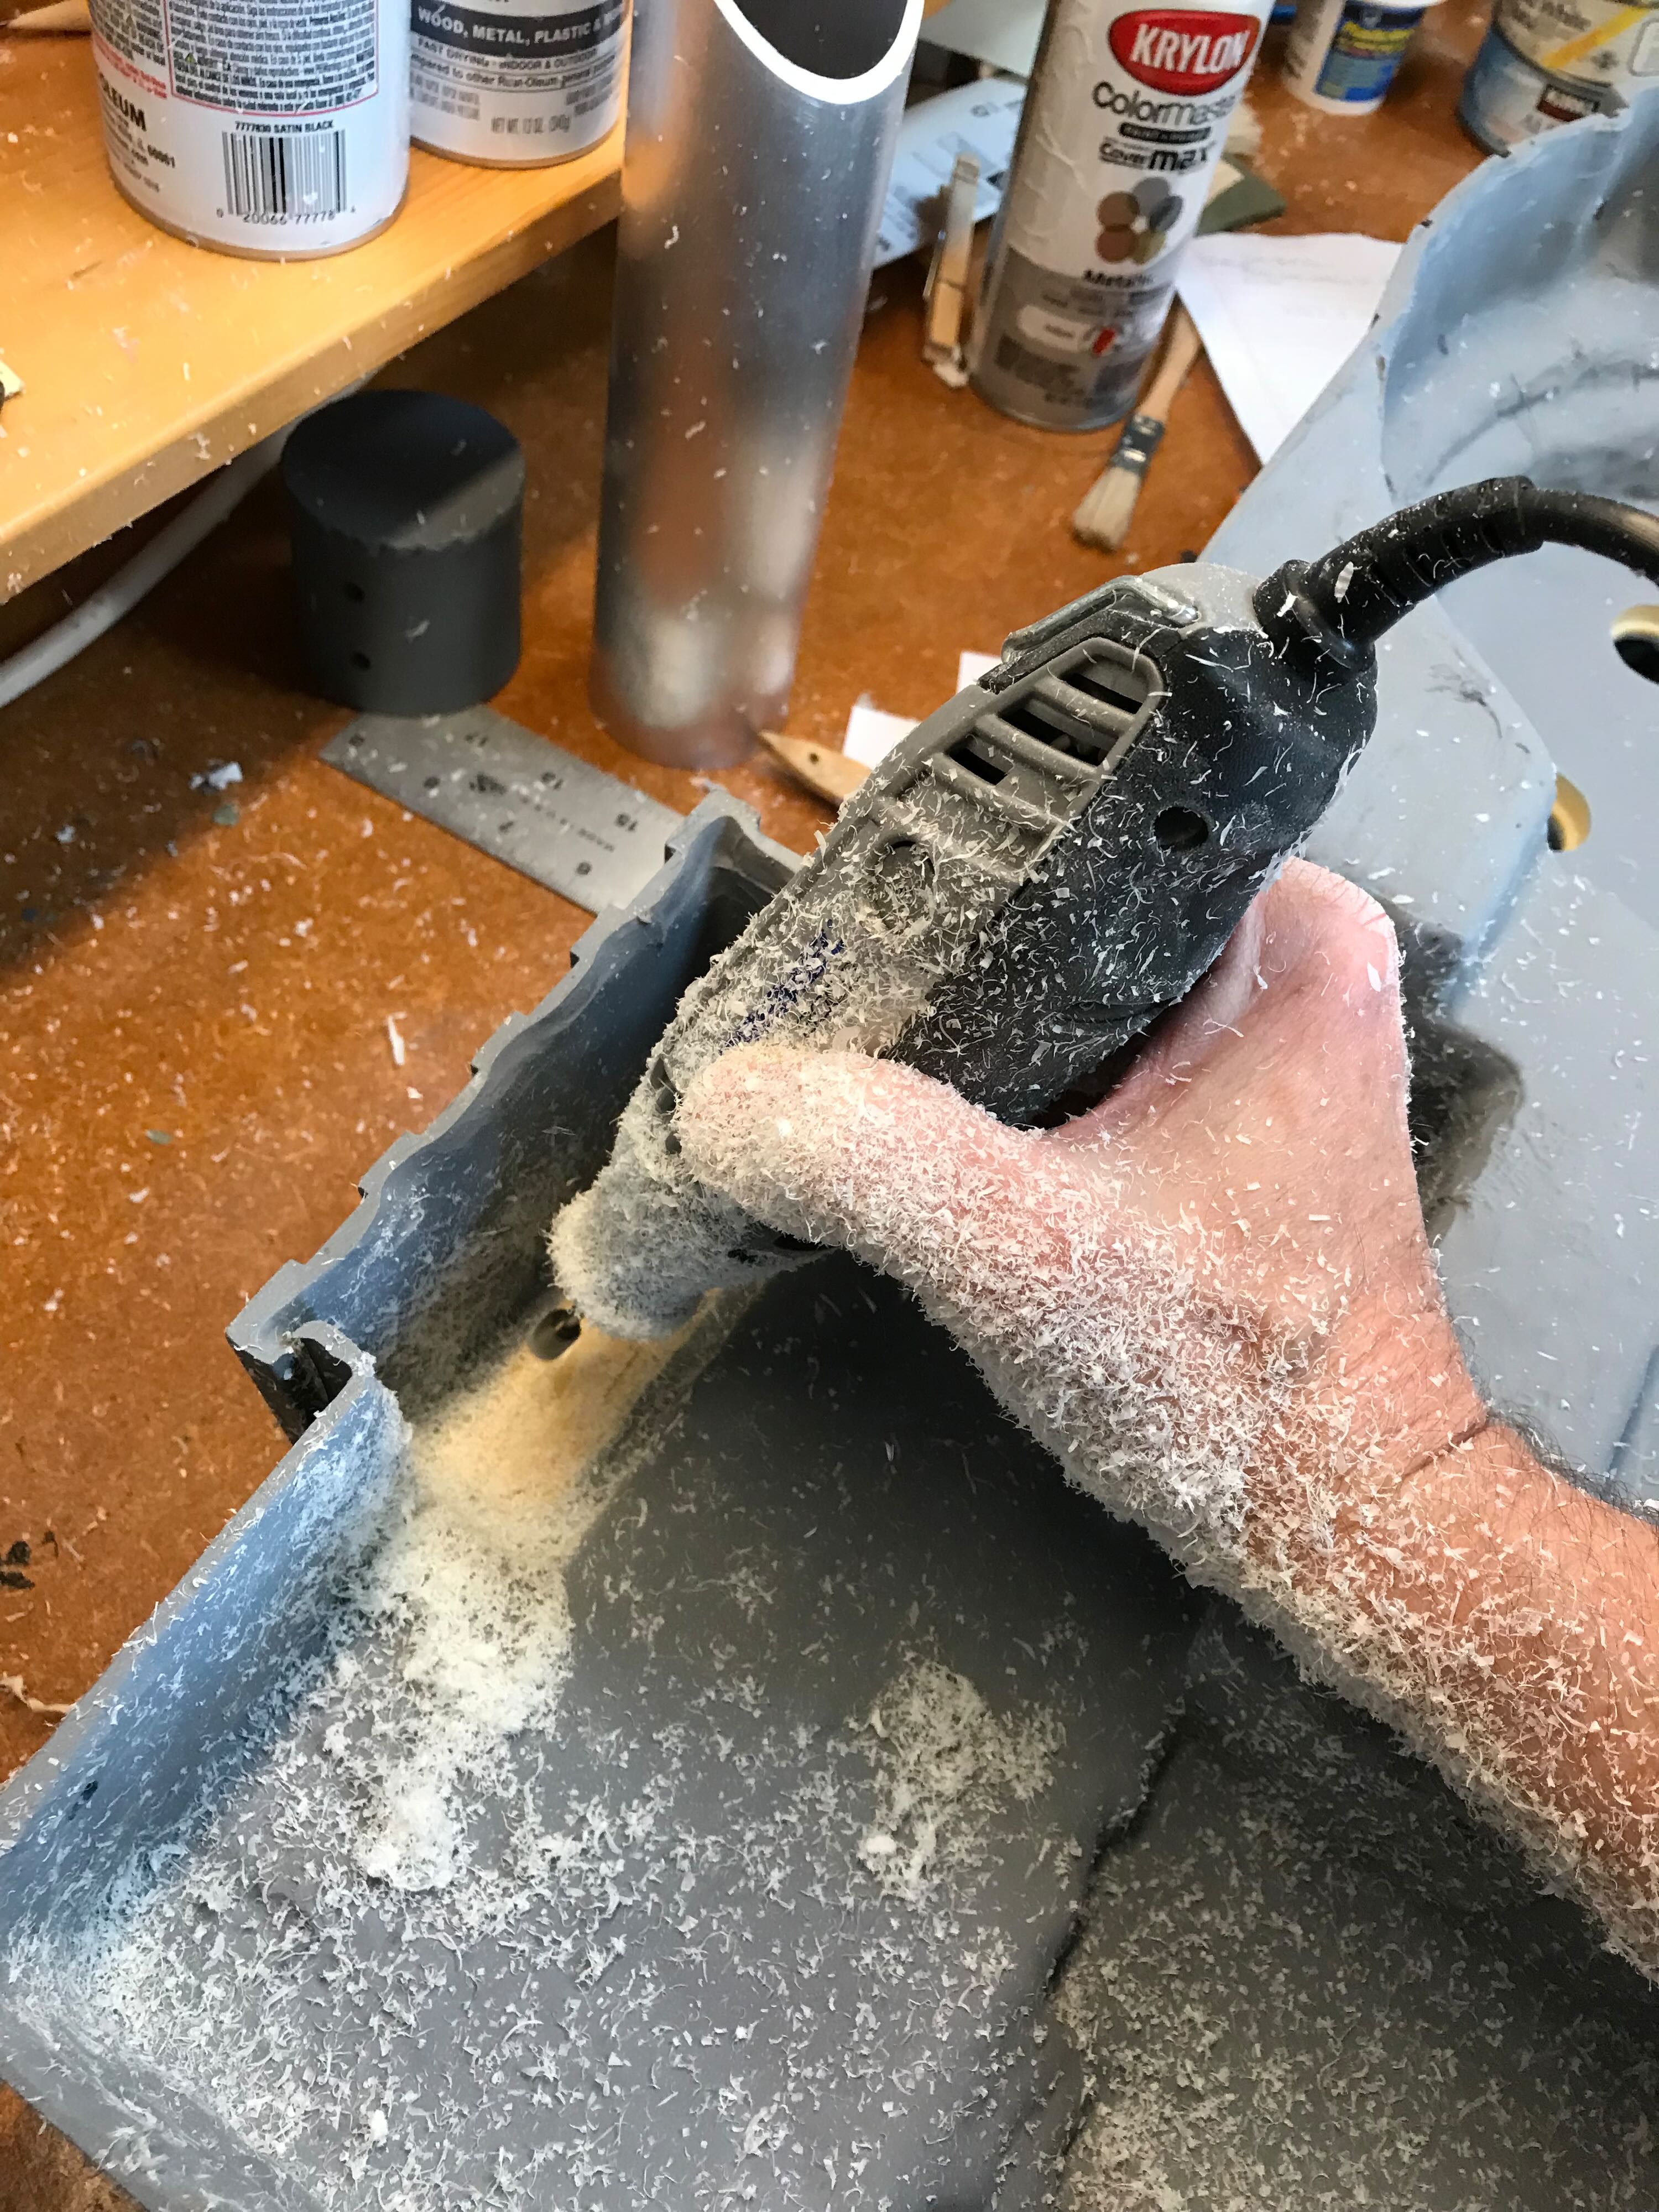
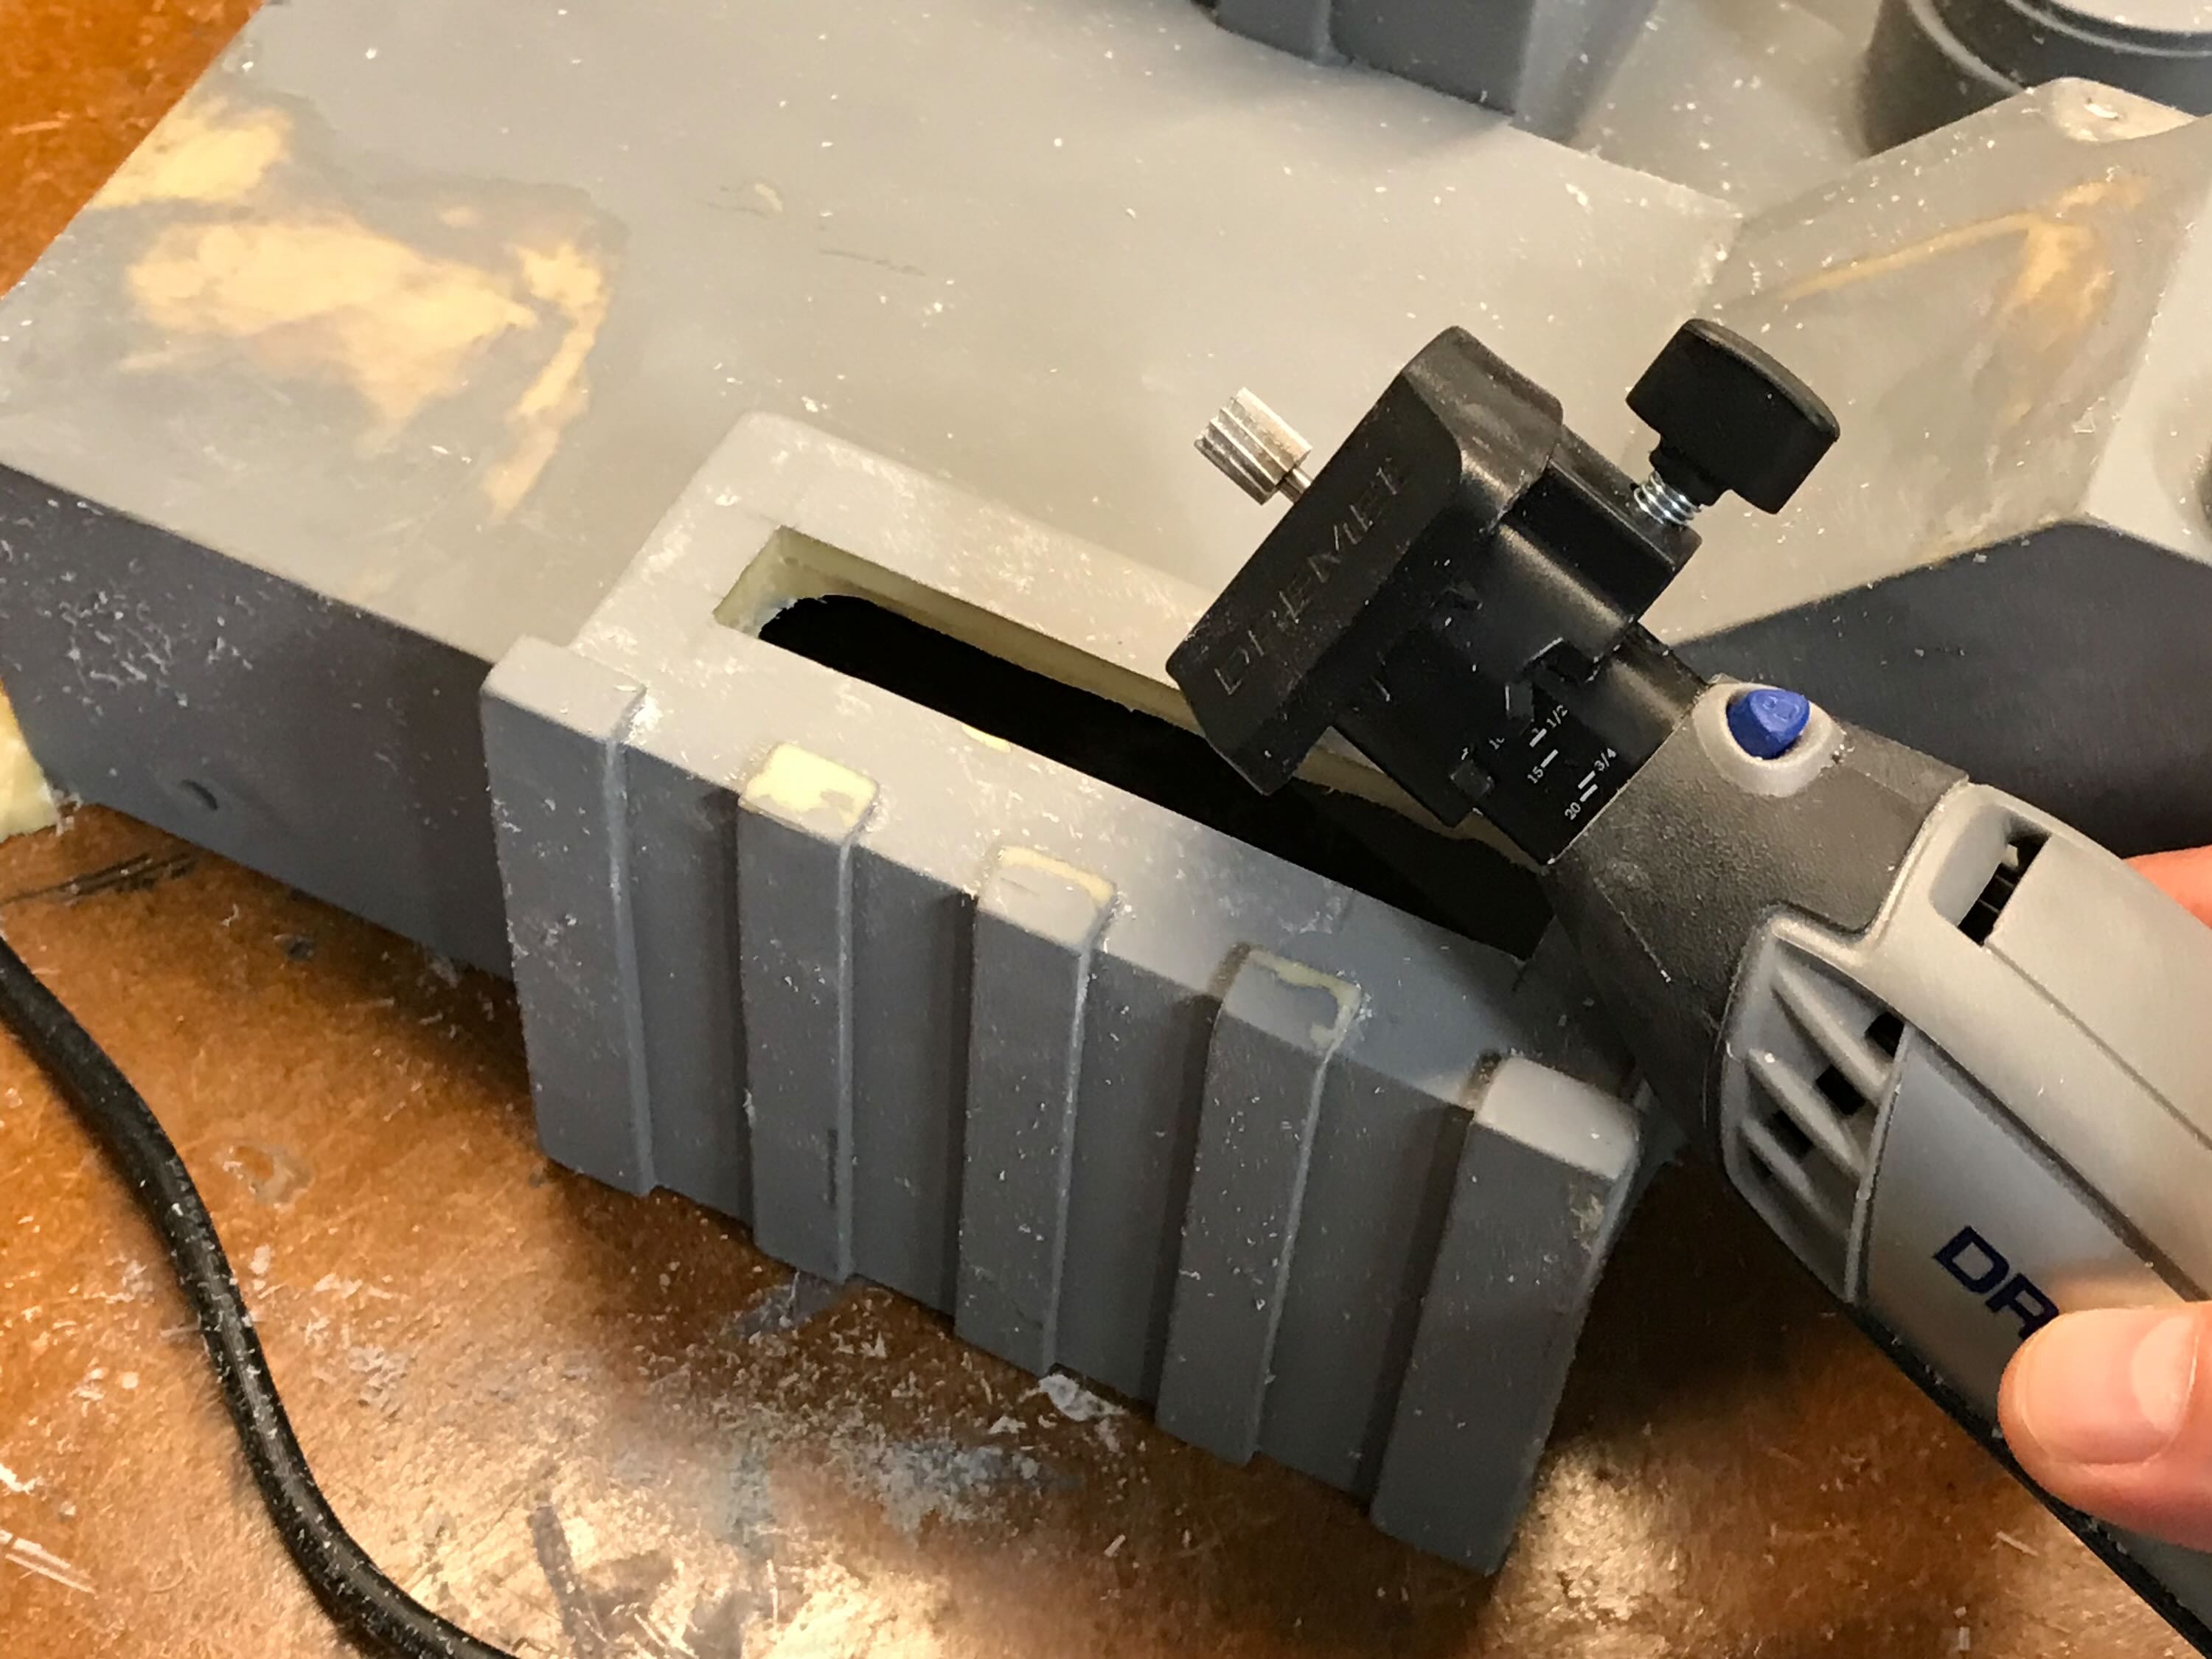
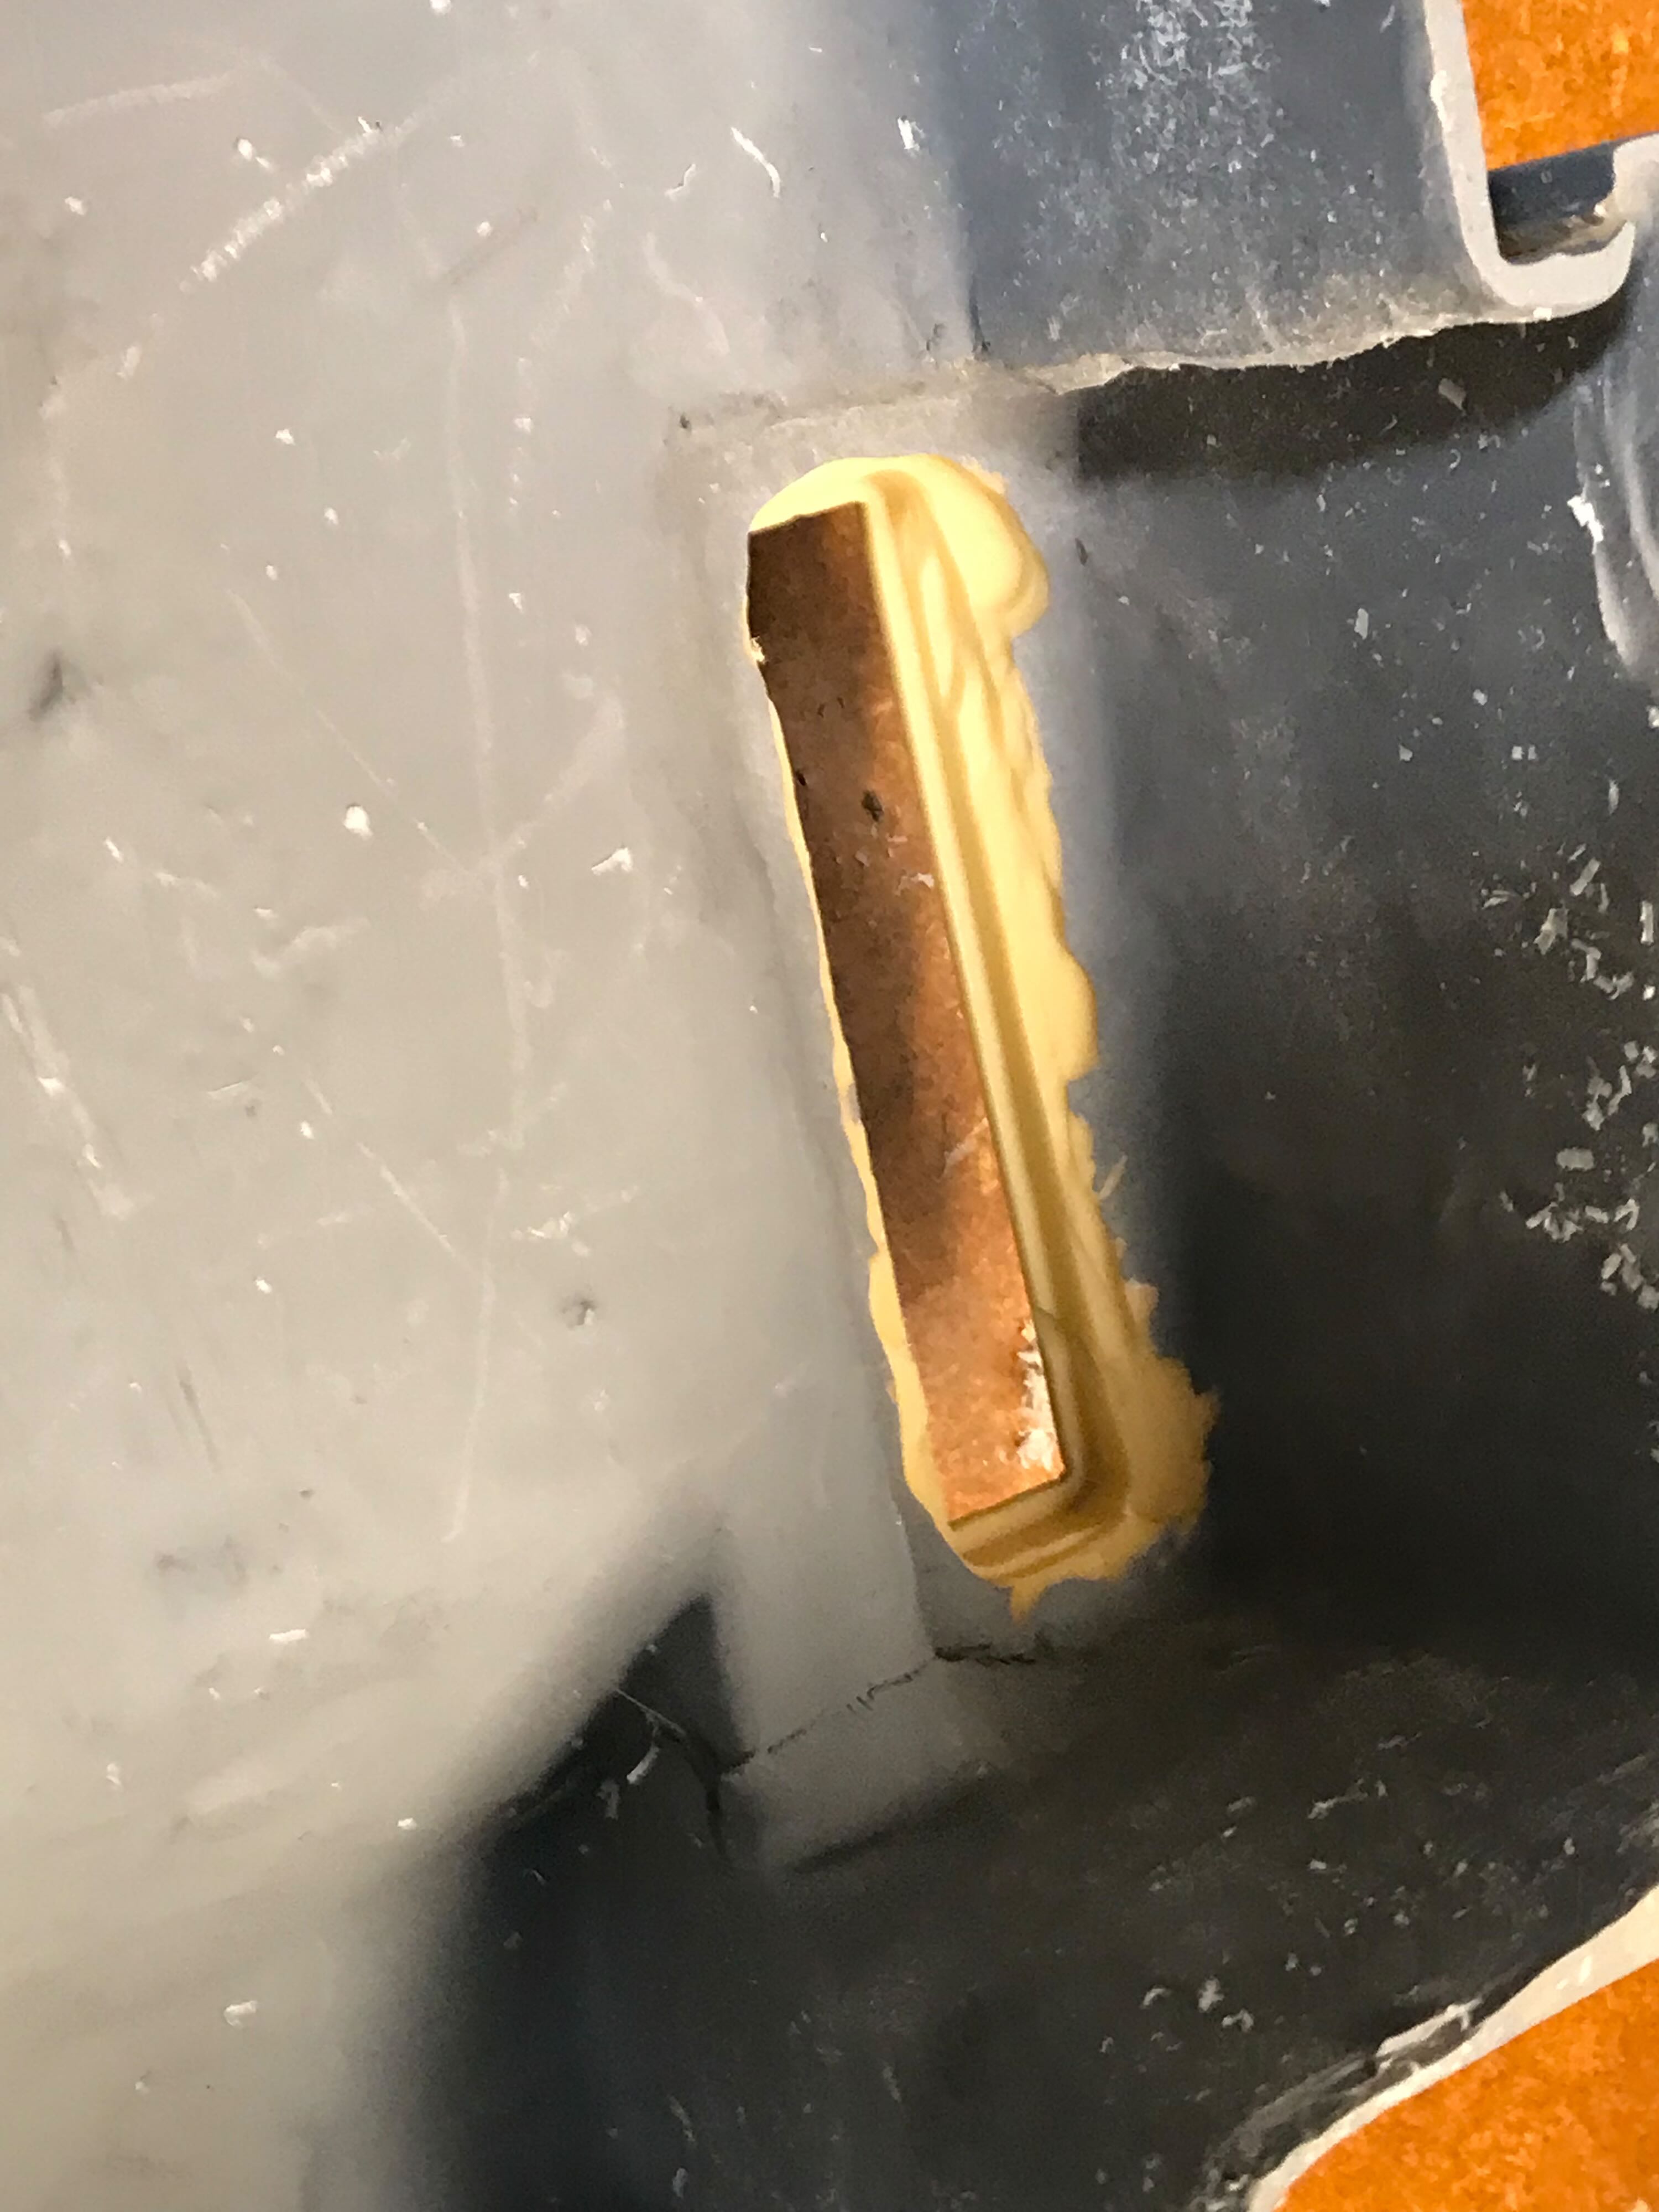
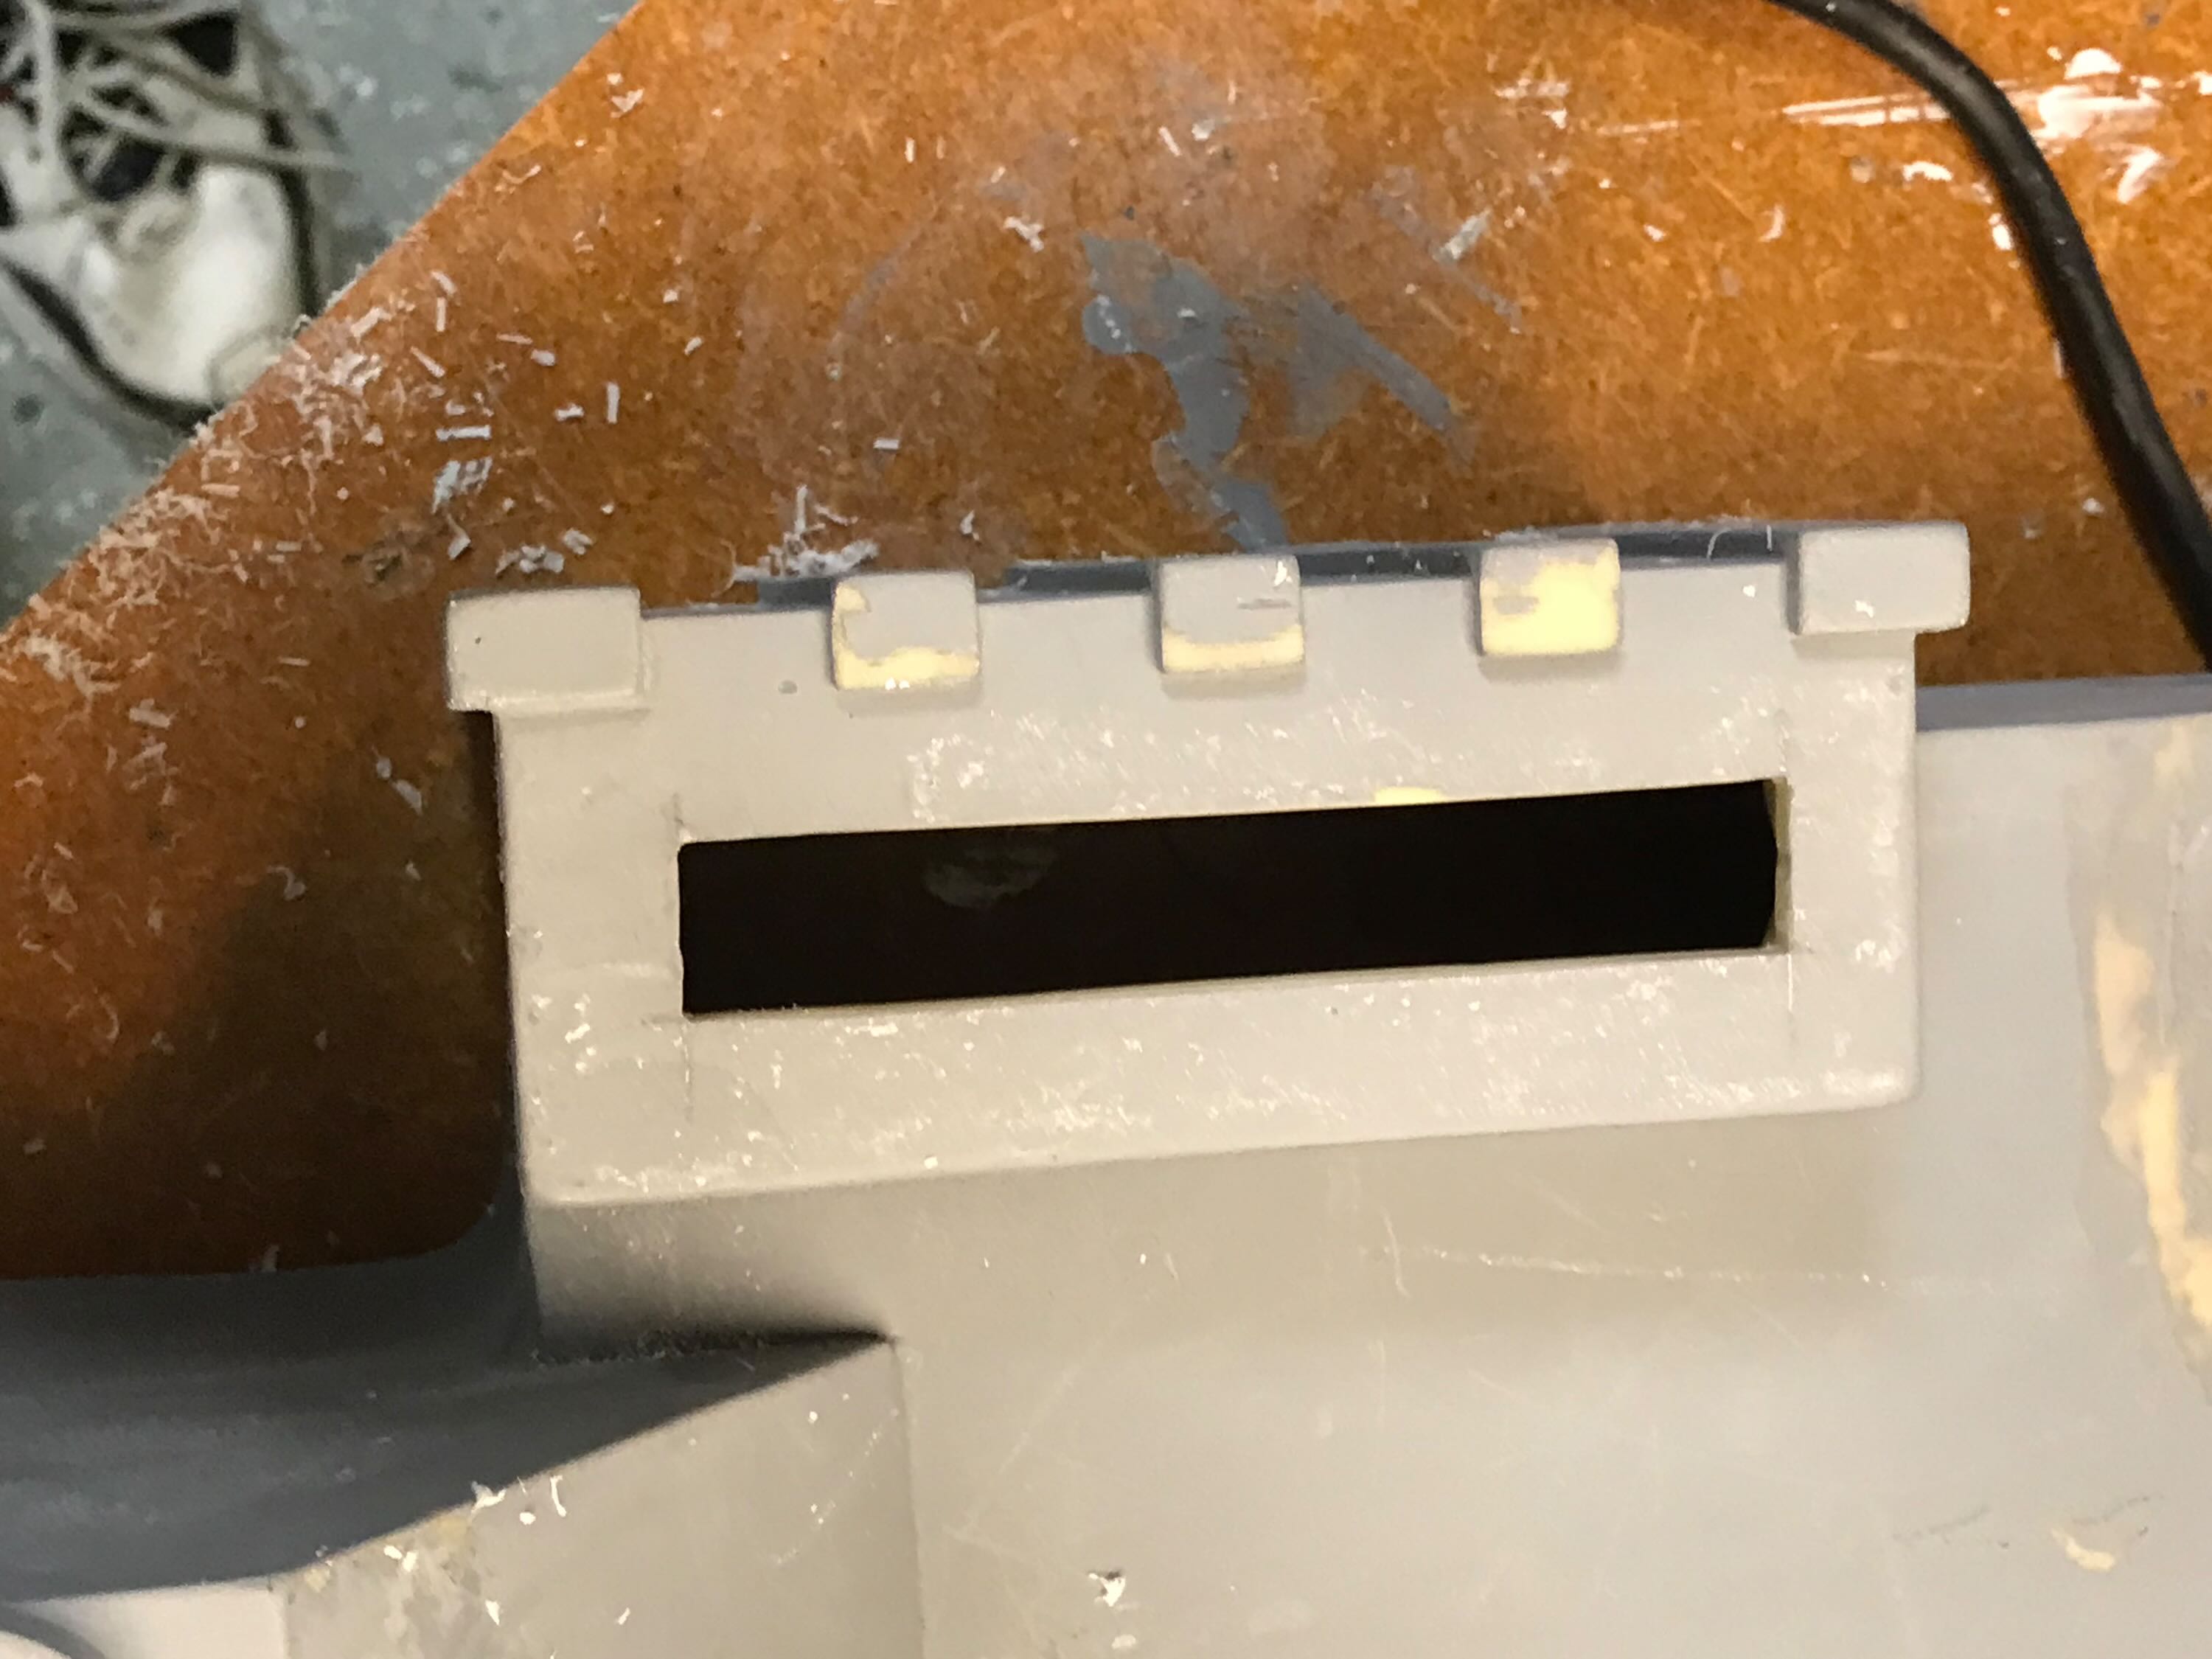
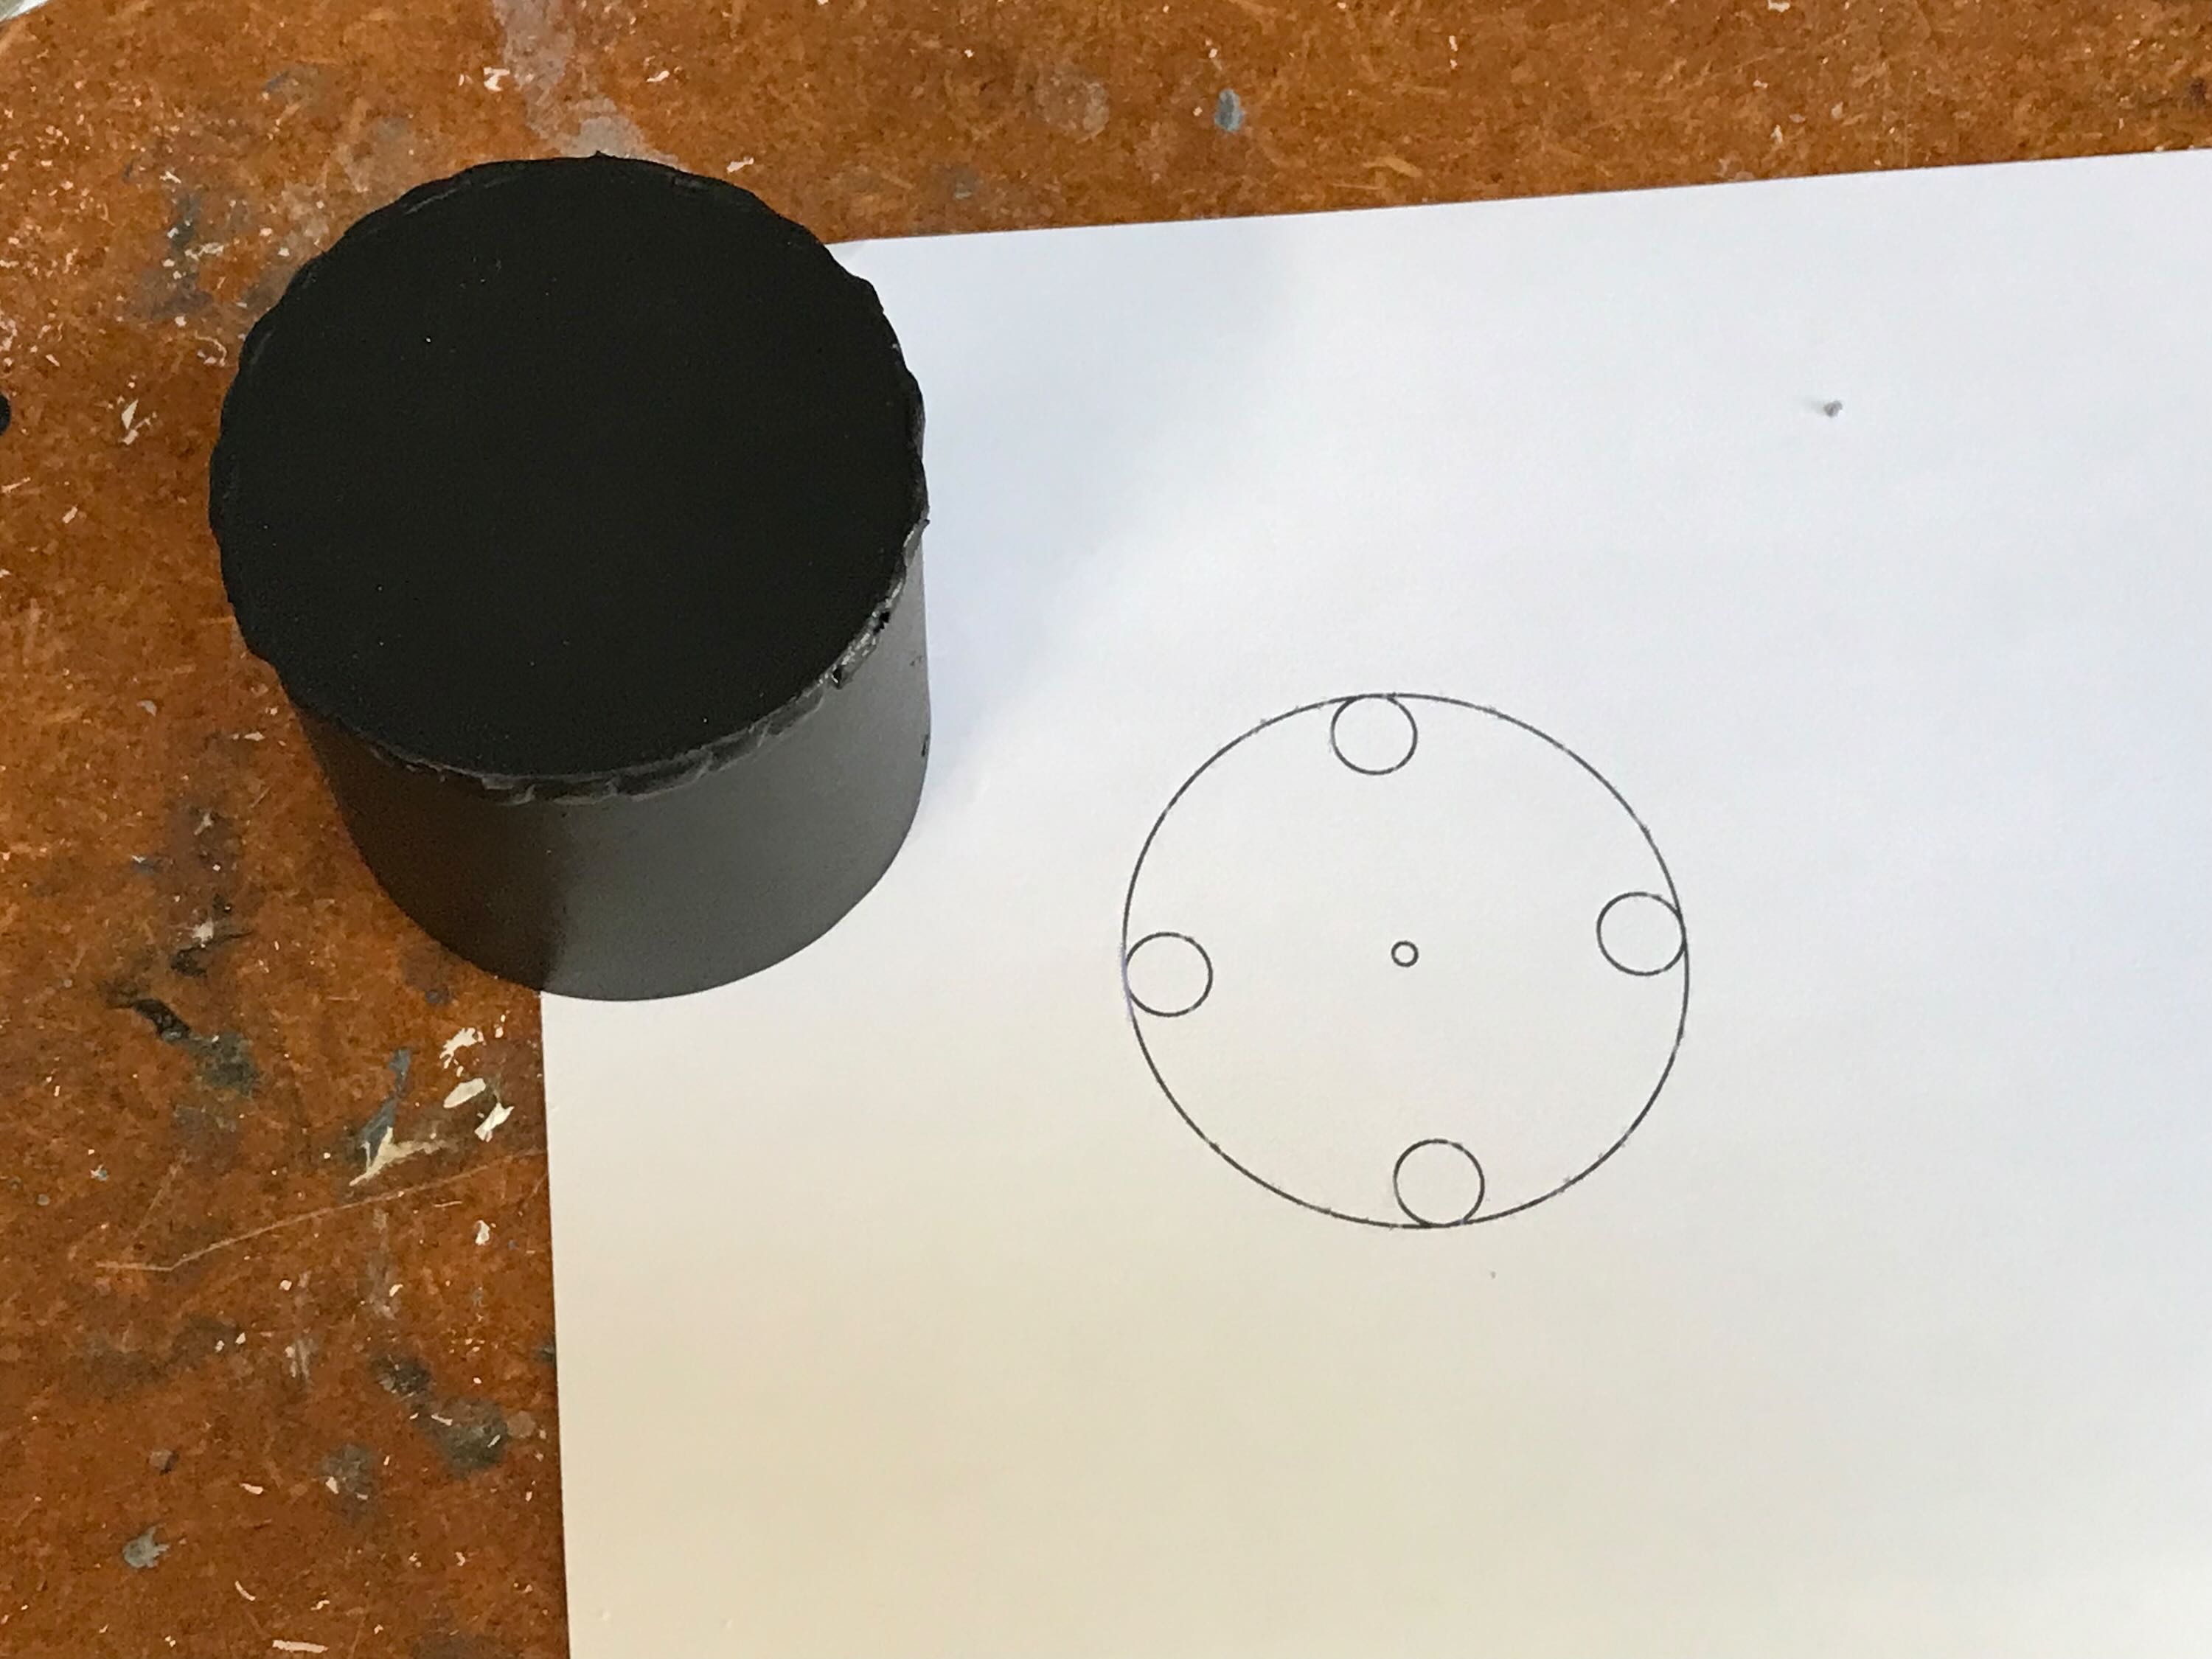
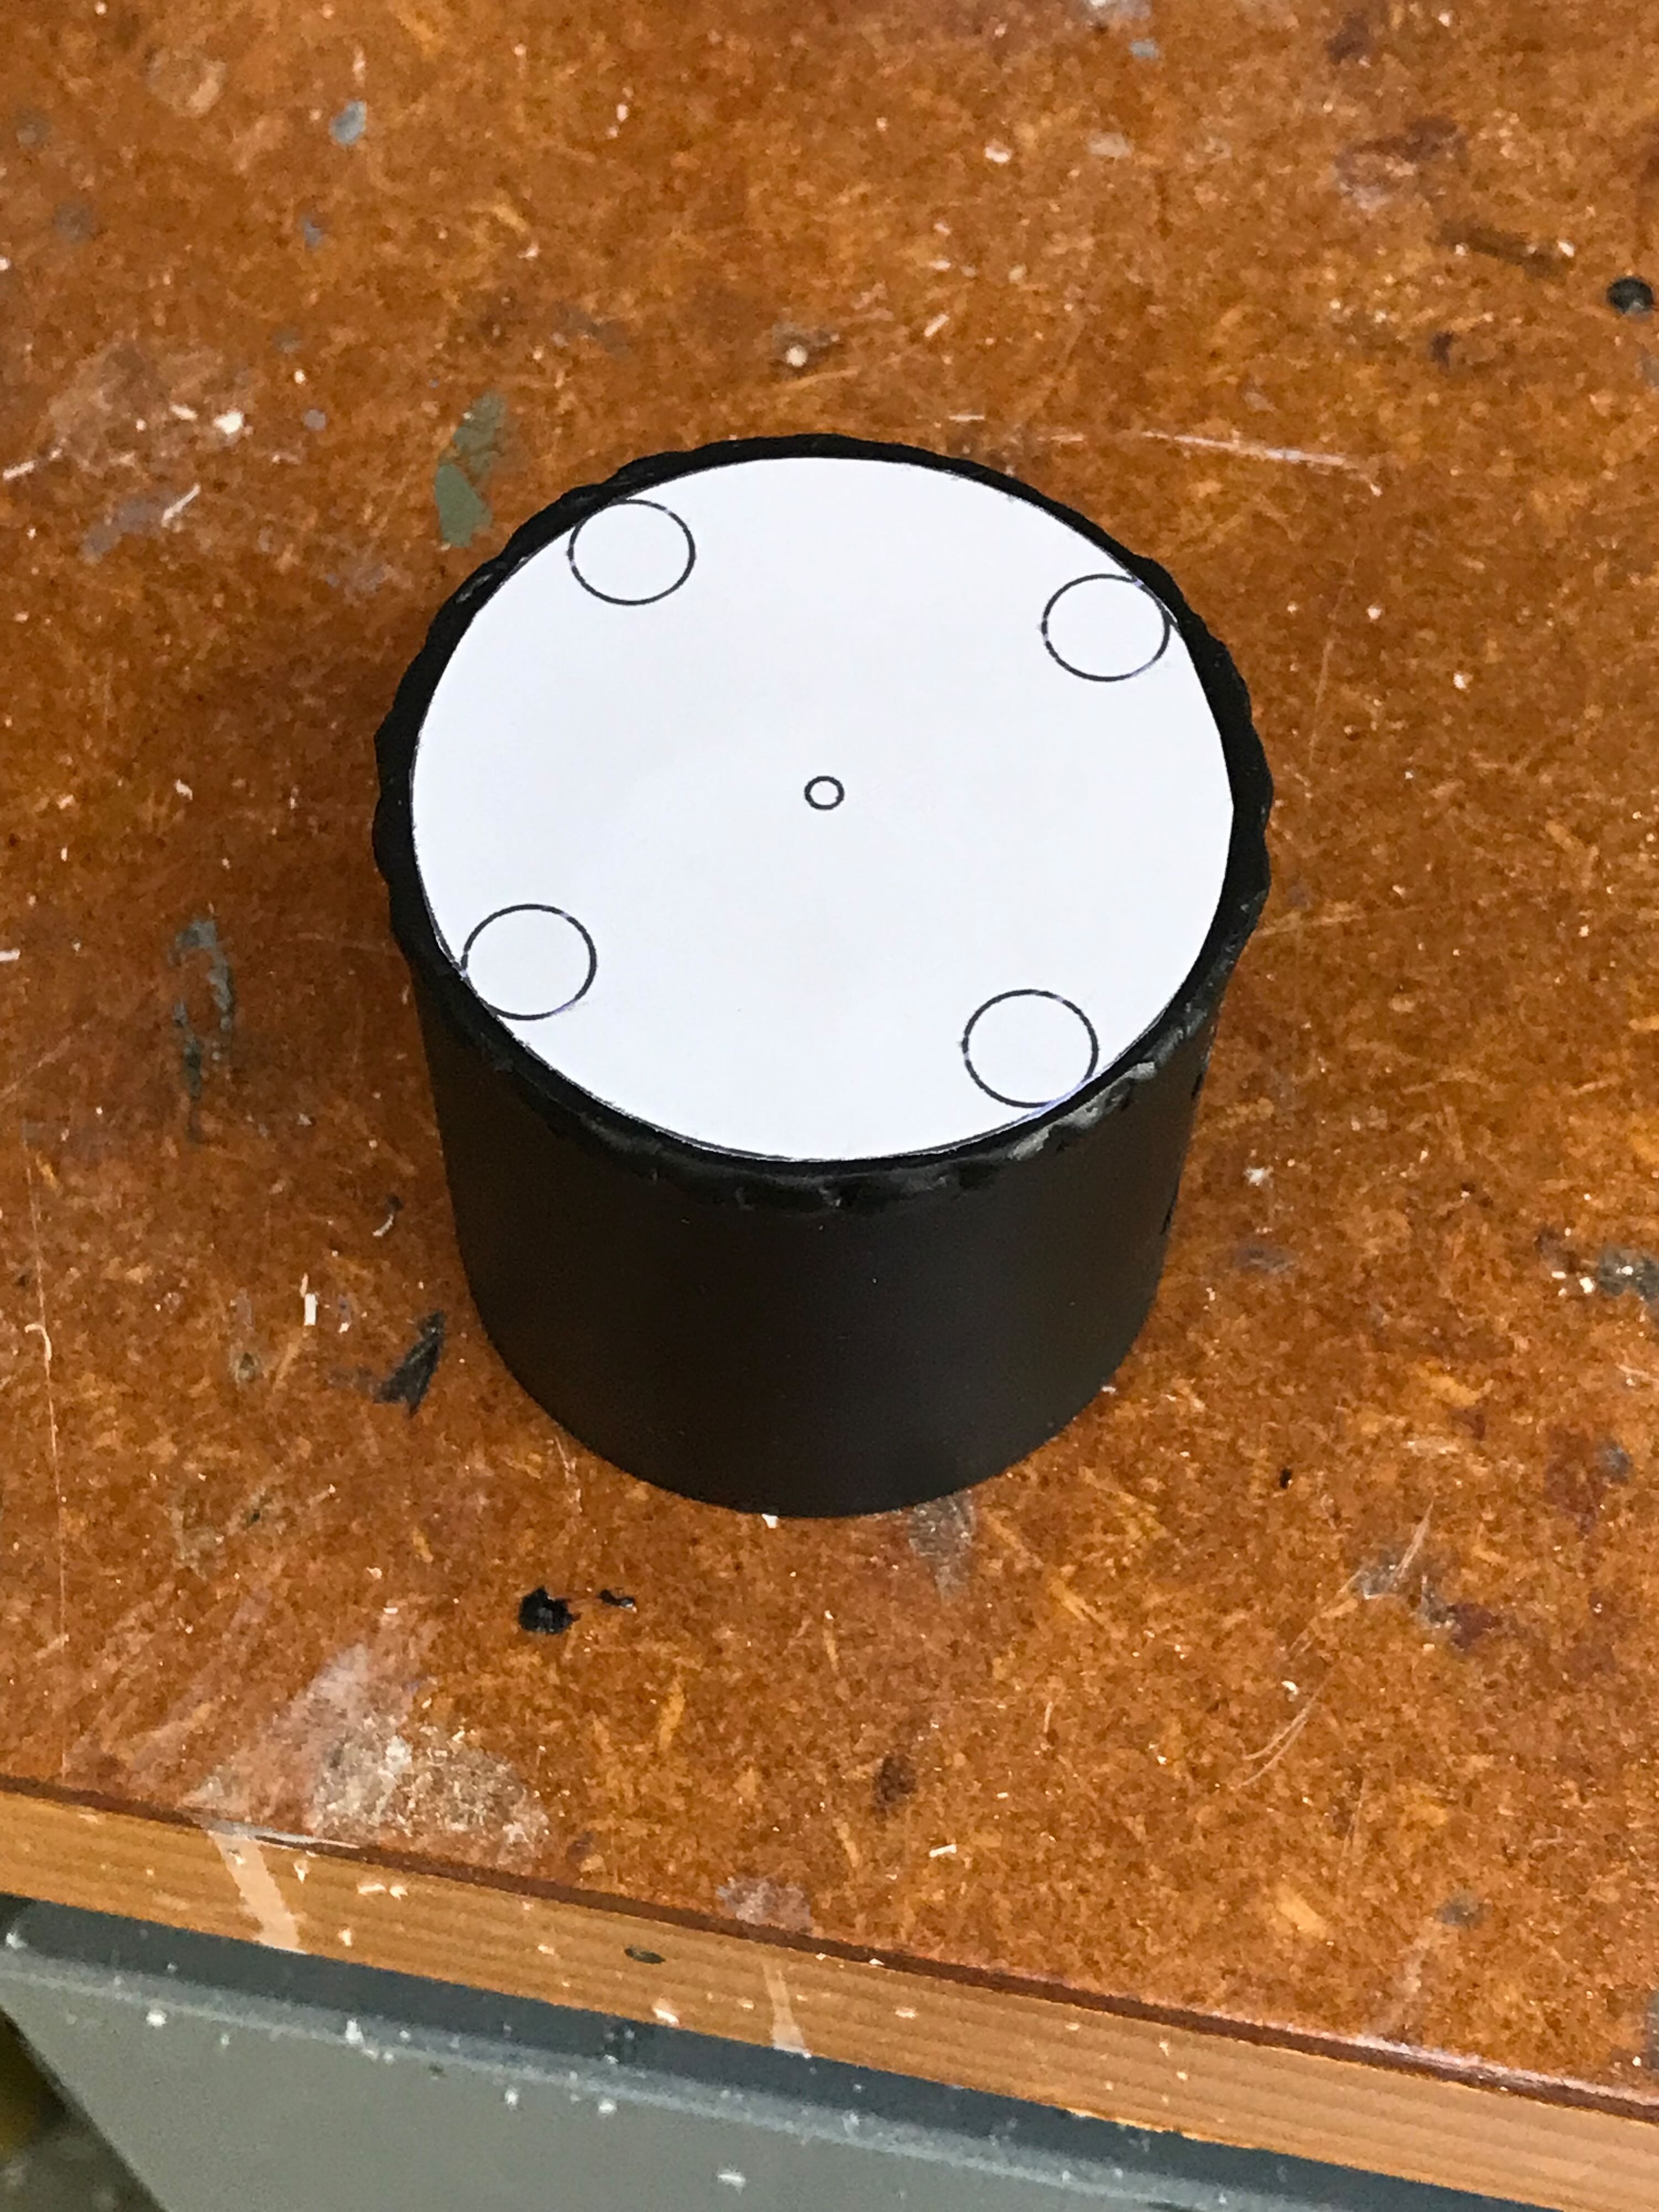
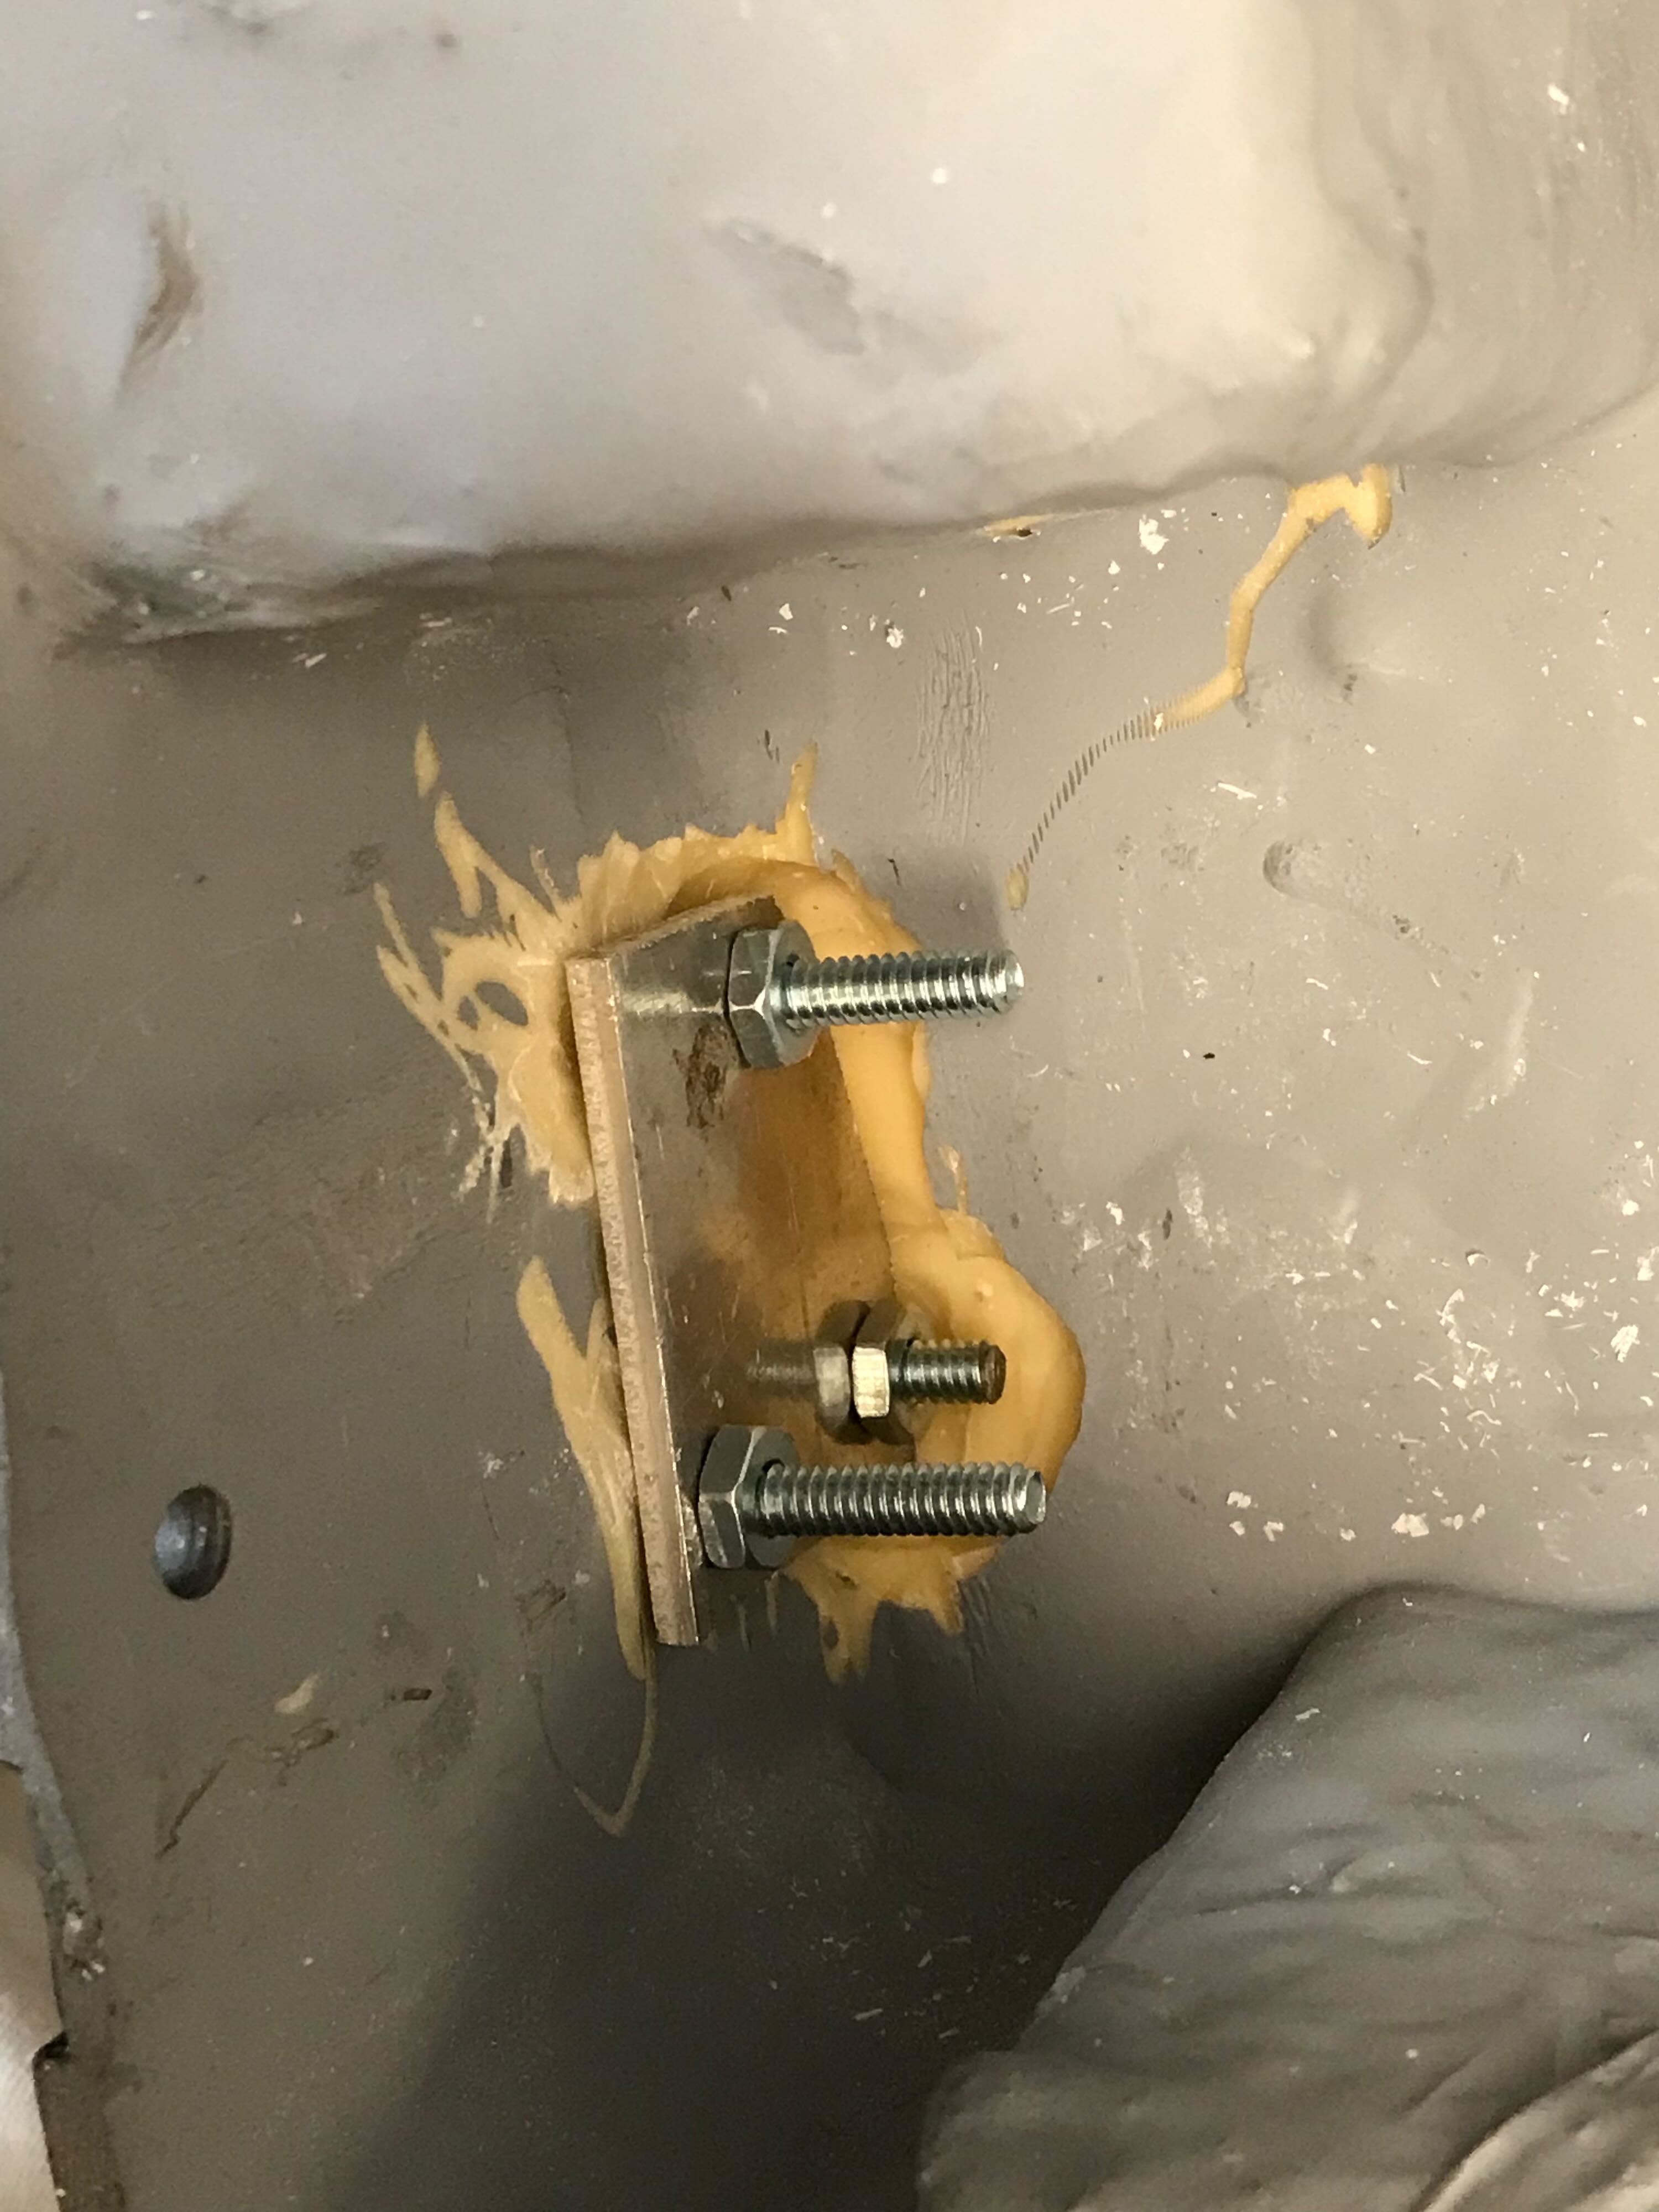
6/22/22 I made a simple template in Adobe Illustrator to mark and drill the holes for the pack Clippard. I routed out the resin inside to accommodate the nuts.
Re: Building a Benofkent Props Proton Pack for fellow 'Buster
Posted: June 22nd, 2022, 12:06 pm
by WShawn
Re: Building a Benofkent Props Proton Pack for fellow 'Buster
Posted: June 22nd, 2022, 12:10 pm
by WShawn
Re: Building a Benofkent Props Proton Pack for fellow 'Buster
Posted: June 22nd, 2022, 12:15 pm
by WShawn
Re: Building a Benofkent Props Proton Pack for fellow 'Buster
Posted: July 27th, 2022, 12:22 am
by WShawn
Re: Building a Benofkent Props Proton Pack for fellow 'Buster
Posted: July 27th, 2022, 12:26 am
by WShawn
Re: Building a Benofkent Props Proton Pack for fellow 'Buster
Posted: July 27th, 2022, 12:31 am
by WShawn
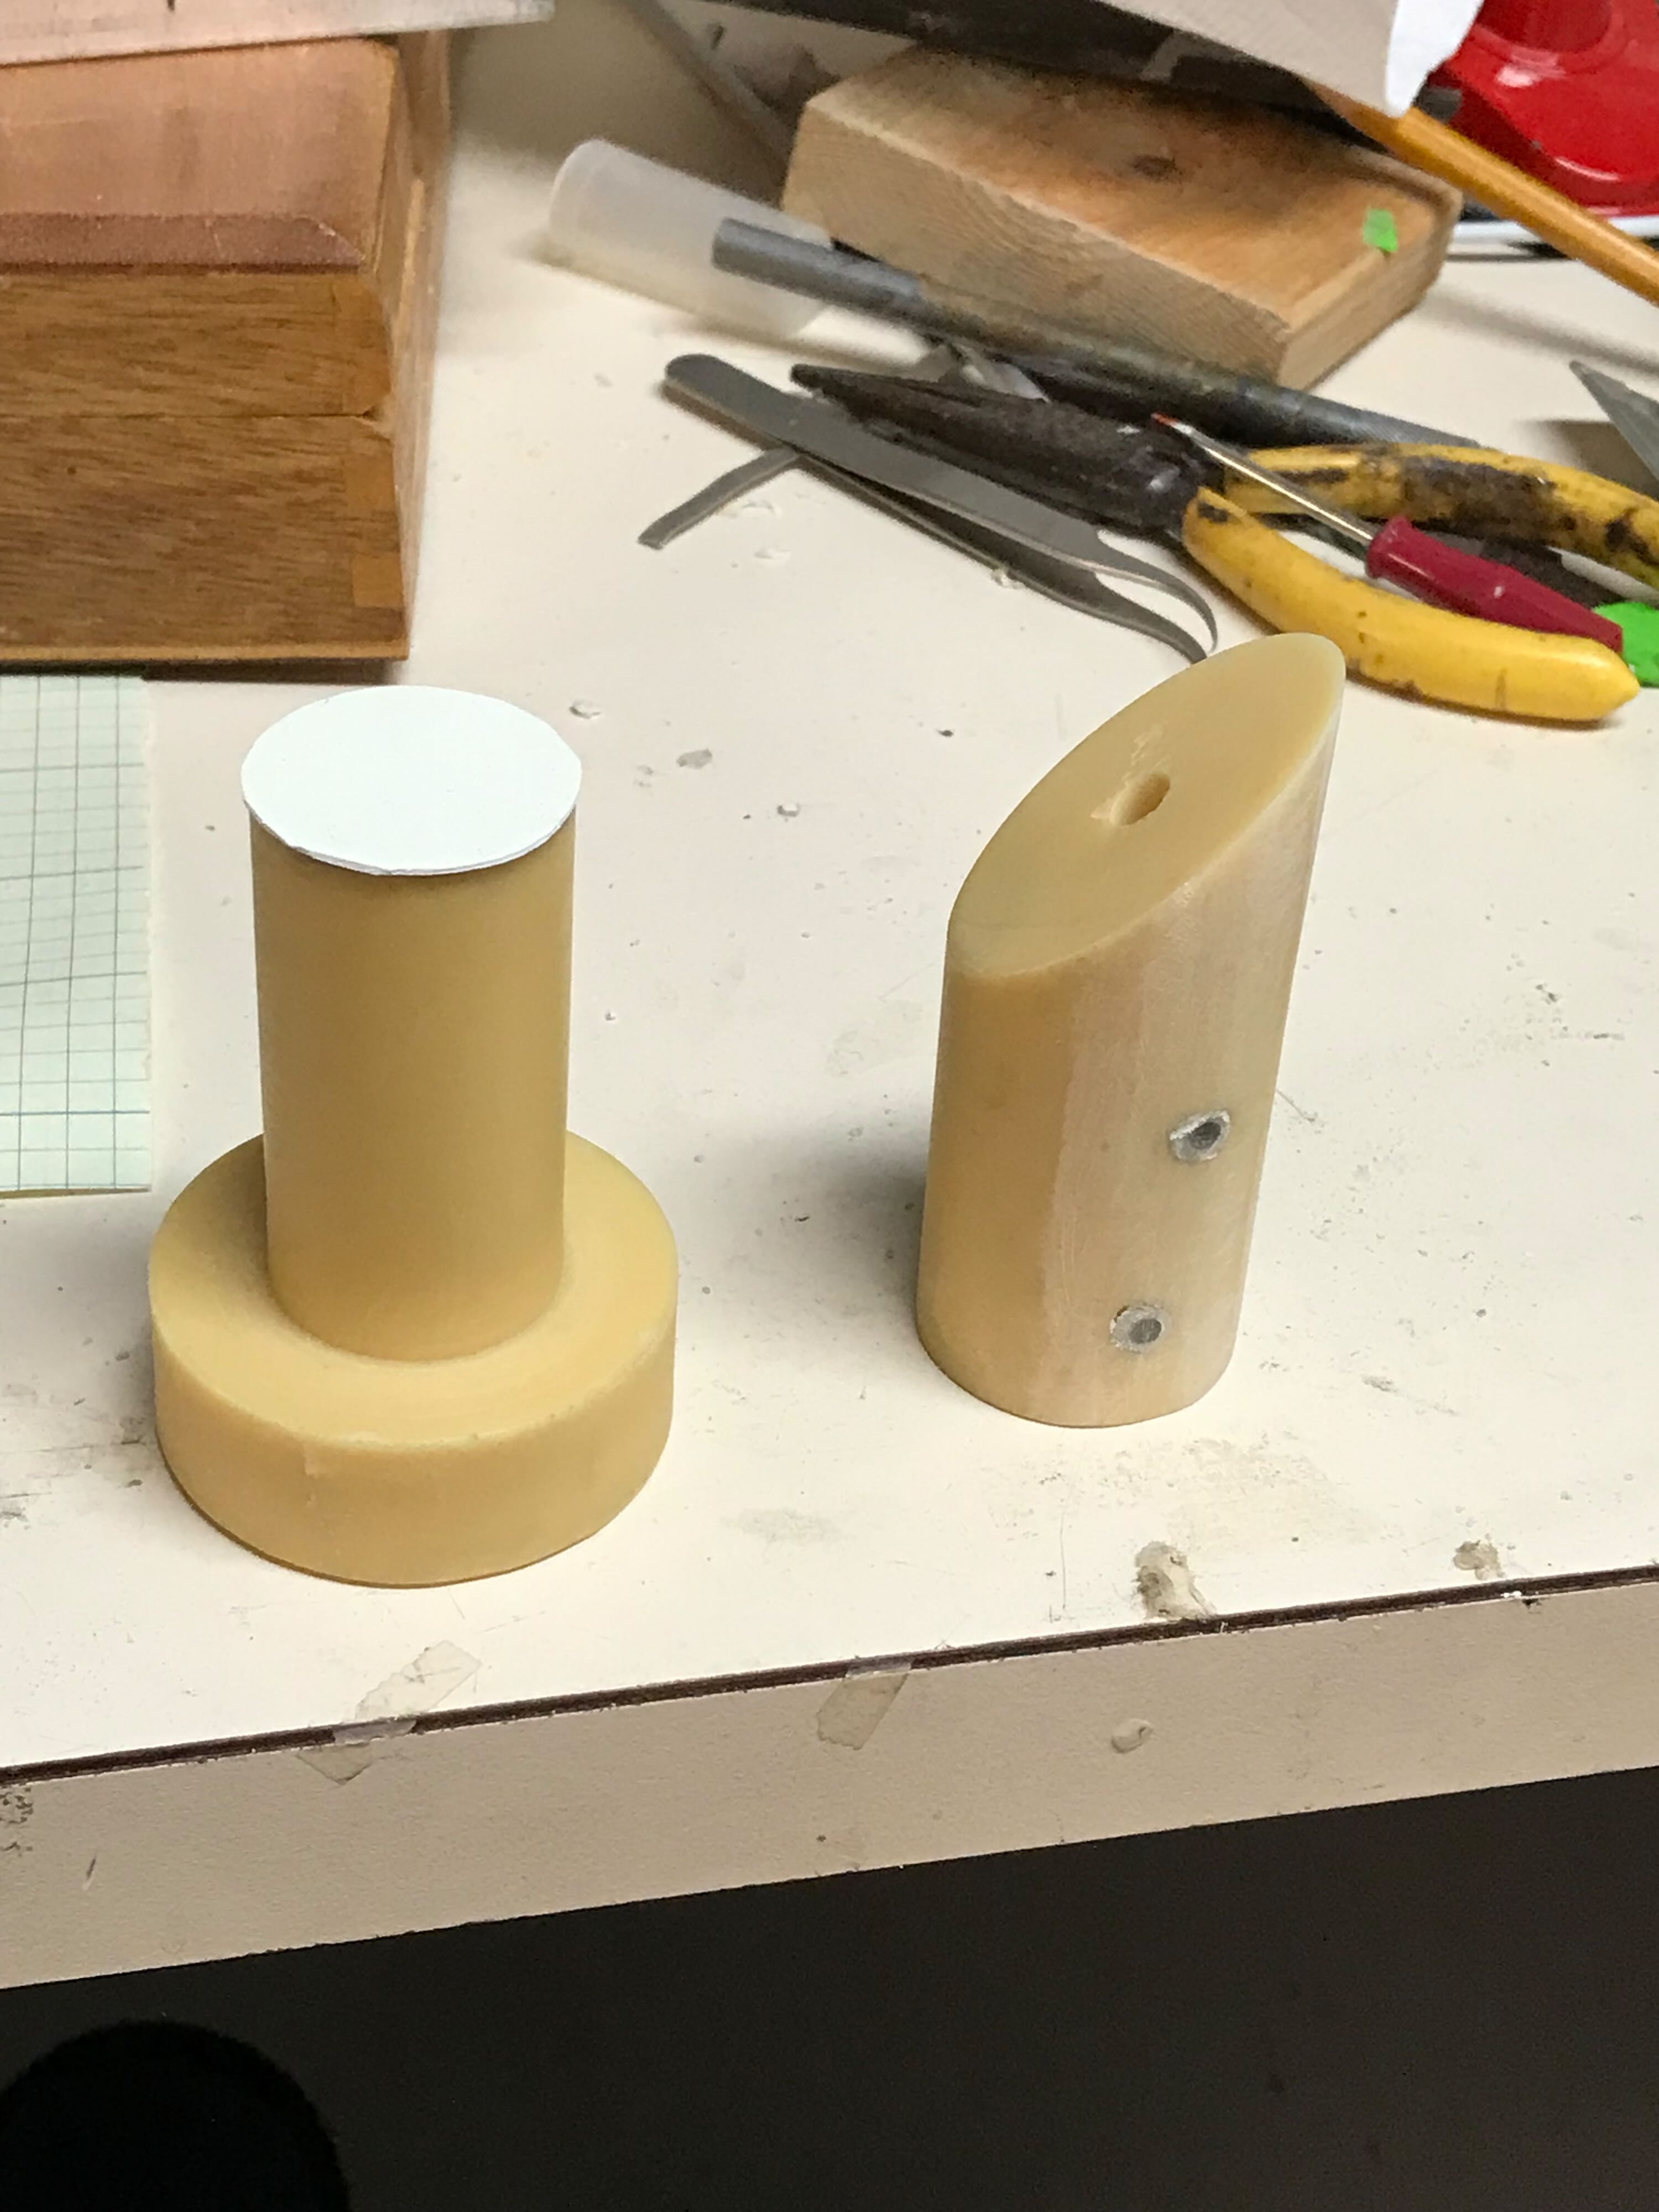
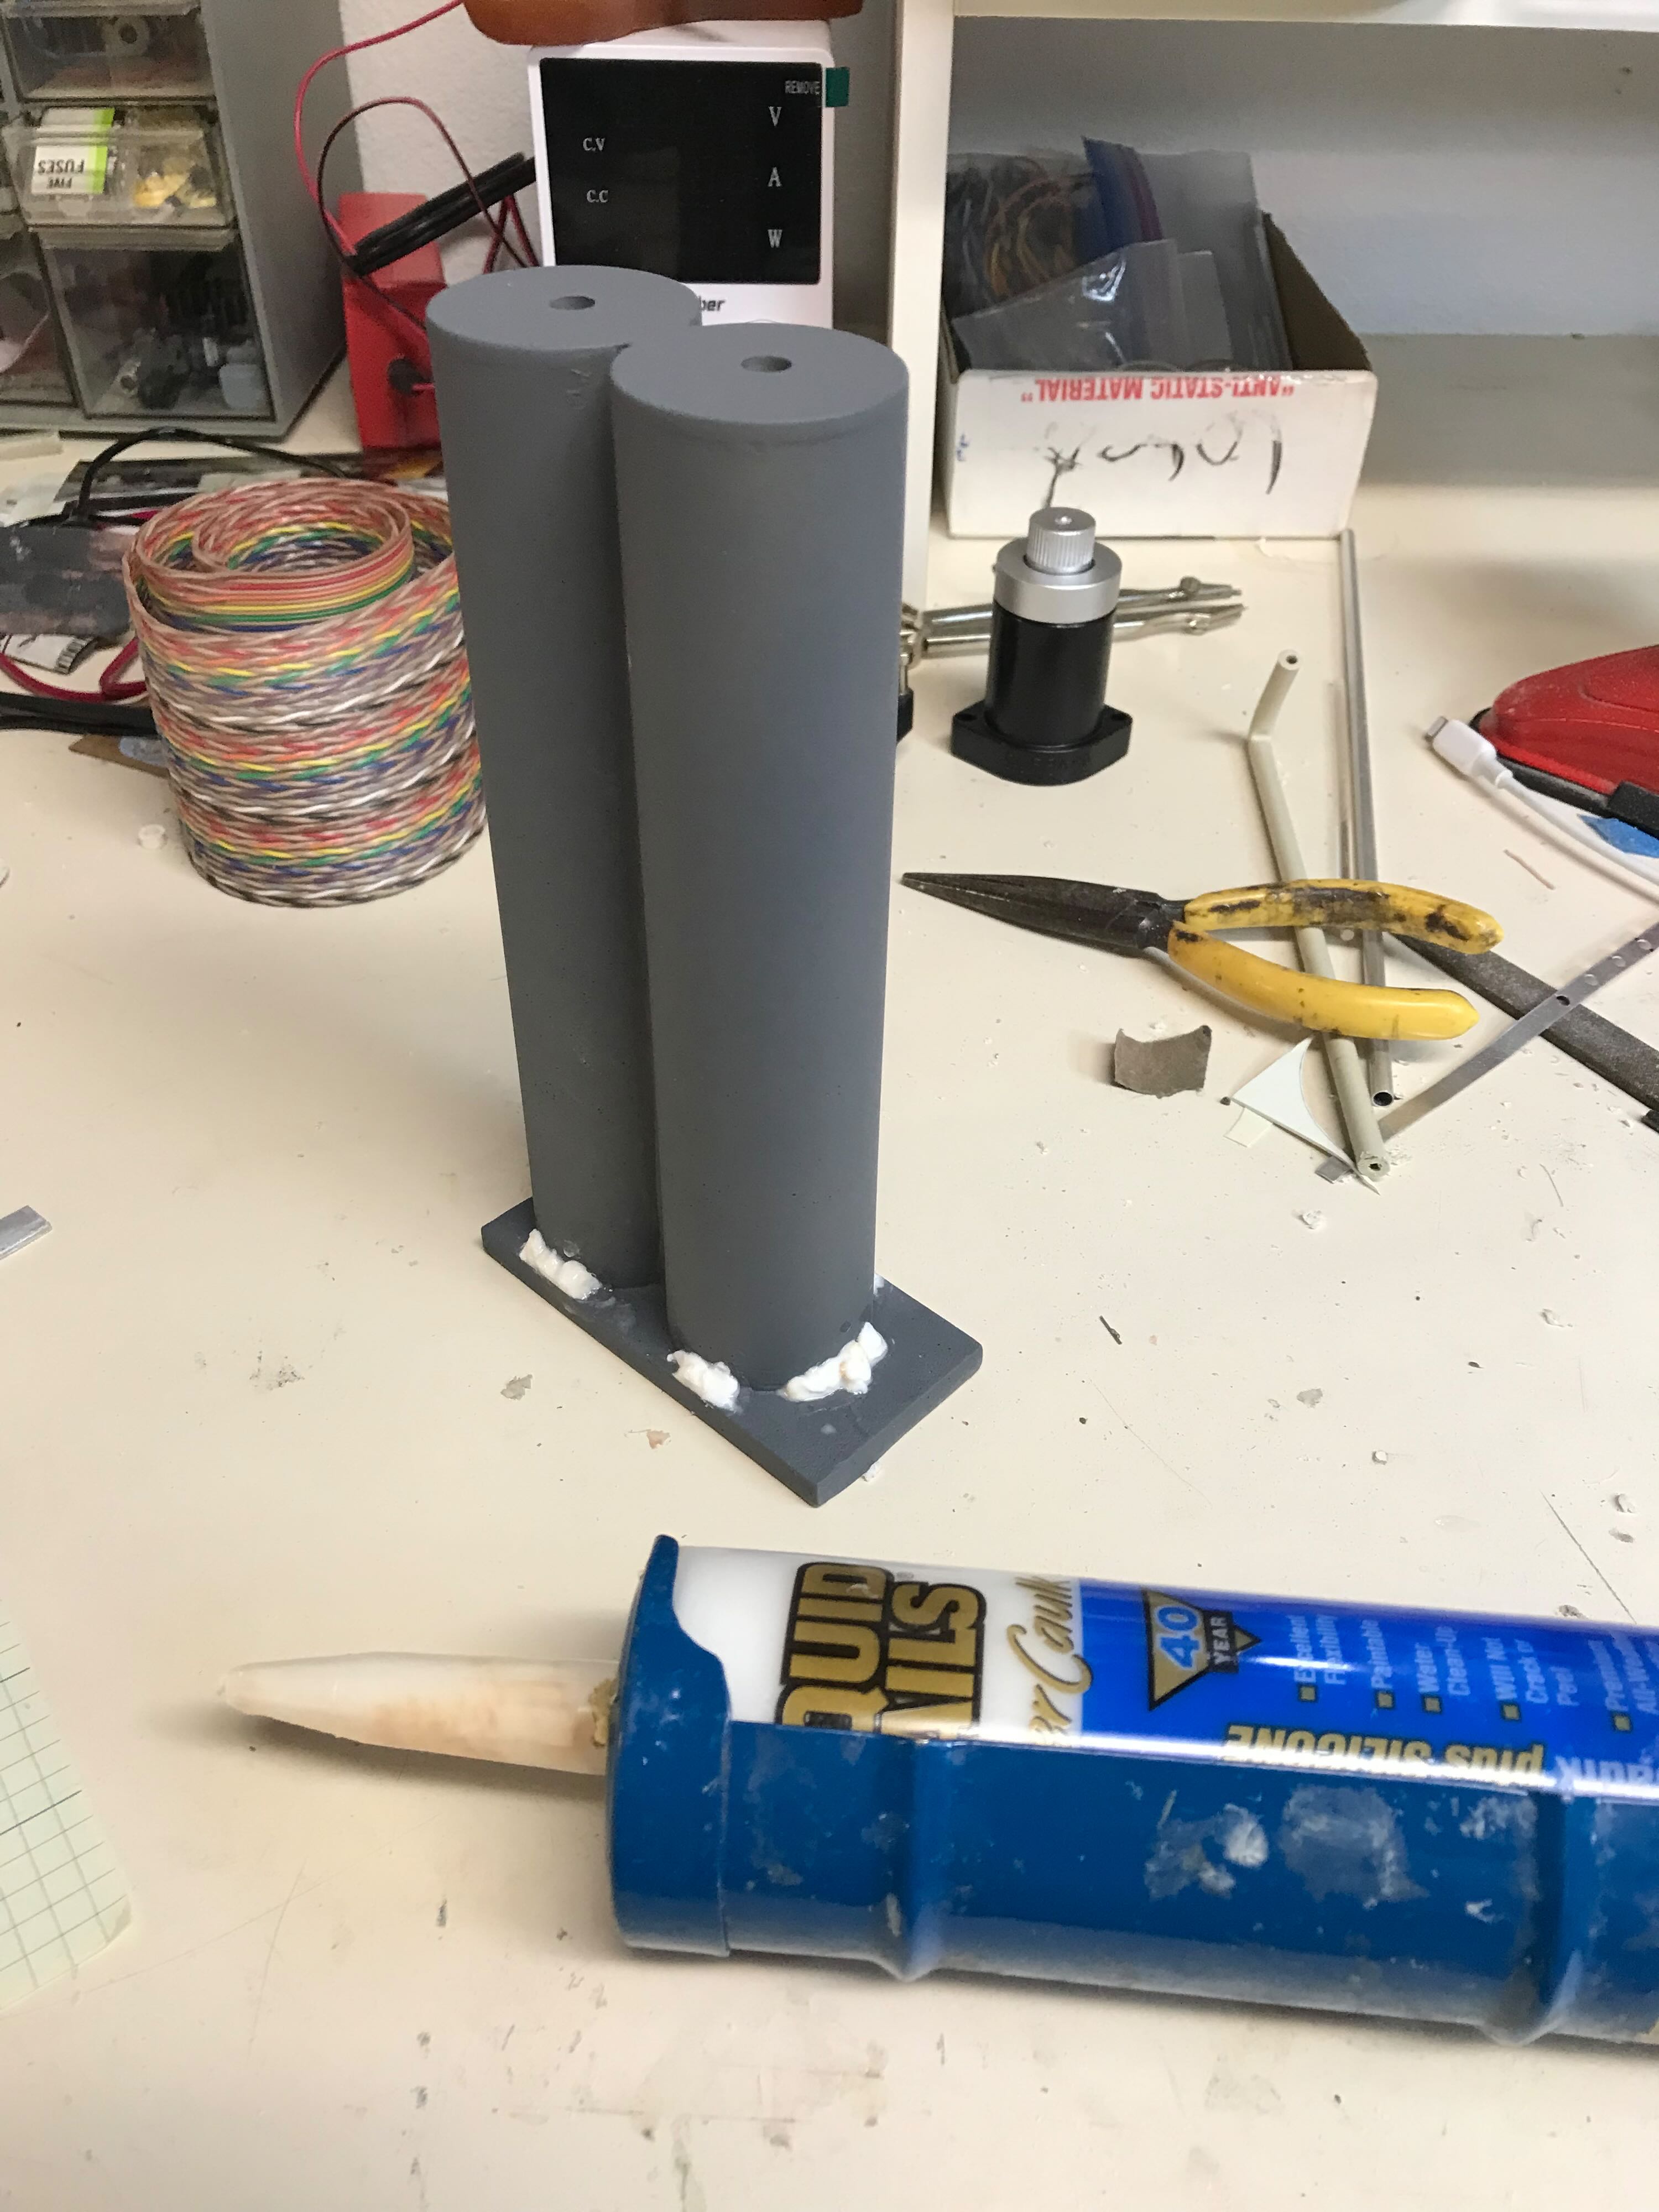
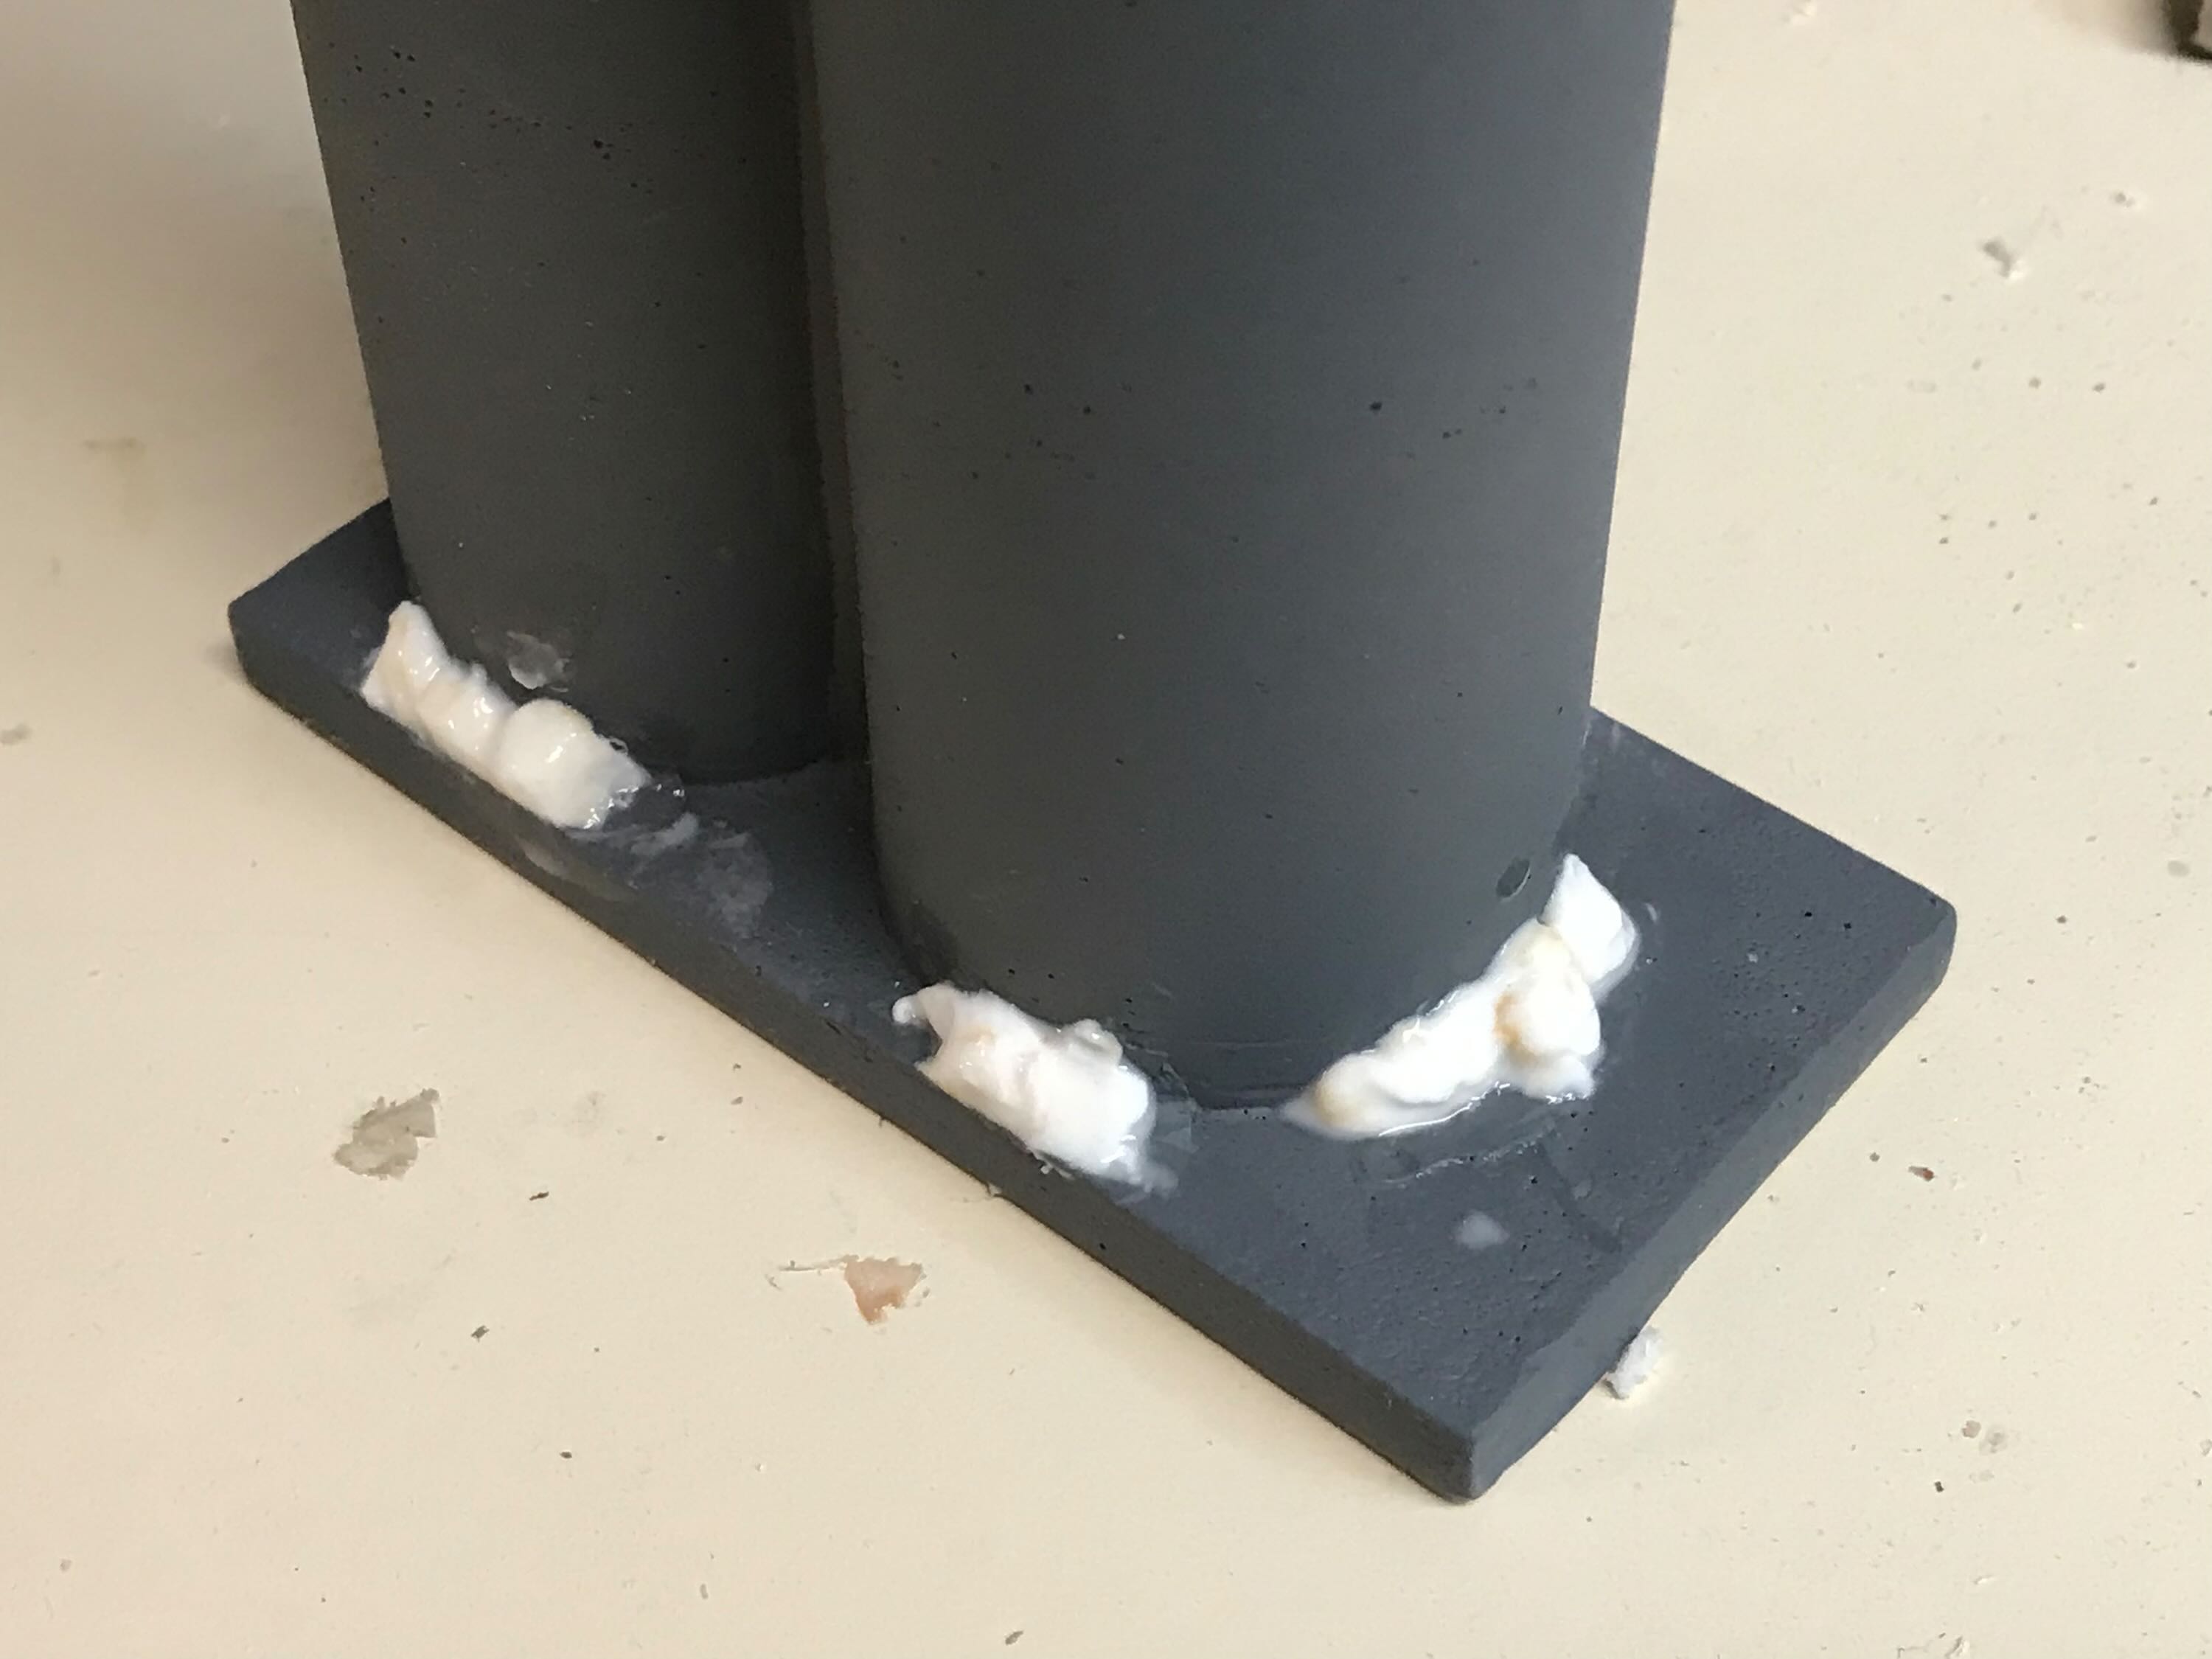
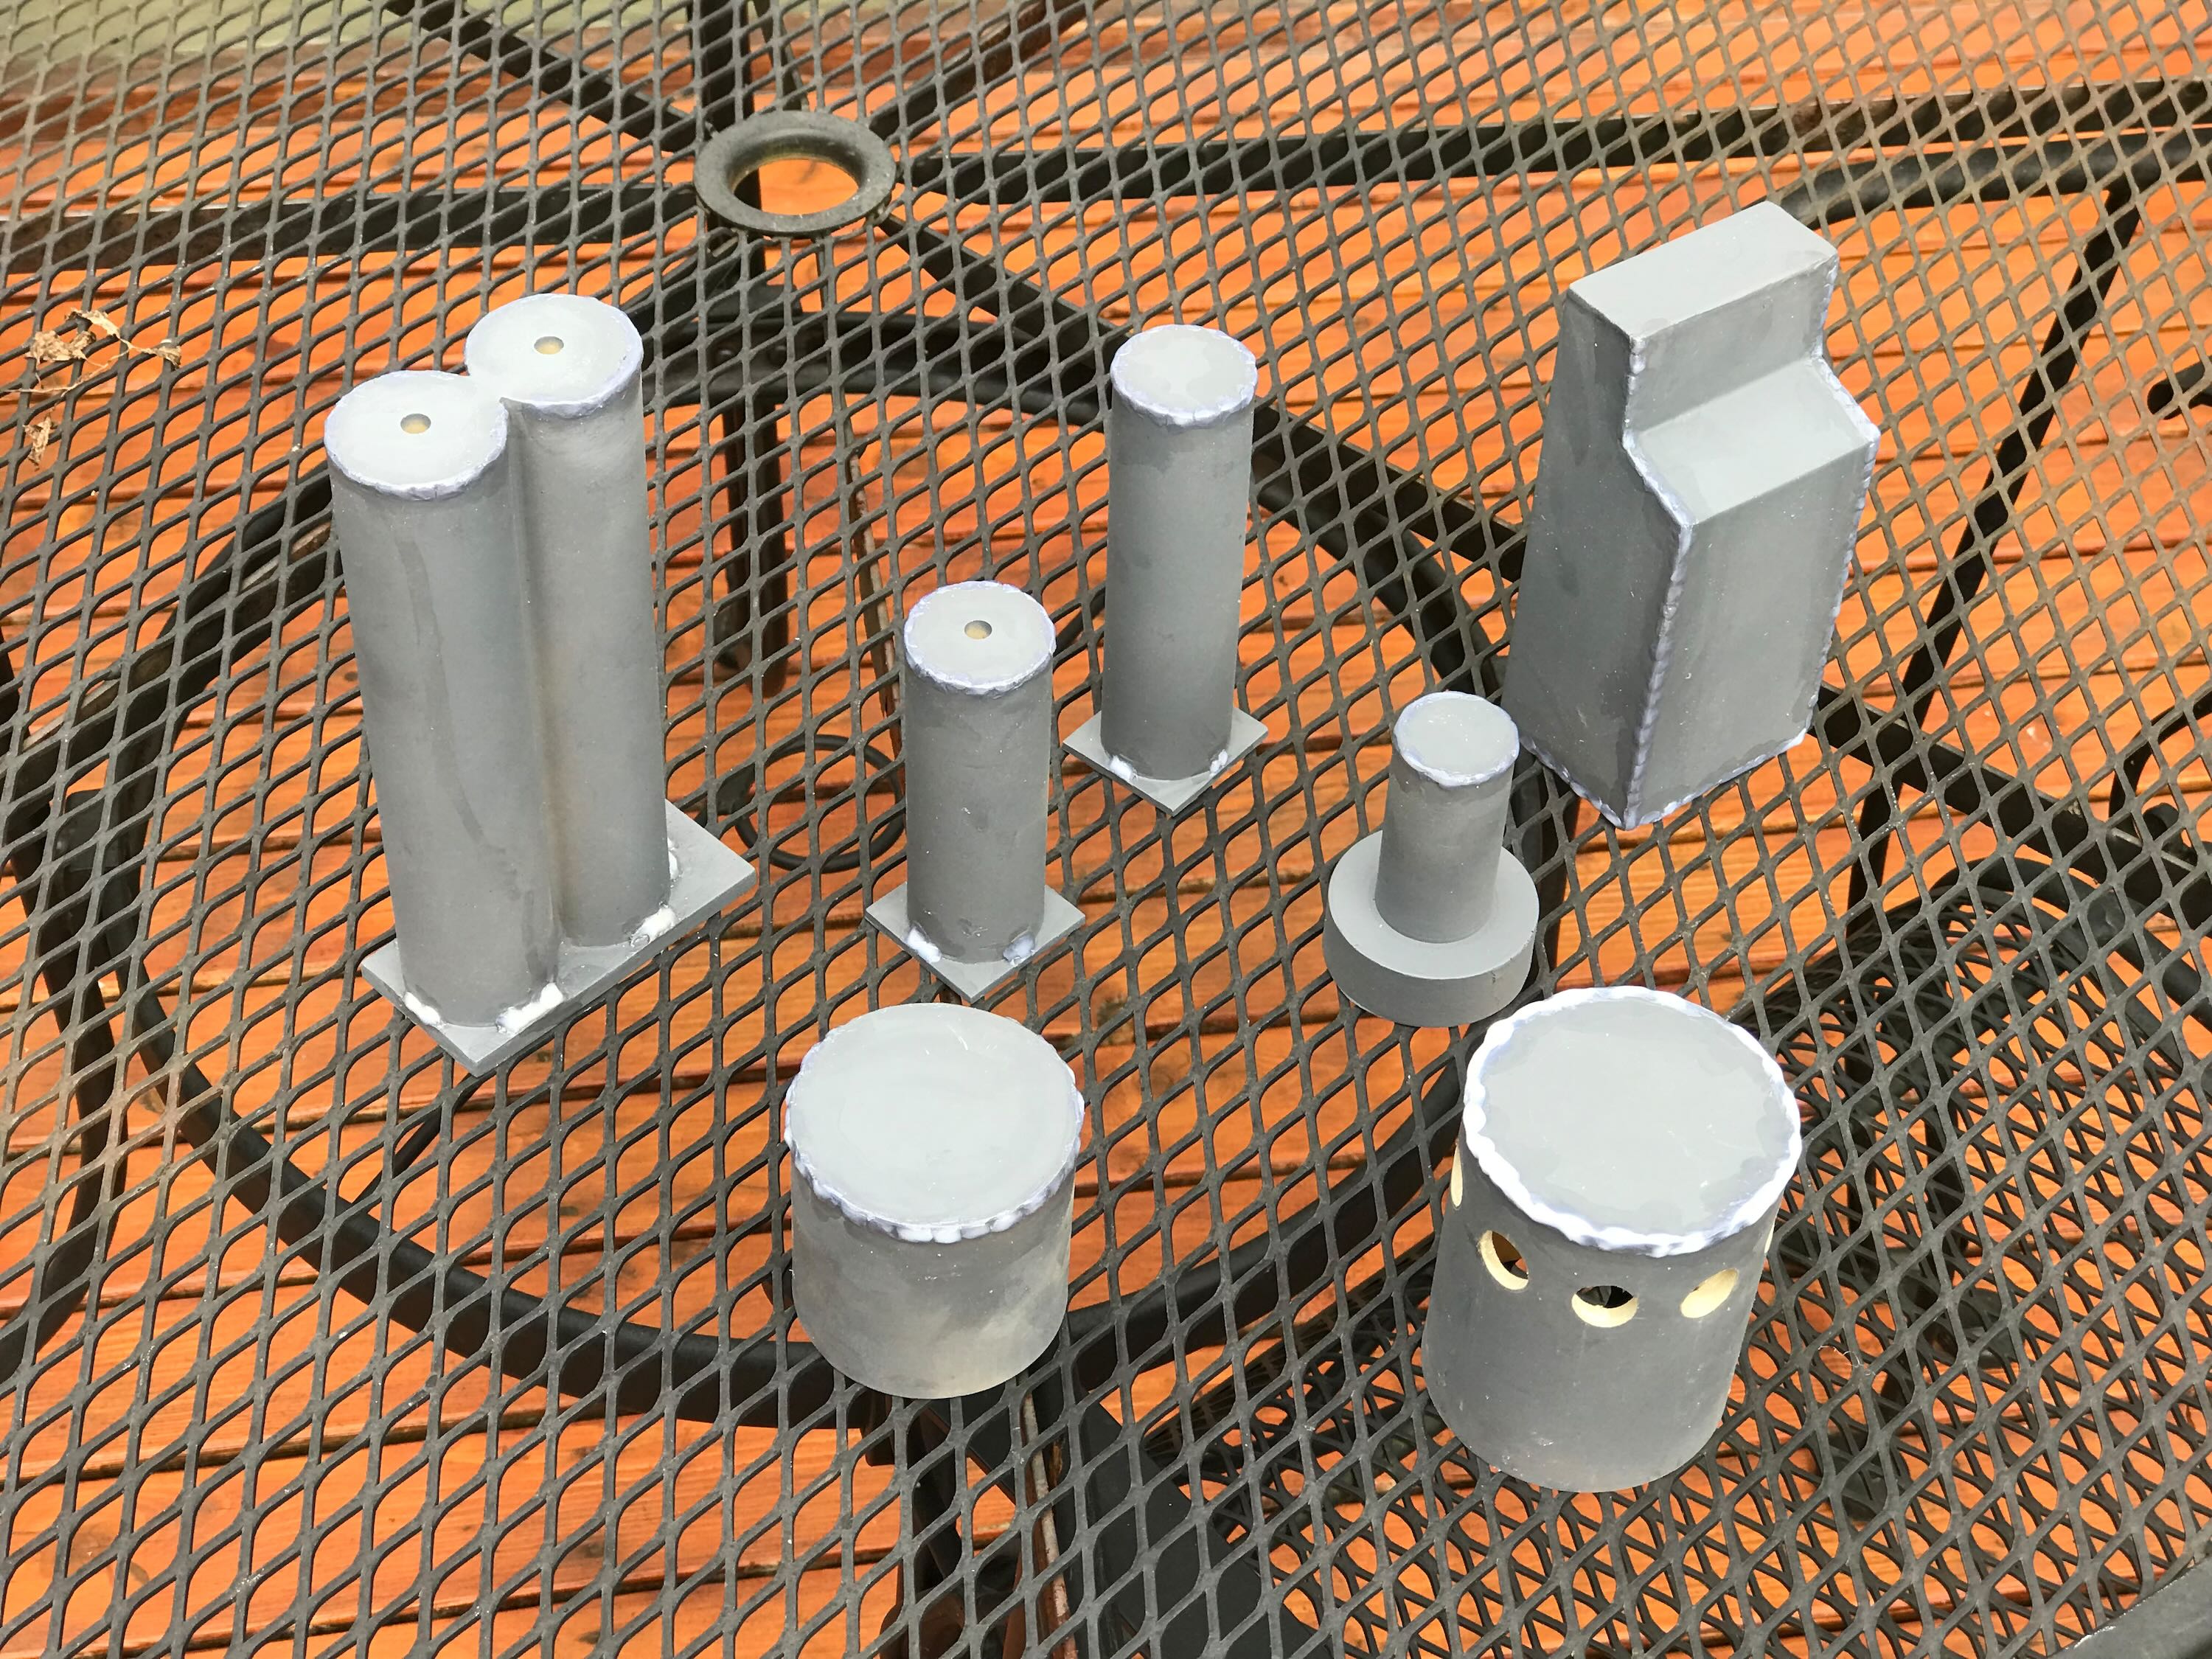
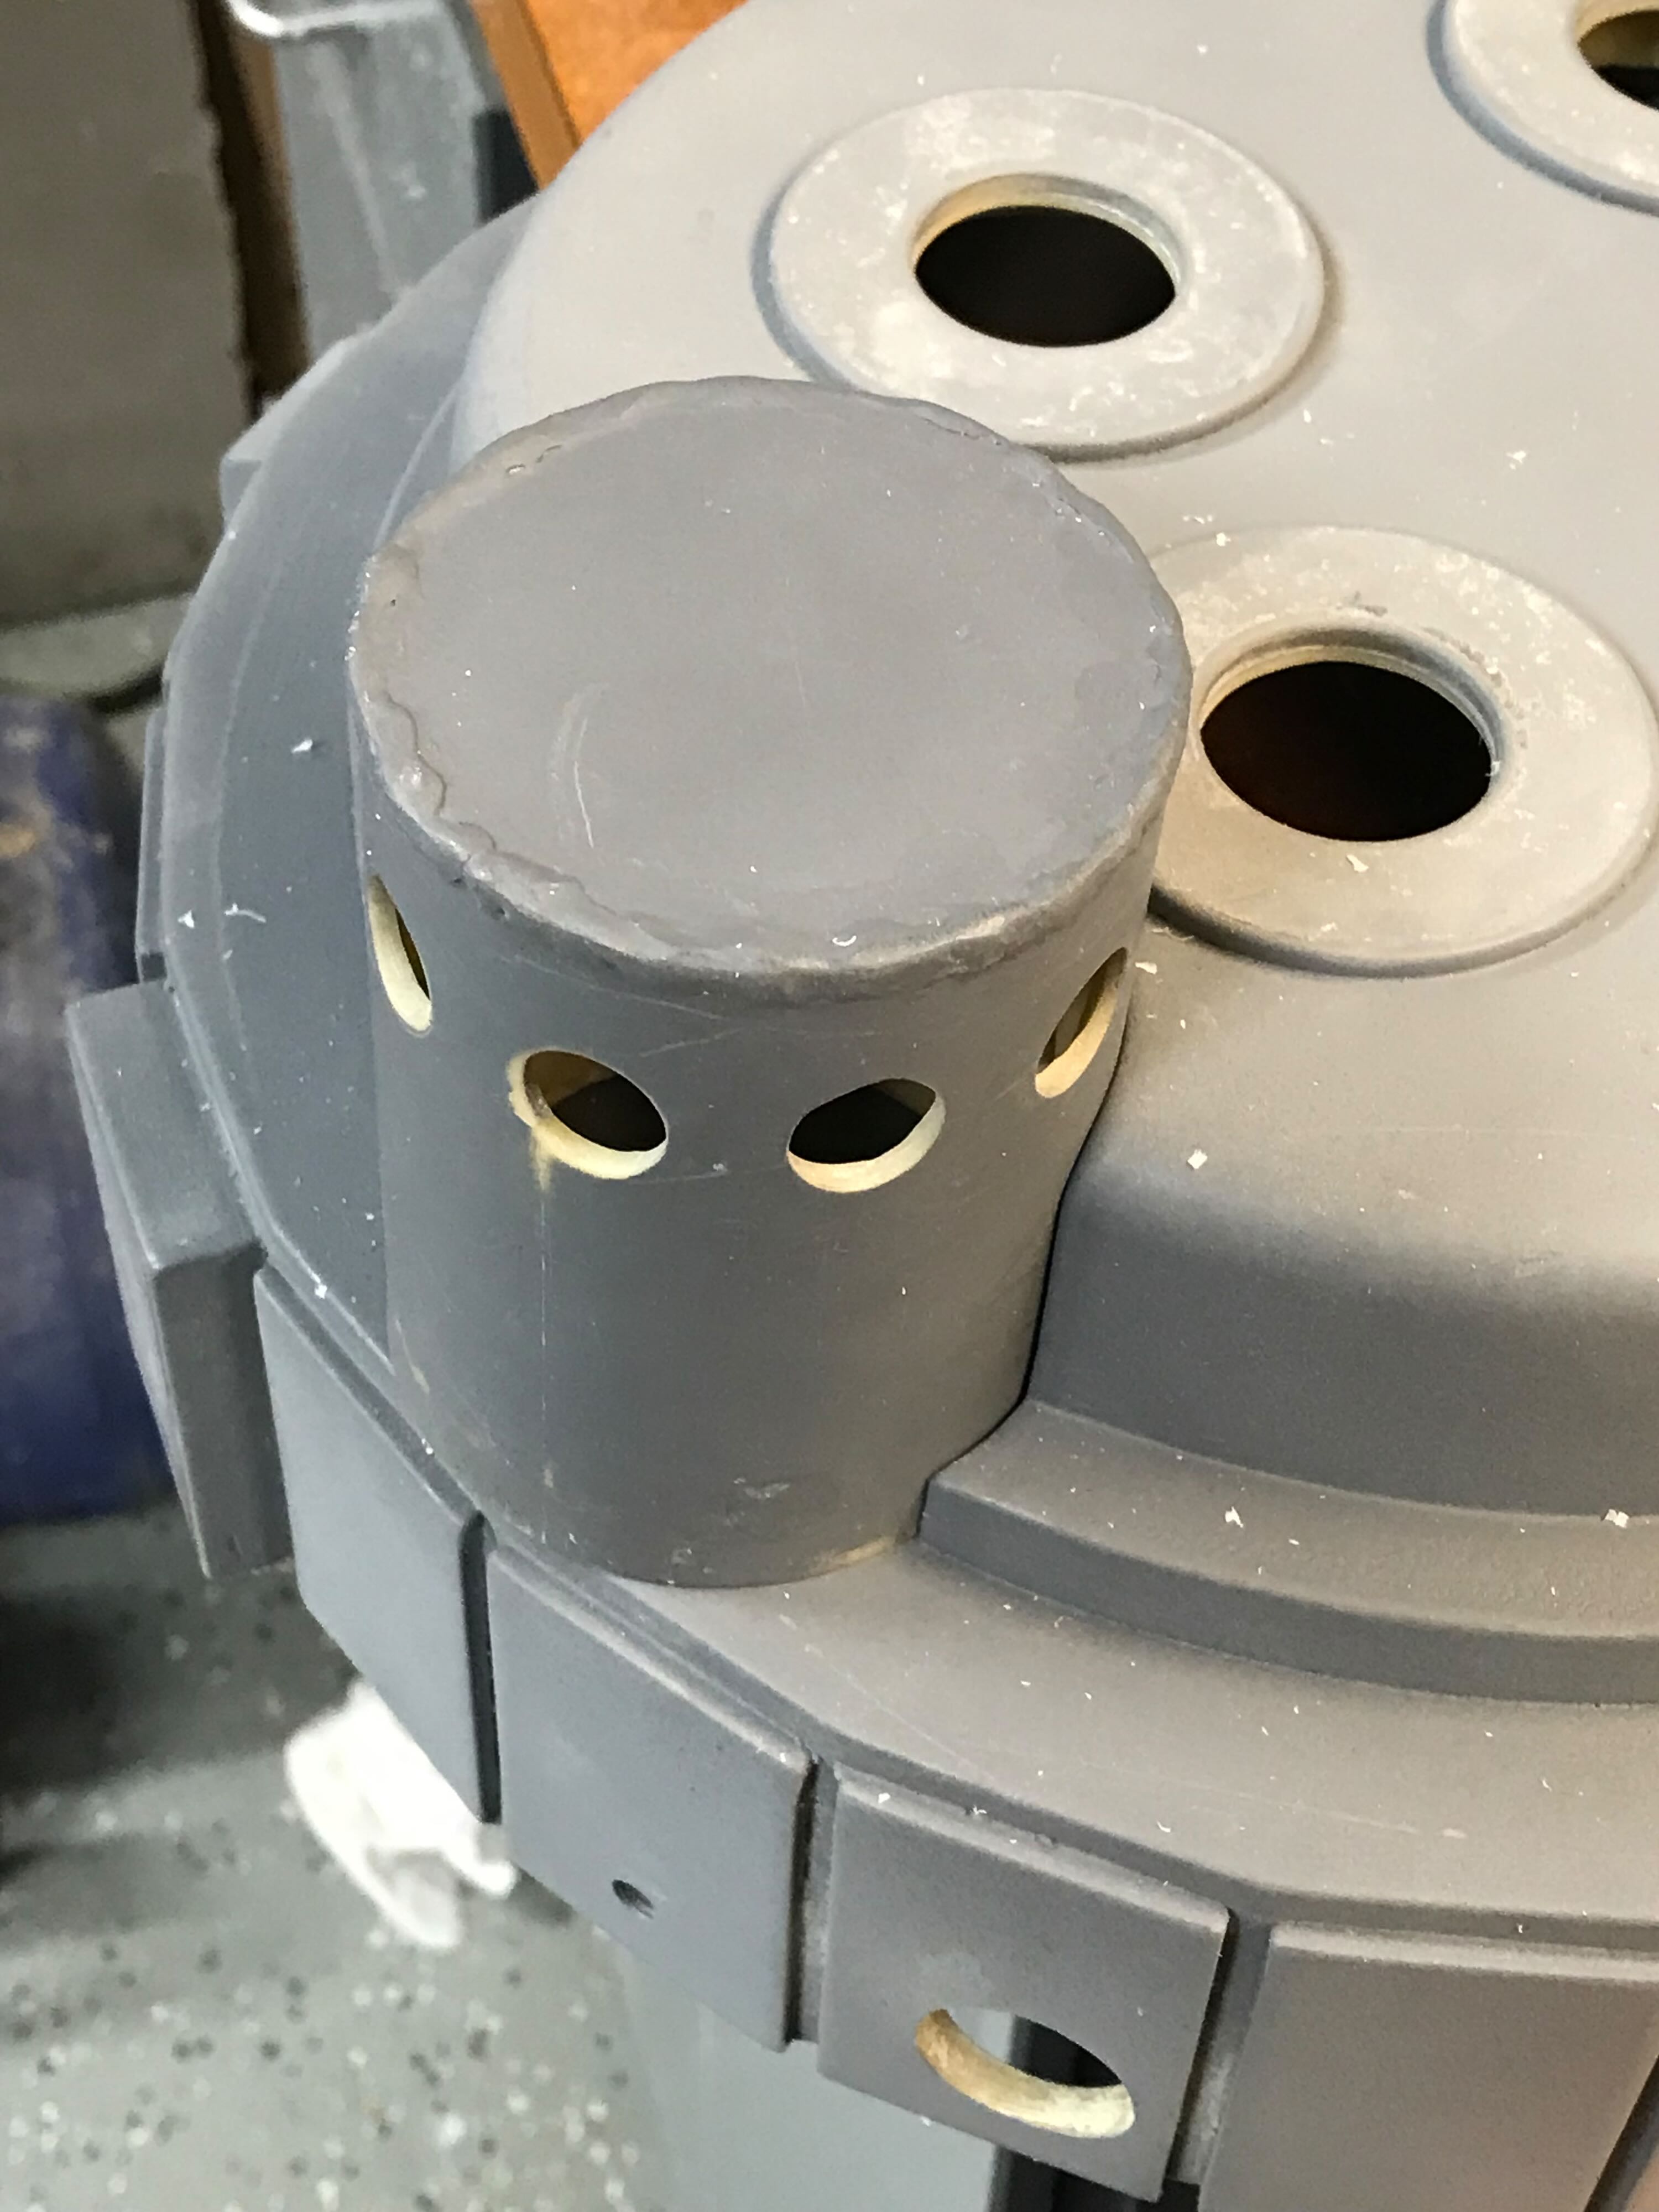
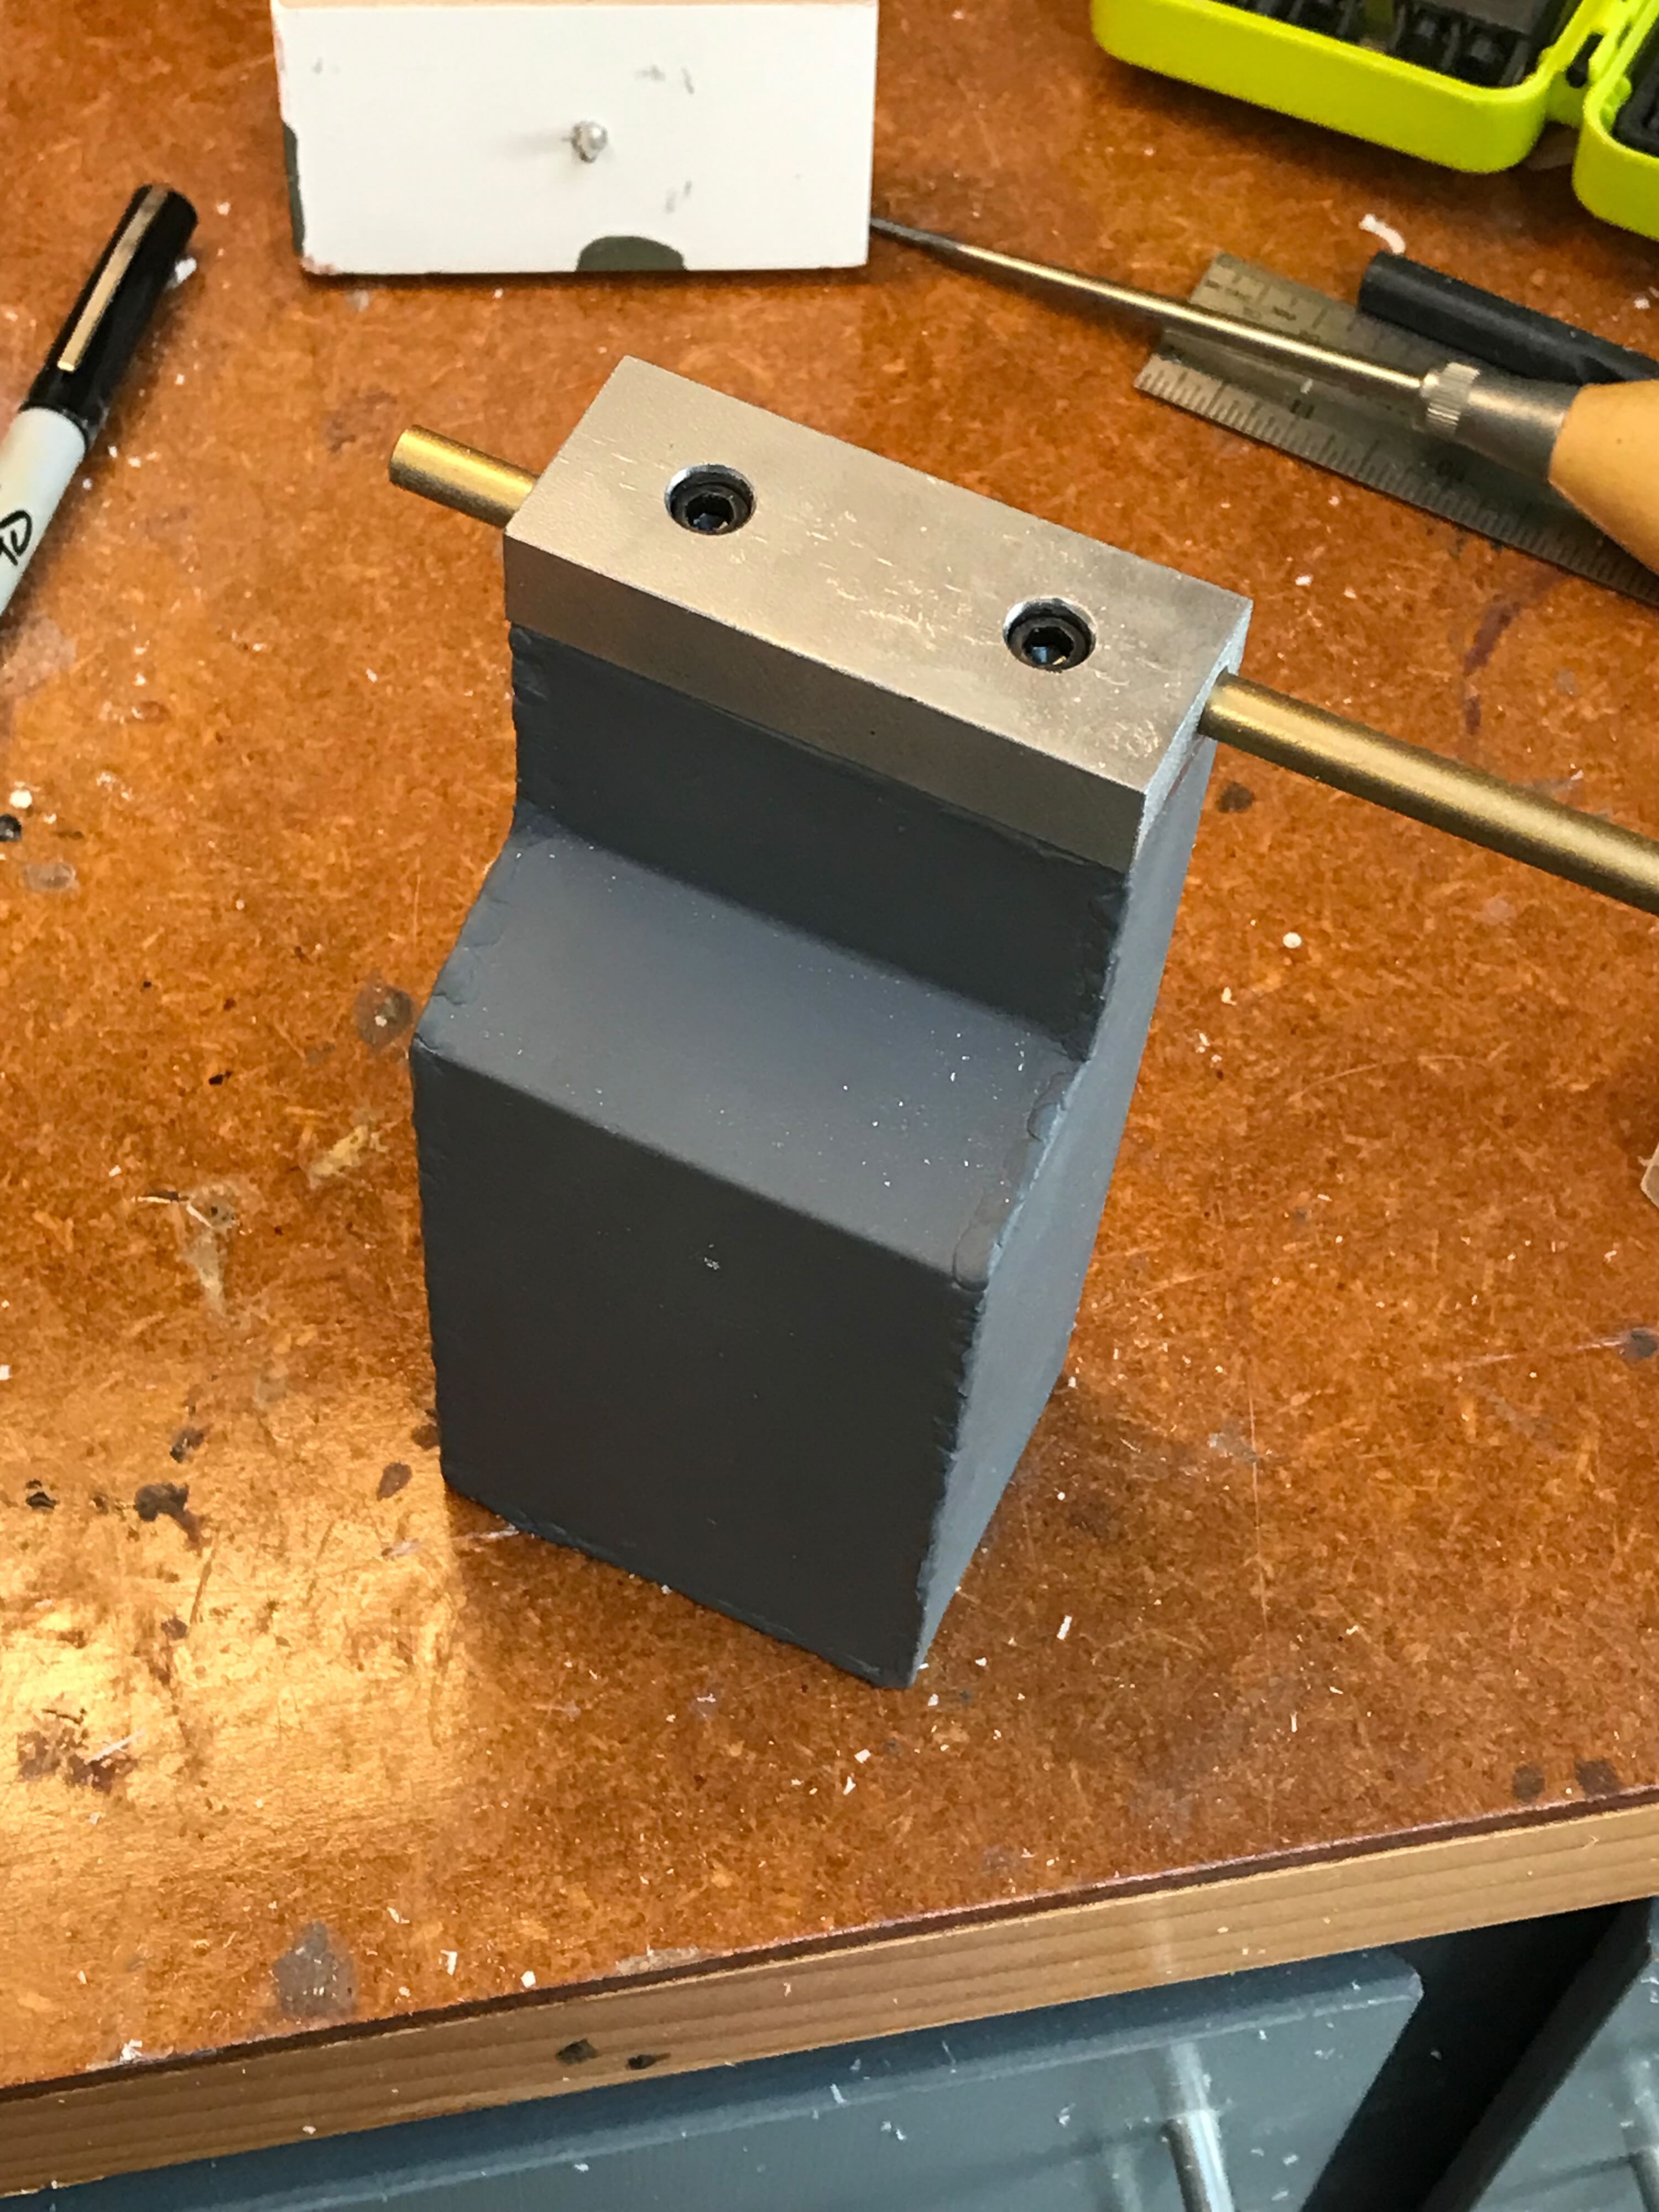
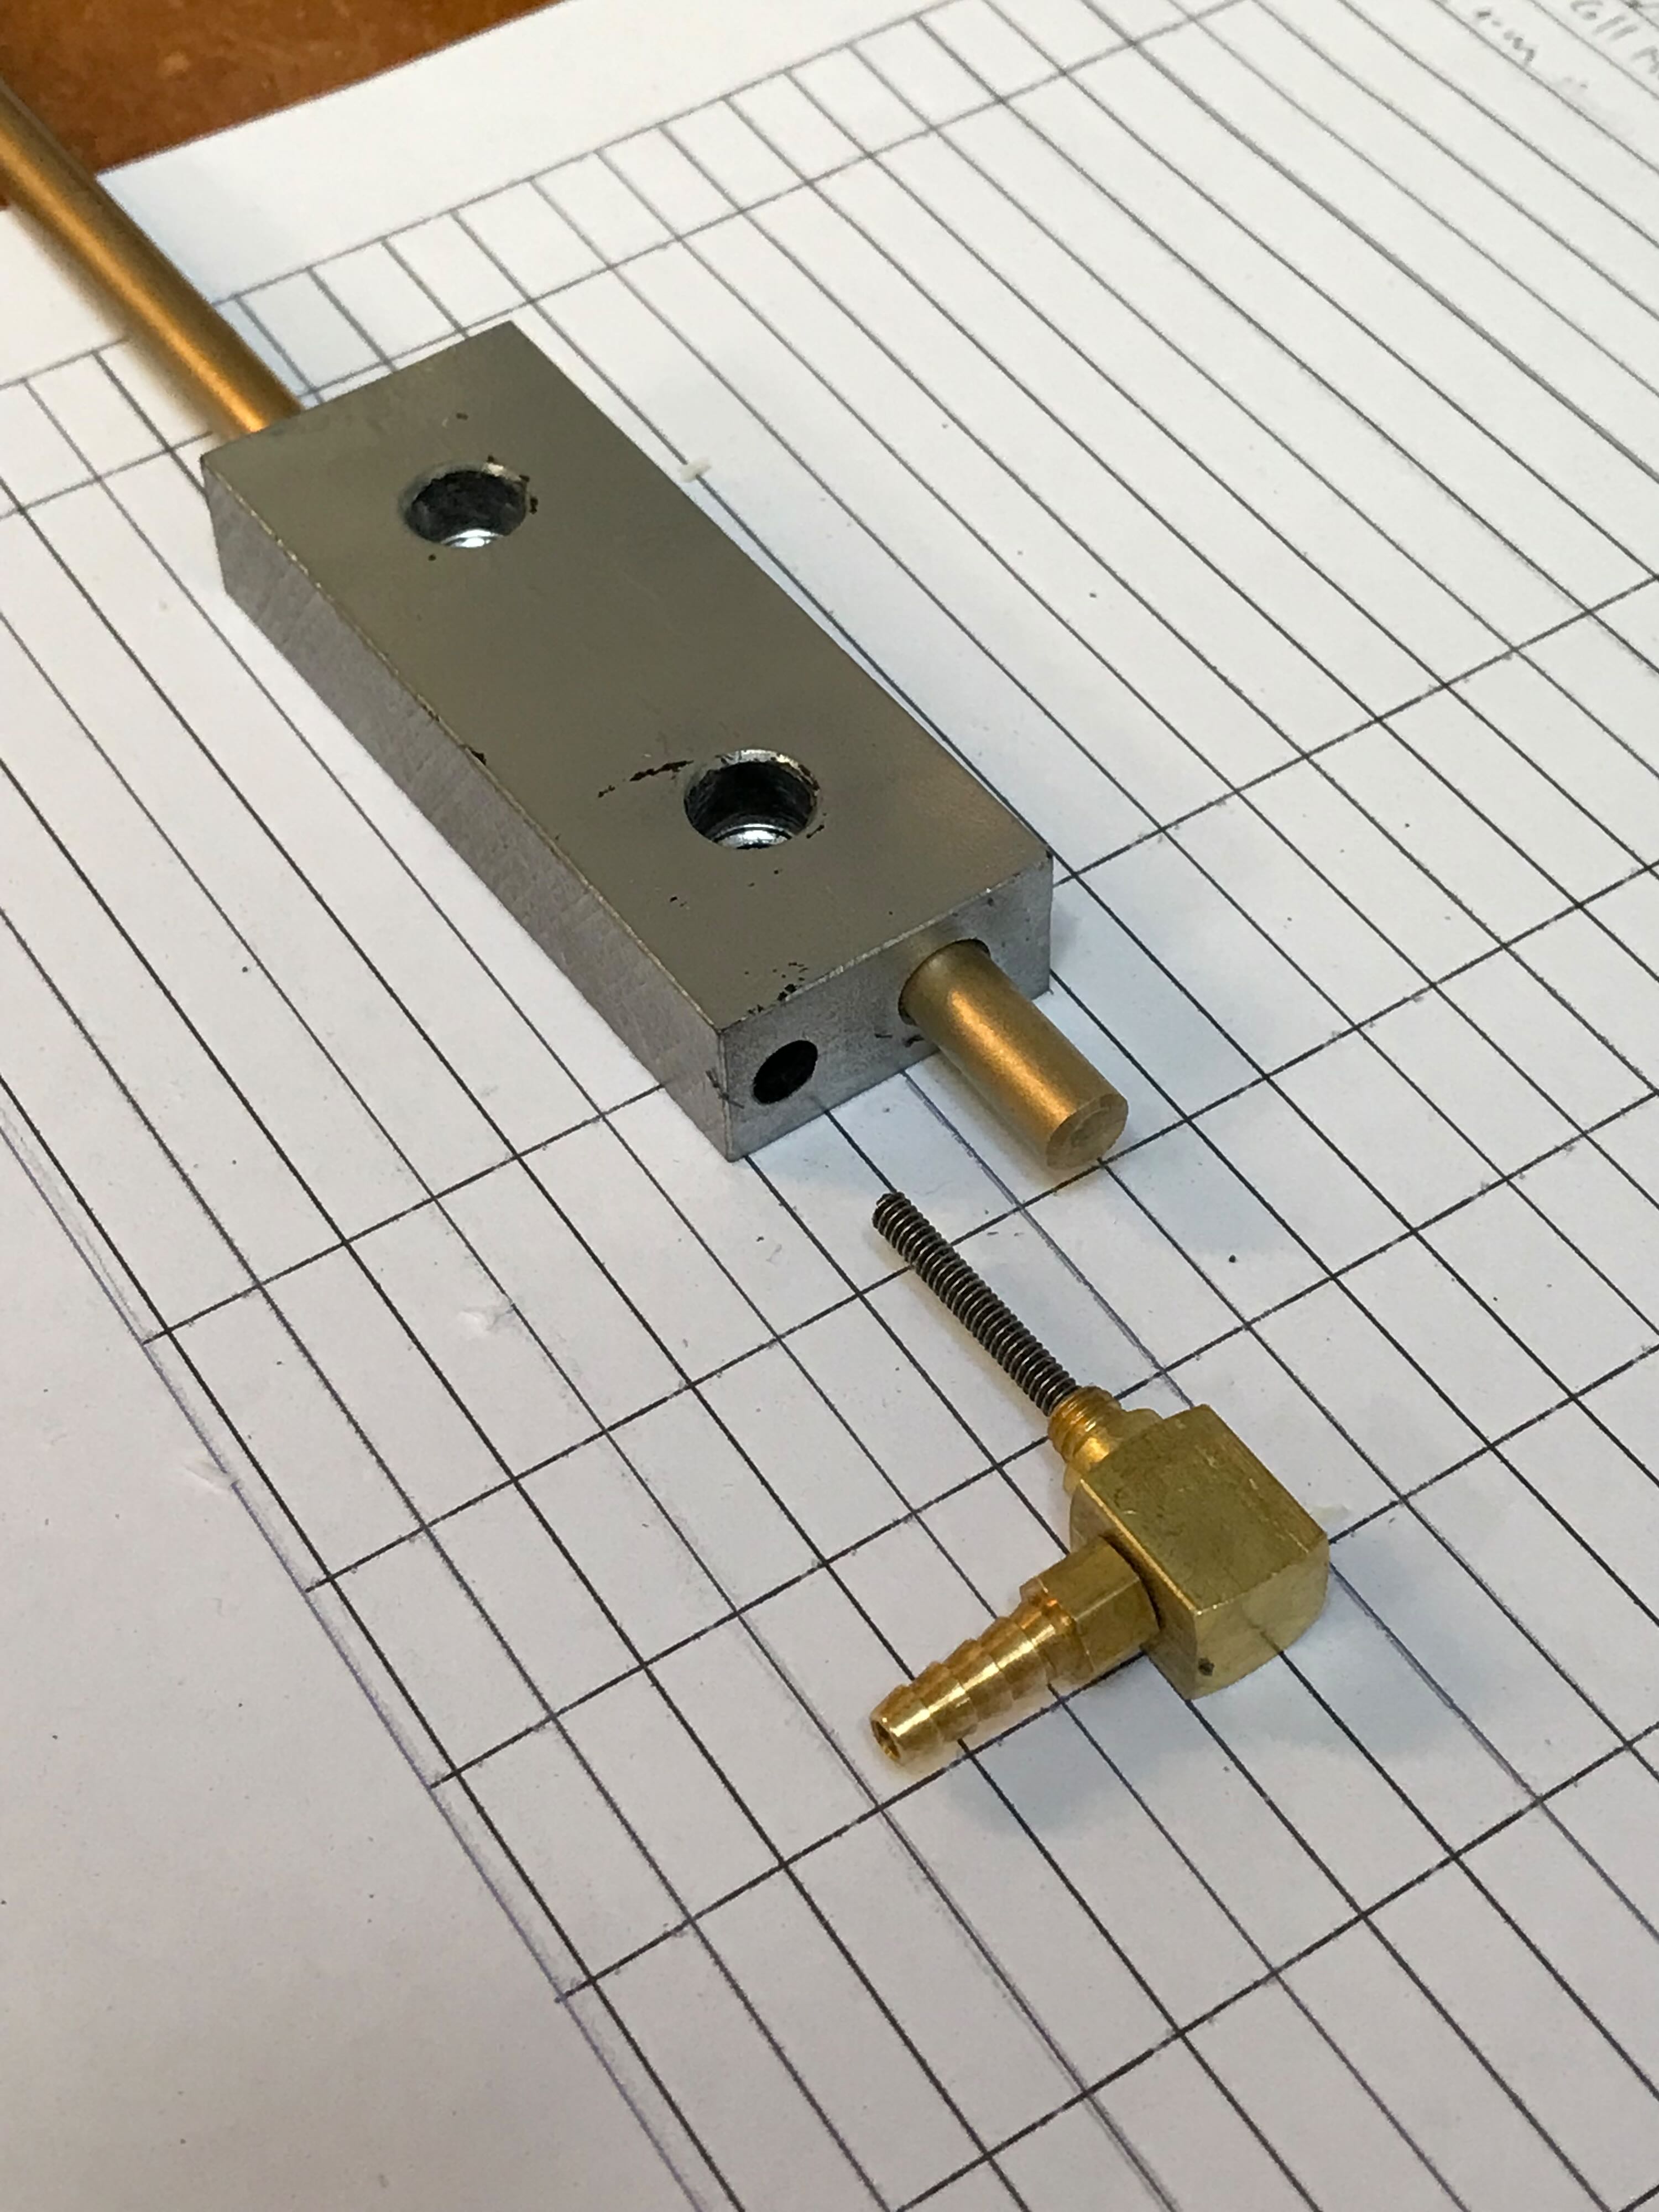
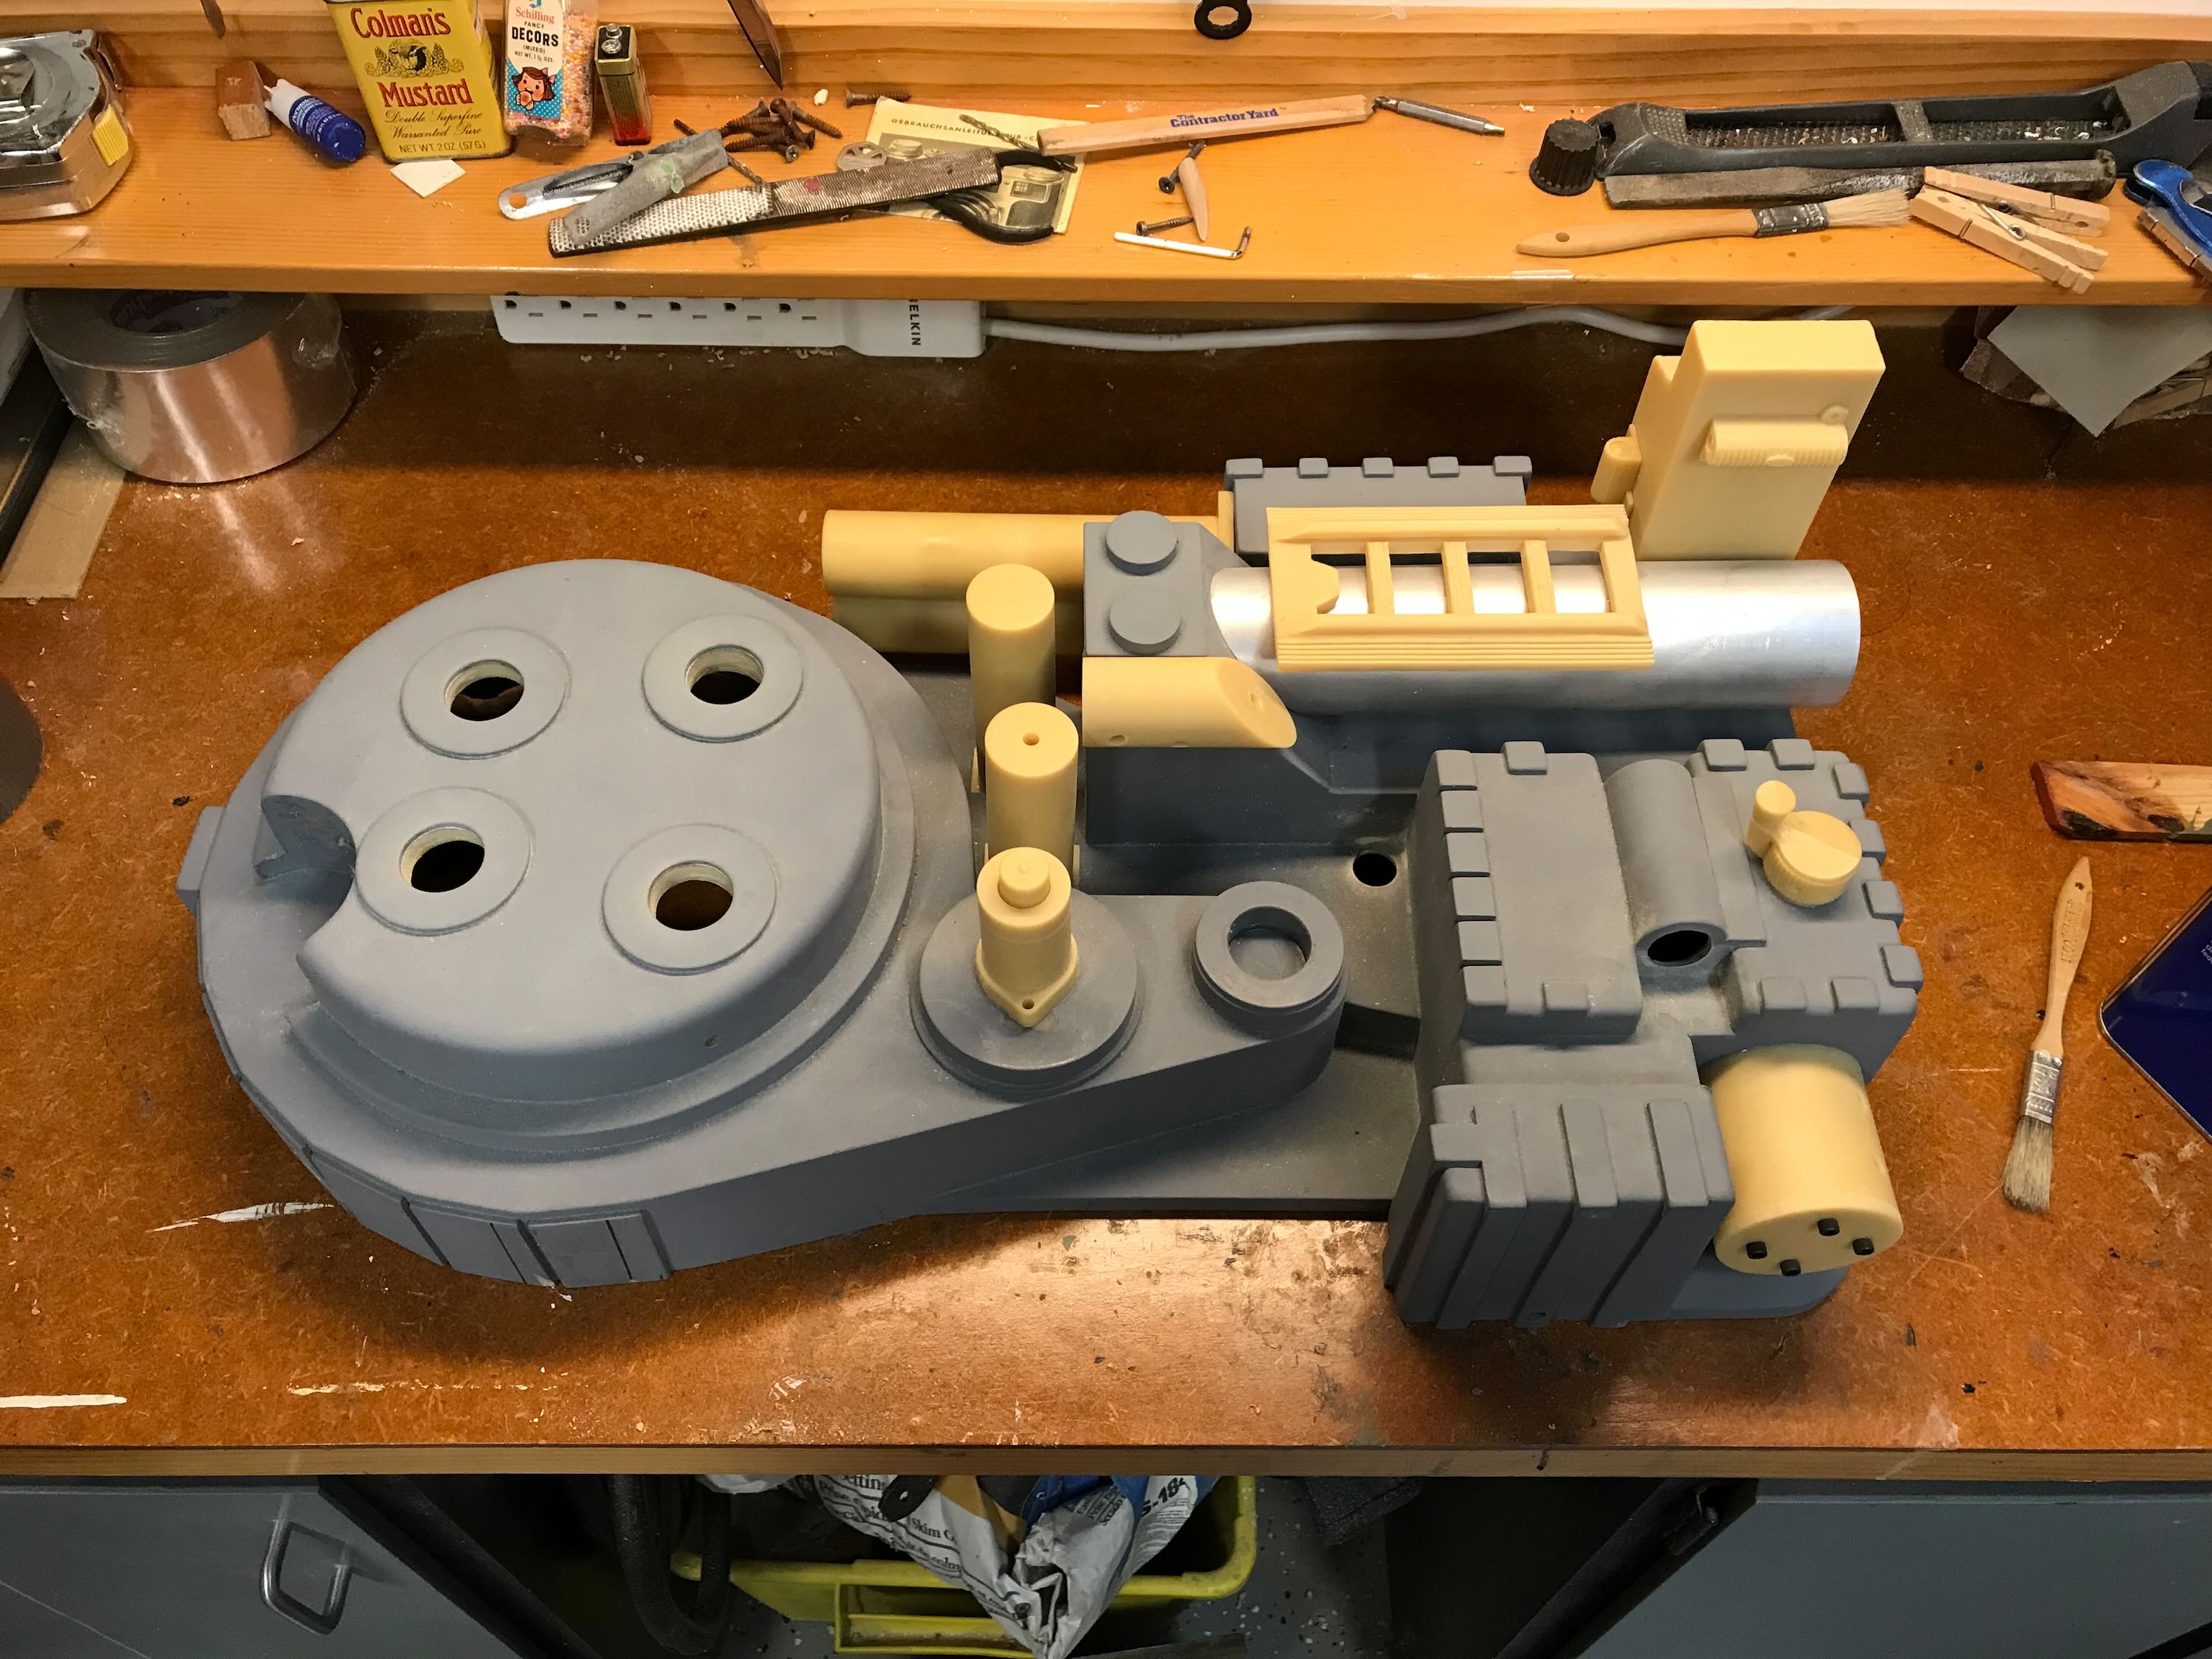
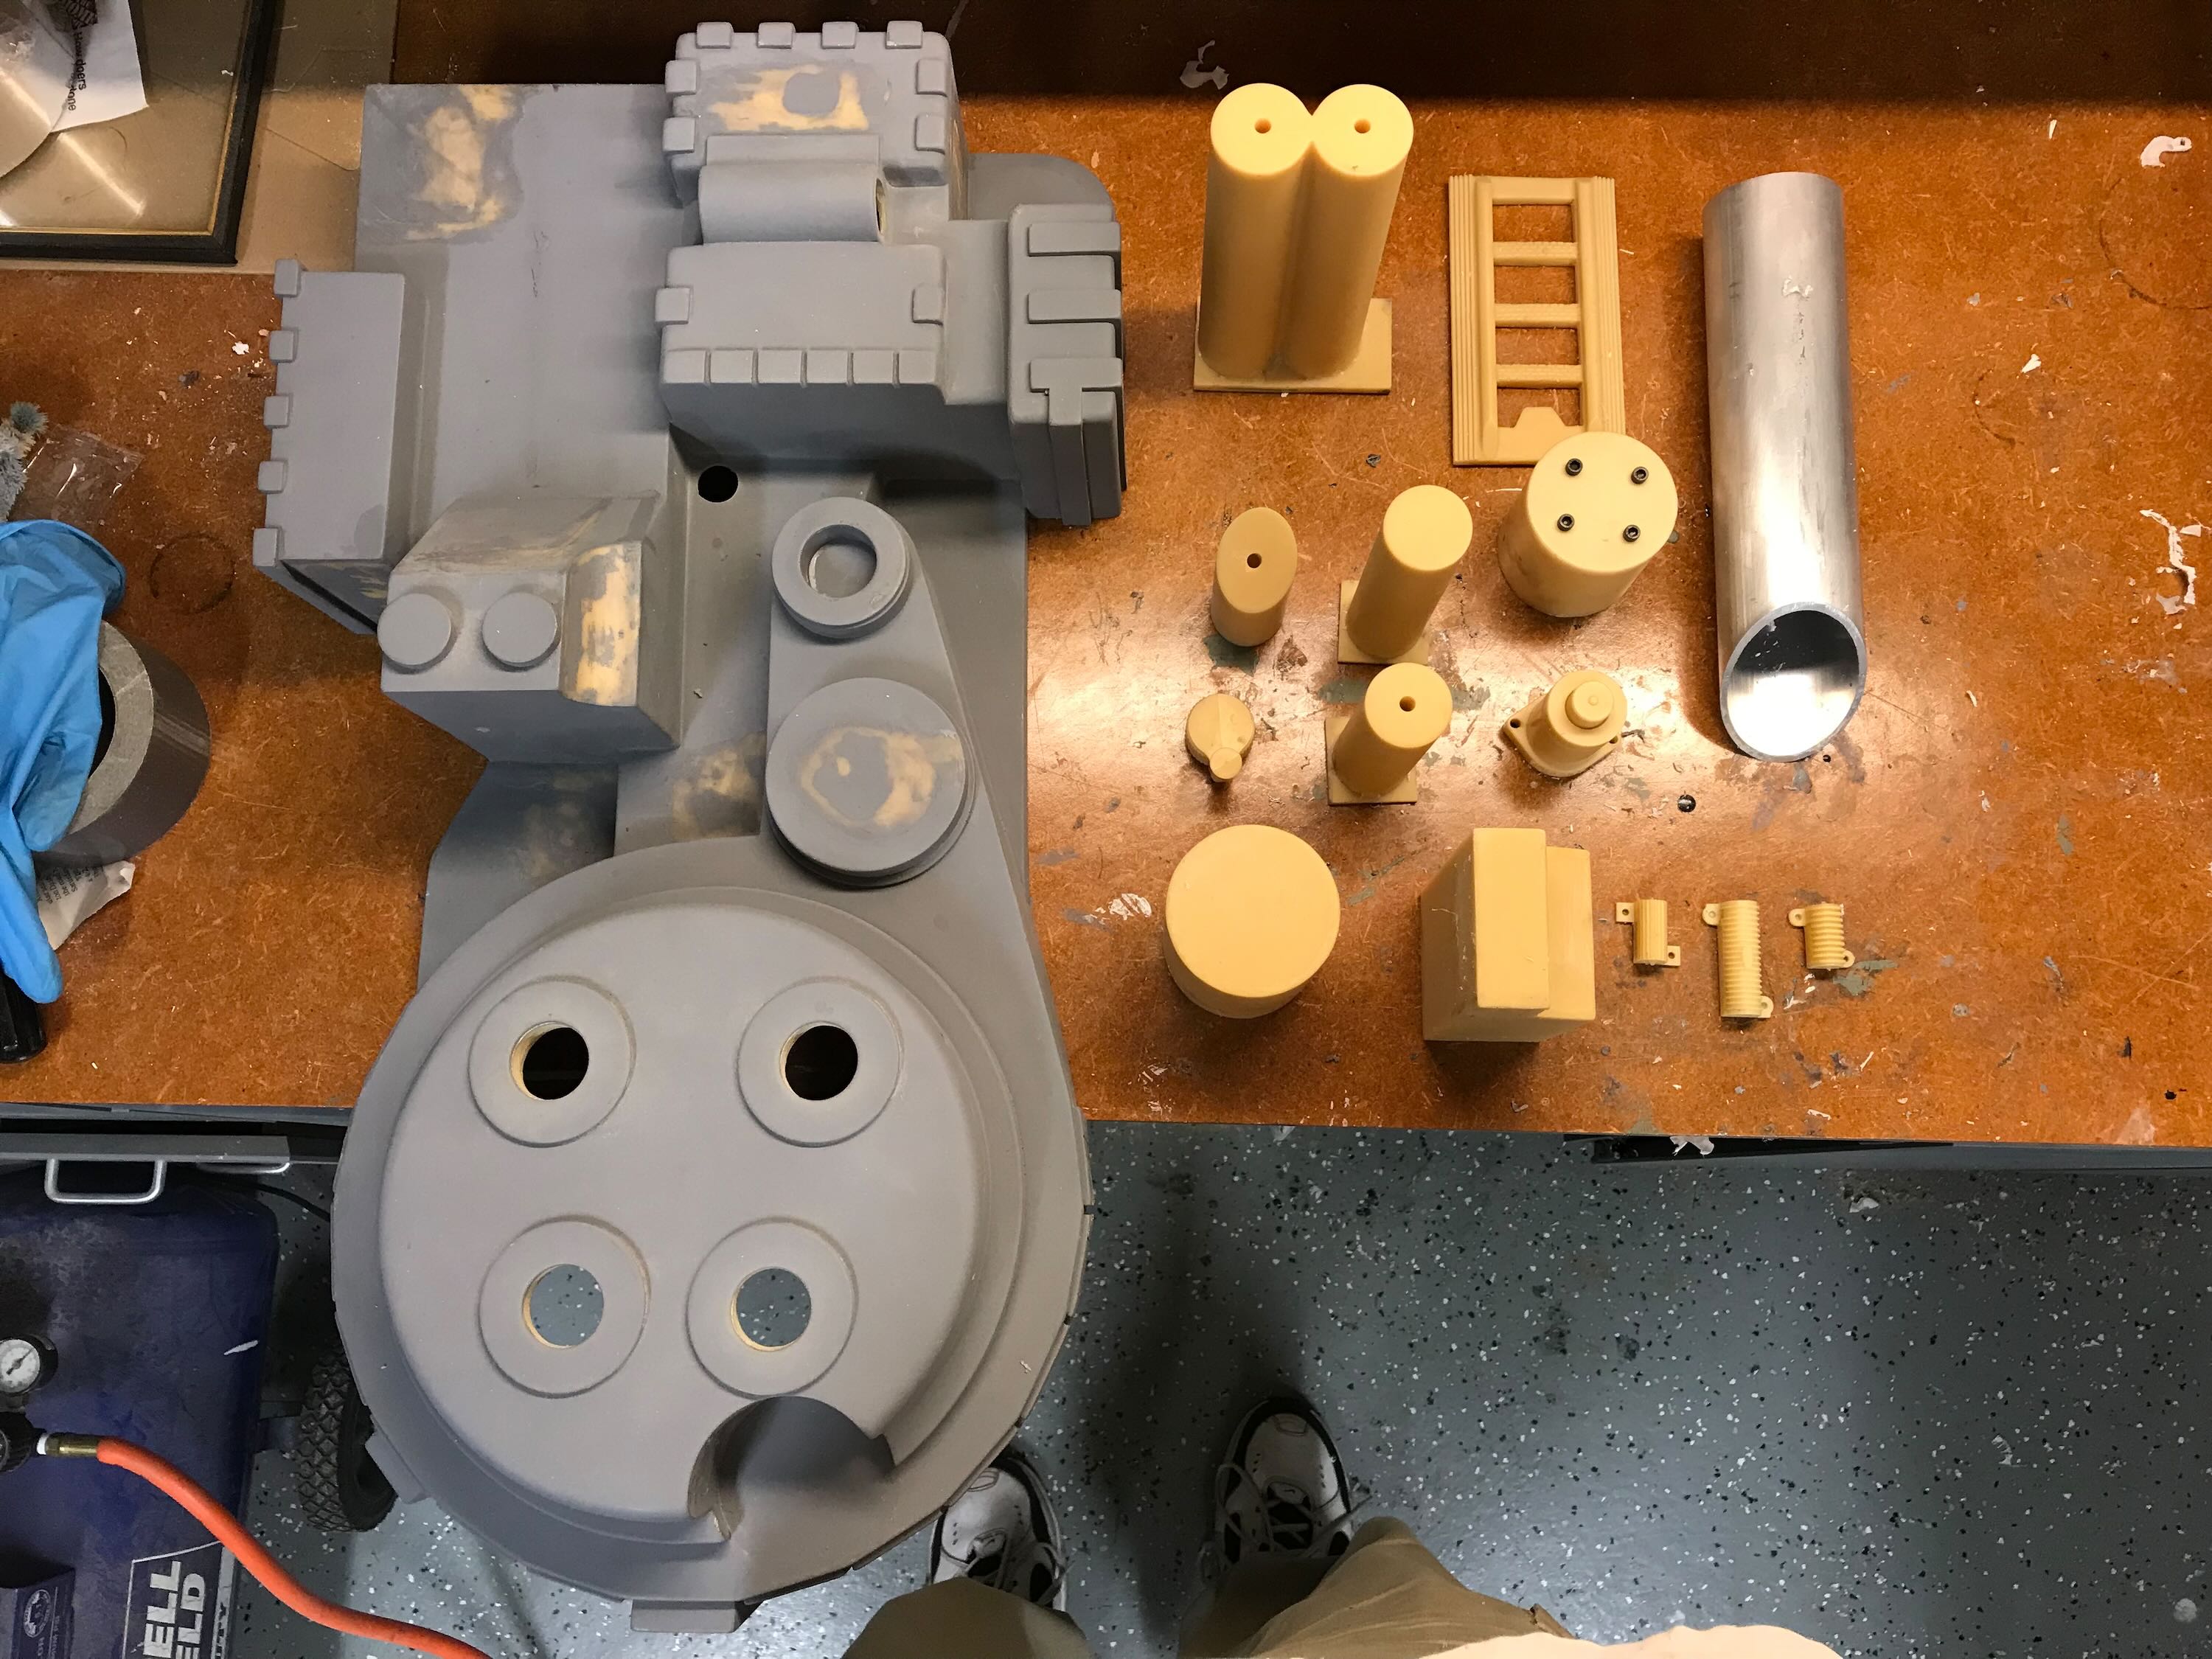
I marked the locations of the "pipes" on the shell. I tried to match the positions seen in the photos I took in 1984 of the Spengler pack.

I drilled and tapped 1/4" threaded holes into the pipes to help secure them to the shell.

I tapped a 4-40 hole into the brass connector and screwed that into a threaded hole on this pipe. The connector should be hexagonal, but my goal was to use every usable part Wes had purchased.

Re: Building a Benofkent Props Proton Pack for fellow 'Buster
Posted: July 27th, 2022, 12:44 am
by WShawn
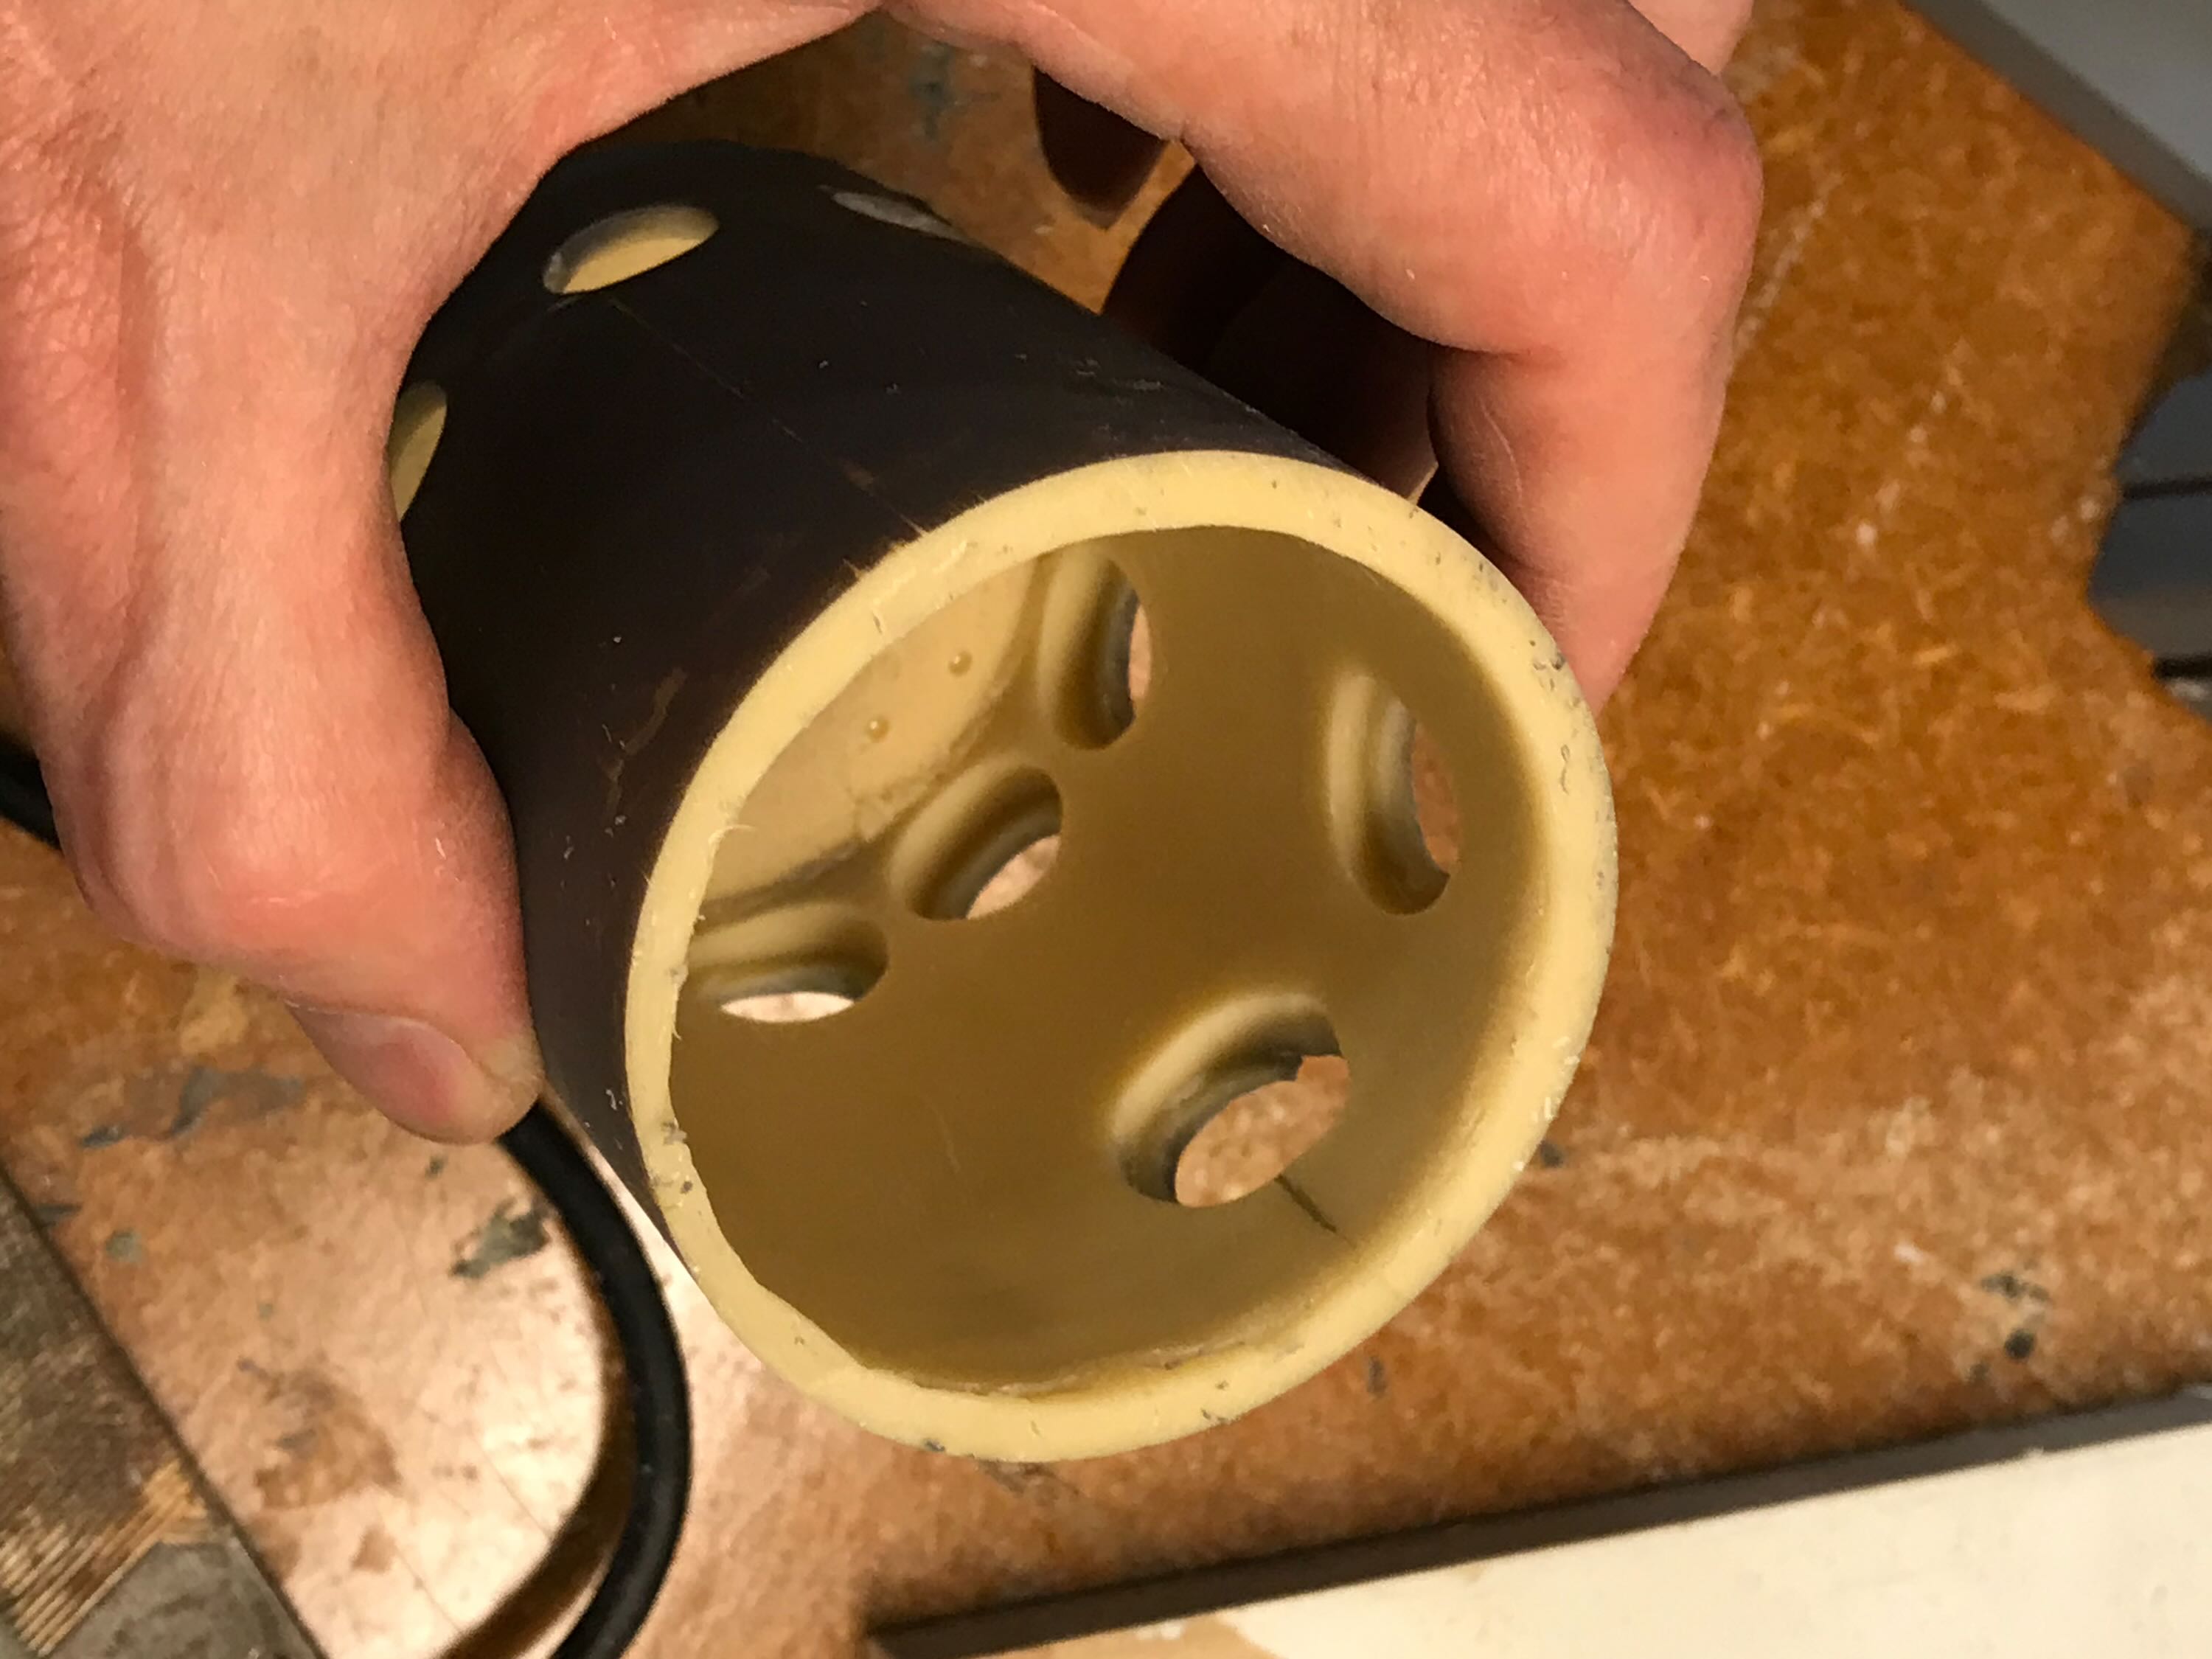
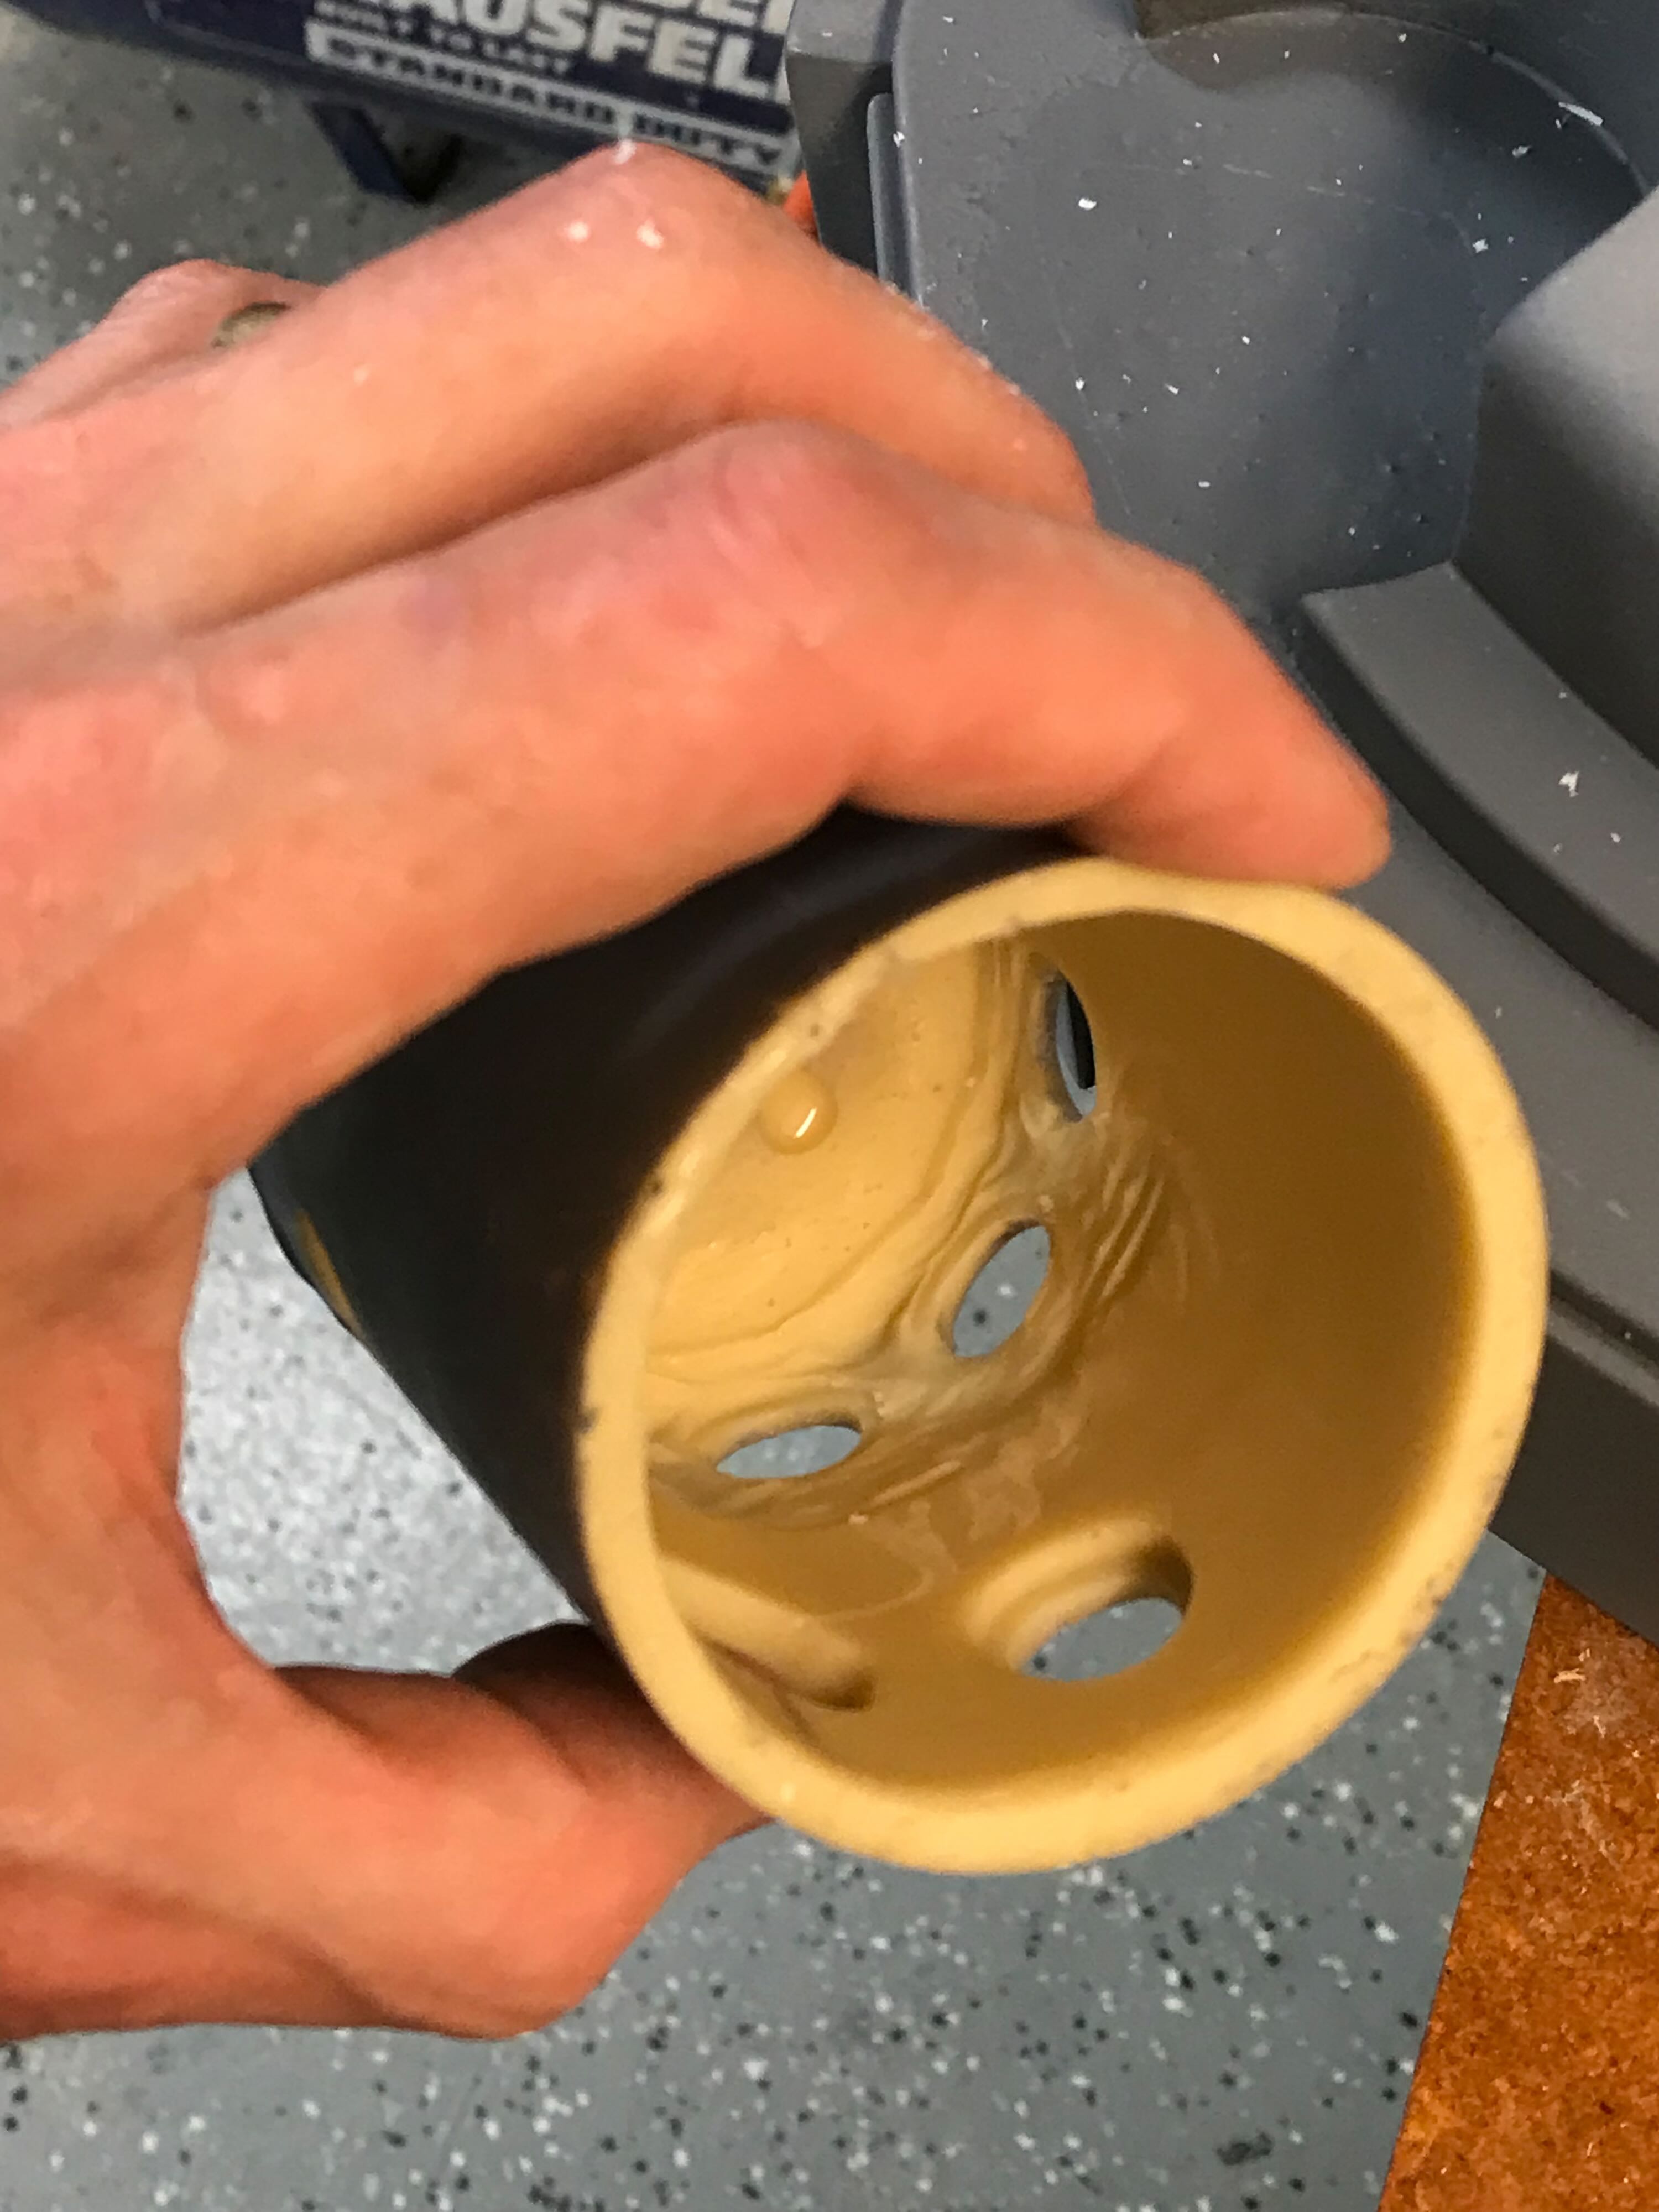
6/23/22 - I ran into some problems with the Legris Elbows that Wes had purchased; the inner metal connectors prevented the thinner tubing from being plugged into them.
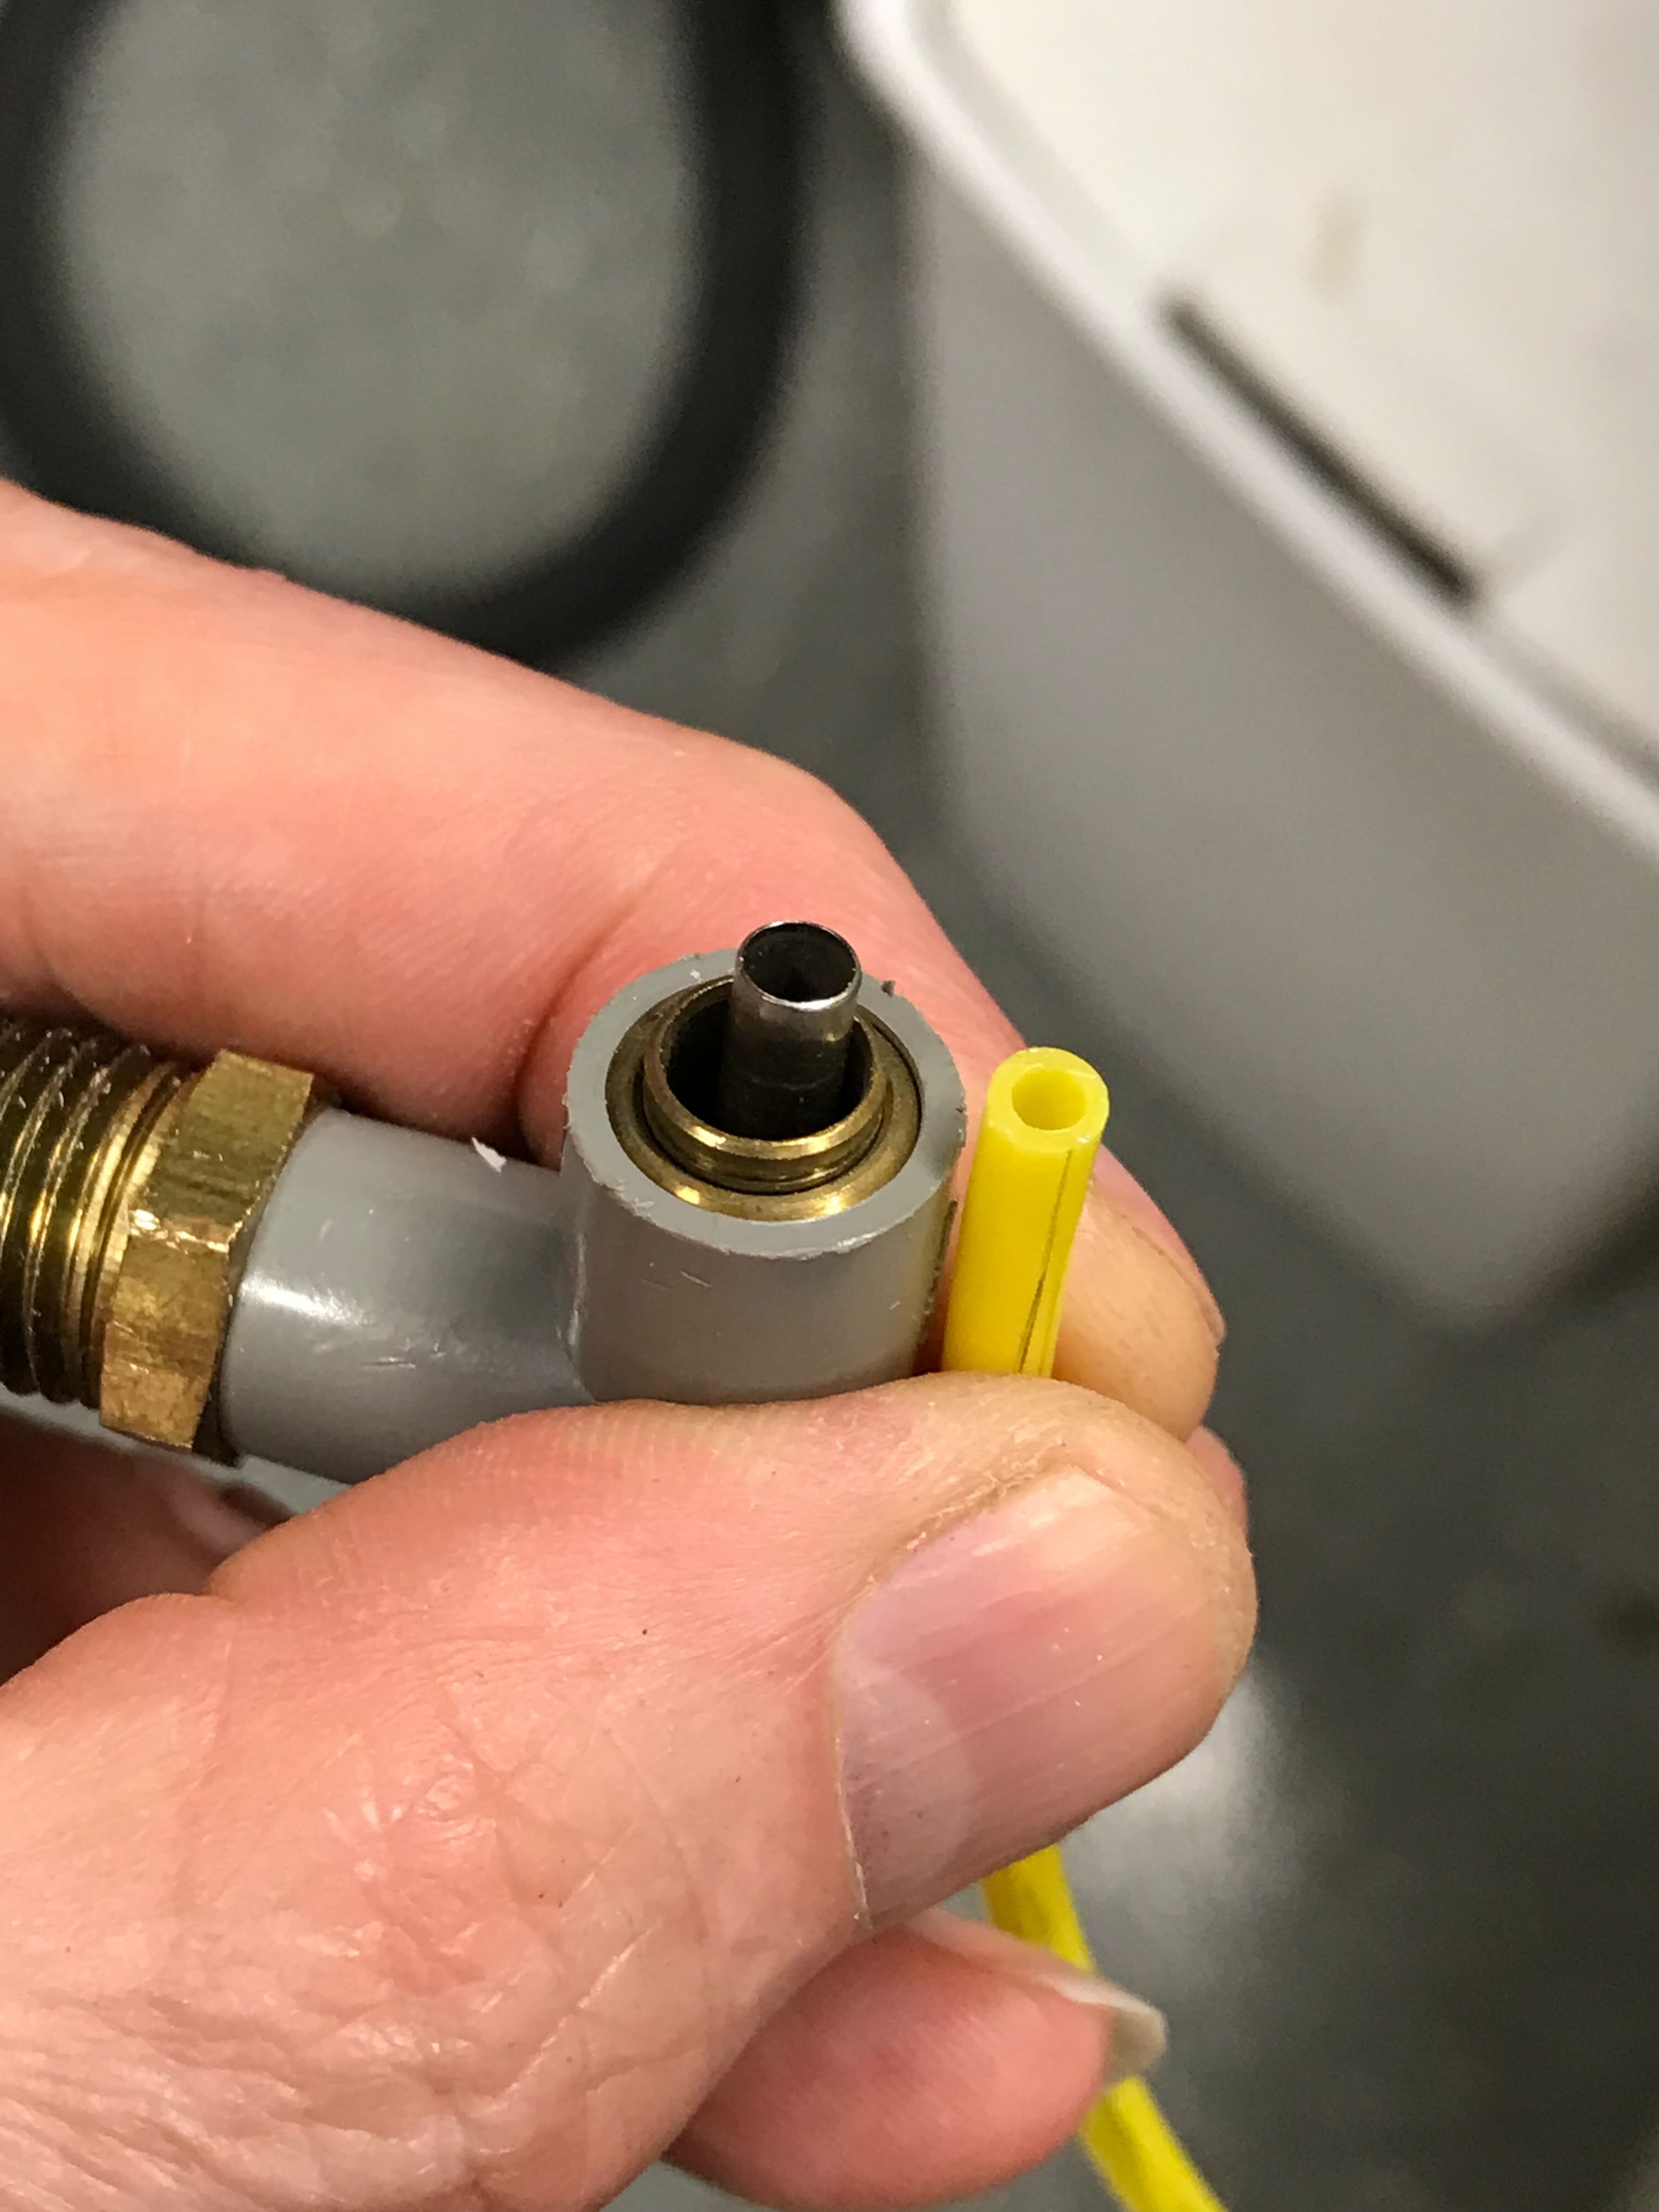
After some trial and error I ended up either yanking out, drilling out, or grinding out the inner metal parts that blocked the tubing. Unfortunately I melted a bit of two of the elbows while drilling out those parts. I then modified some rigid plastic tube I had (routing the inside a bit) and glued those into the Legris Elbows.
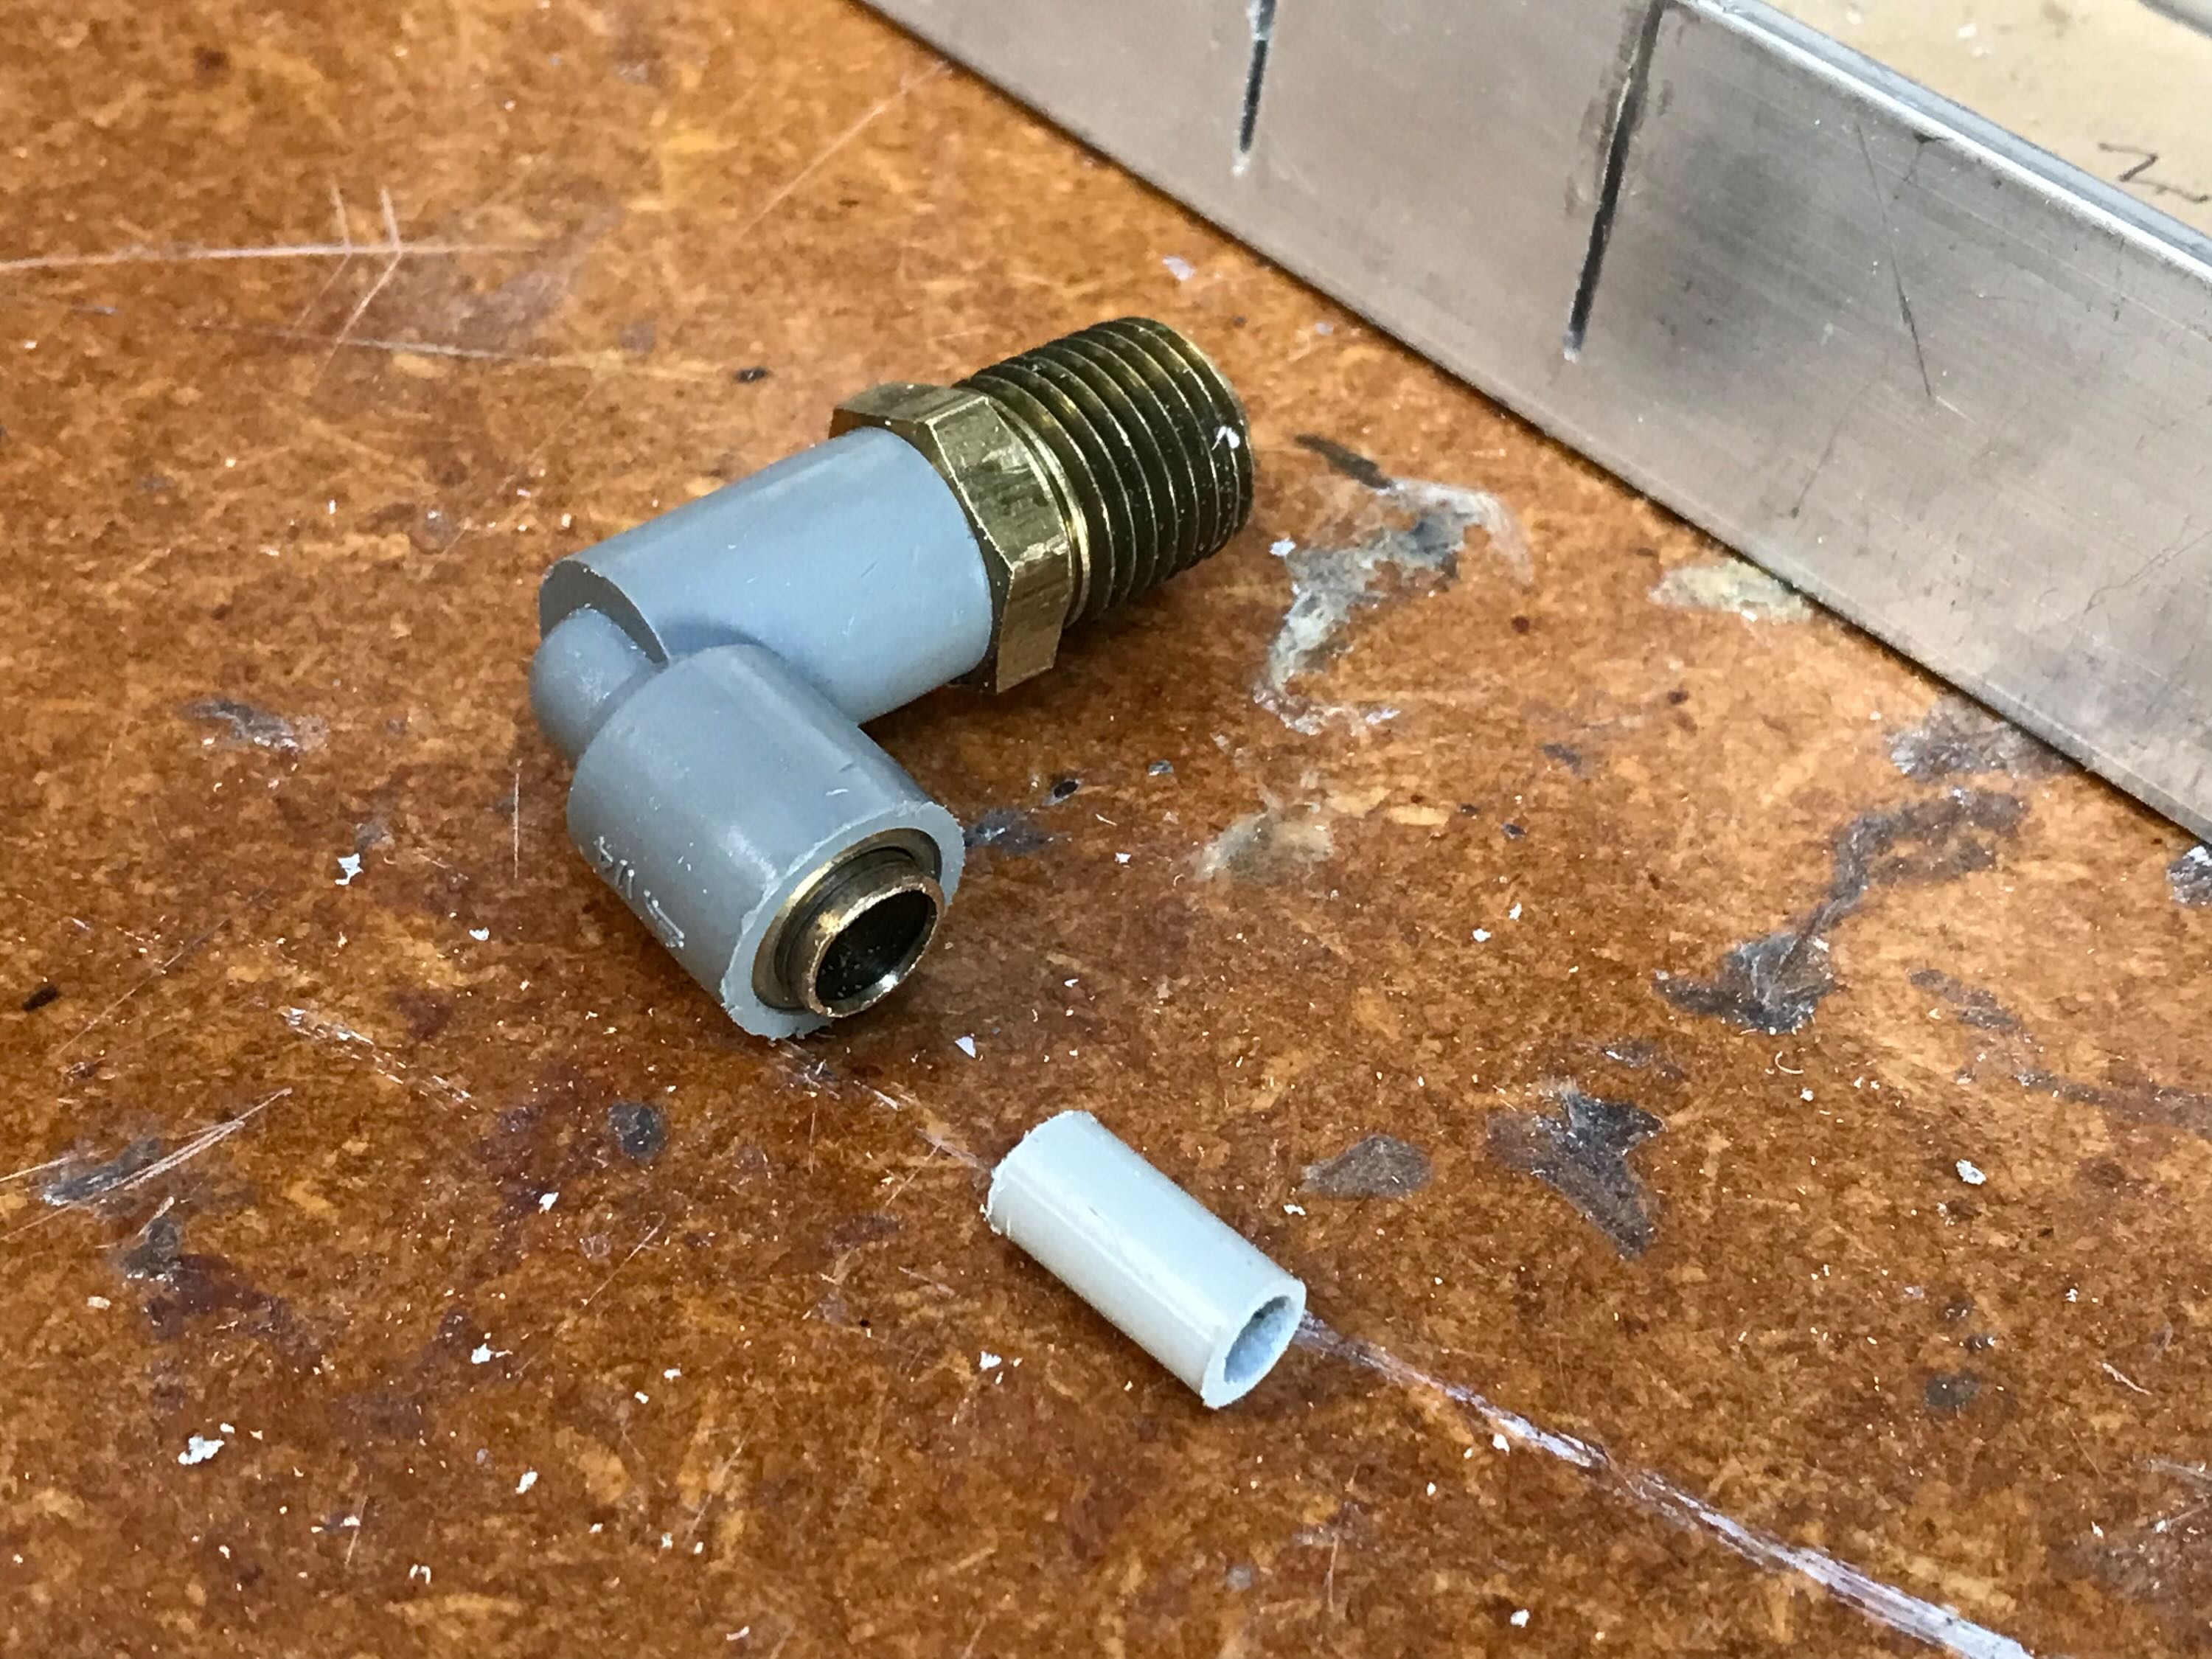
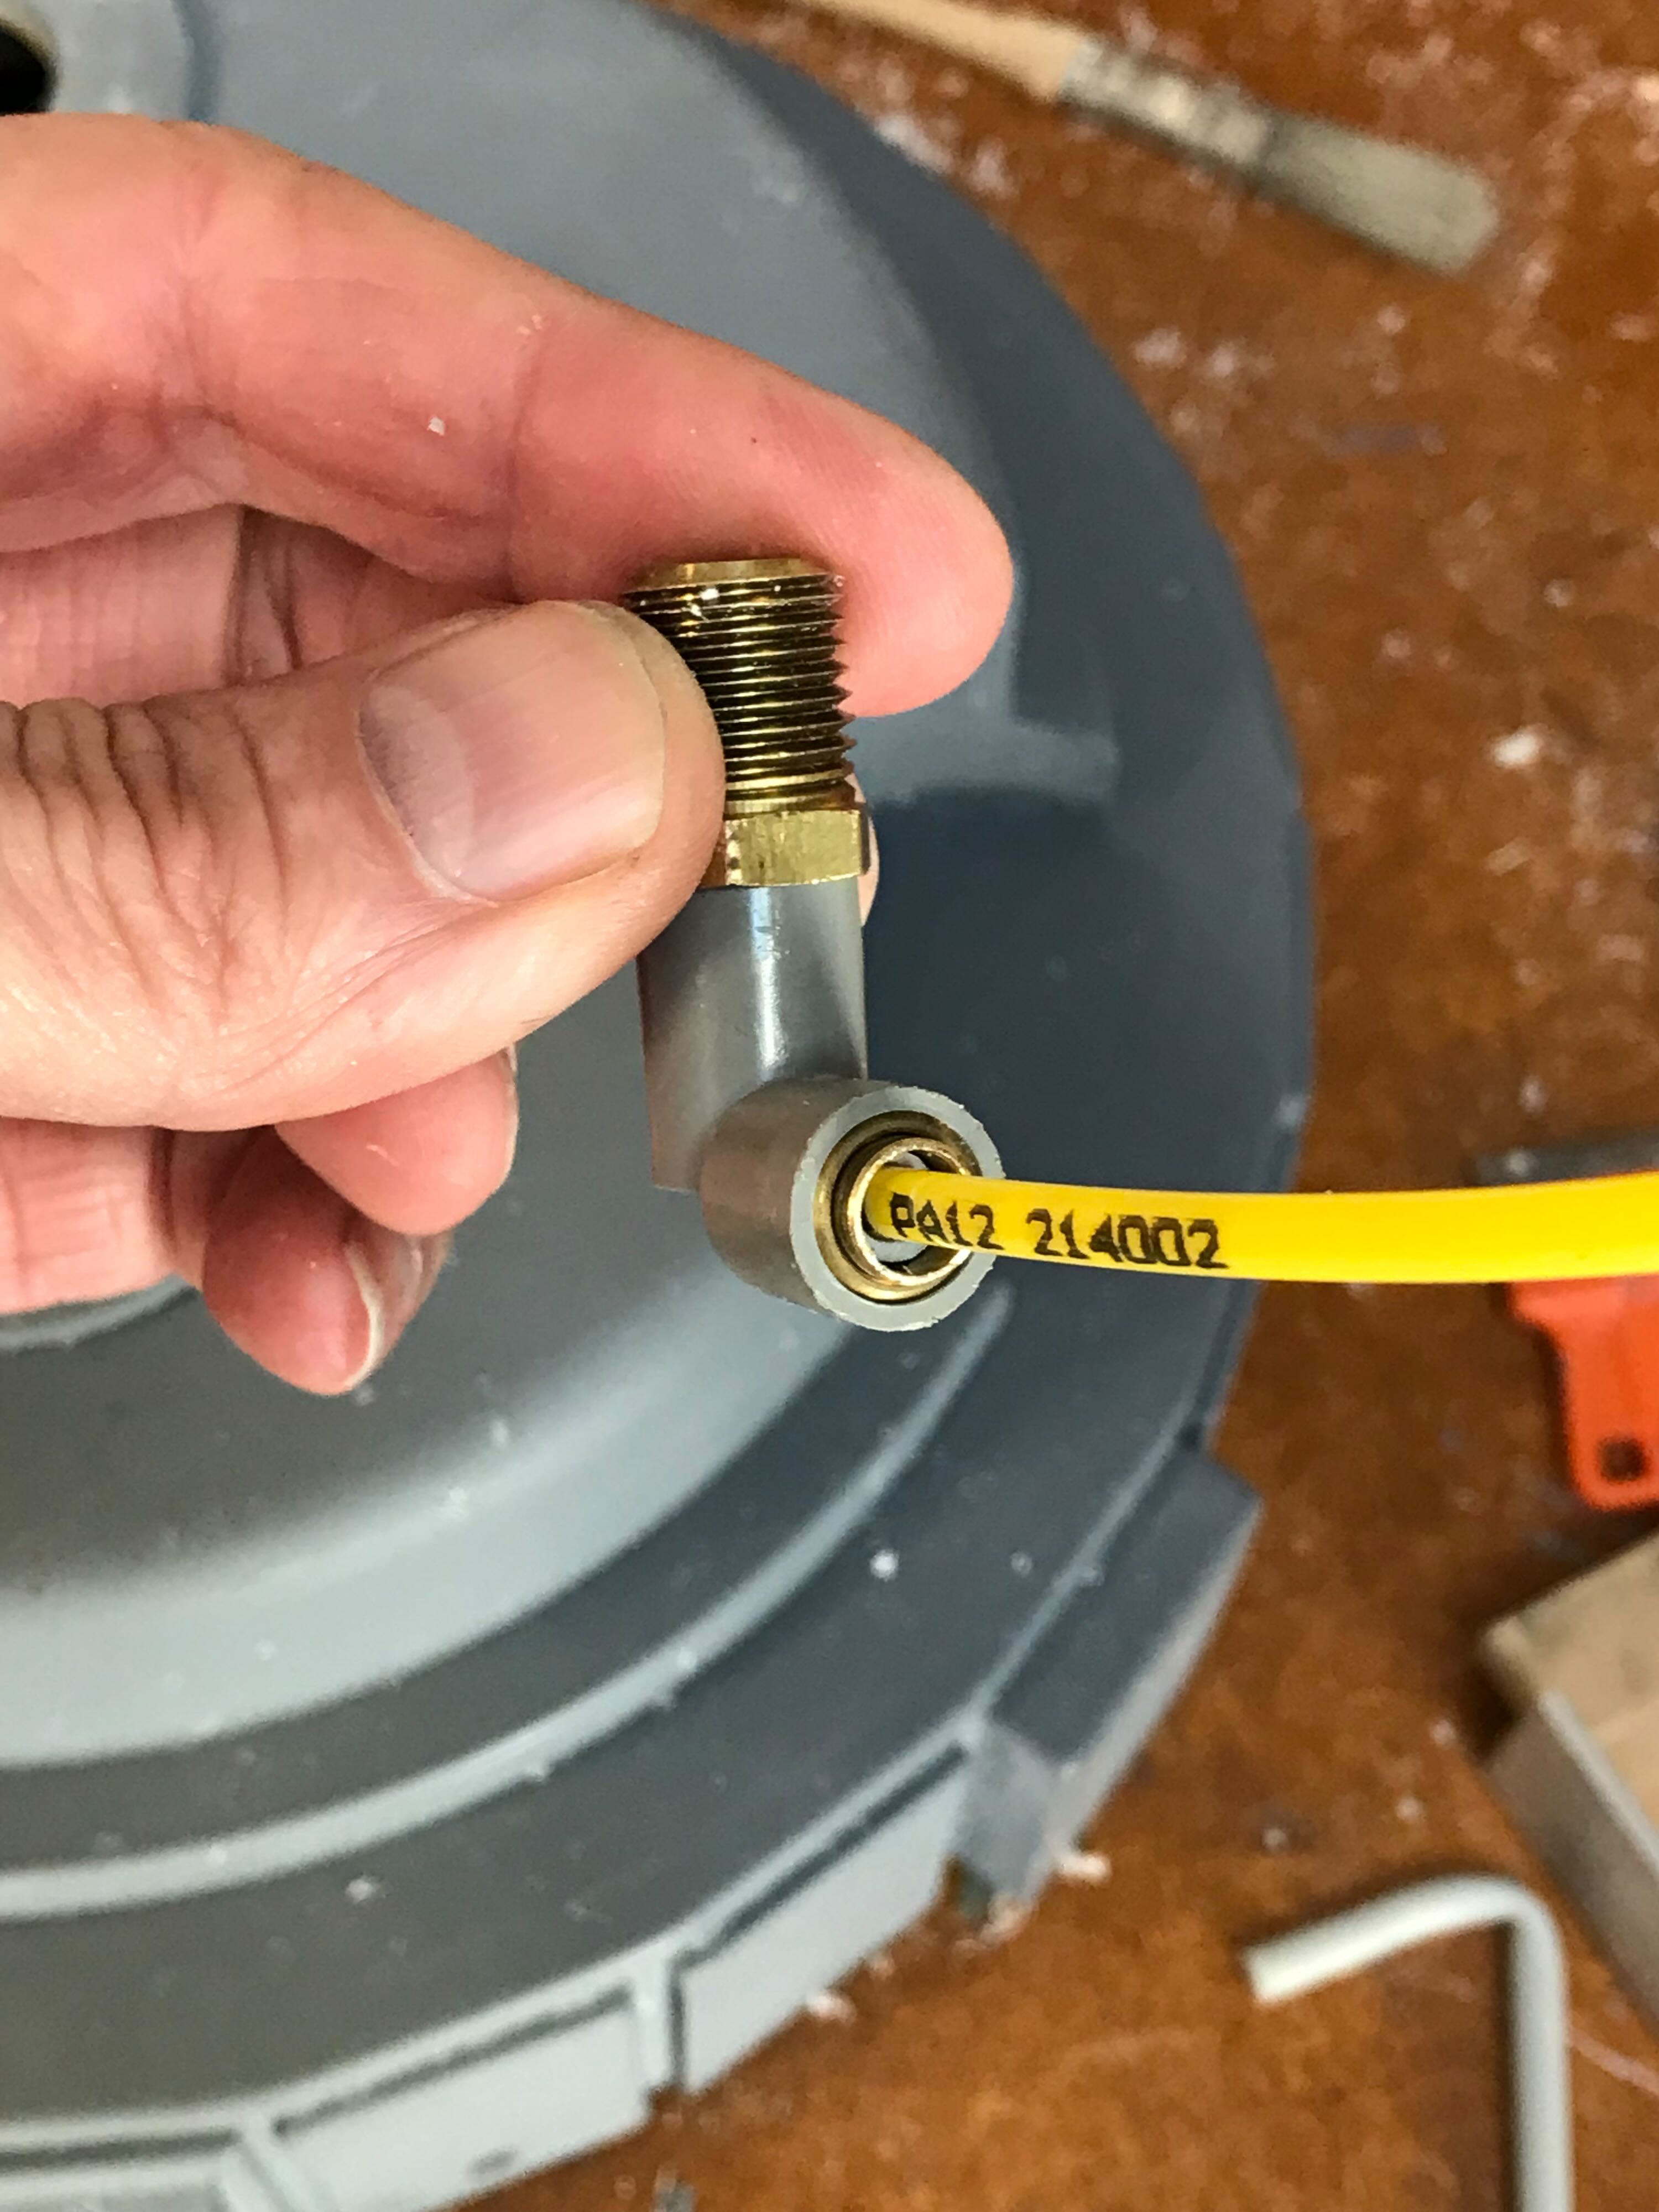
With those adapters glued in the tubing would then slide securely into the elbows.
Re: Building a Benofkent Props Proton Pack for fellow 'Buster
Posted: July 27th, 2022, 1:04 am
by WShawn
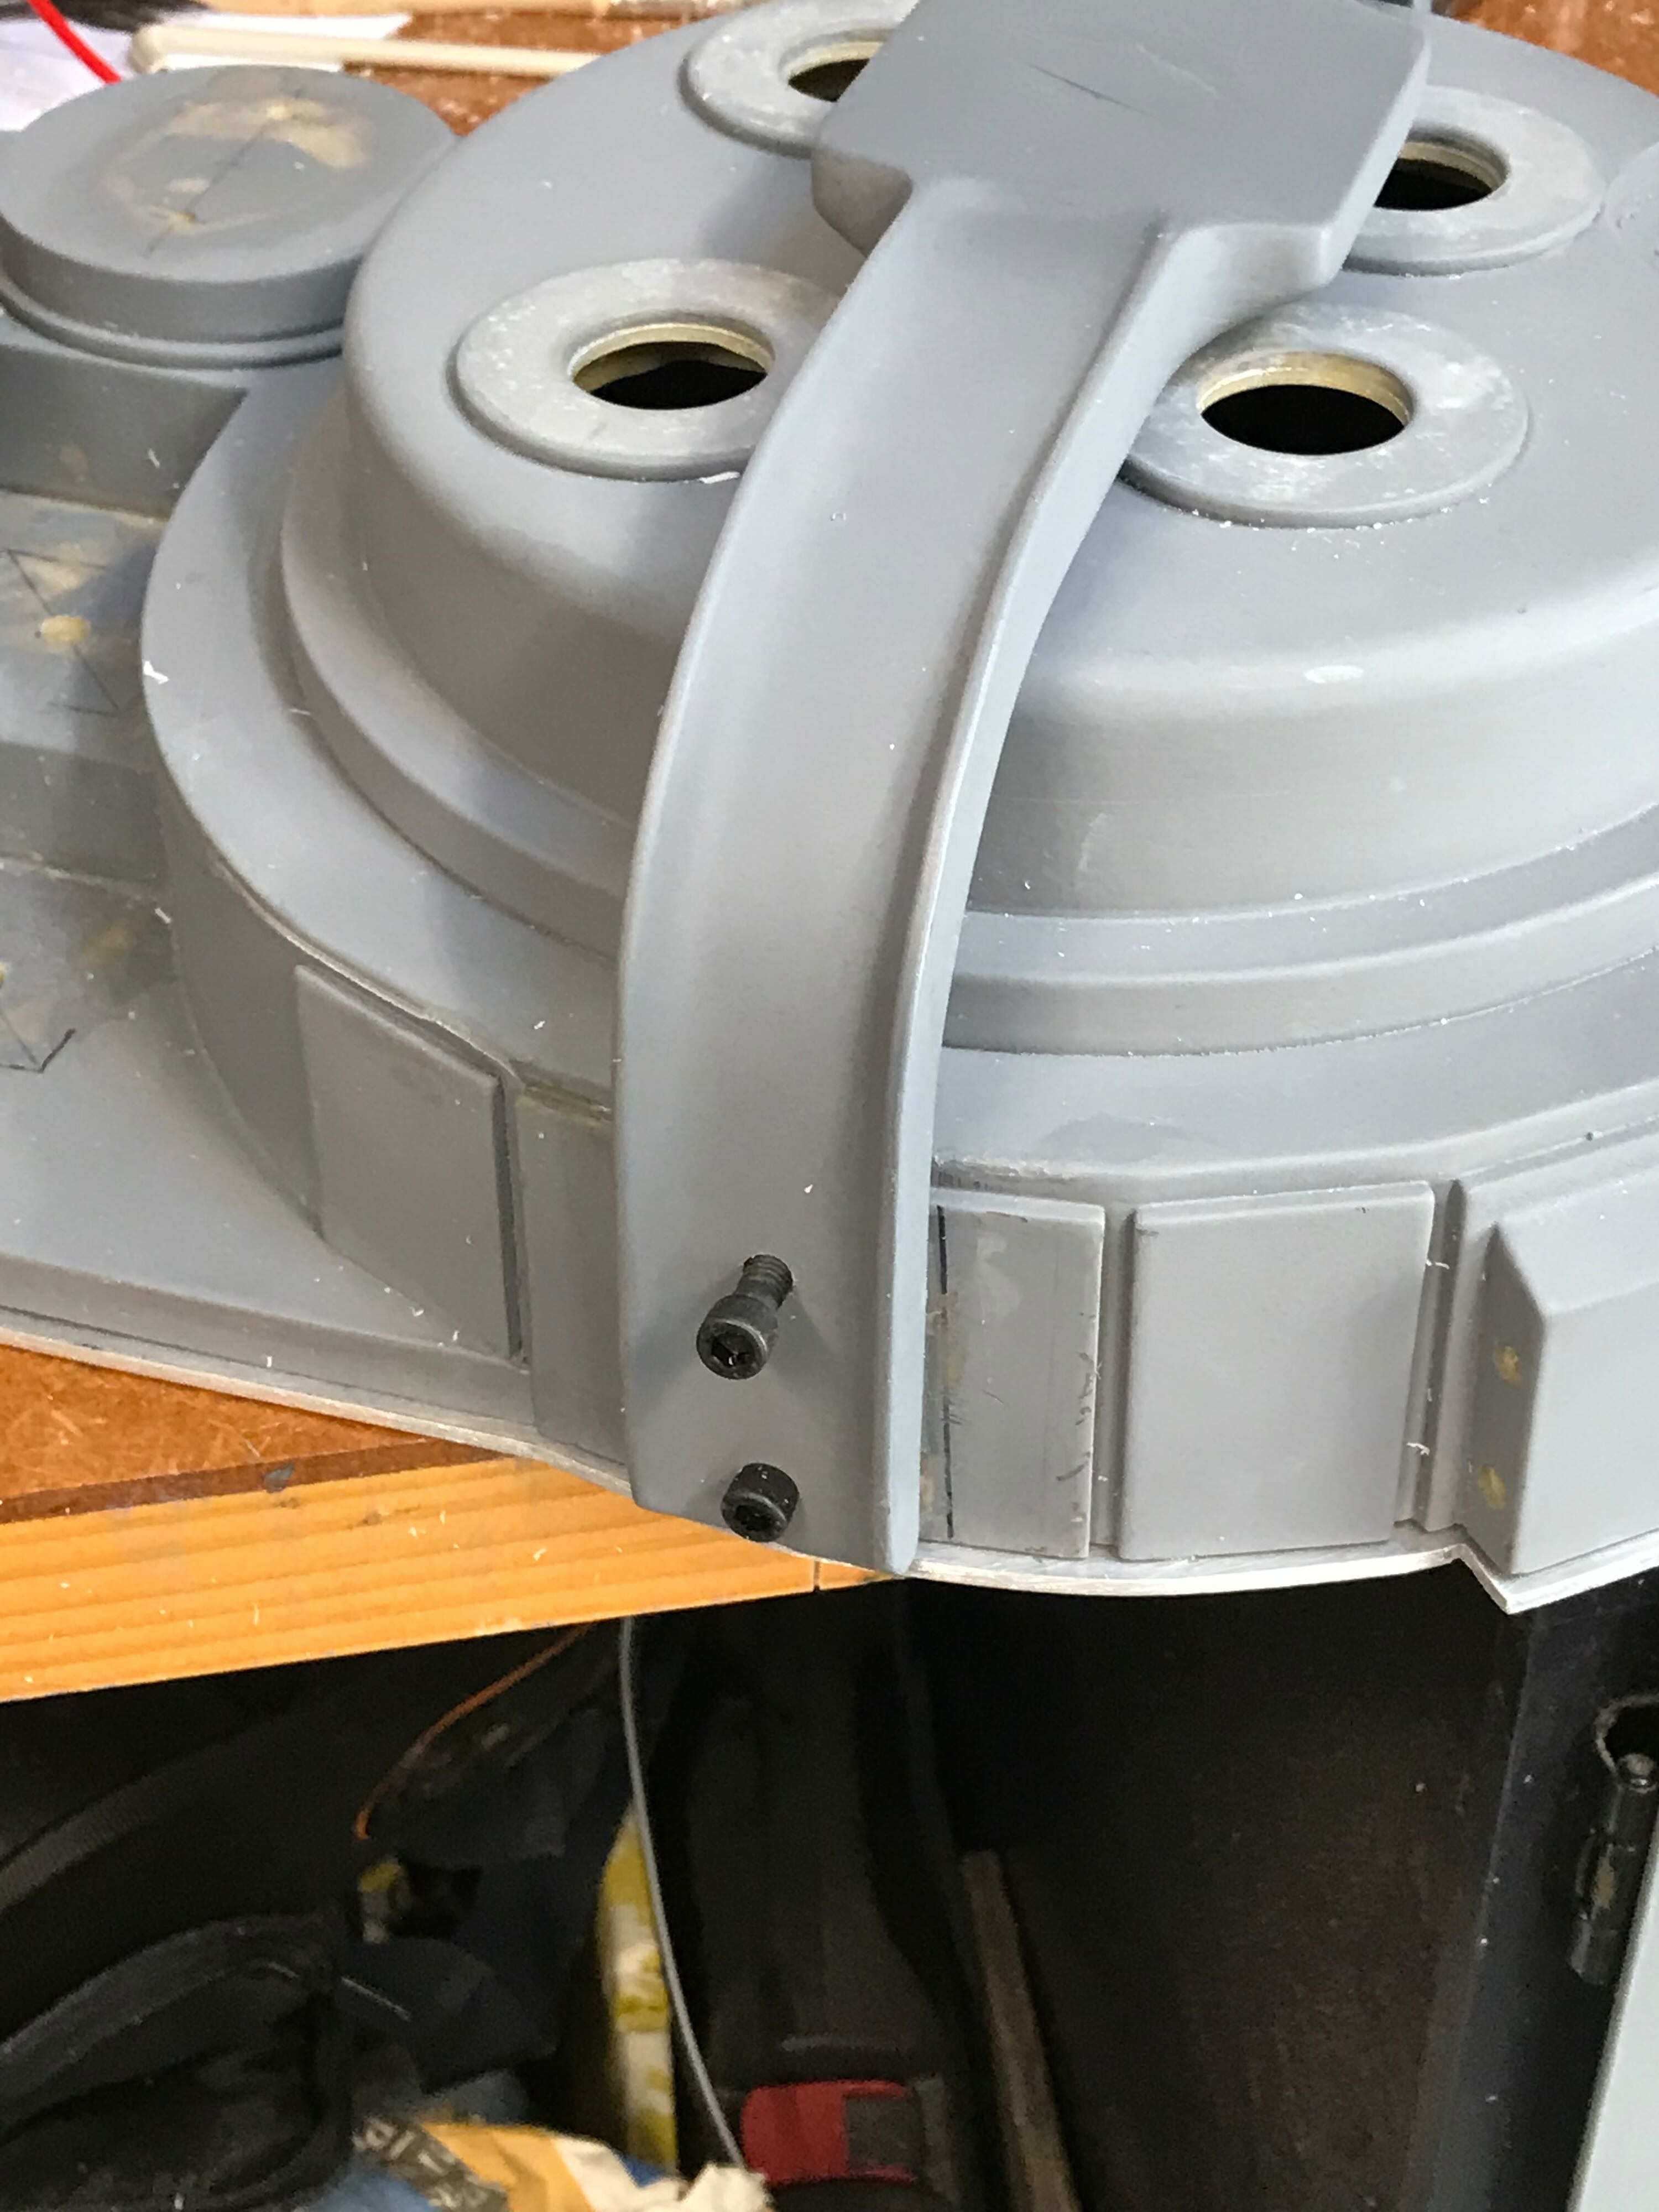
6/24/22 - I drilled holes to mount the bumper, attempting to approximate the positions seen in my 1984 photos. I think the 1/4" socket cap bolts I used are a little too big.
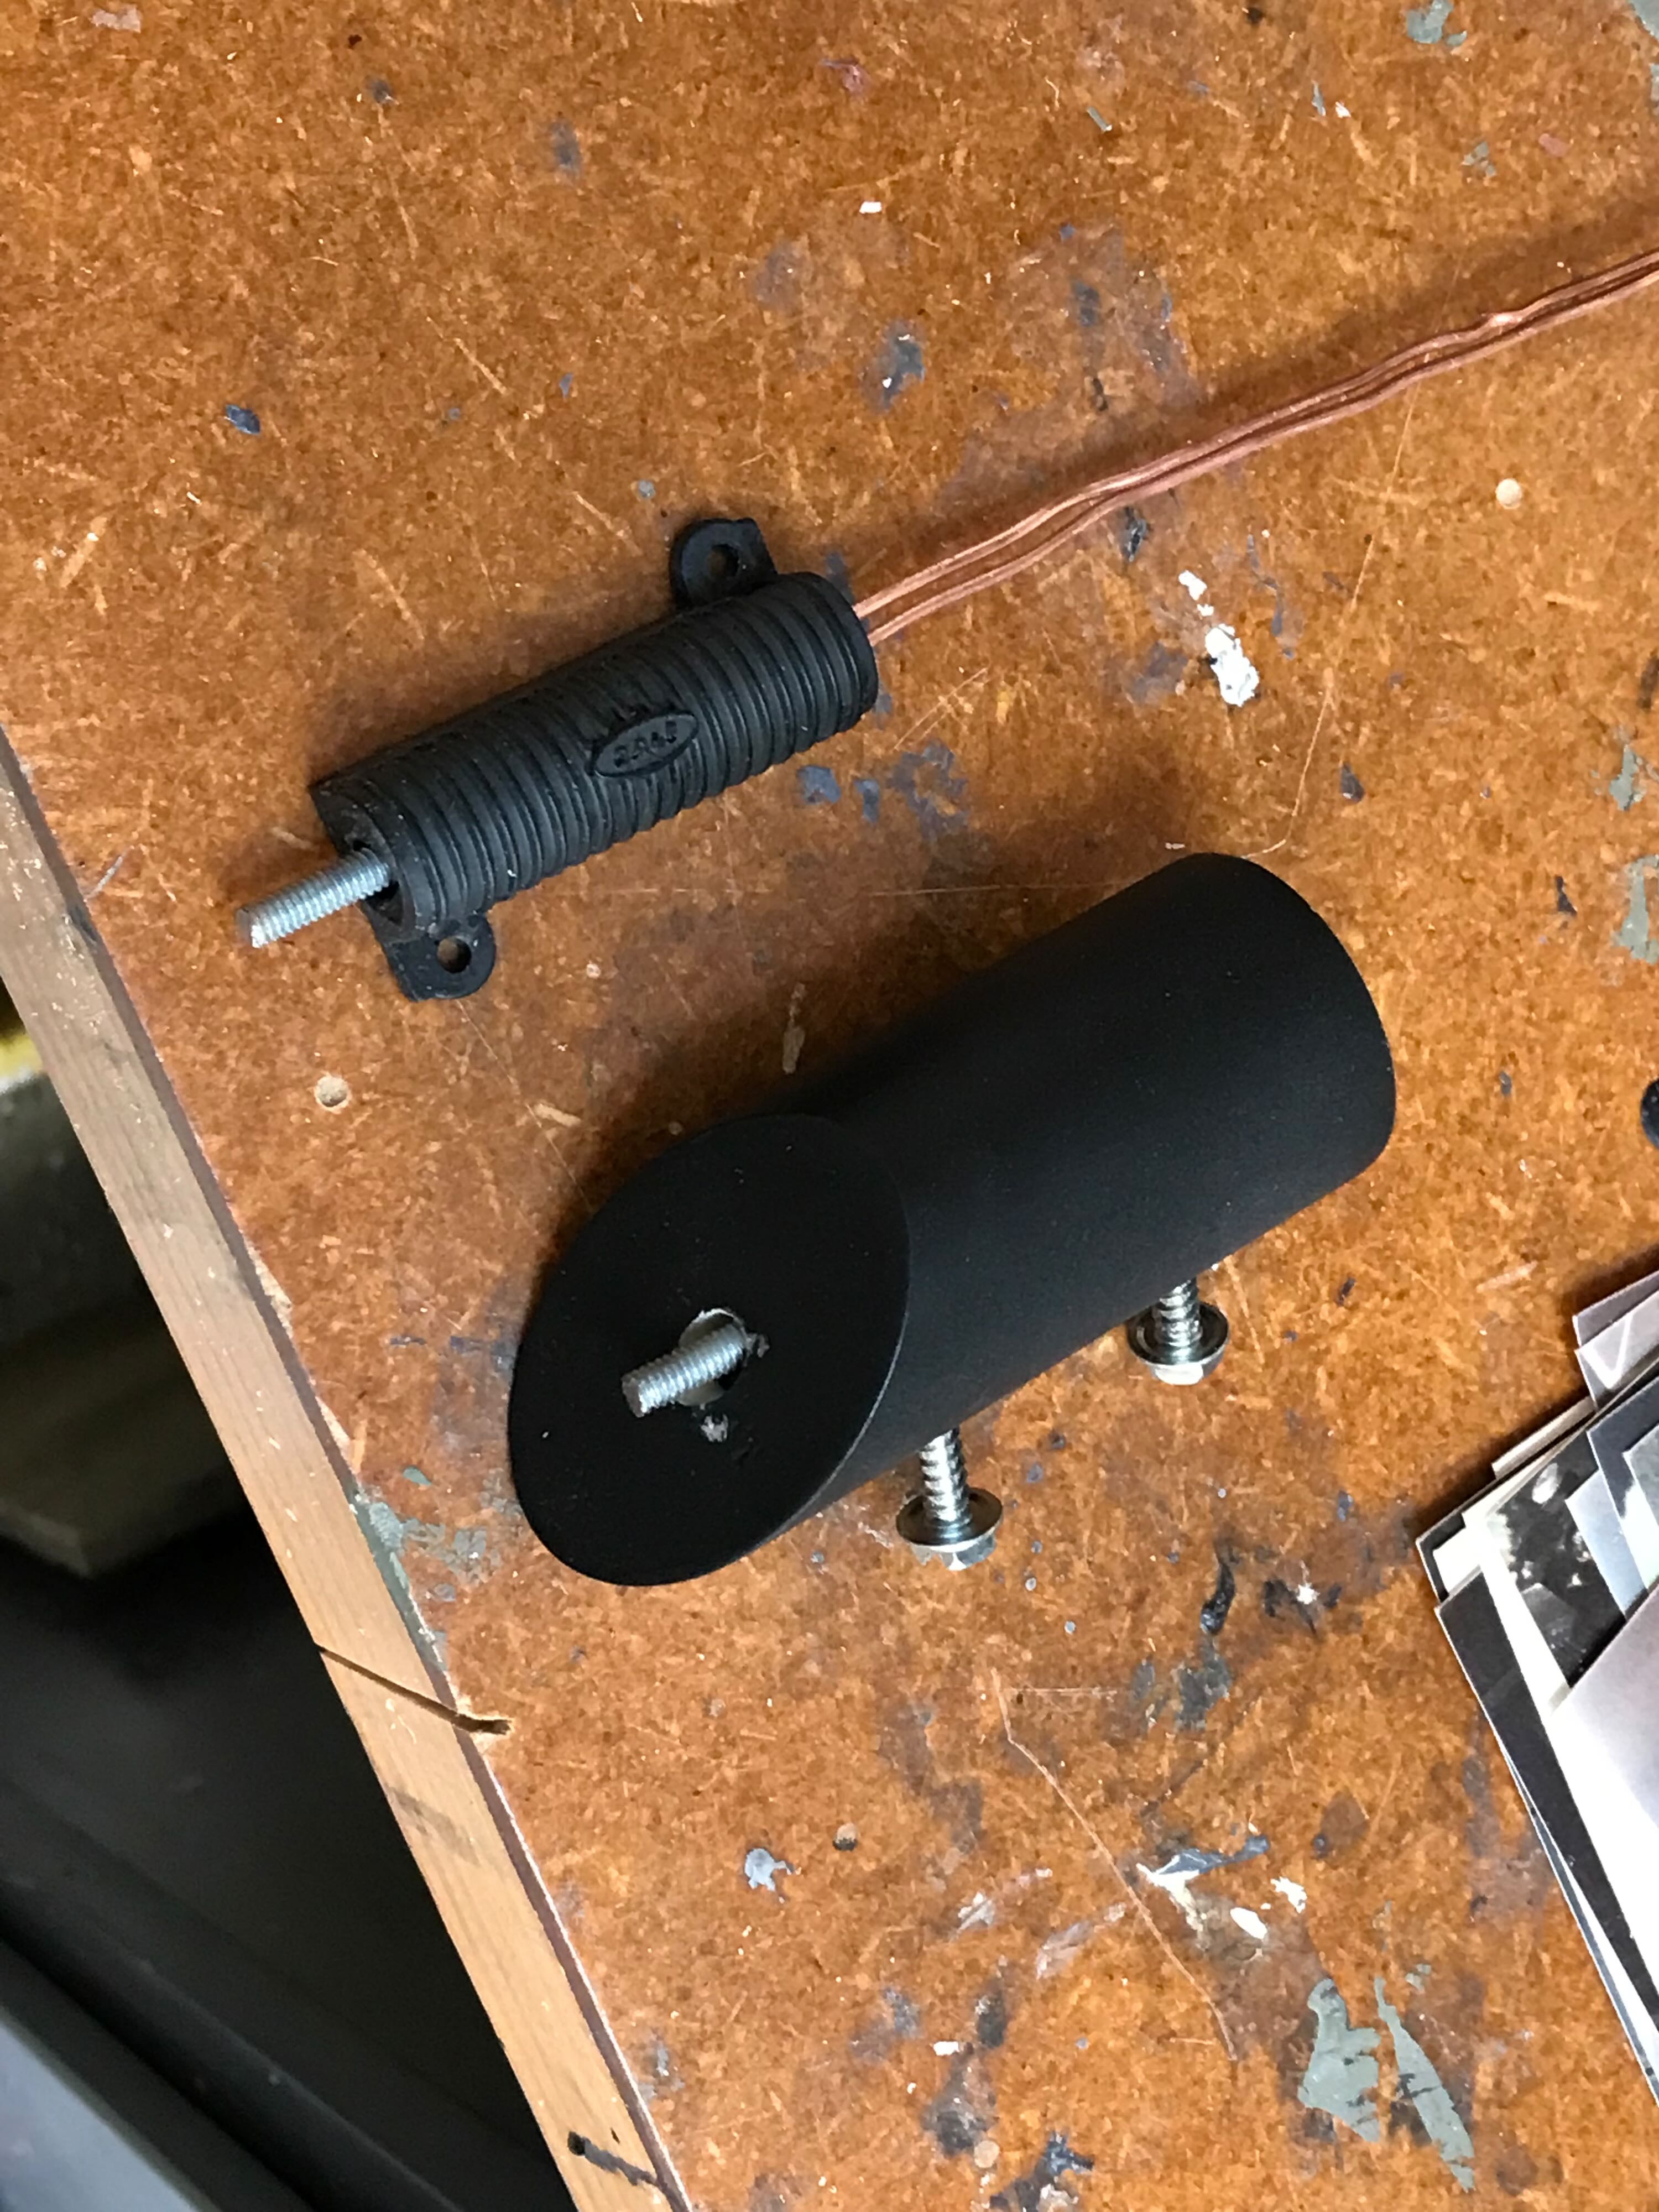
I drilled and tapped an 10-24 hole into the shock mount.
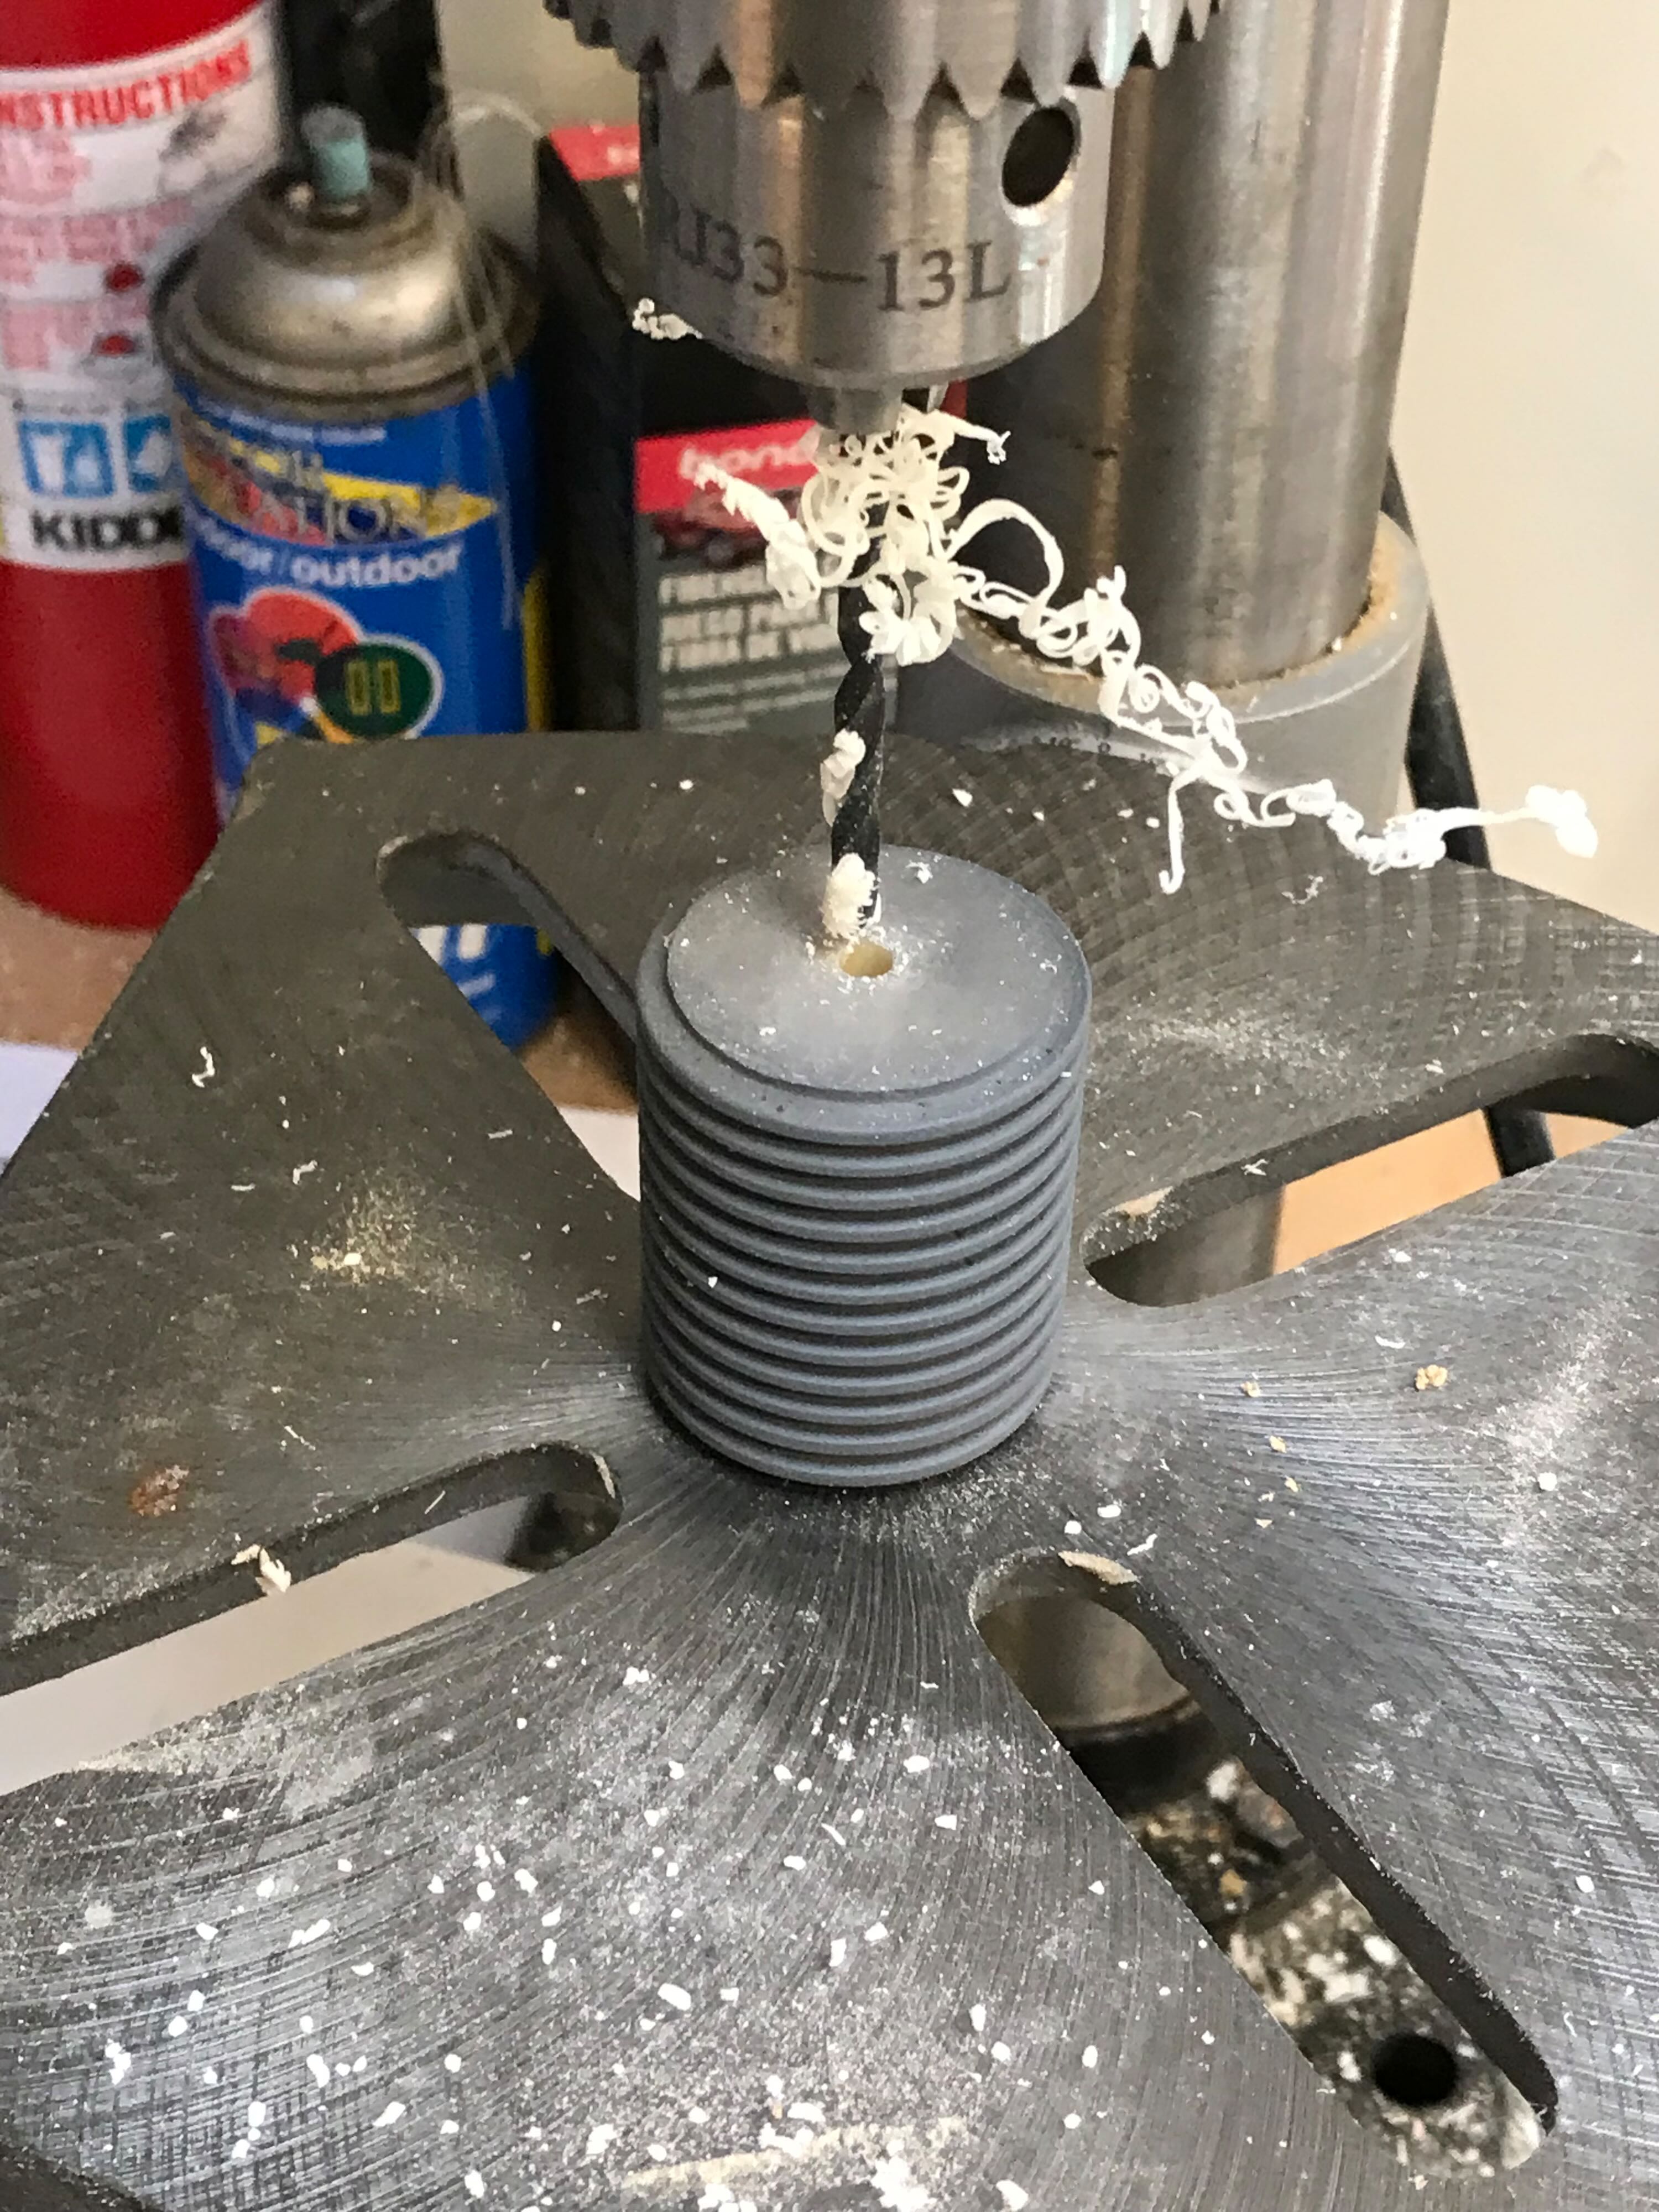
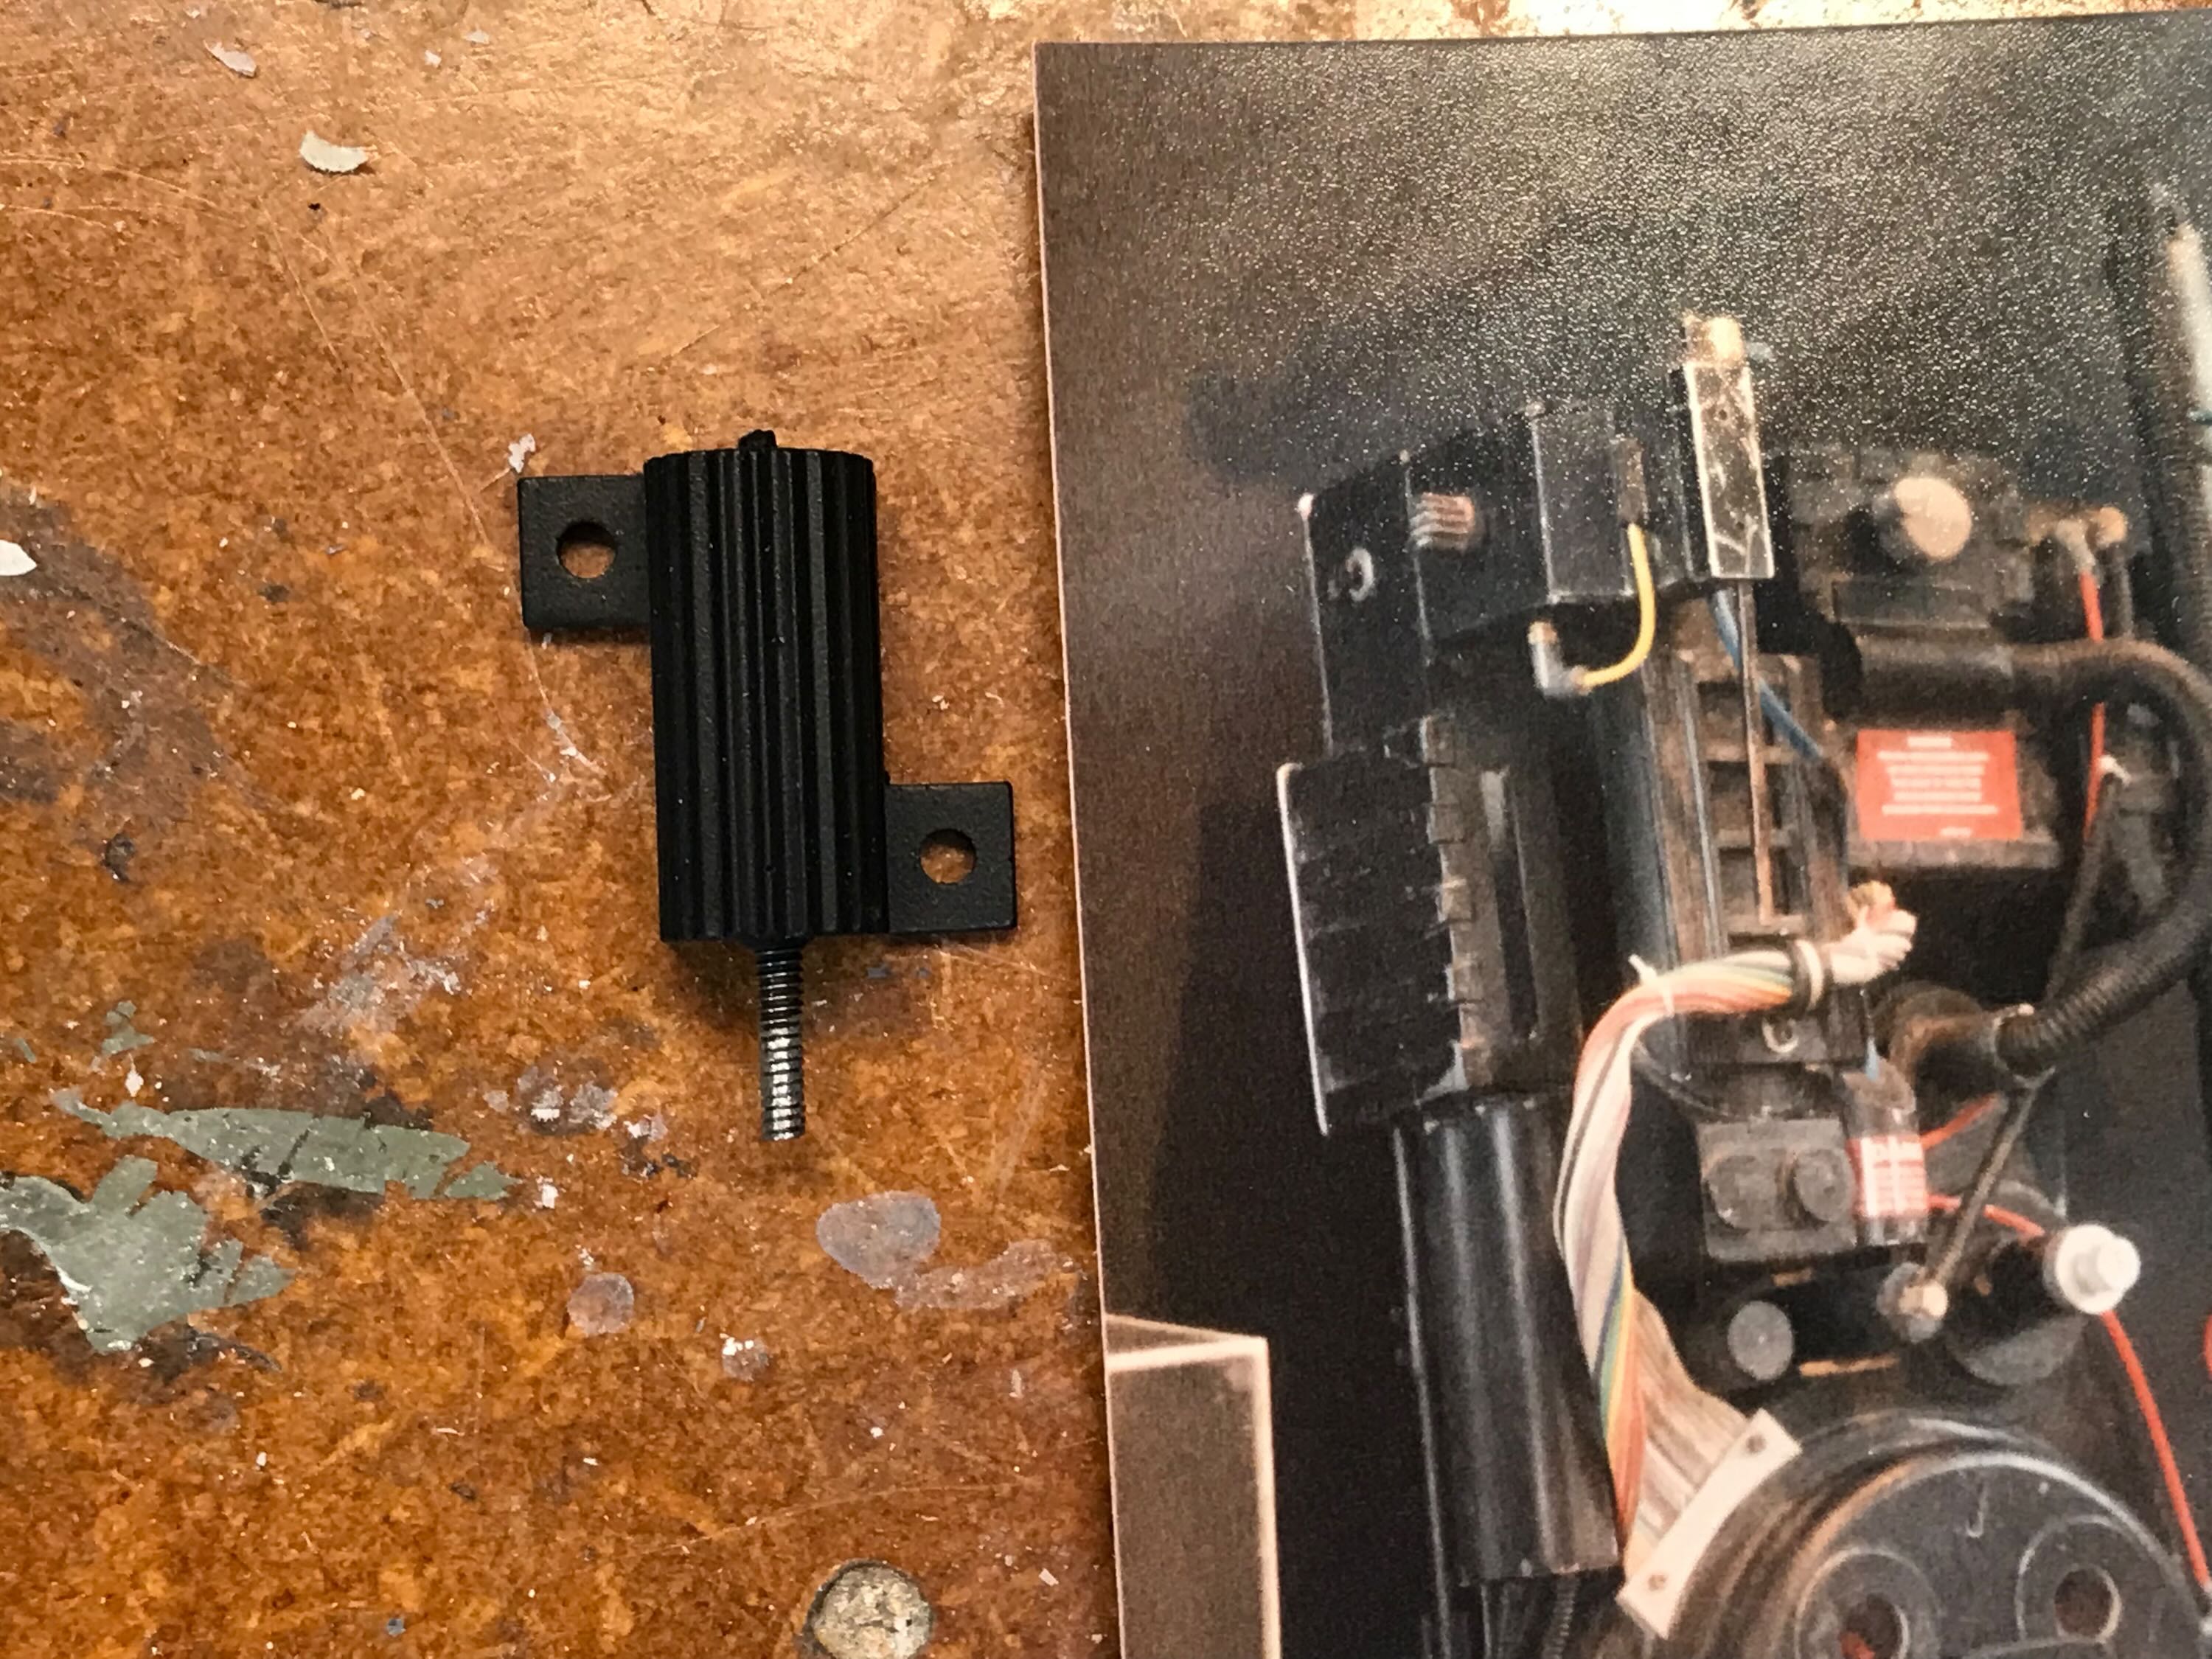
I drilled and tapped a 4-40 threaded rod into the resistors over which the thinner tubing would fit.
Re: Building a Benofkent Props Proton Pack for fellow 'Buster
Posted: July 27th, 2022, 1:10 am
by WShawn
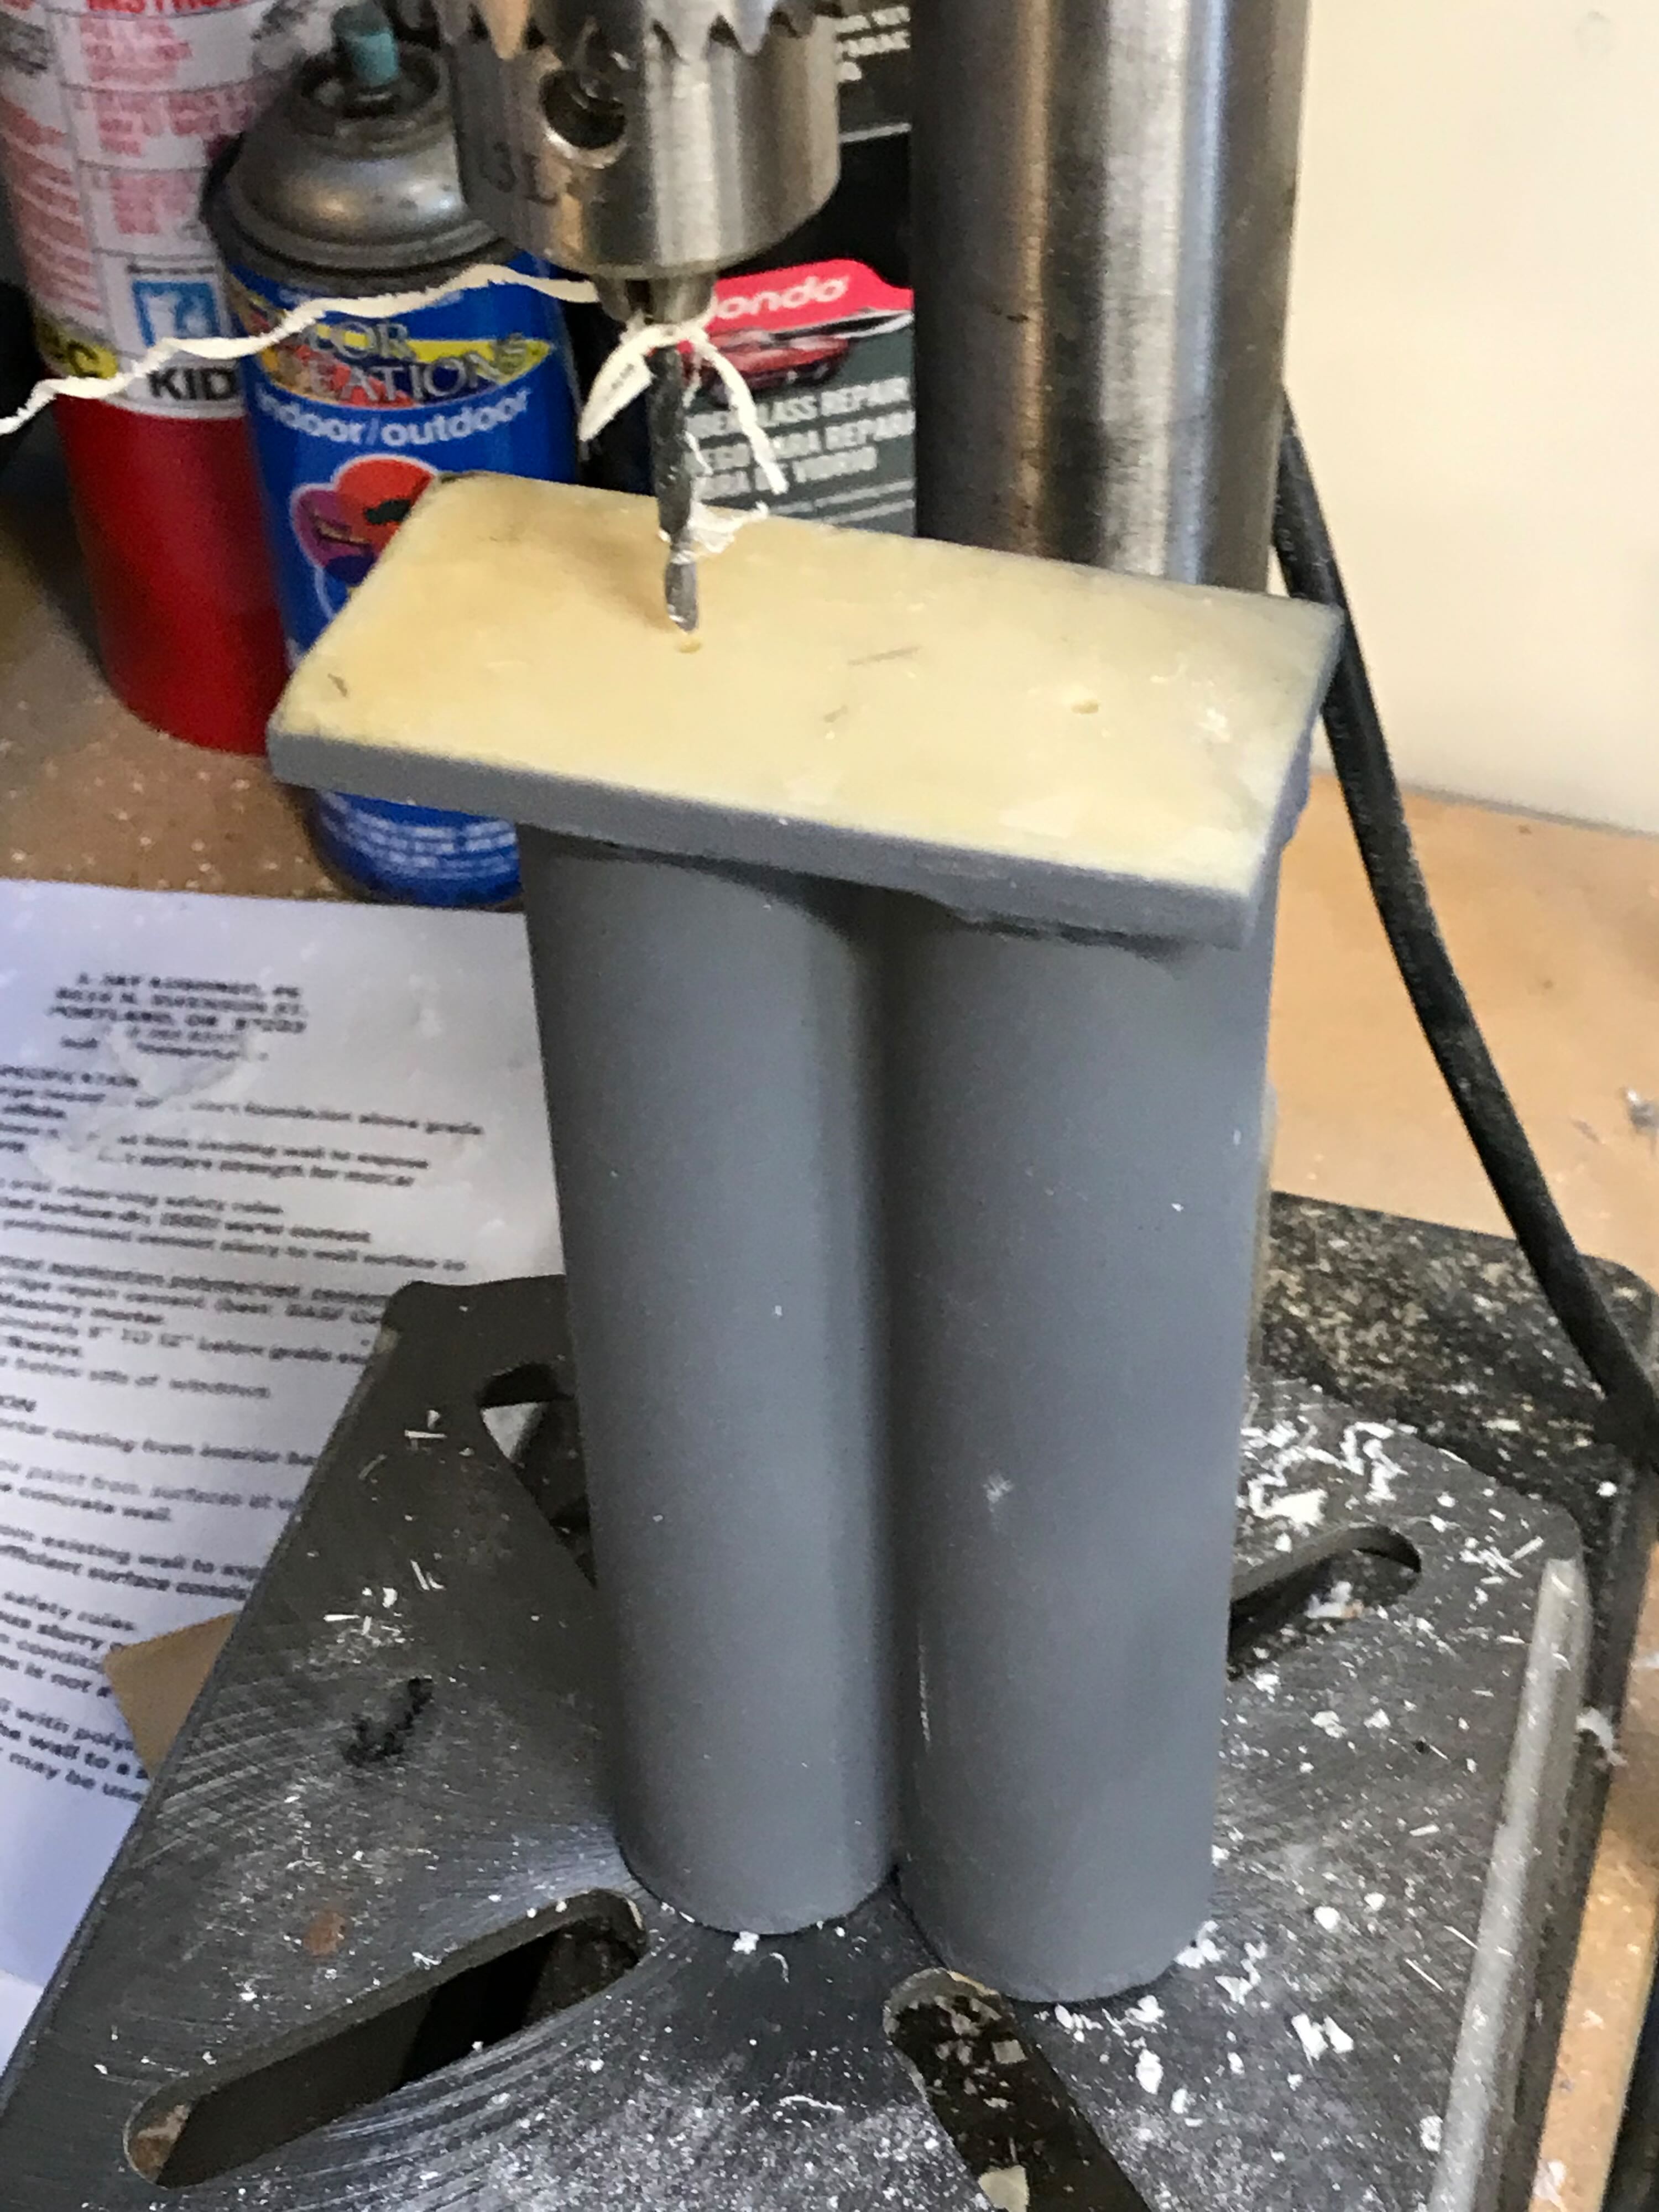
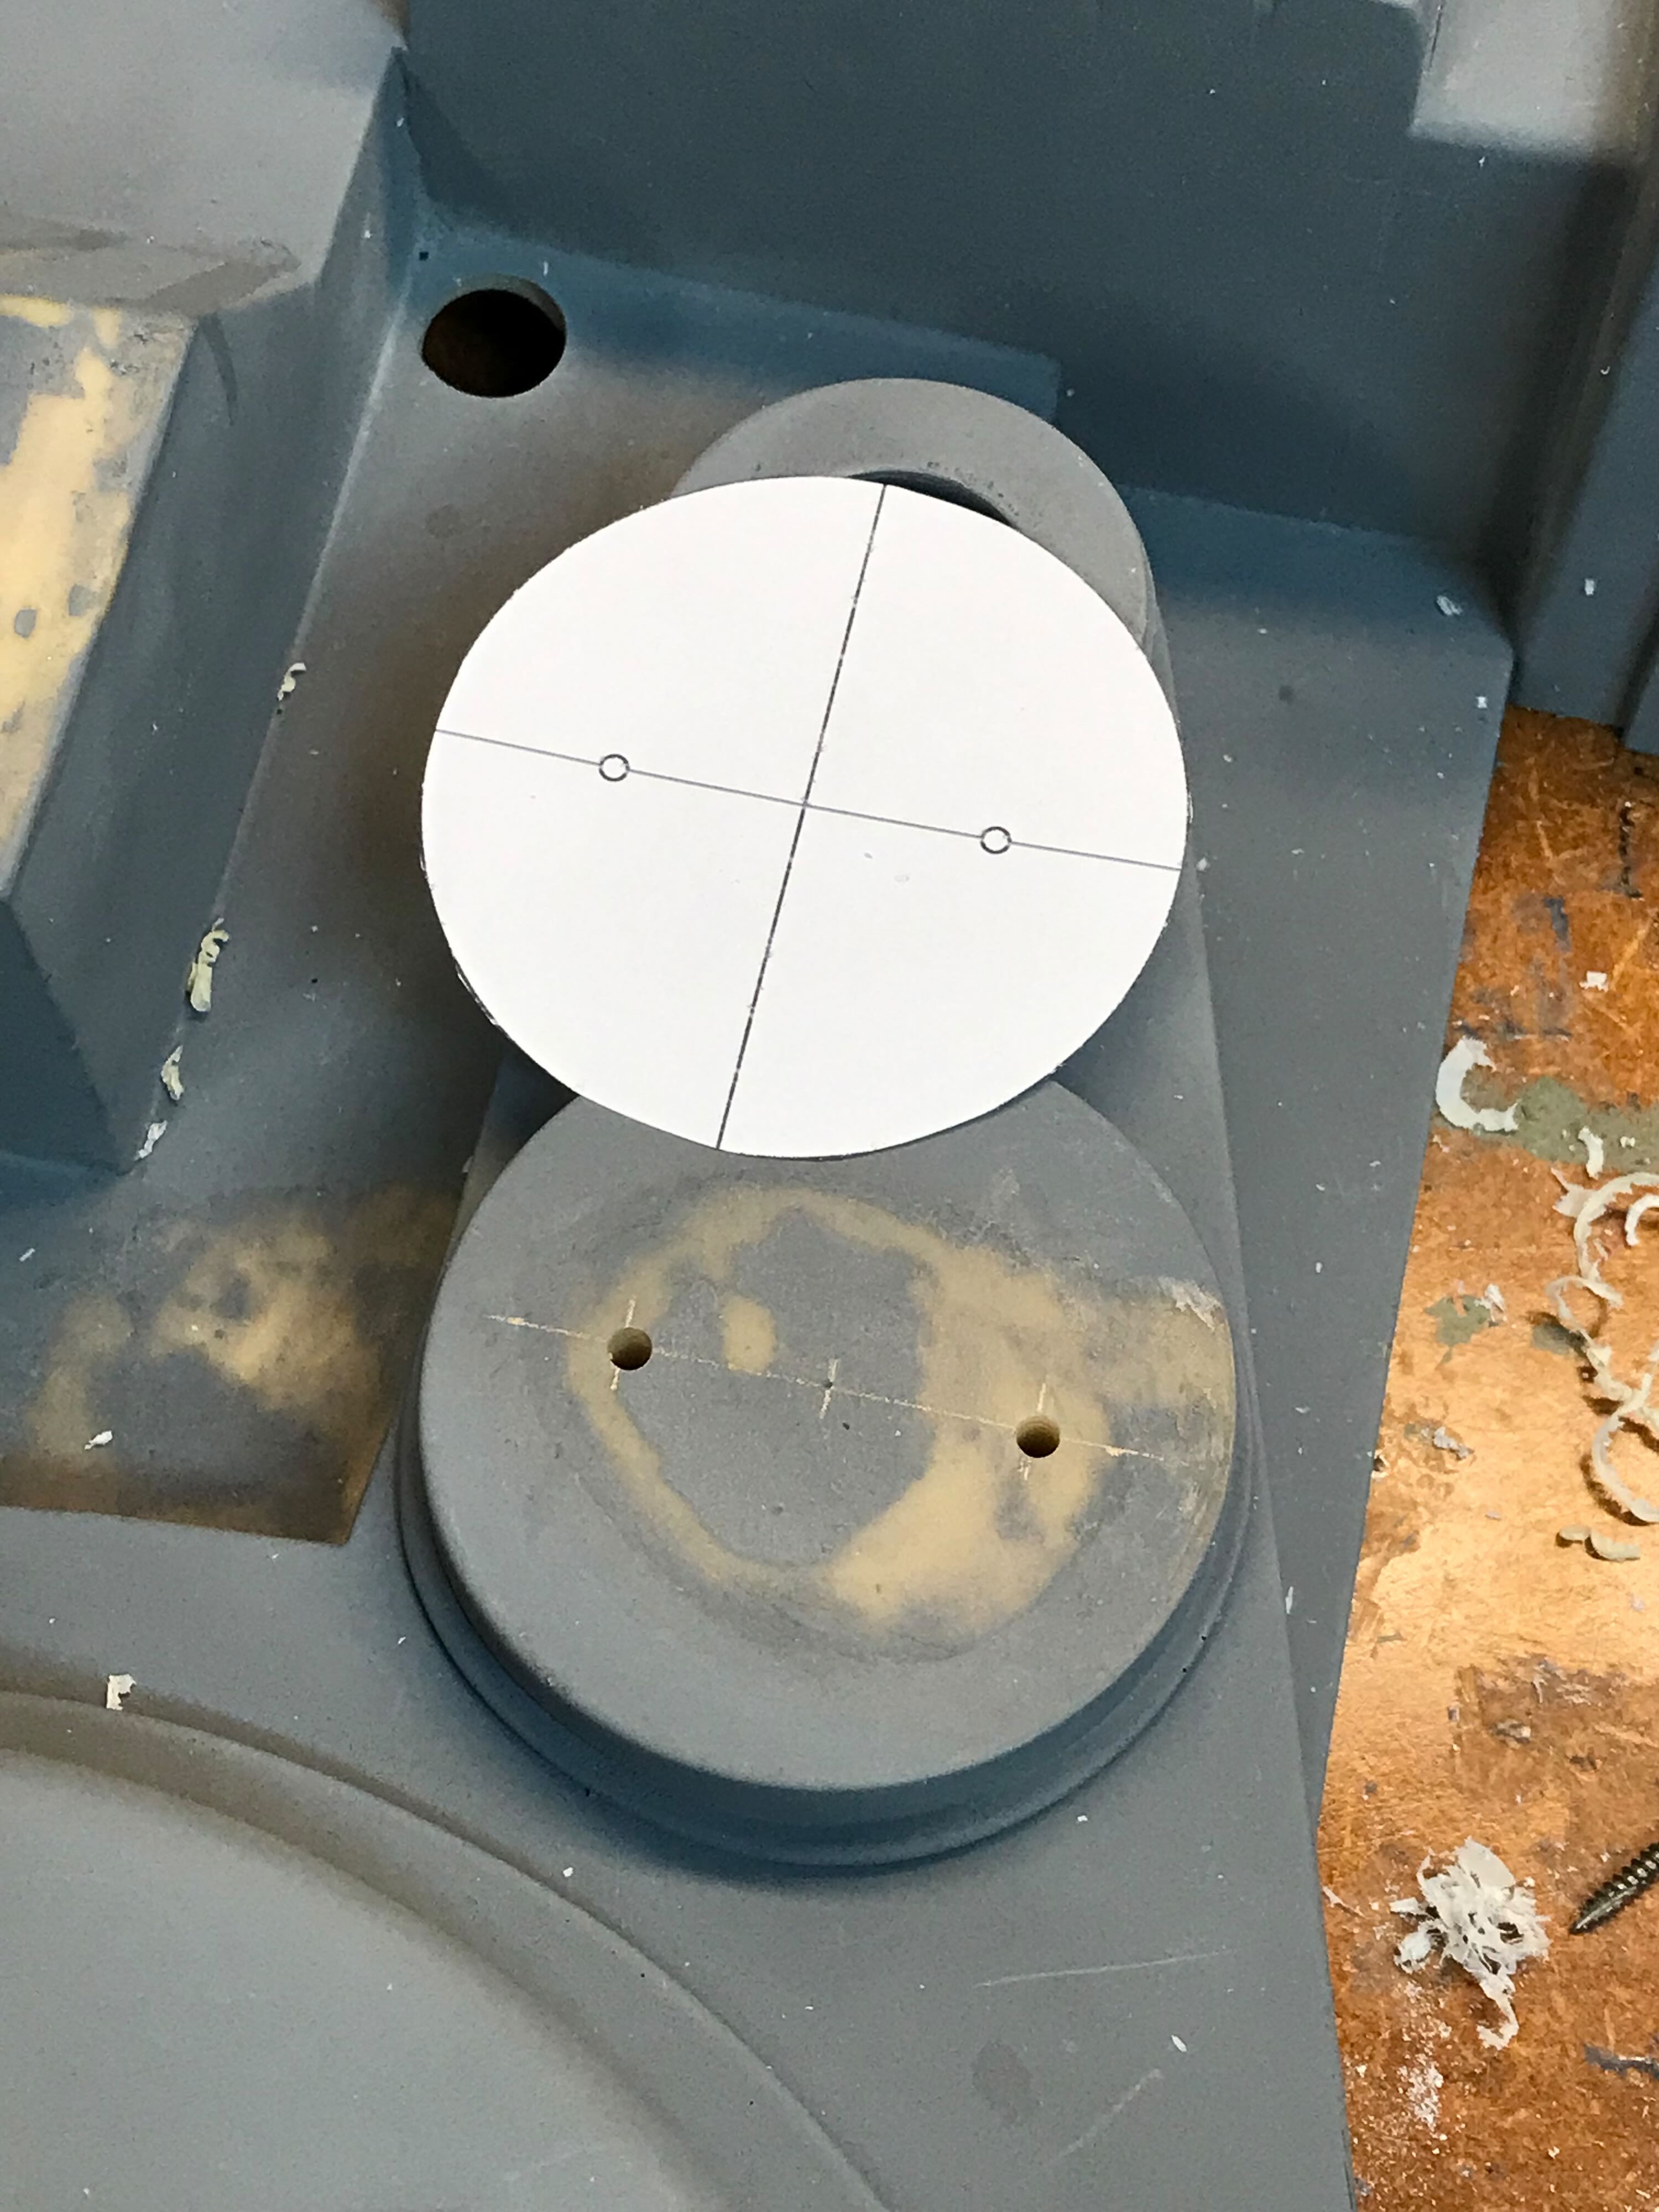
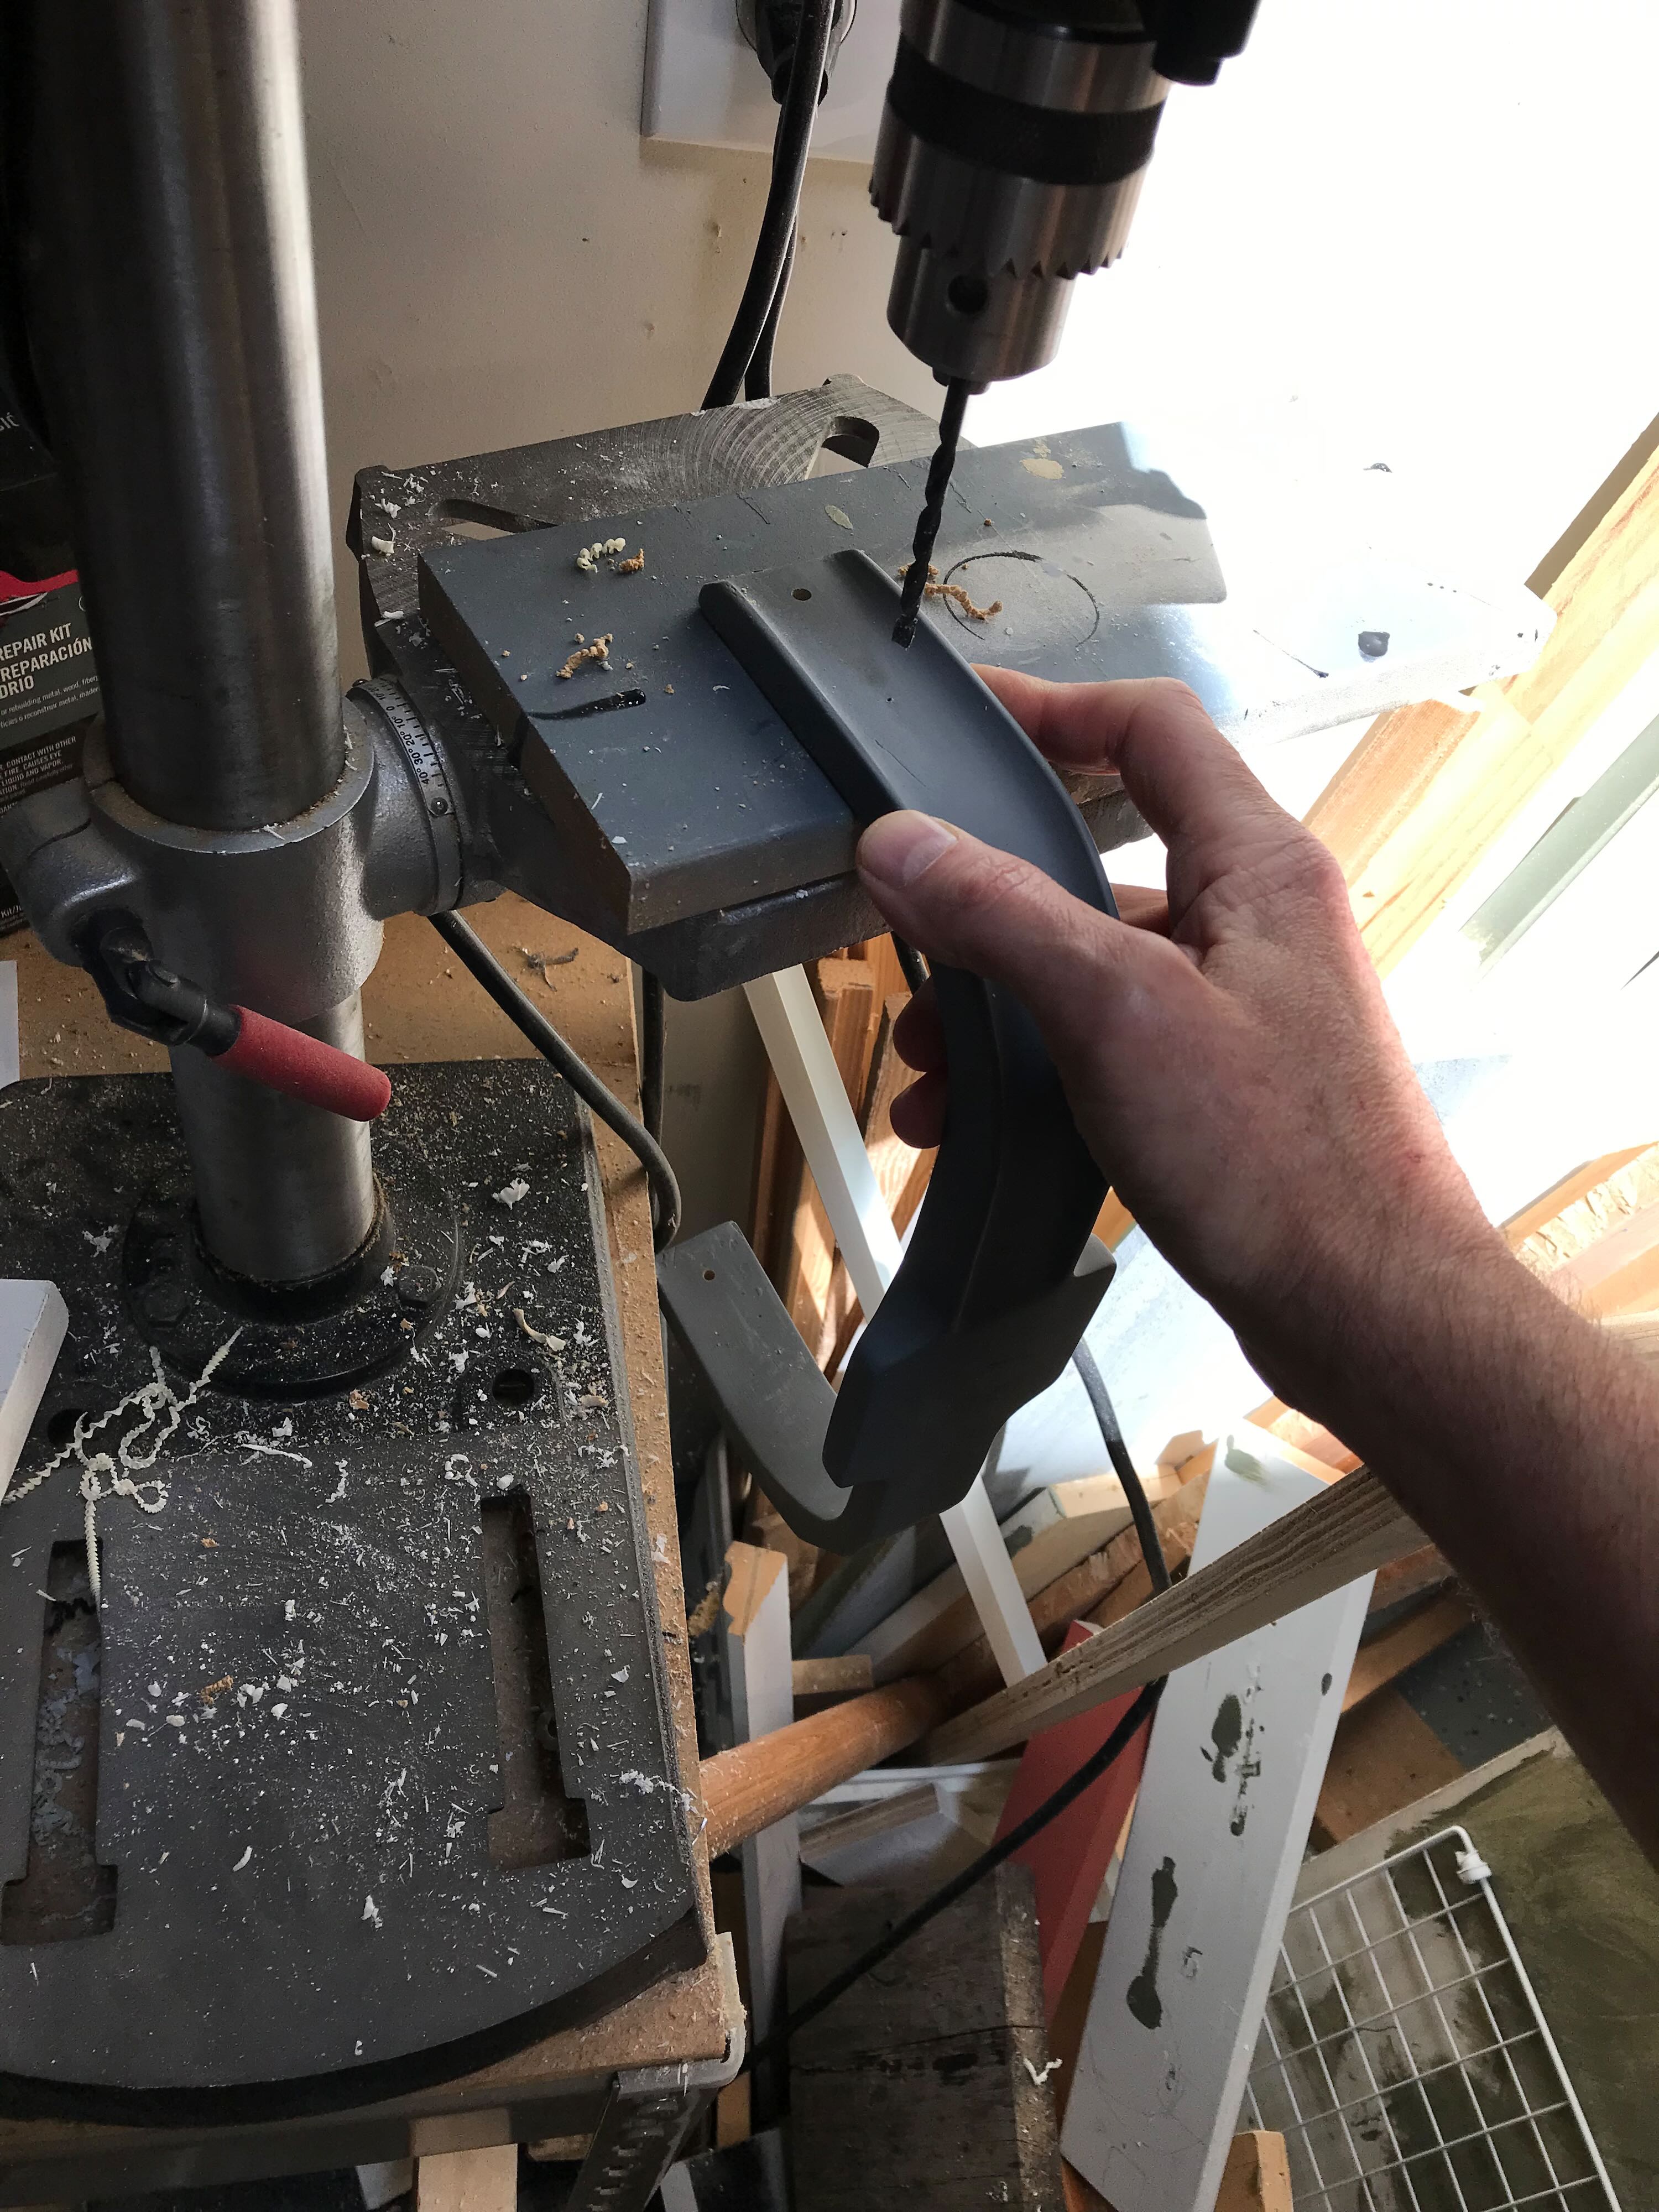
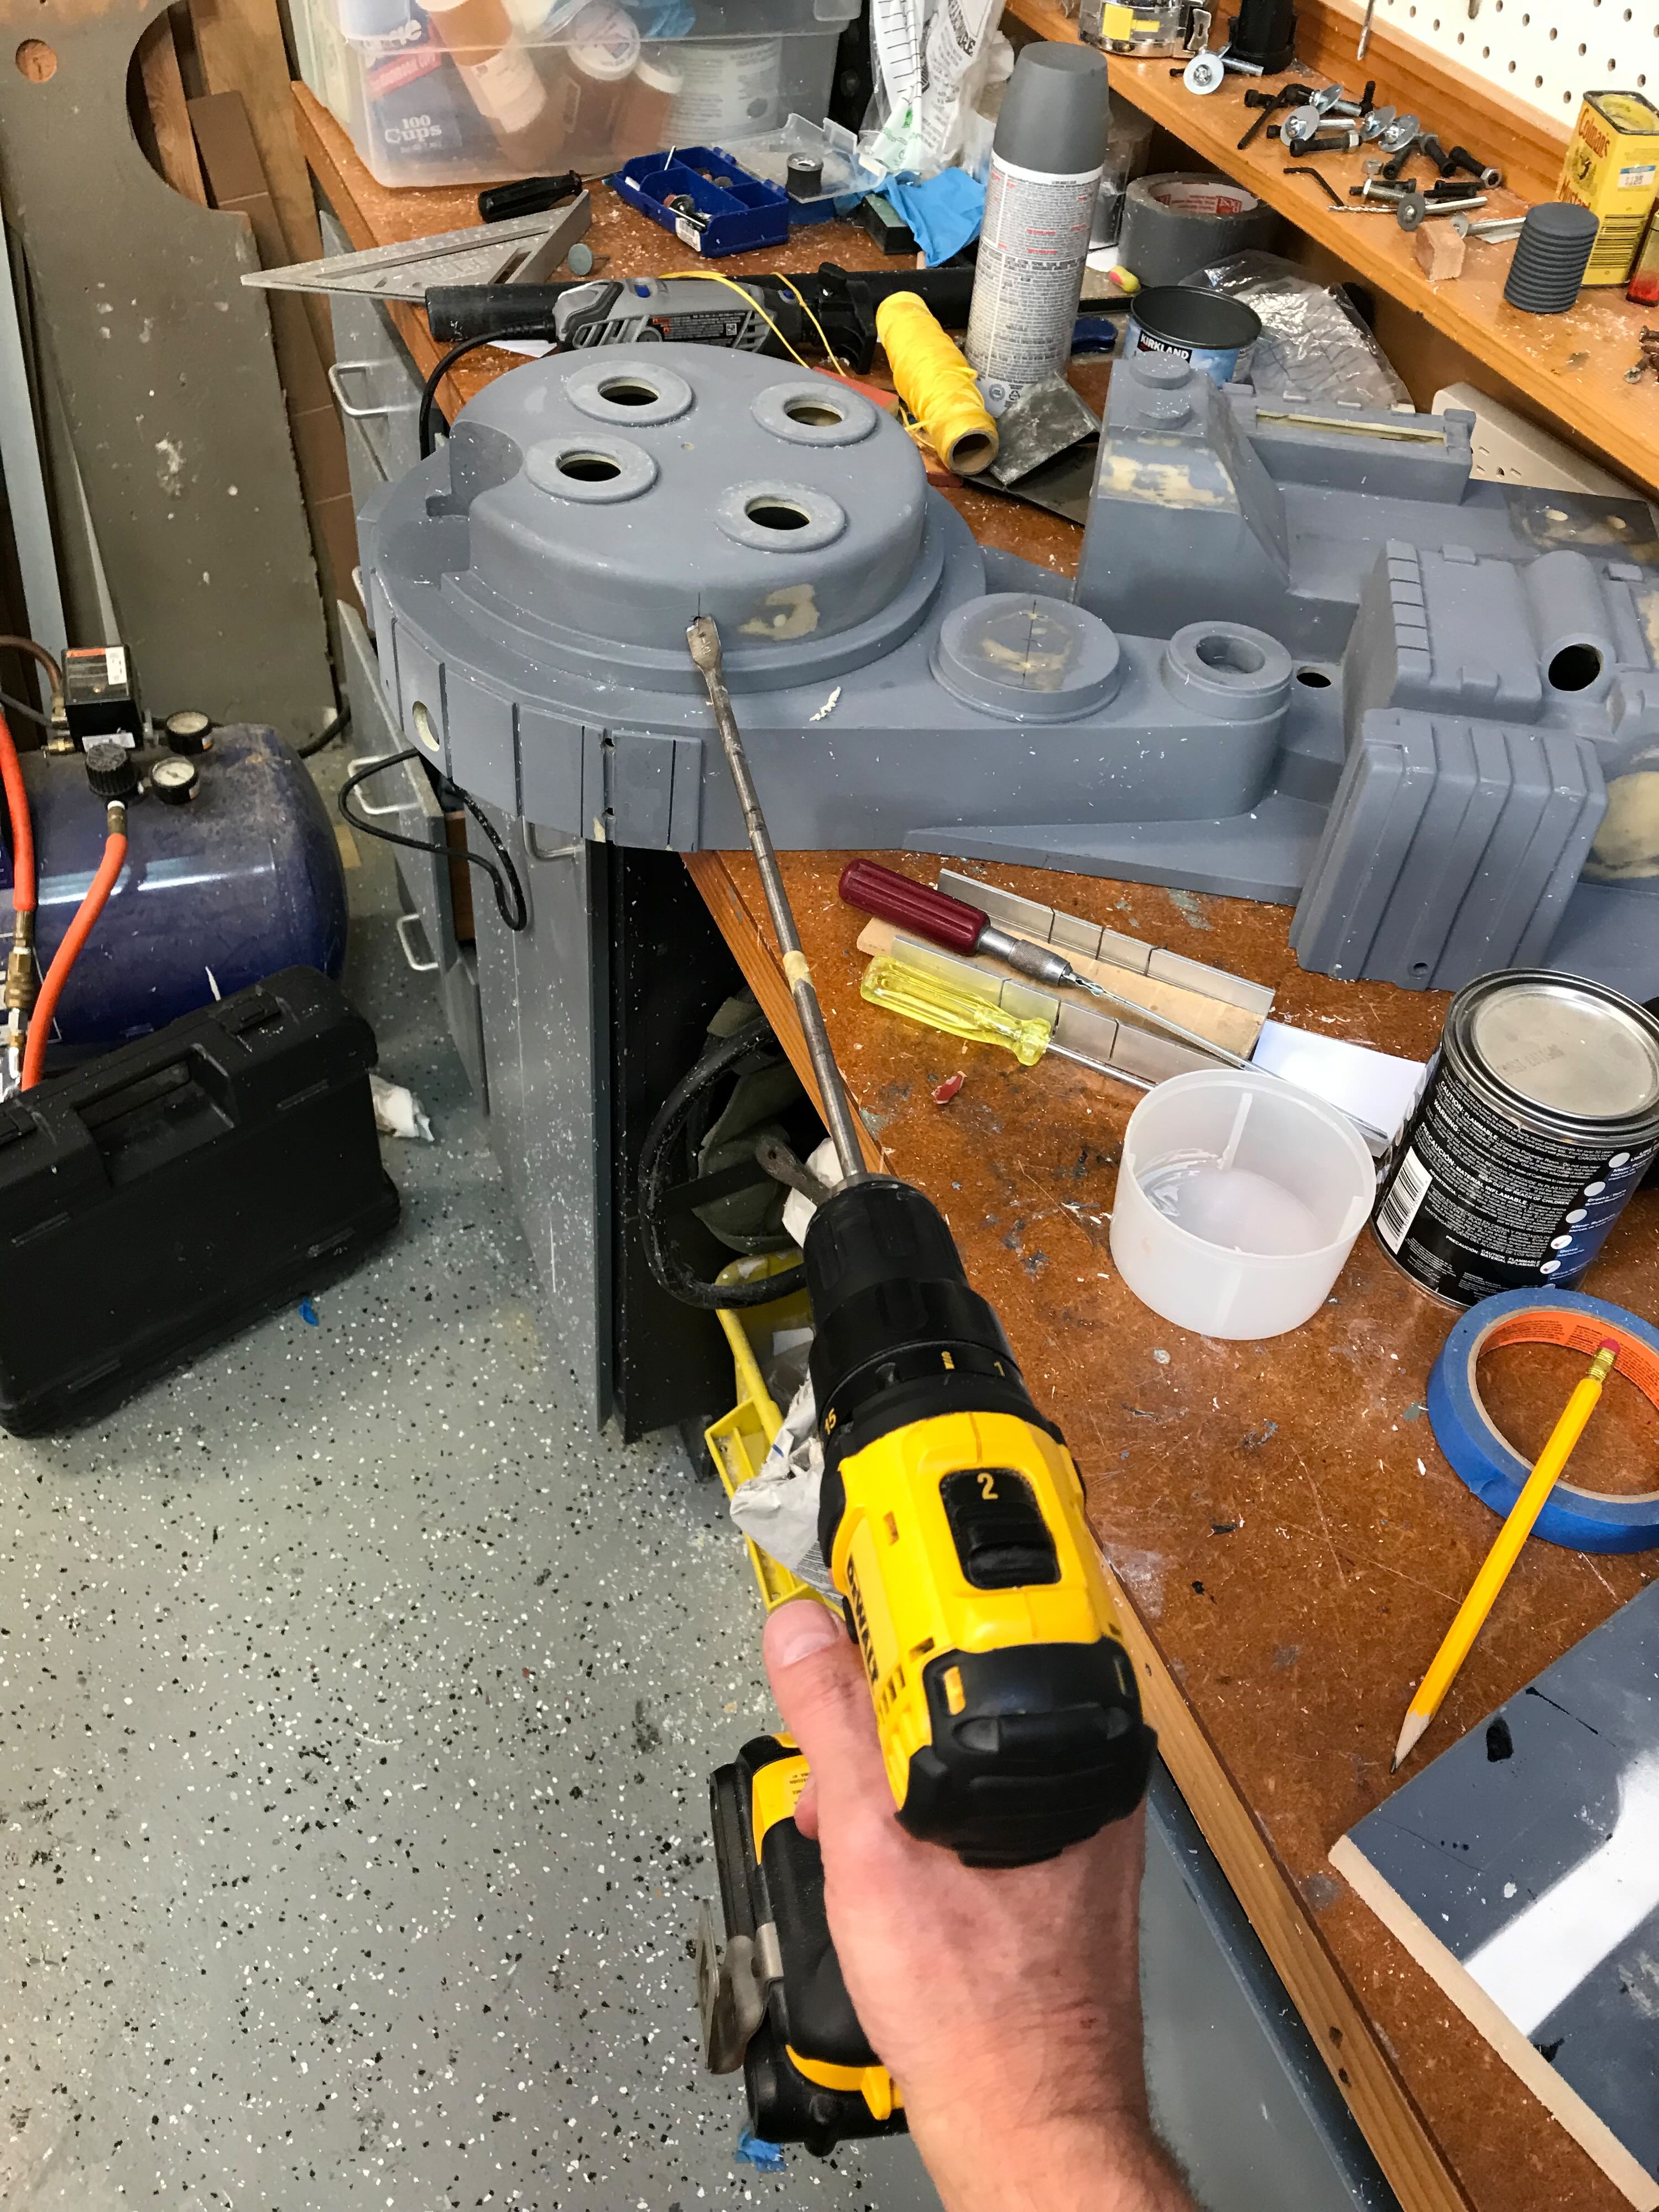
6/25/22 - I used one of the templates from the BoK Facebook page to help set the position of the Cyclotron Legris Elbow.
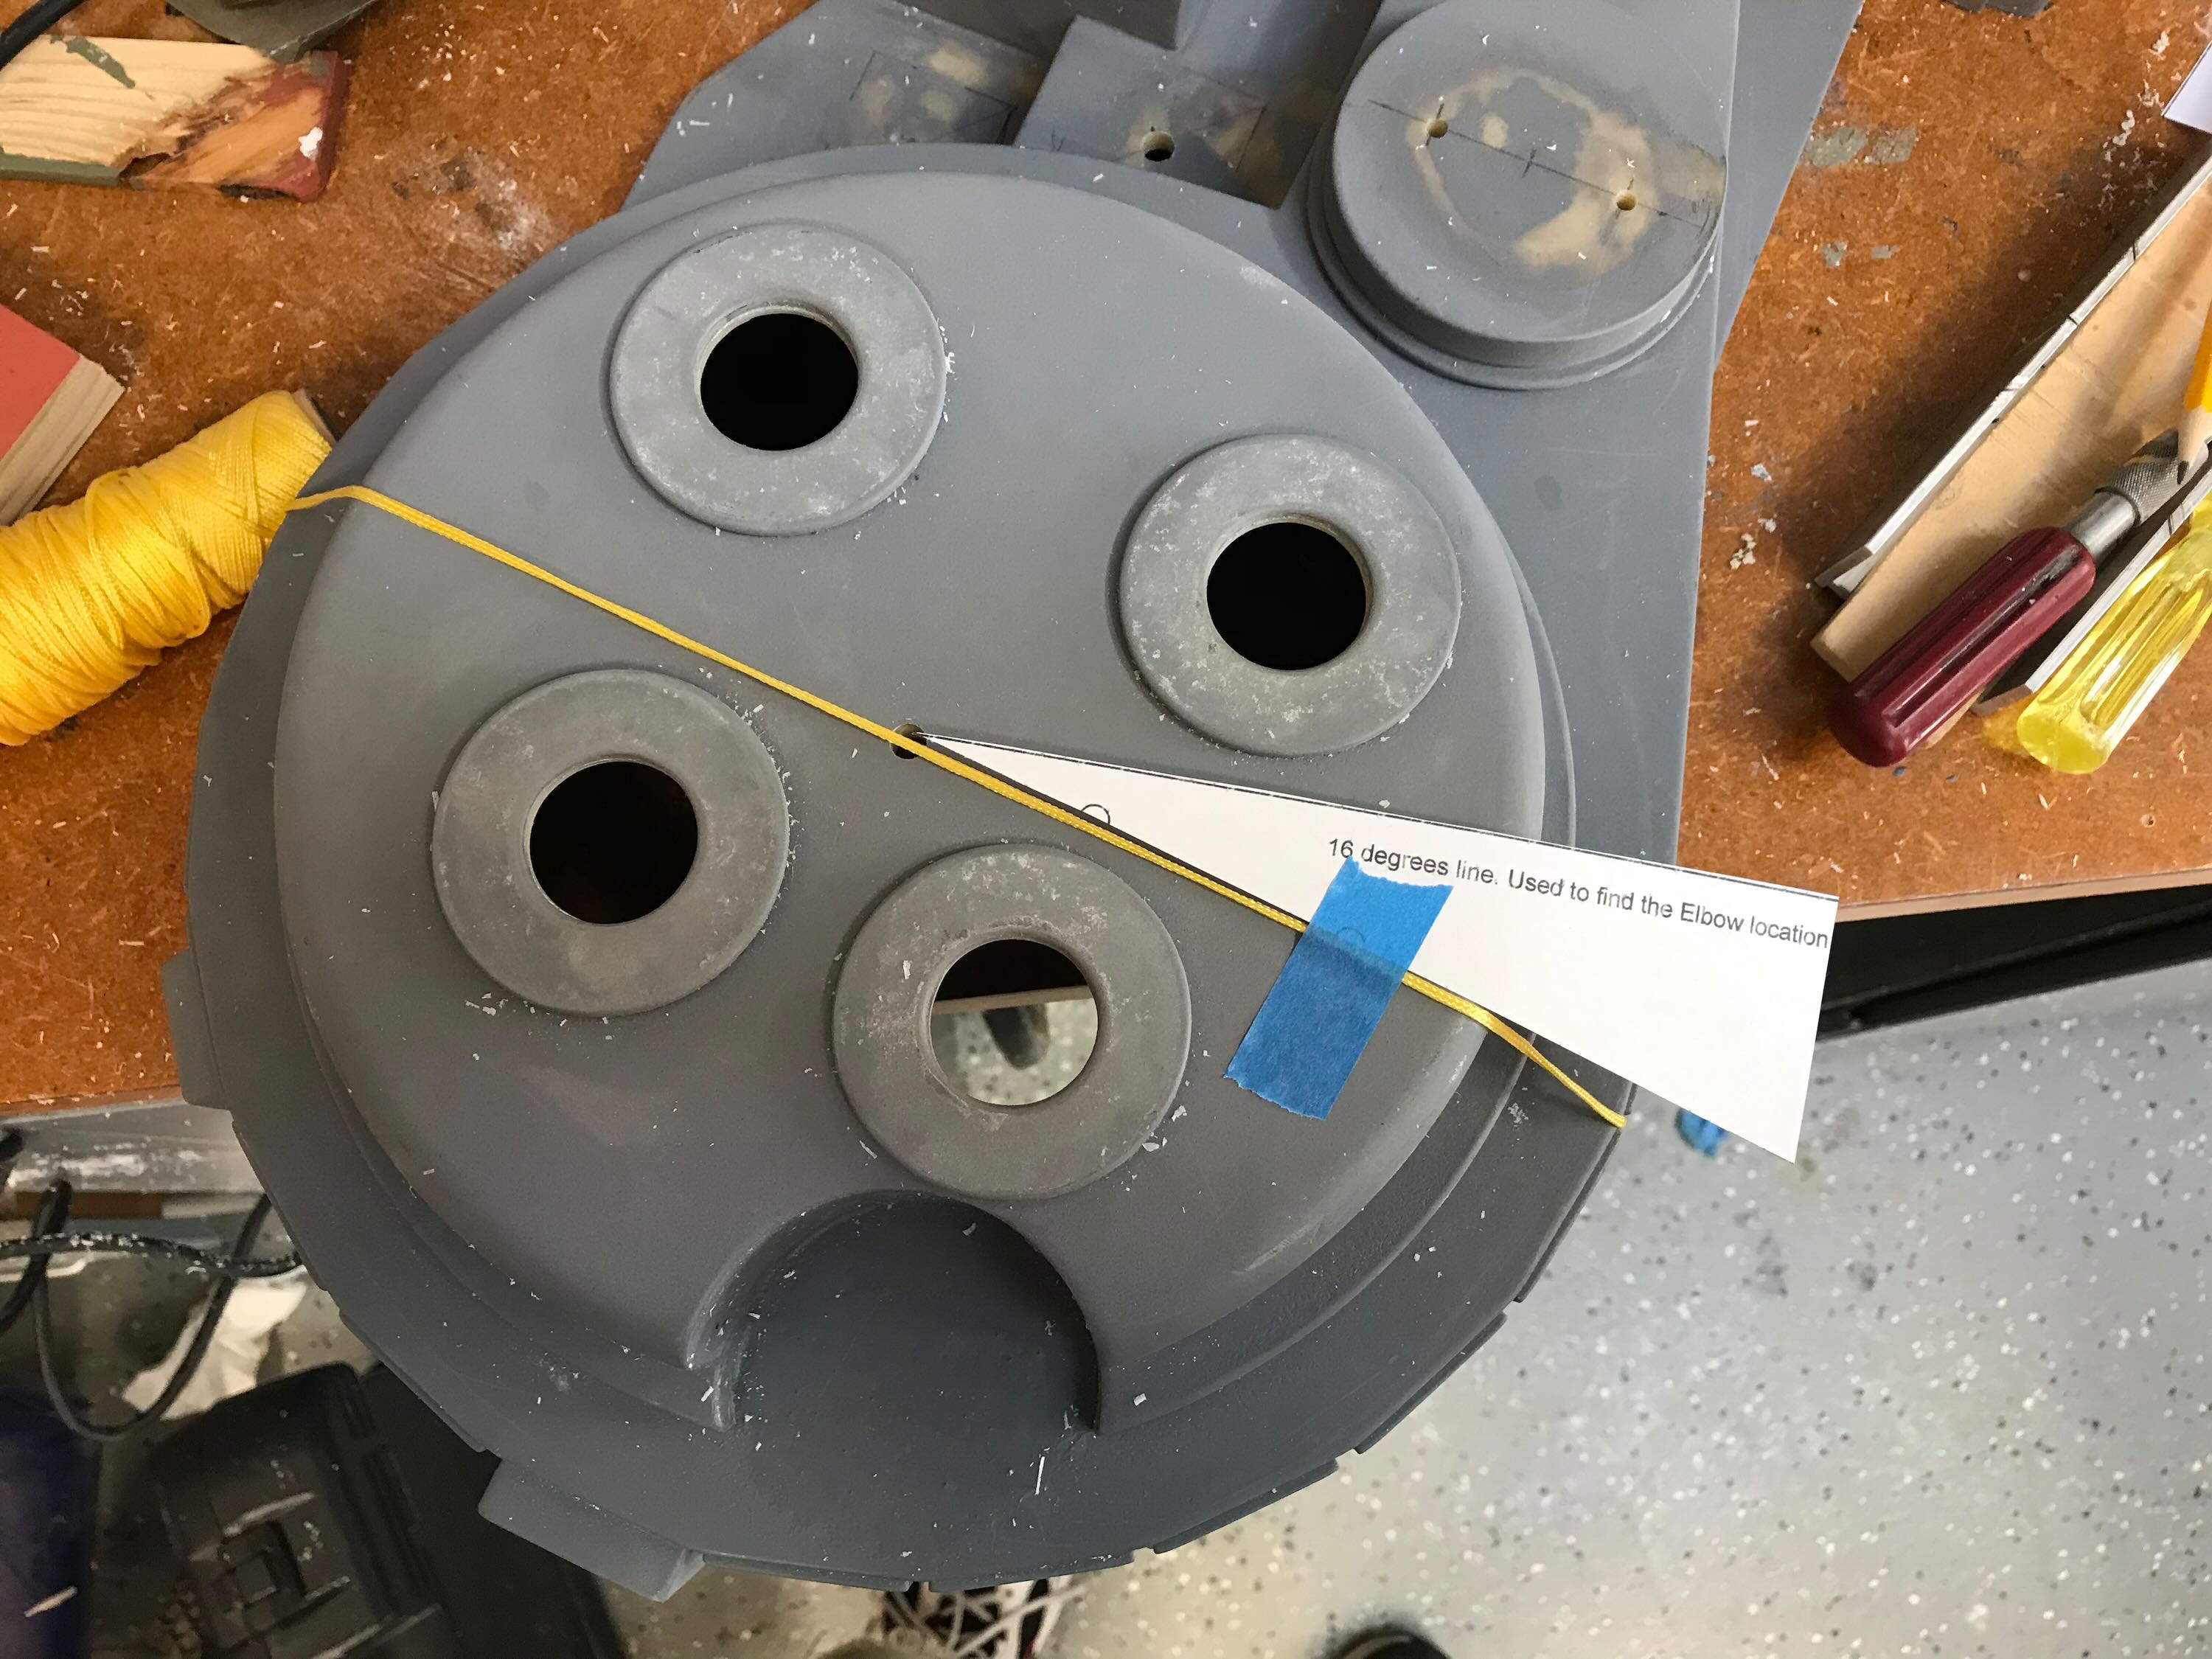
You gotta keep your distance when drilling into an unlicensed nuclear accelerator.
I worked up a template for the HGA in Adobe Illustrator to guide the hole positions.
Re: Building a Benofkent Props Proton Pack for fellow 'Buster
Posted: July 27th, 2022, 1:19 am
by WShawn
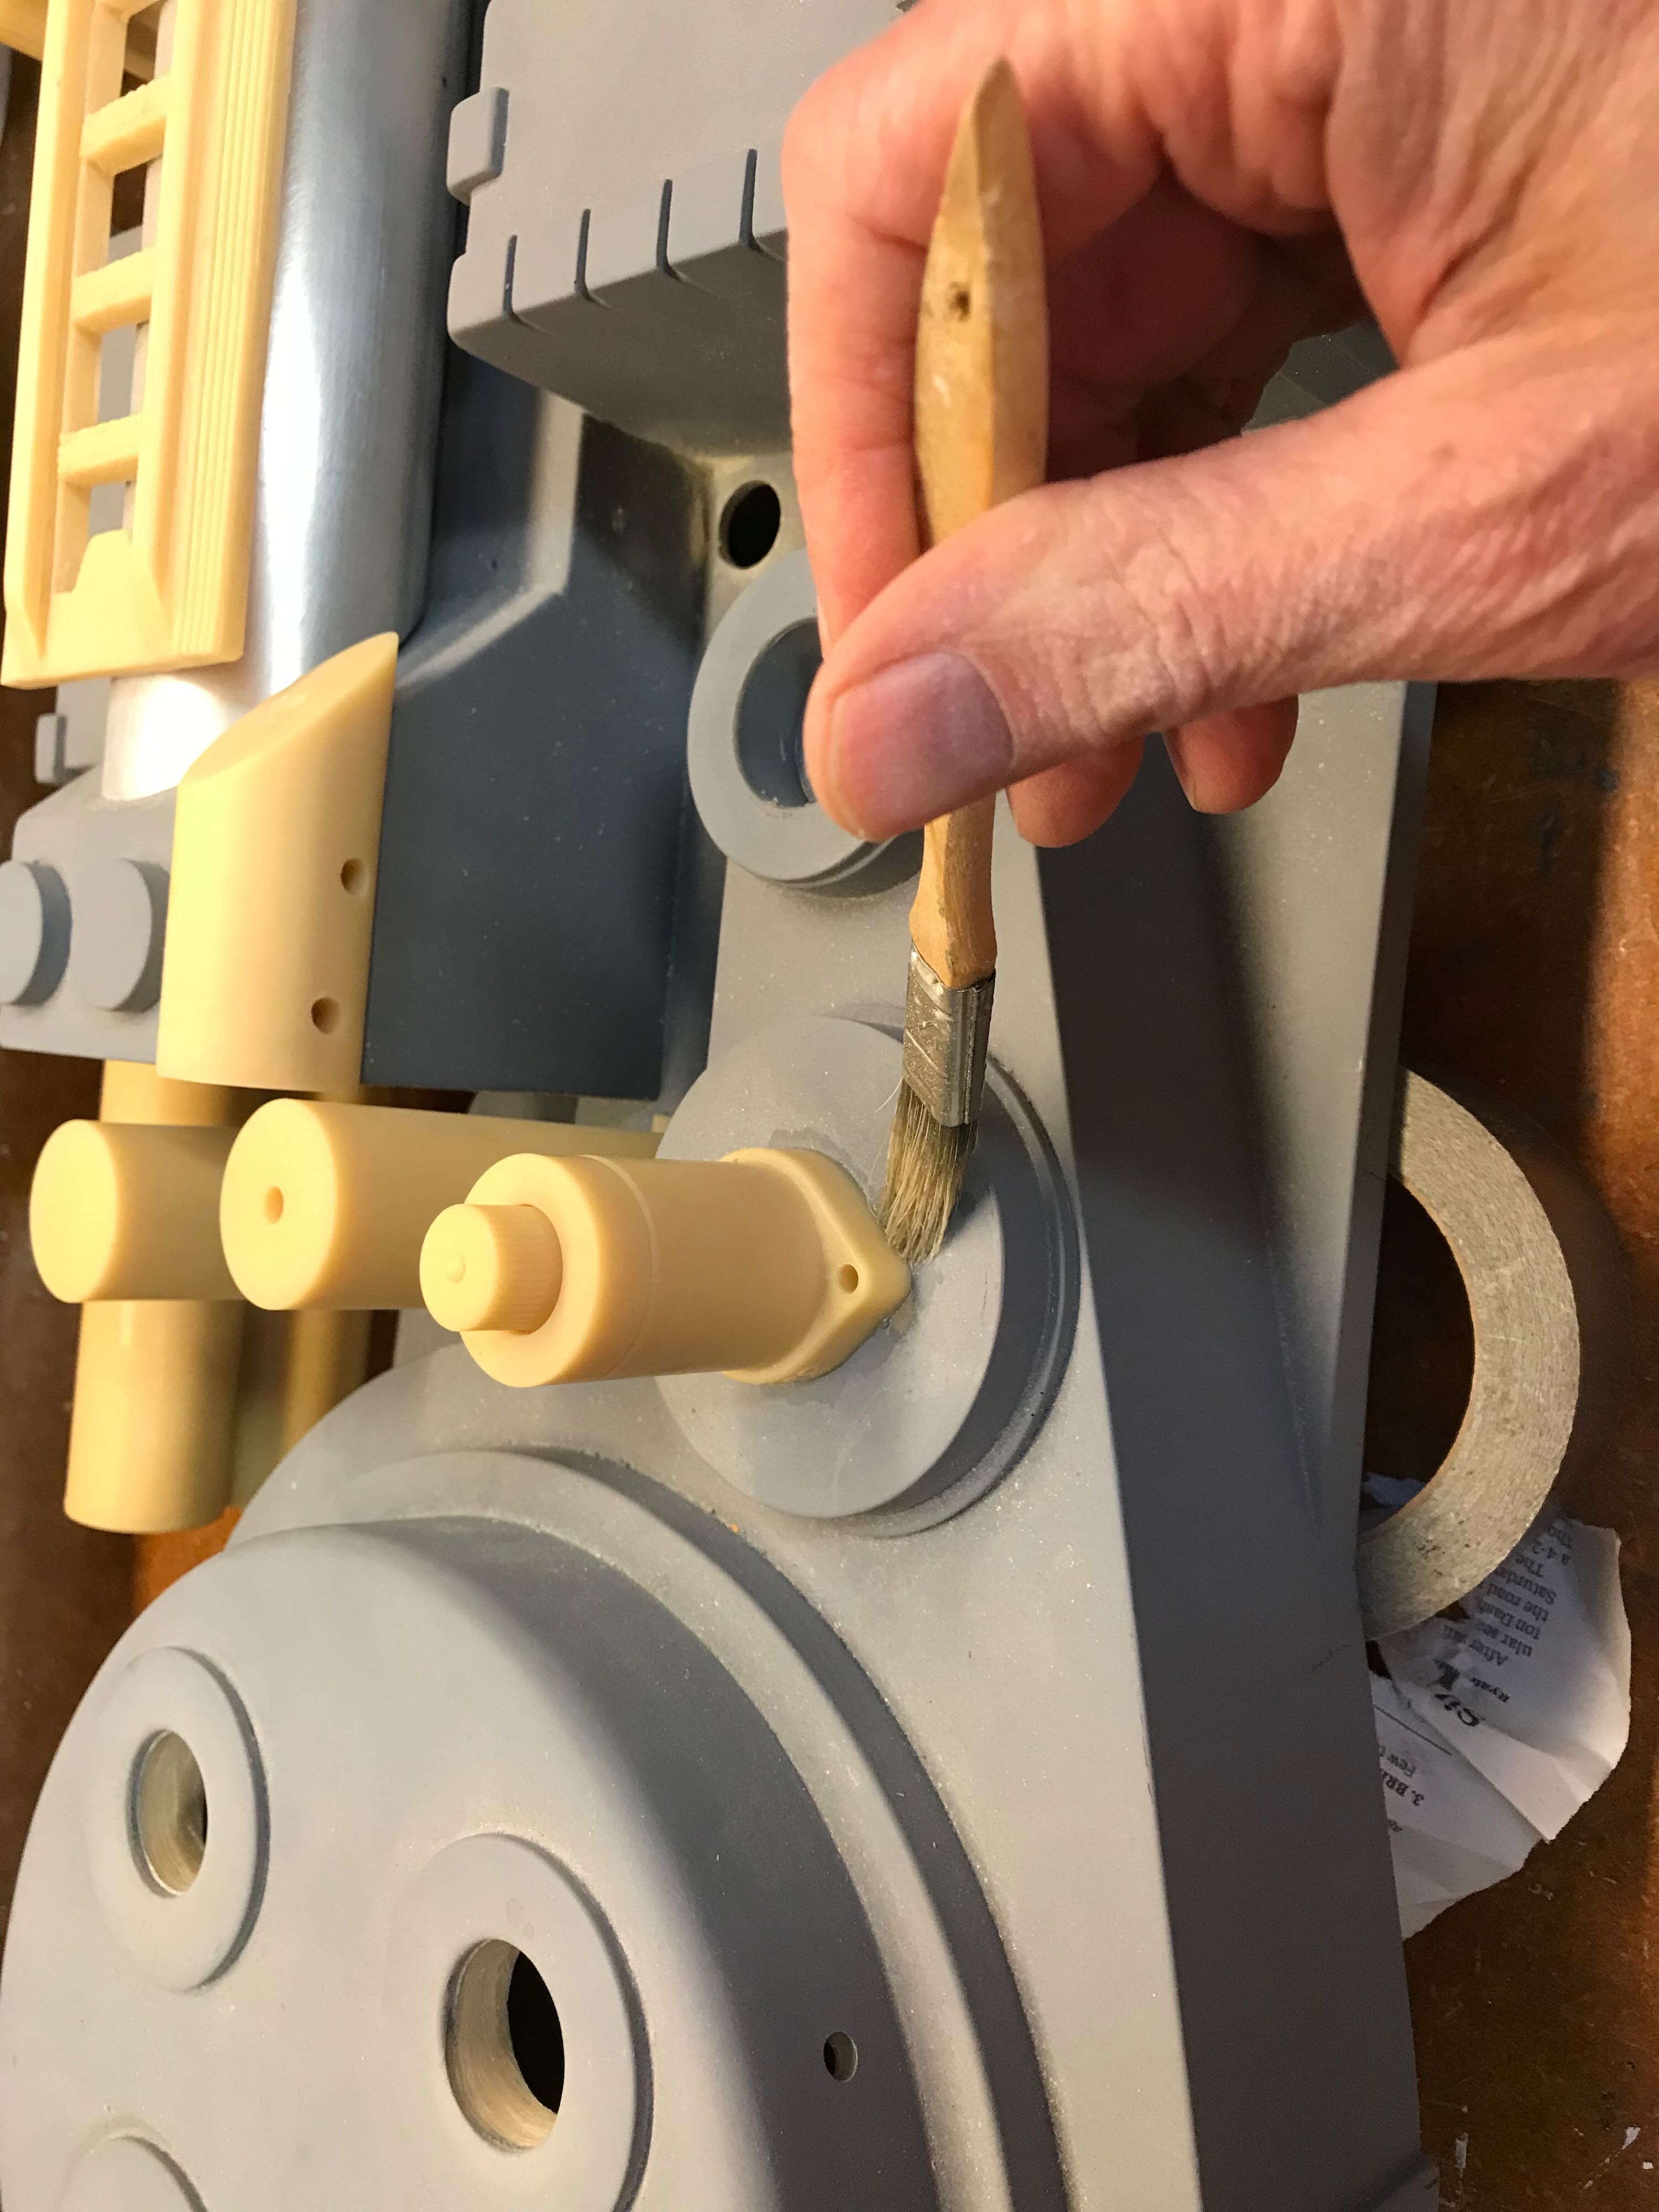
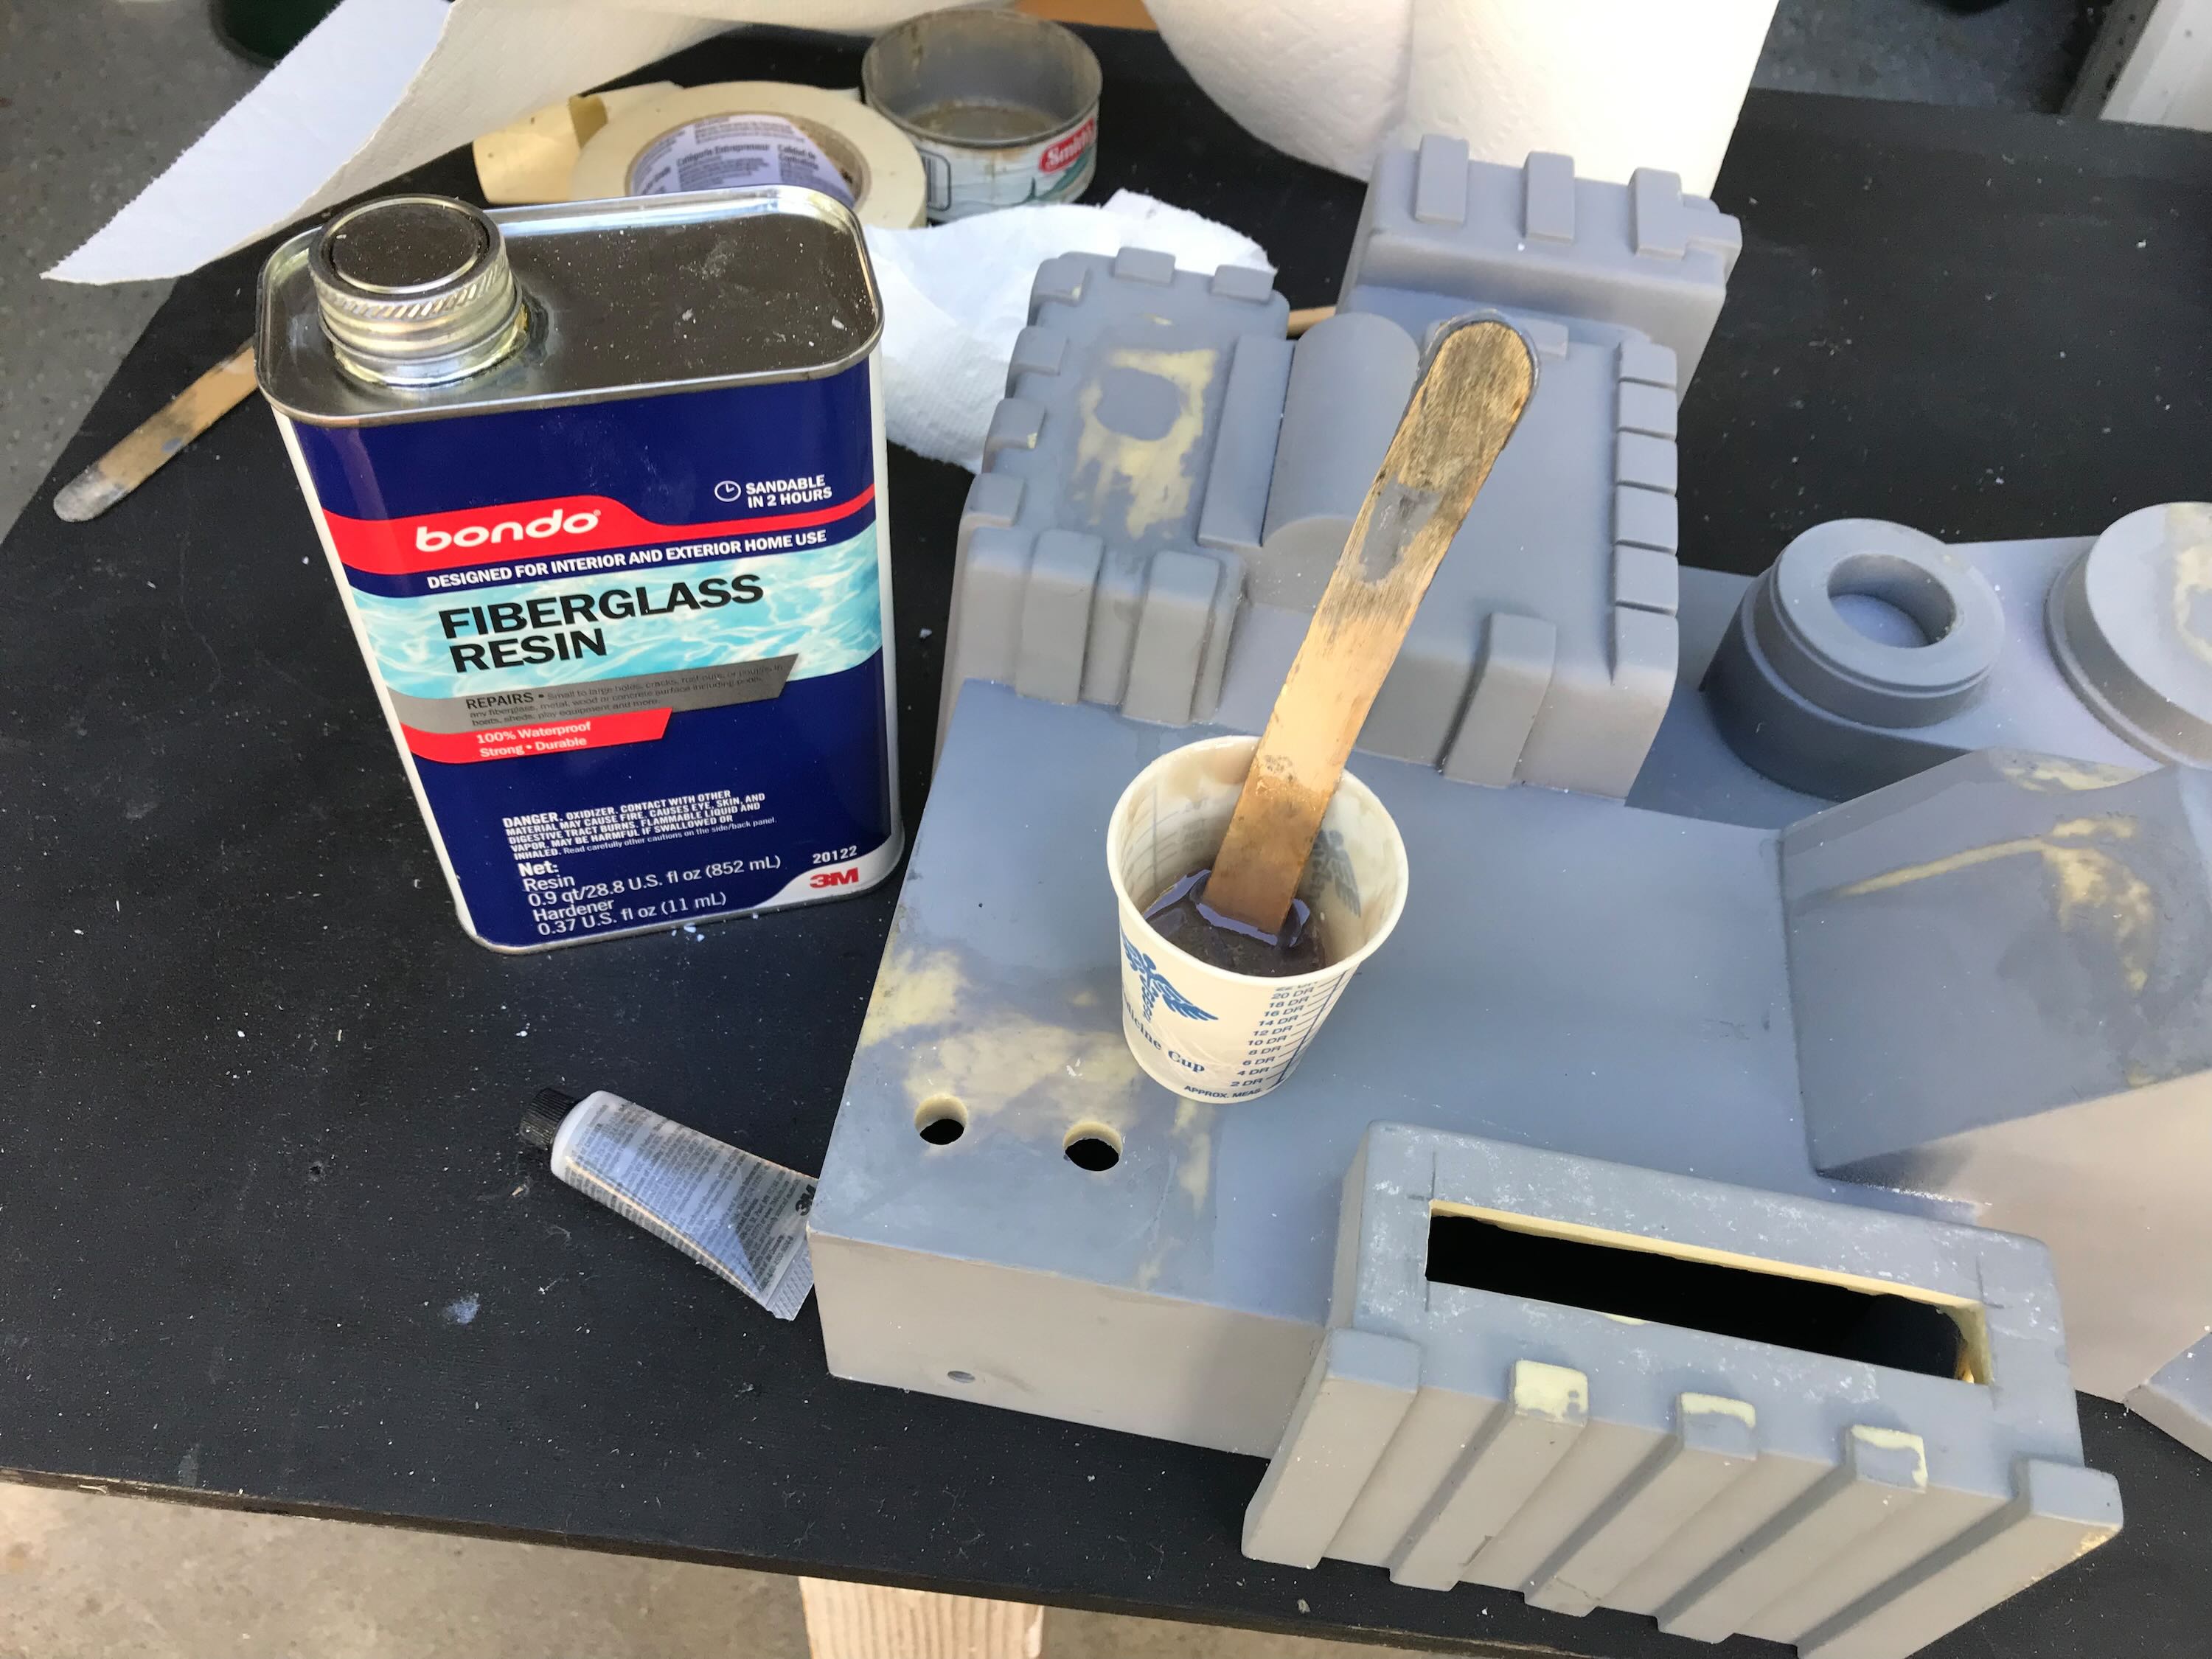
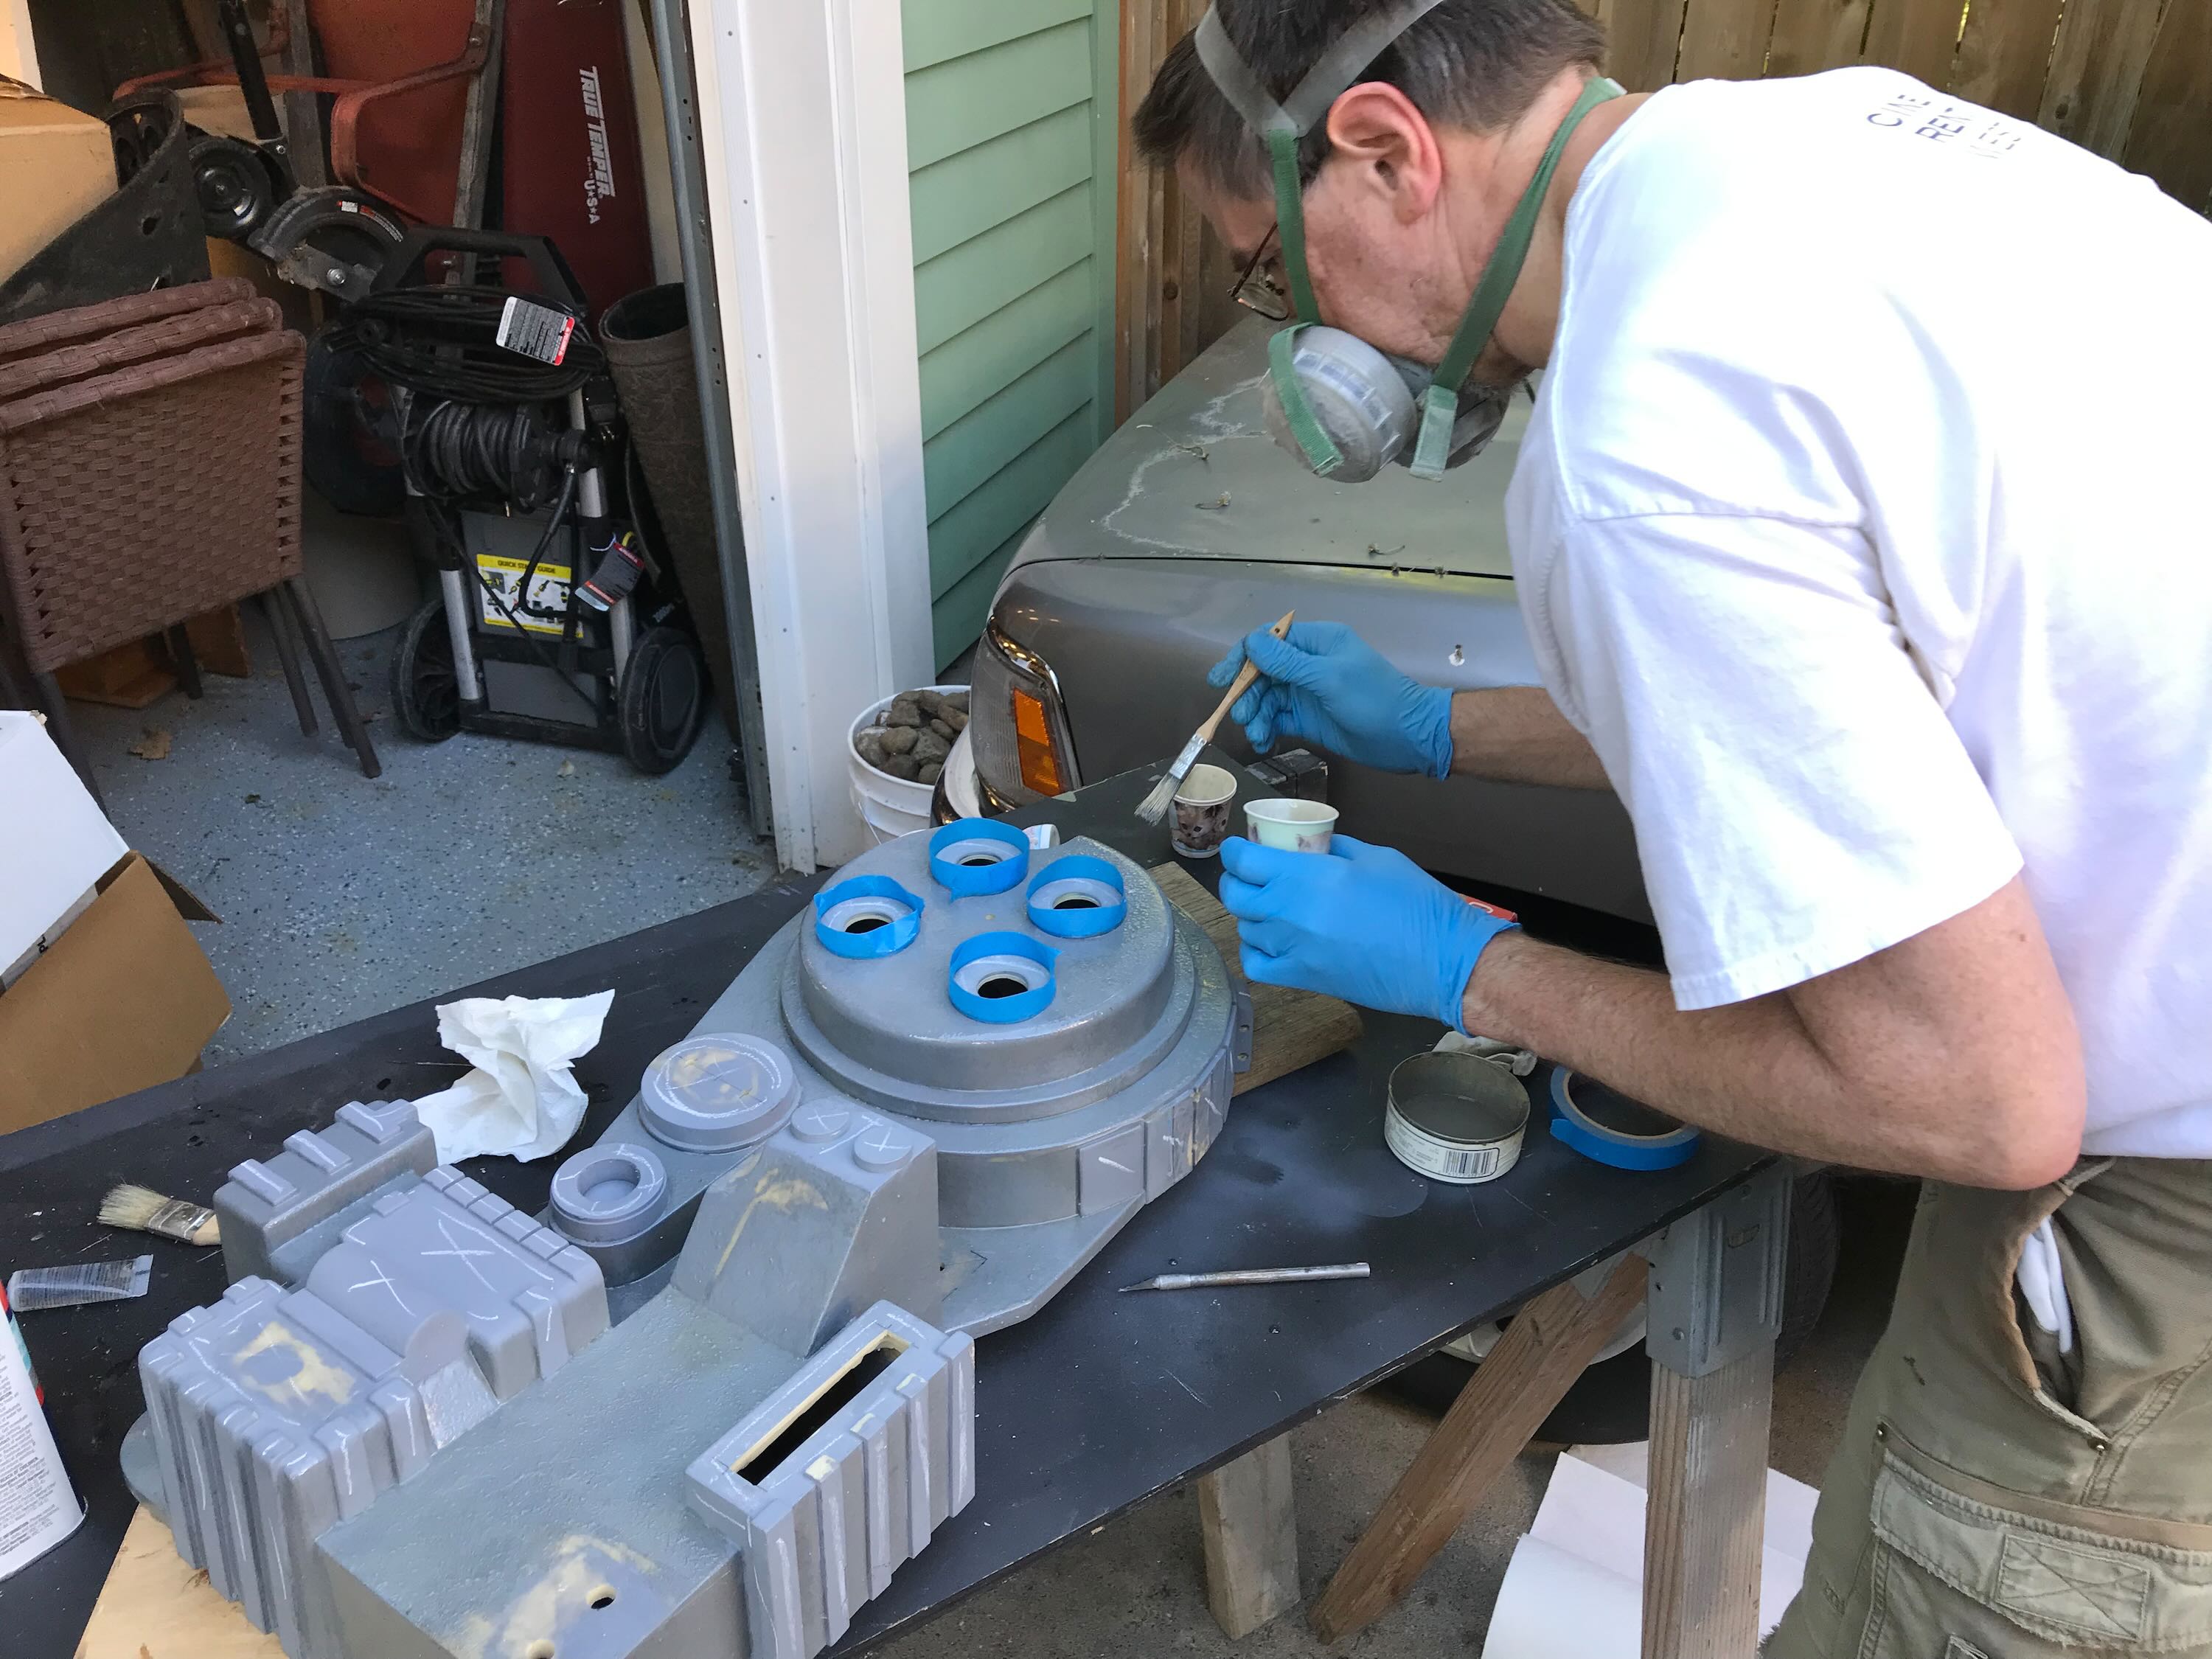
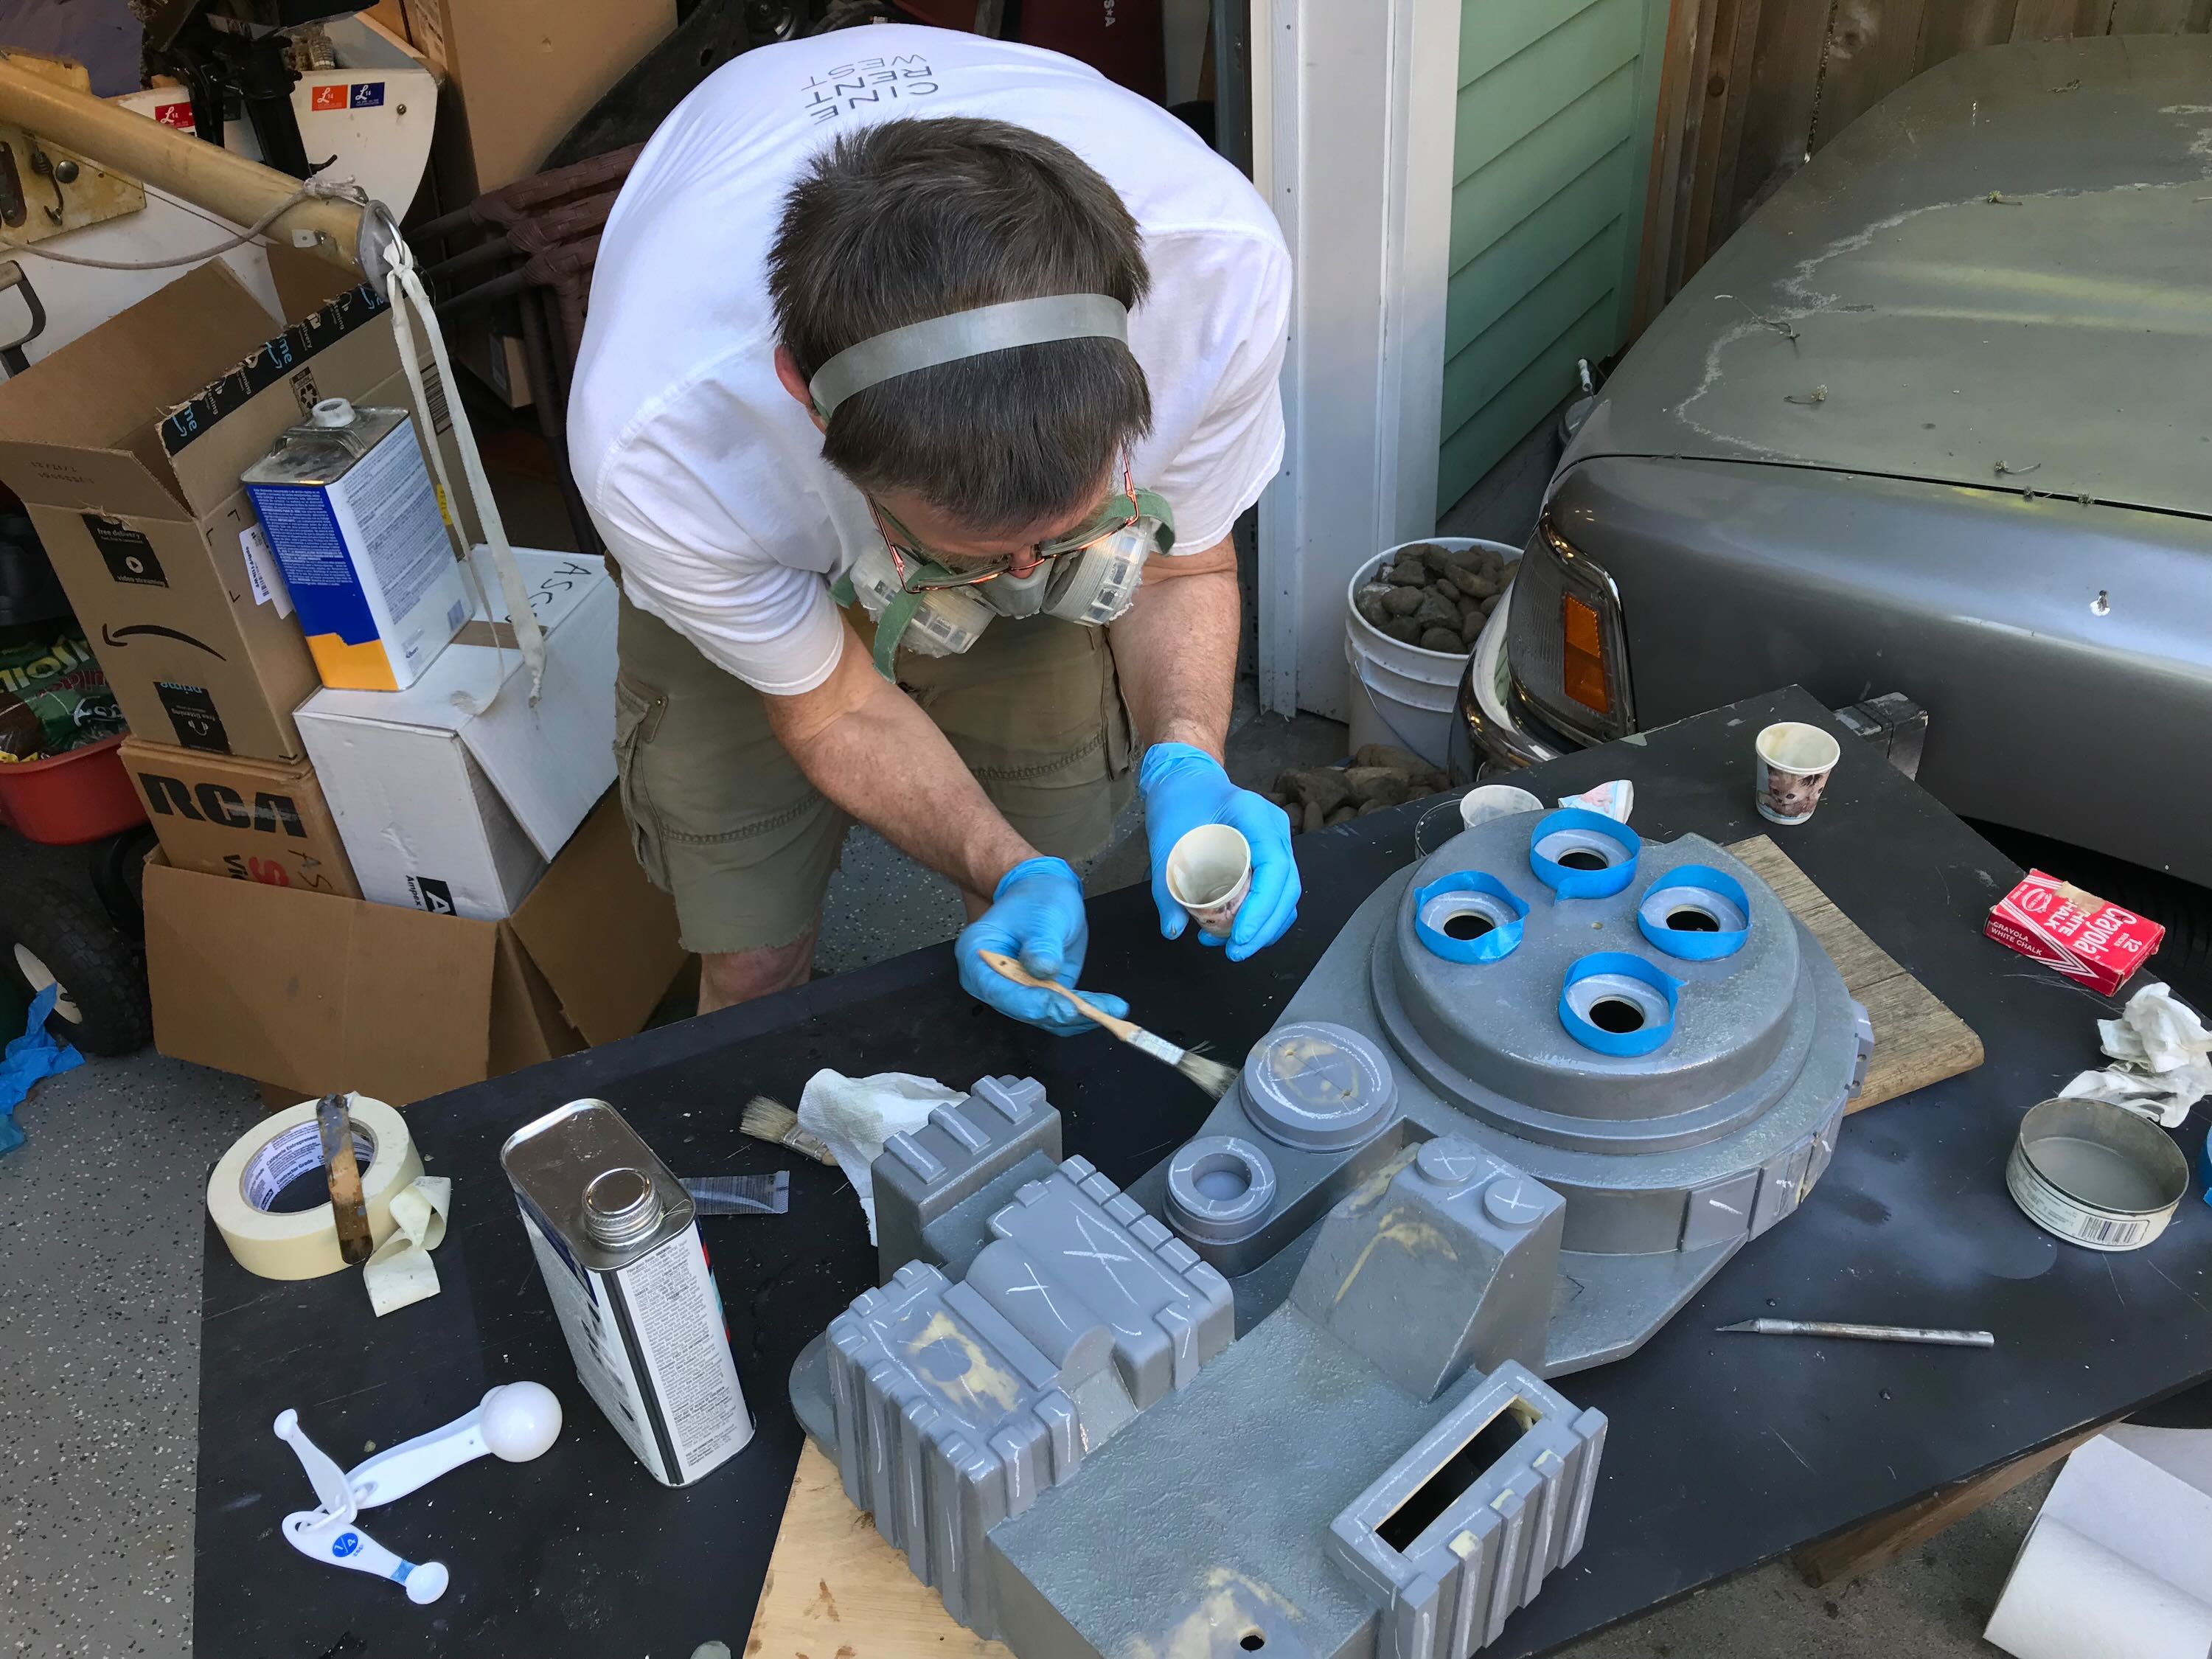
When Bryan and I built our Proton Packs in 1984 I stippled fiberglass resin onto our shells (wood, matt board, fiberglass) to create a rough, cast-iron texture. I decided to use the same technique here. After some trial and error I ended up mixing 1 tsp of Cabosil to 1 oz of resin to thicken it up just a bit to keep it from flowing too smooth.
I marked the areas that were to remain smooth with chalk.
I taped around the Cyclotron rings to mask them.

I stippled the resin onto the various sections over the course of an hour or so, mixing batches of resin in 1/4 oz. increments so I could cover those areas before it set up too fast. In retrospect I probably could have added a tiny bit more Cabosil to thicken the resin a bit more to create a more pronounced texture.
I think the resin ended up smoothing out a bit more than seen here.

Re: Building a Benofkent Props Proton Pack for fellow 'Buster
Posted: July 27th, 2022, 1:28 am
by WShawn
Re: Building a Benofkent Props Proton Pack for fellow 'Buster
Posted: July 27th, 2022, 1:36 am
by WShawn
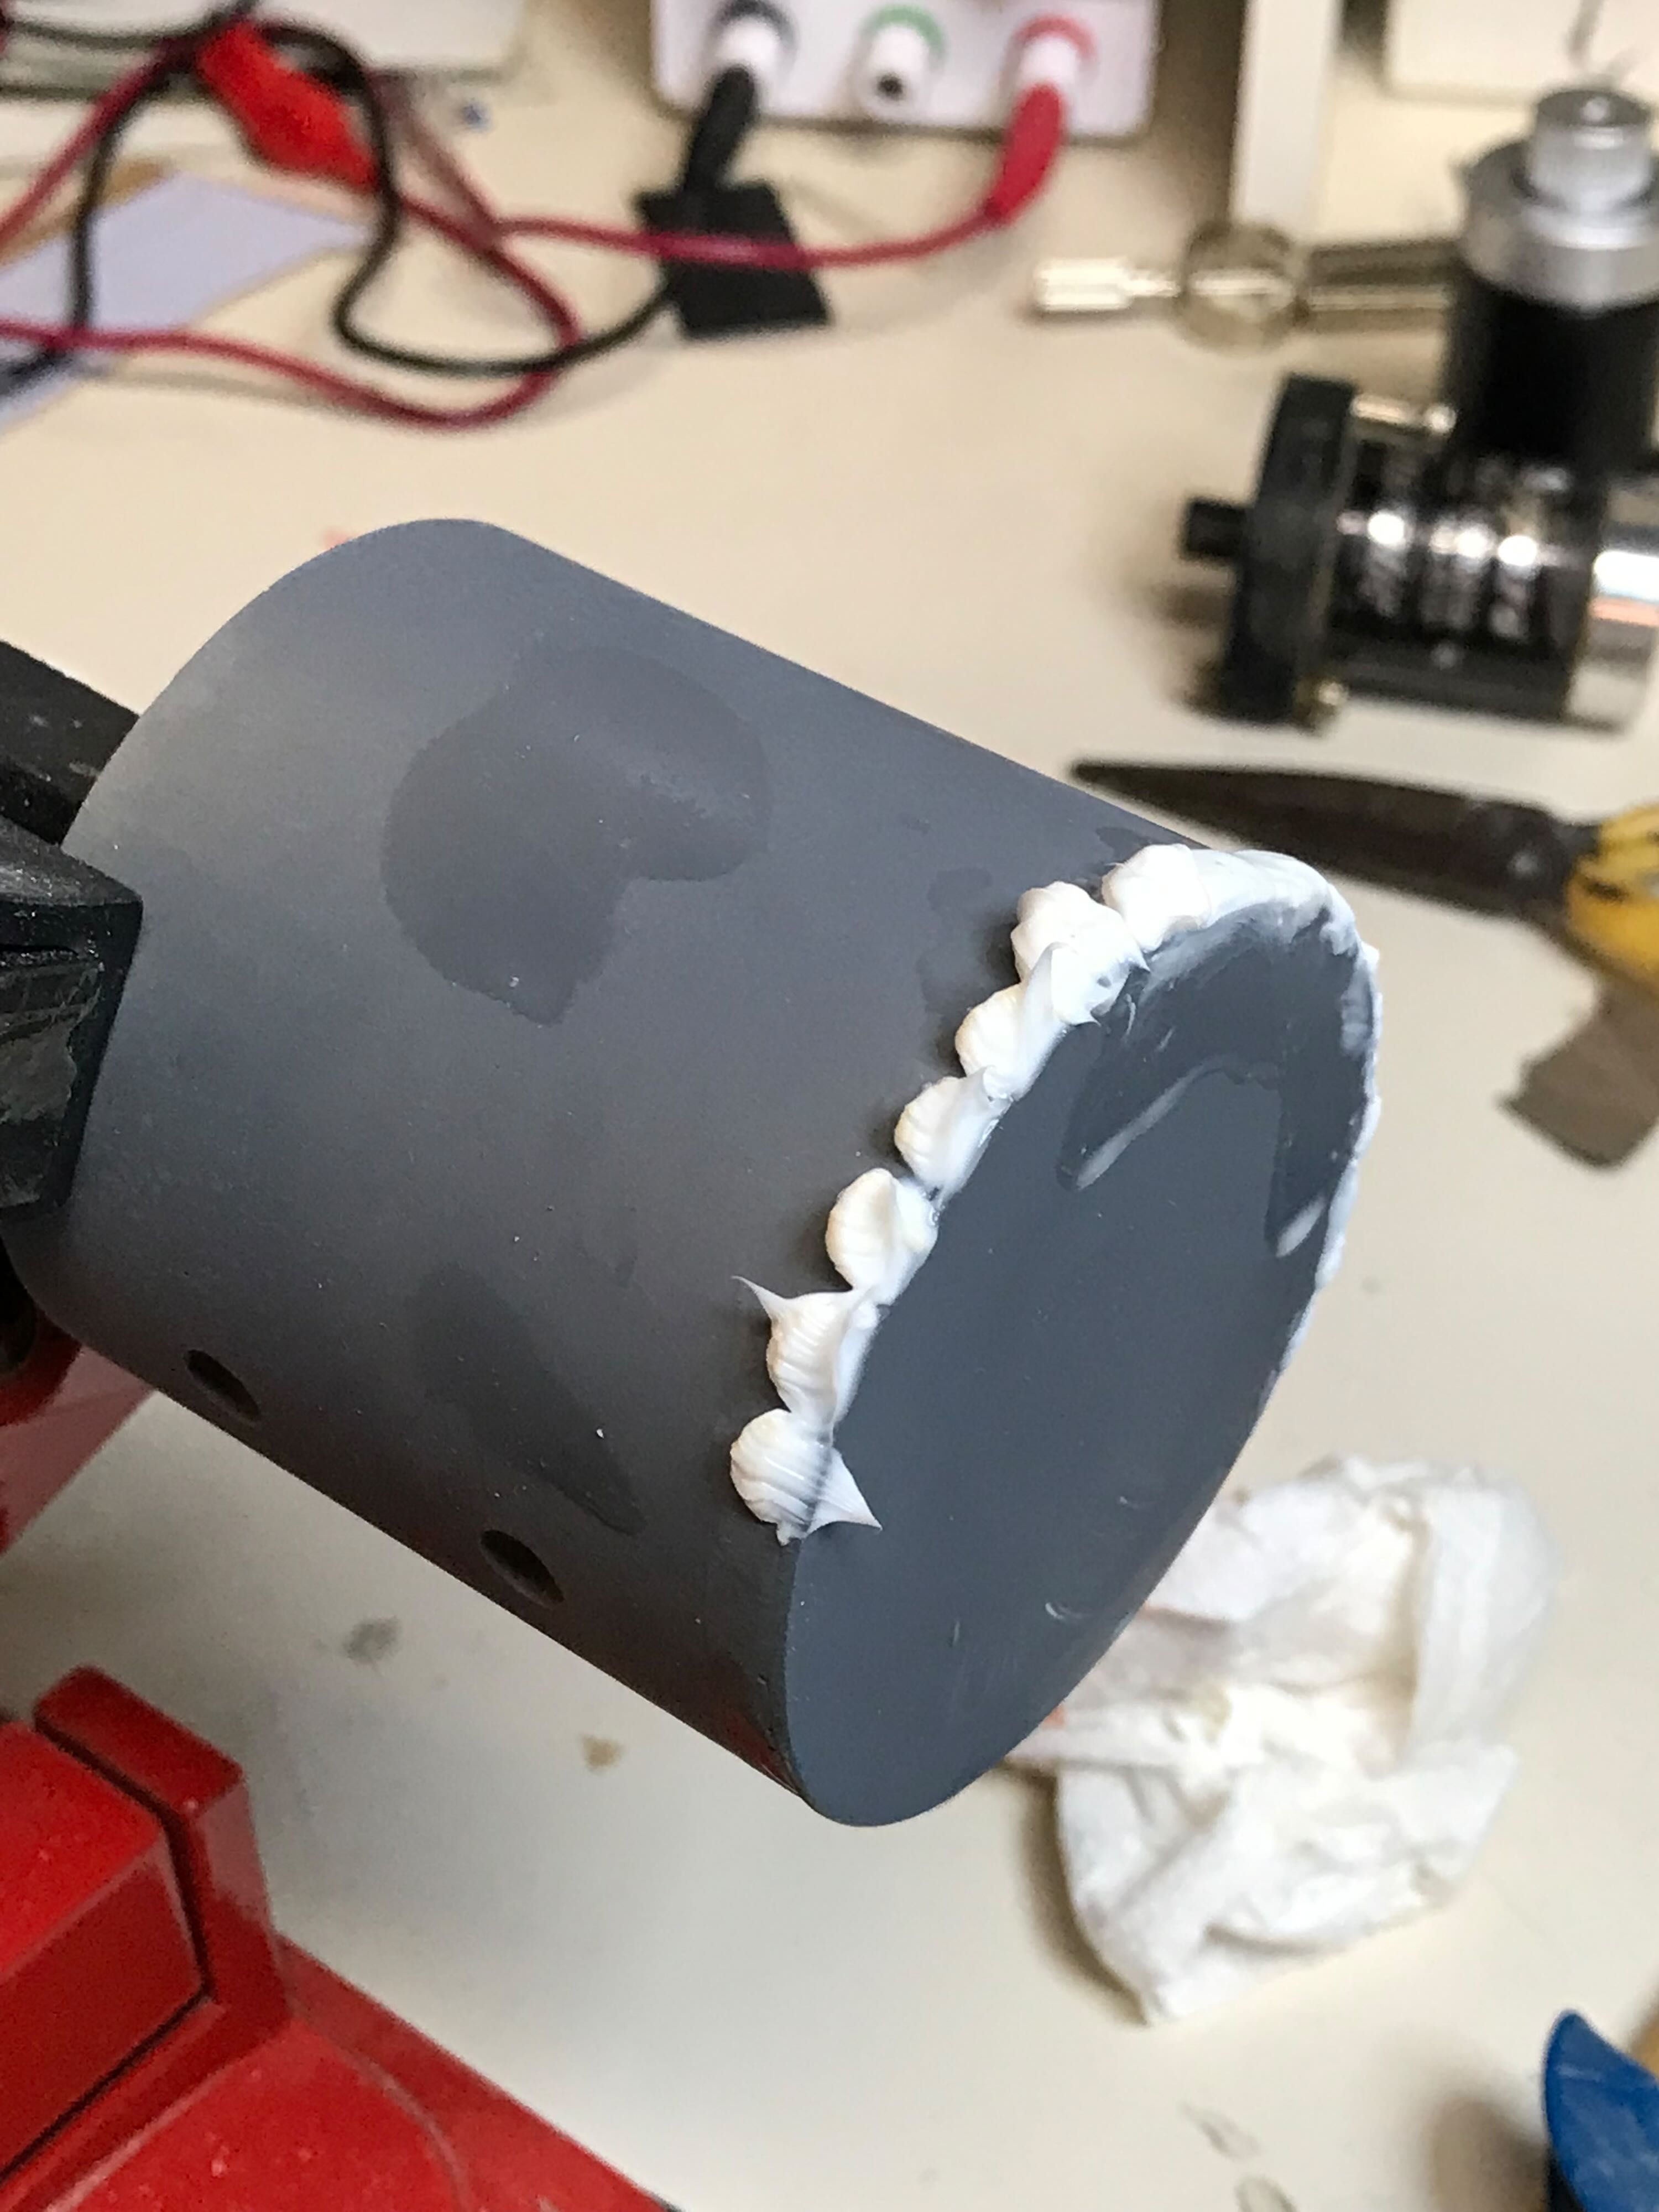
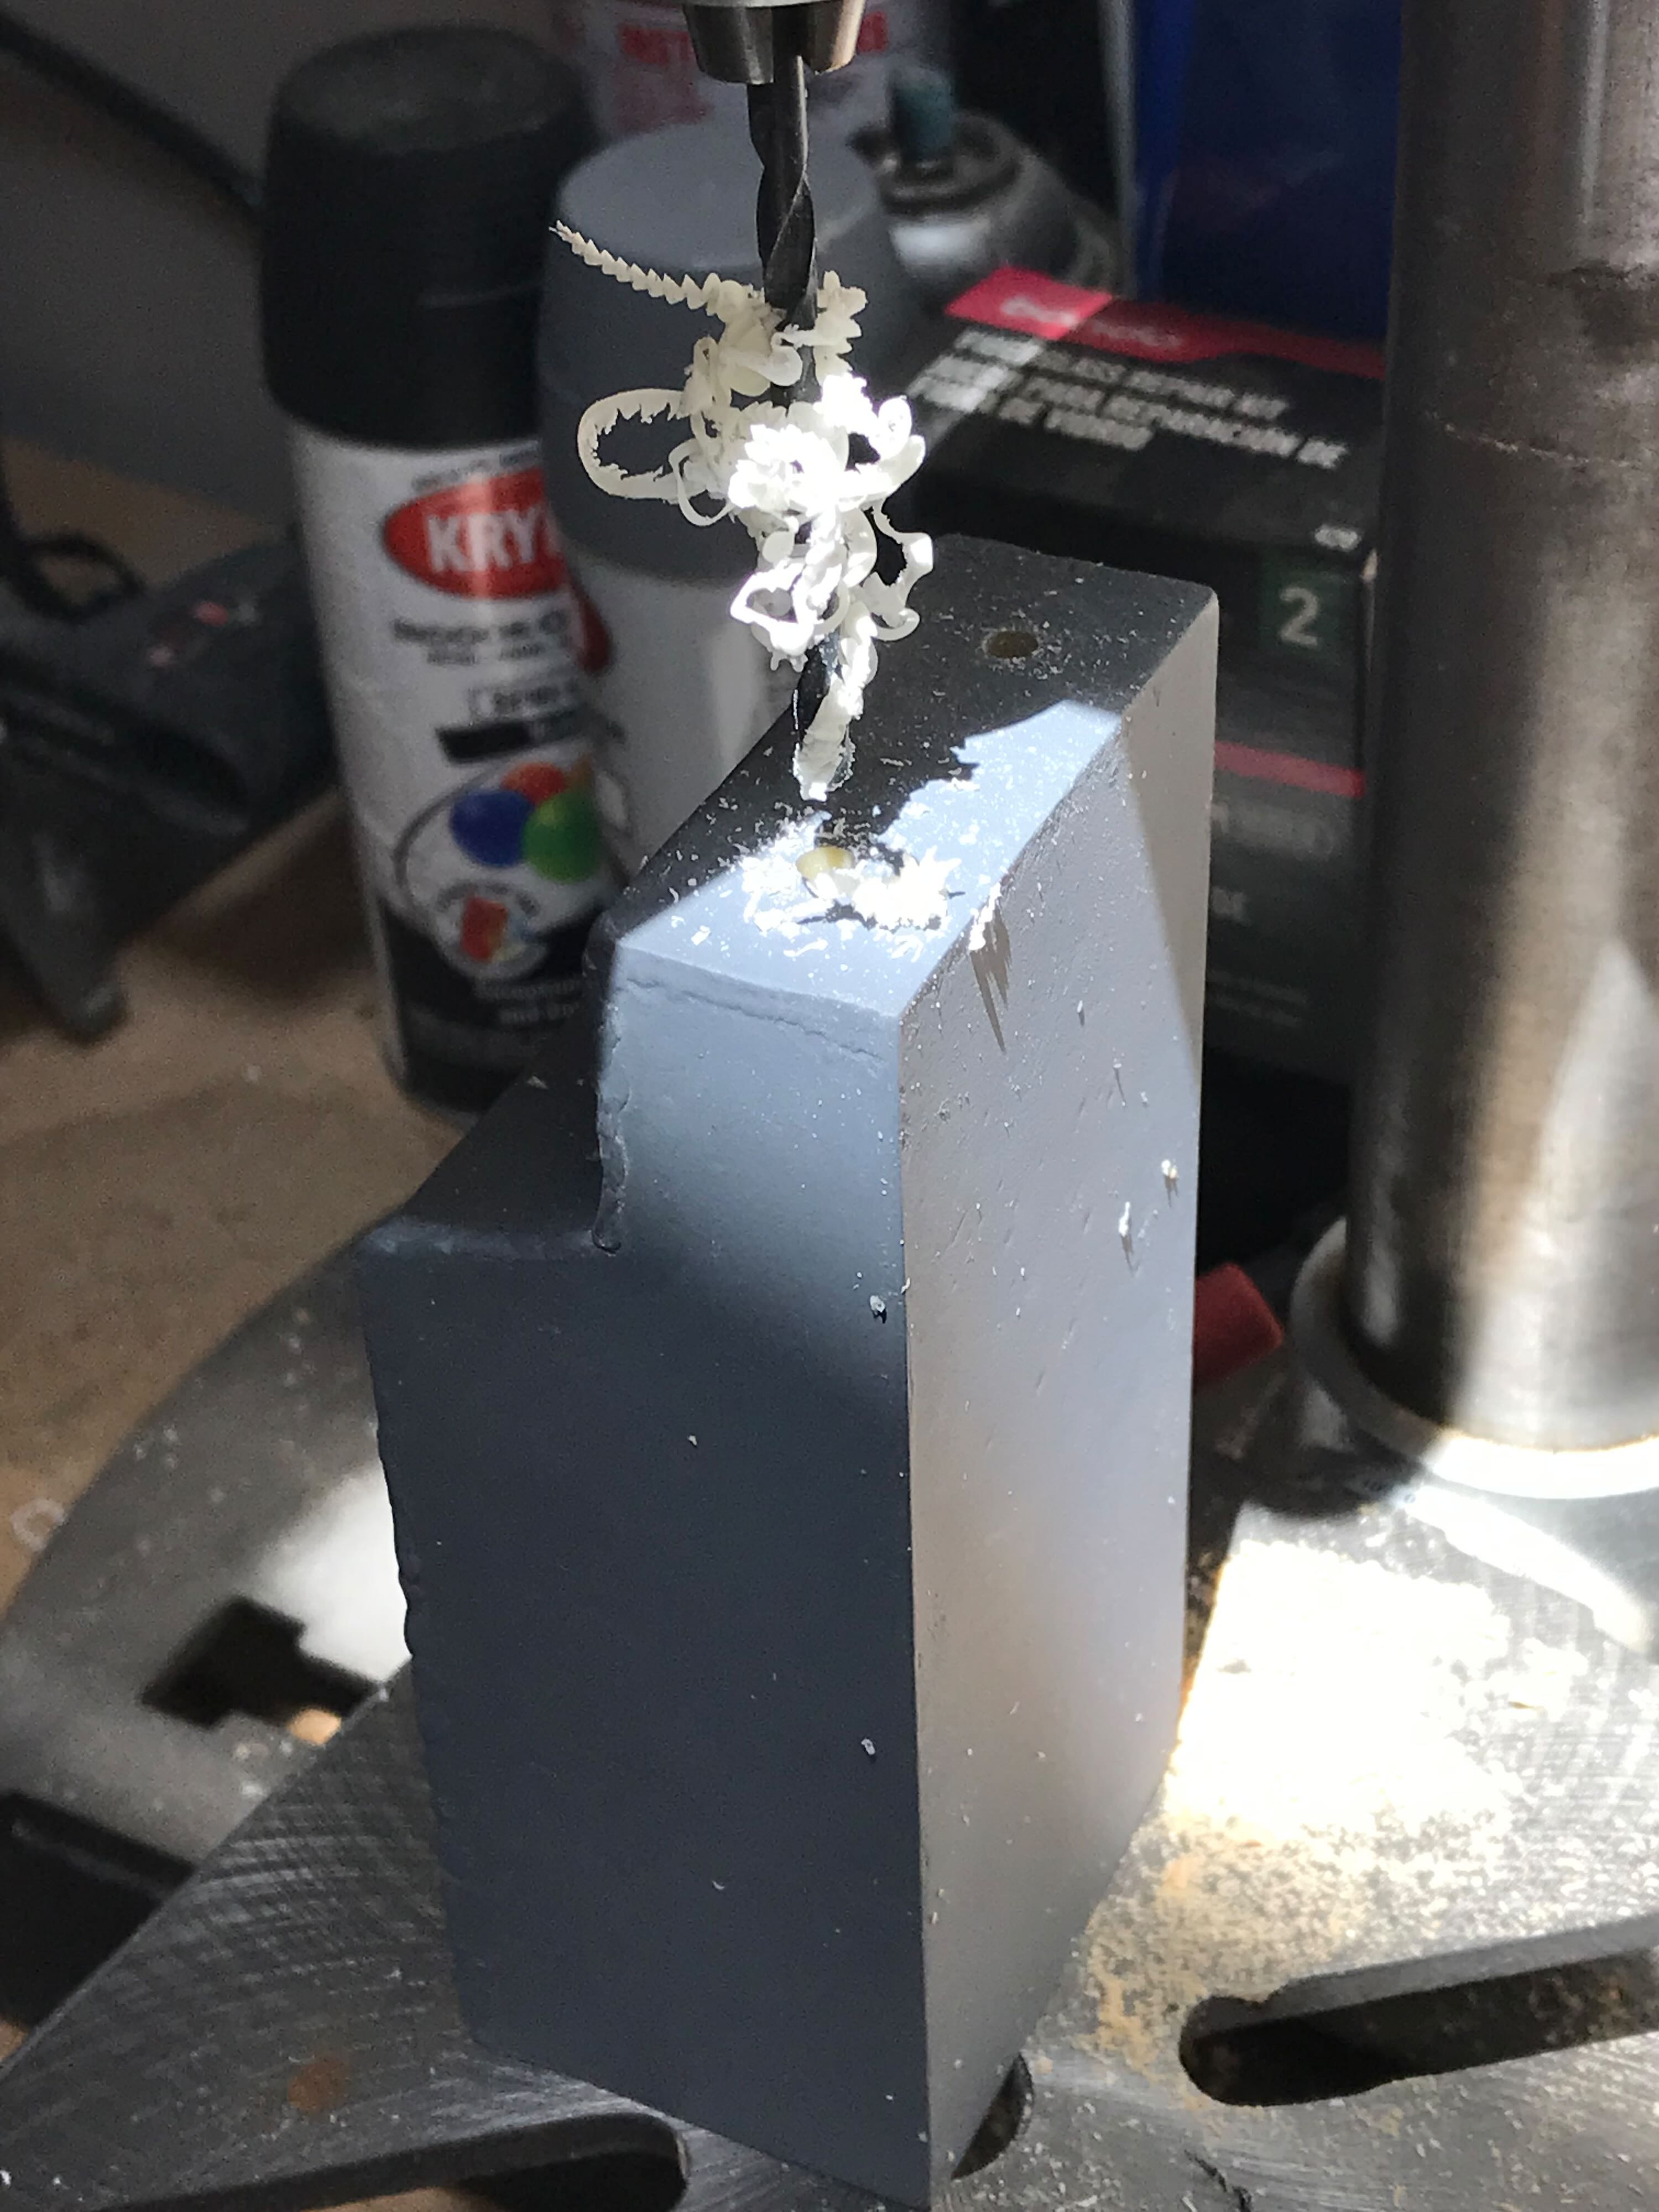
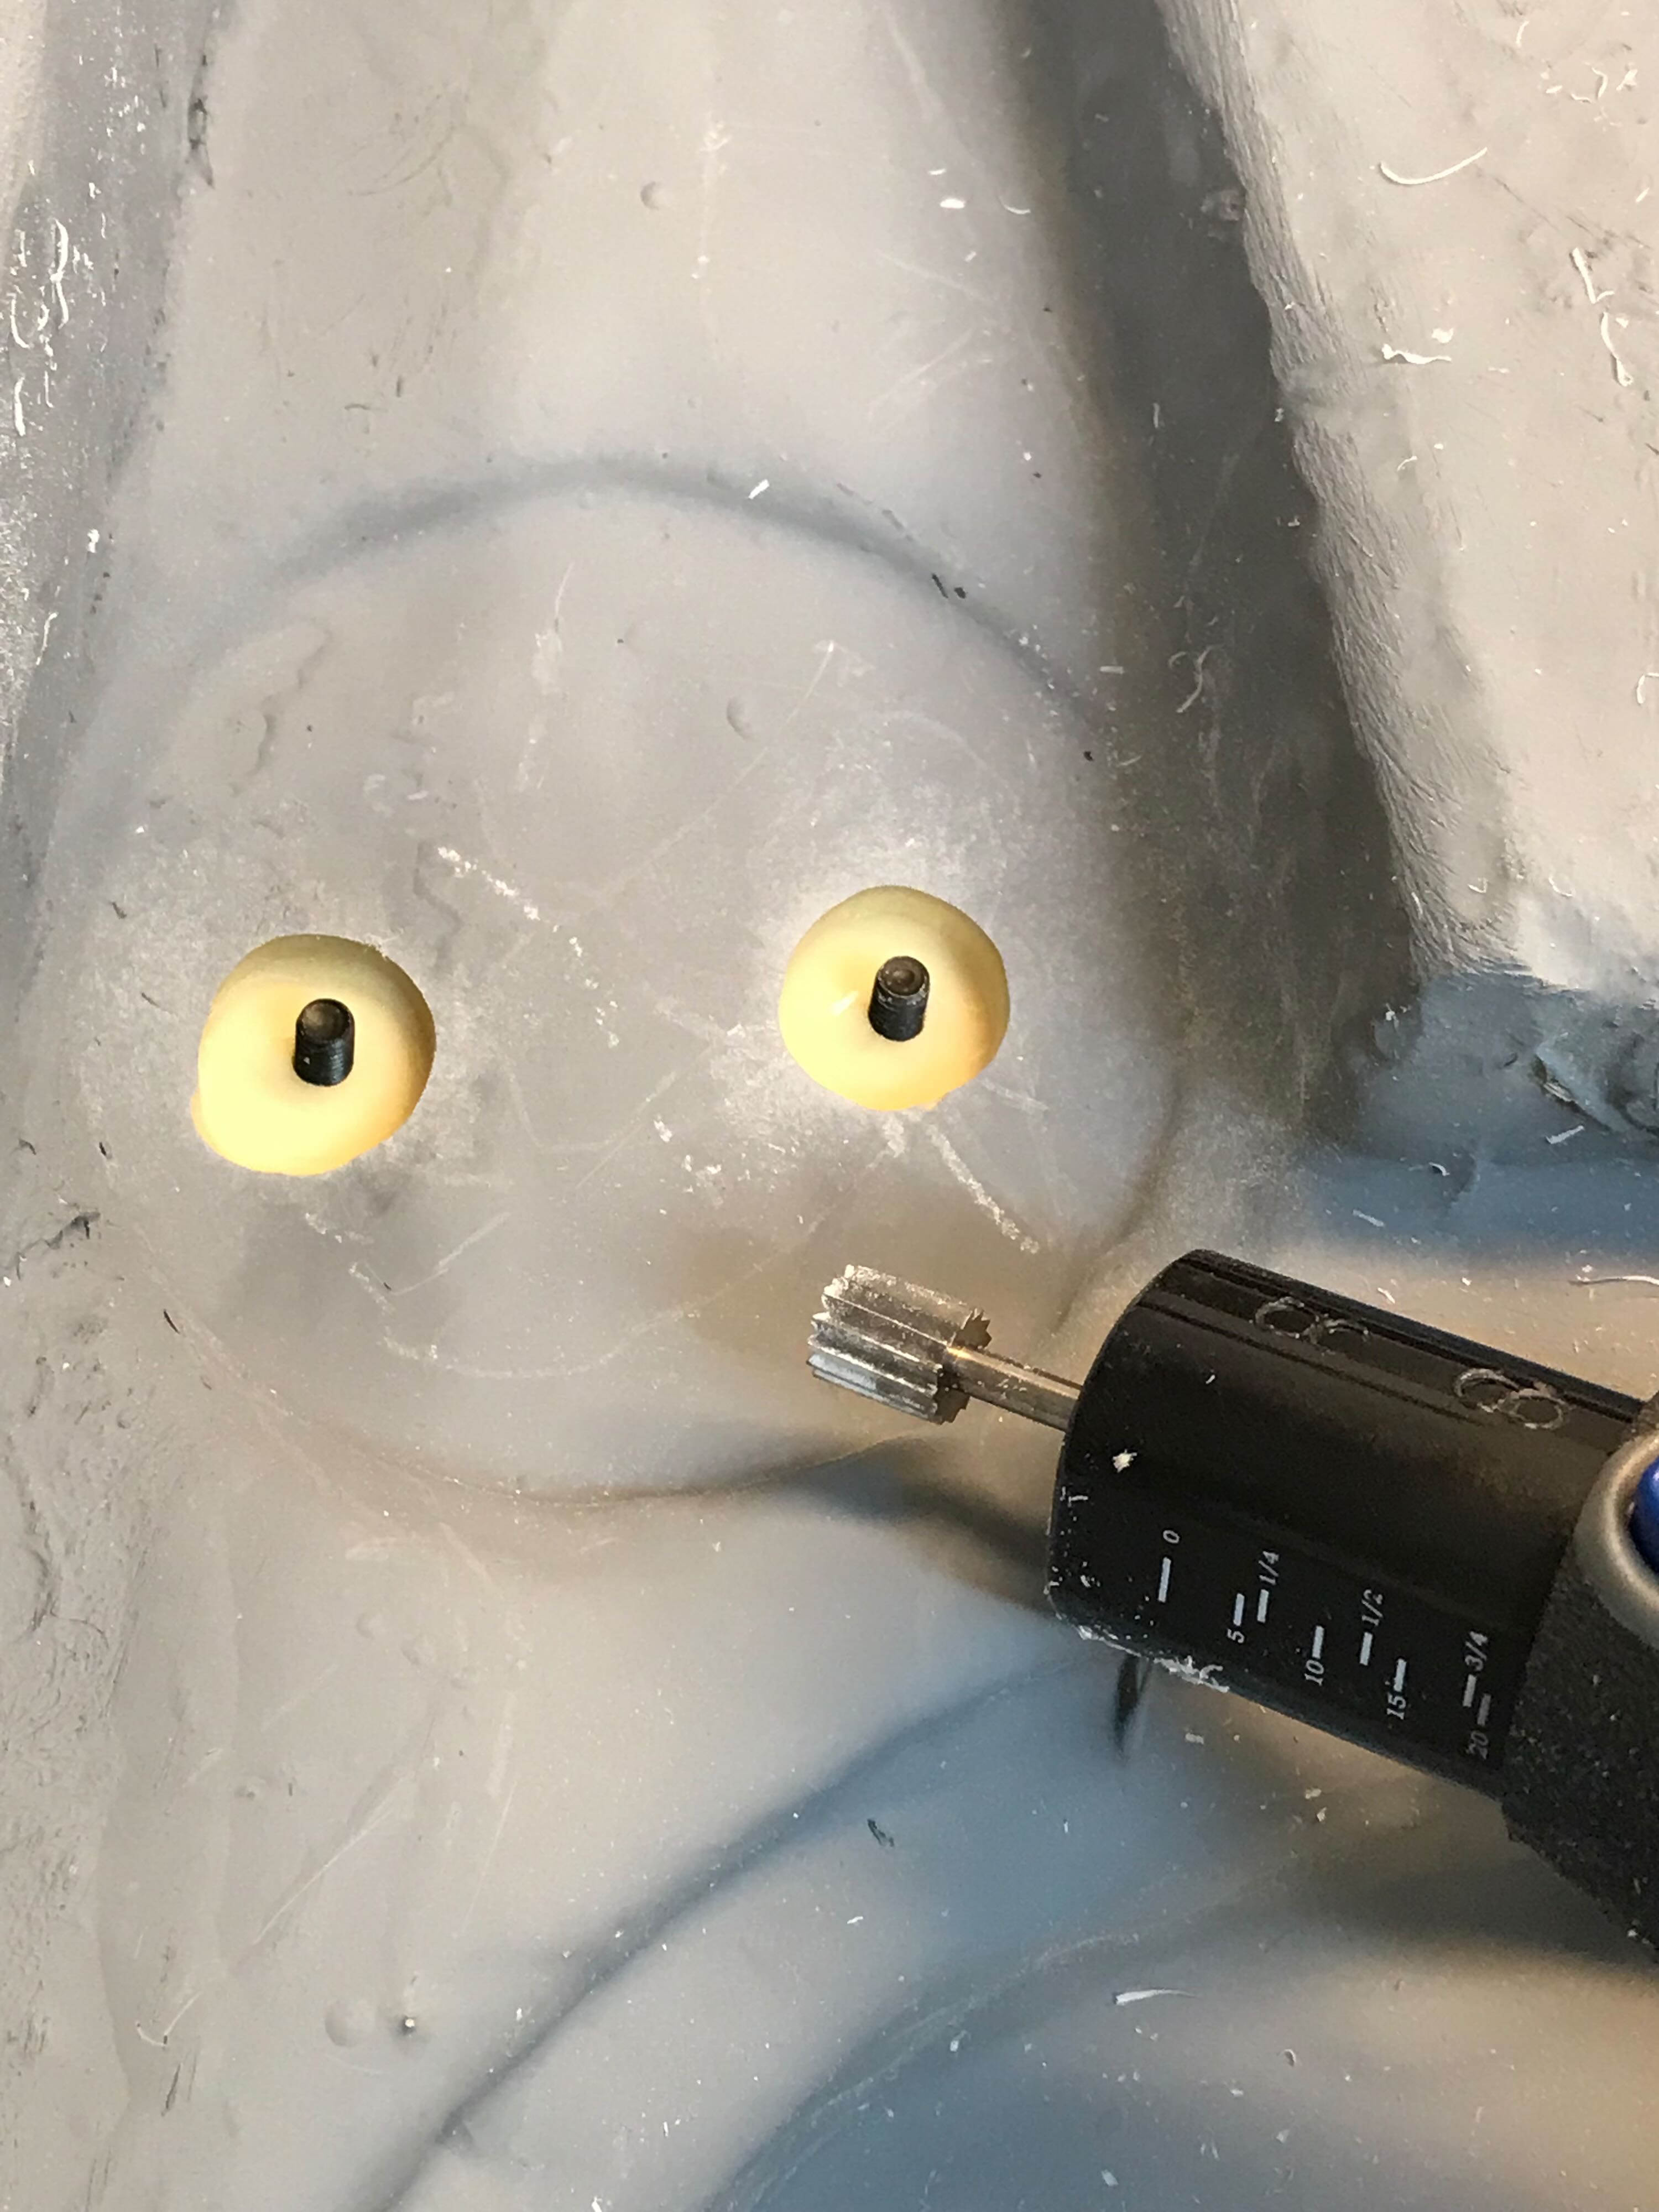
6/26/22 - As with the elbow connectors, I had to drill out the inner parts of the straight connectors to accommodate the thinner tubing. I jammed a screw into the opposite end to grab the metal connector so it wouldn't spin when I drilled and Dremeled it out.

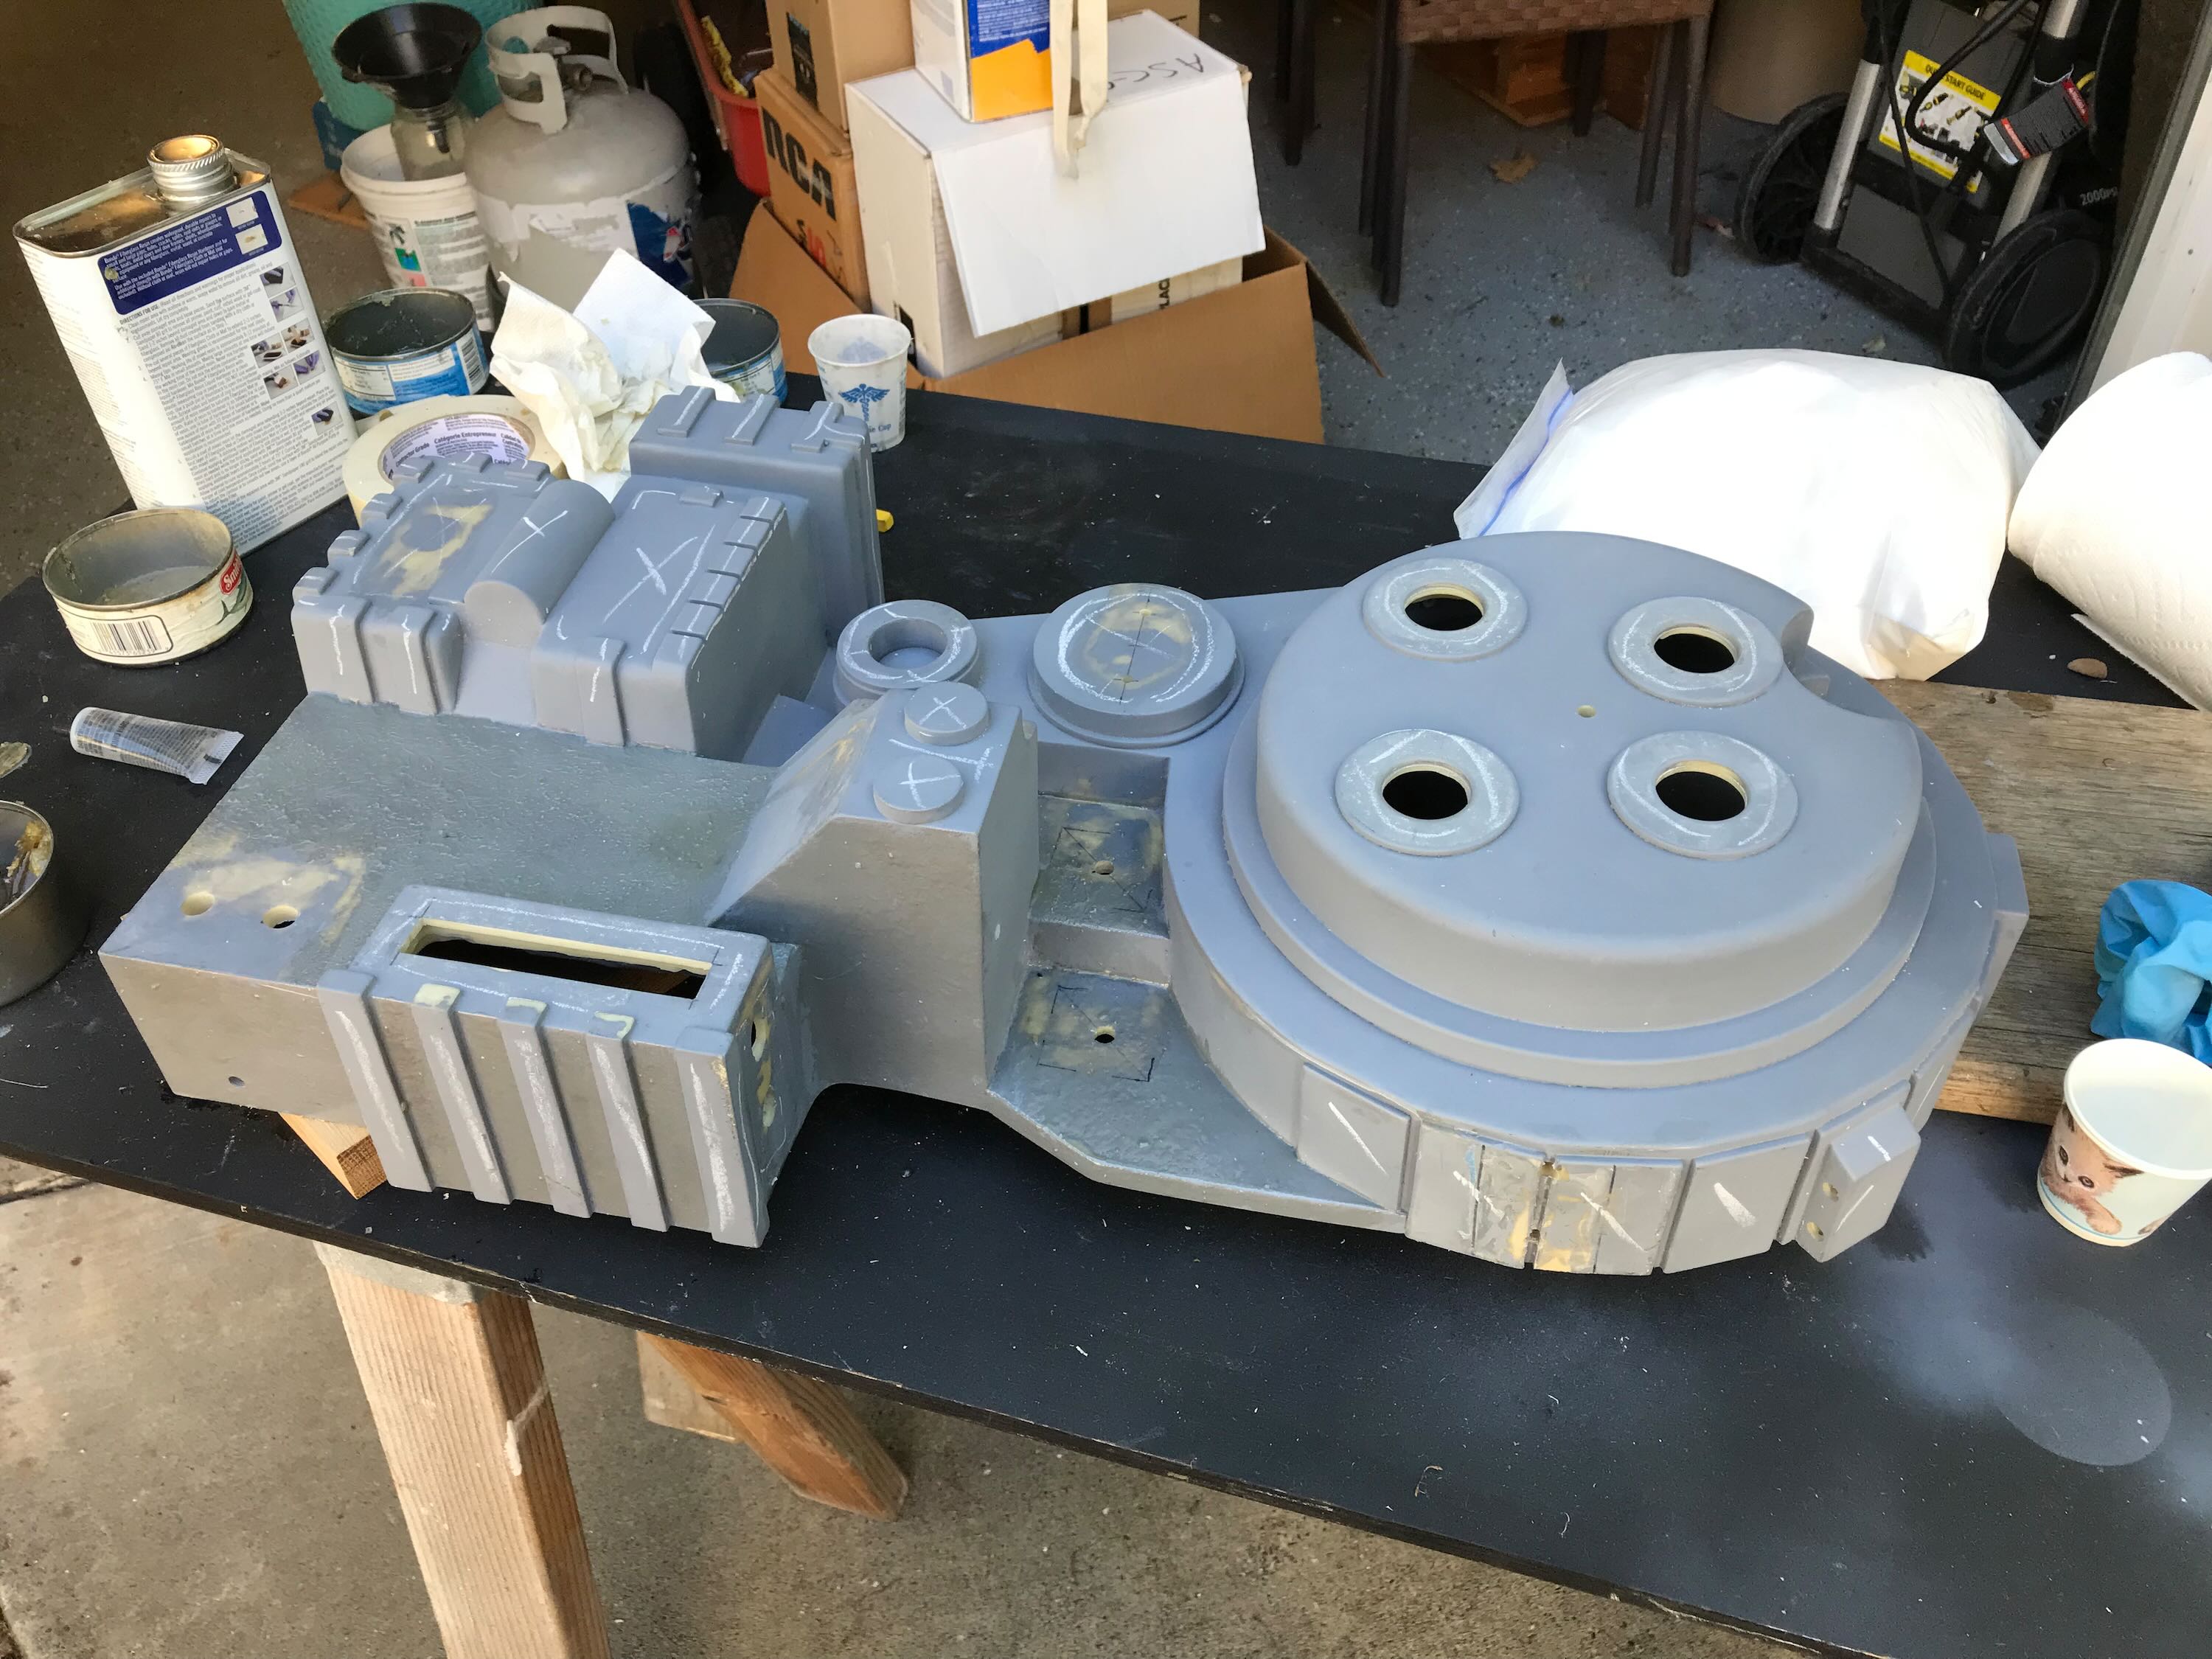
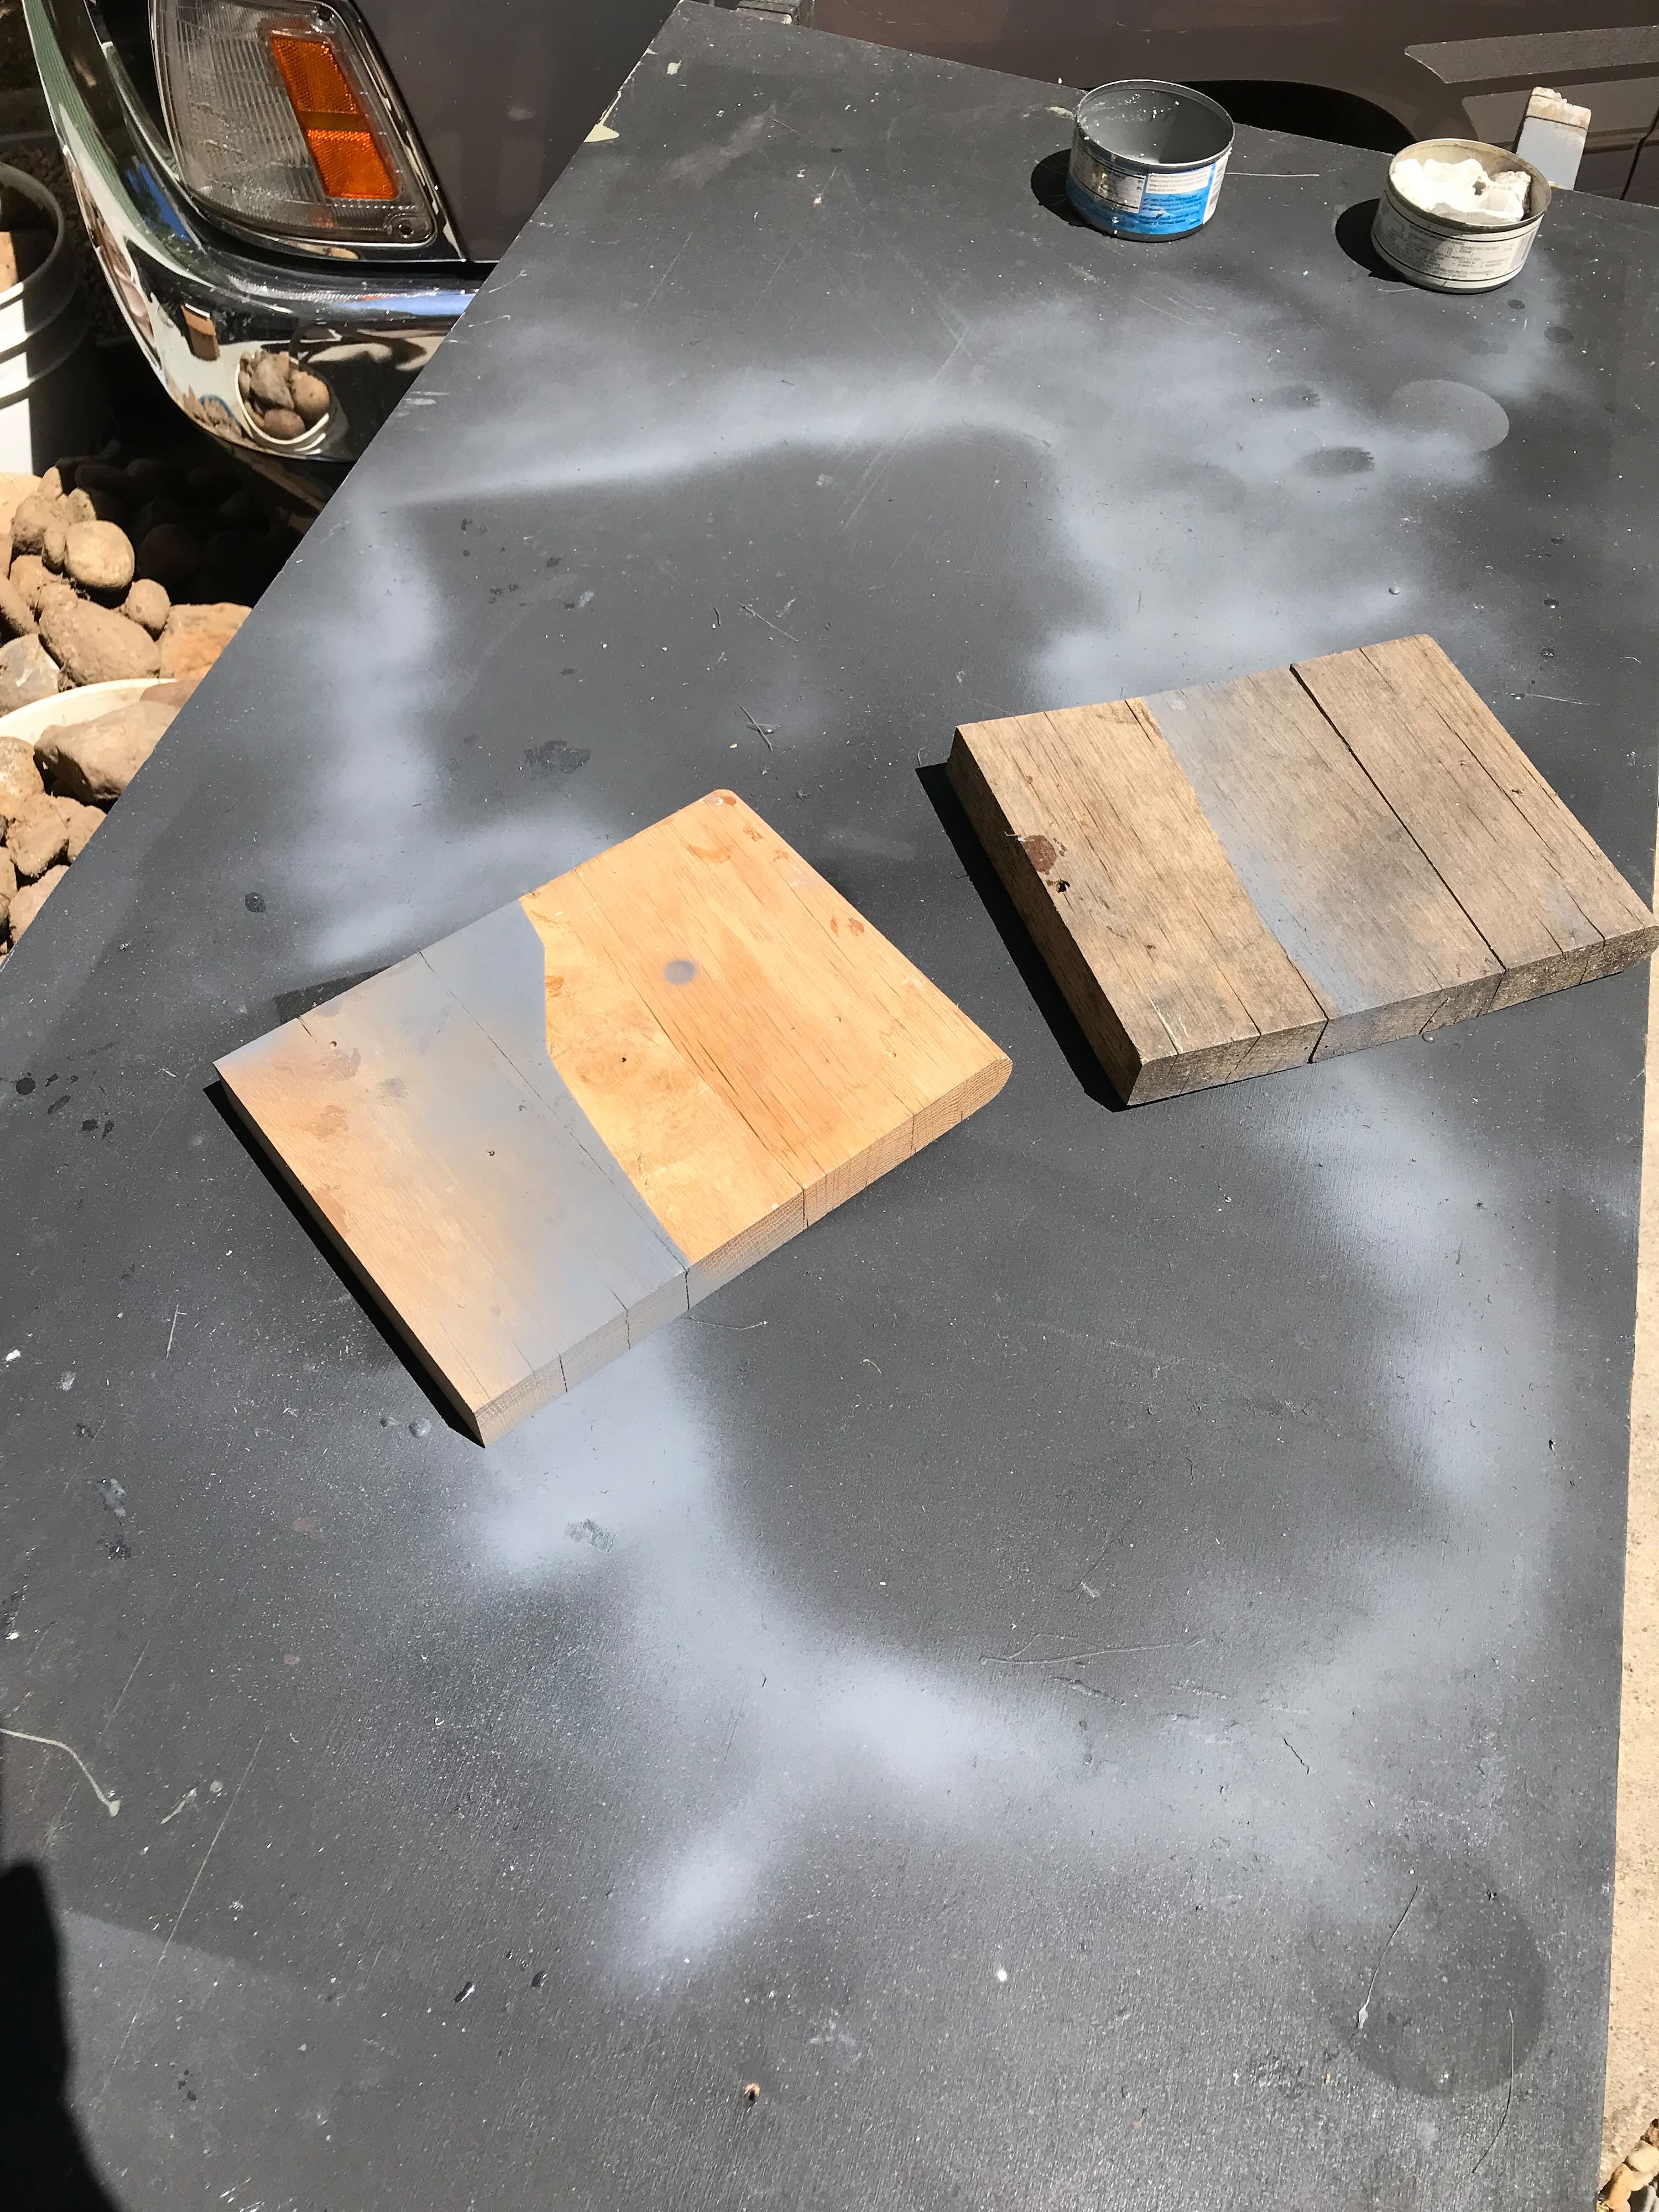
A ghostly shadow after priming the stippled shell.
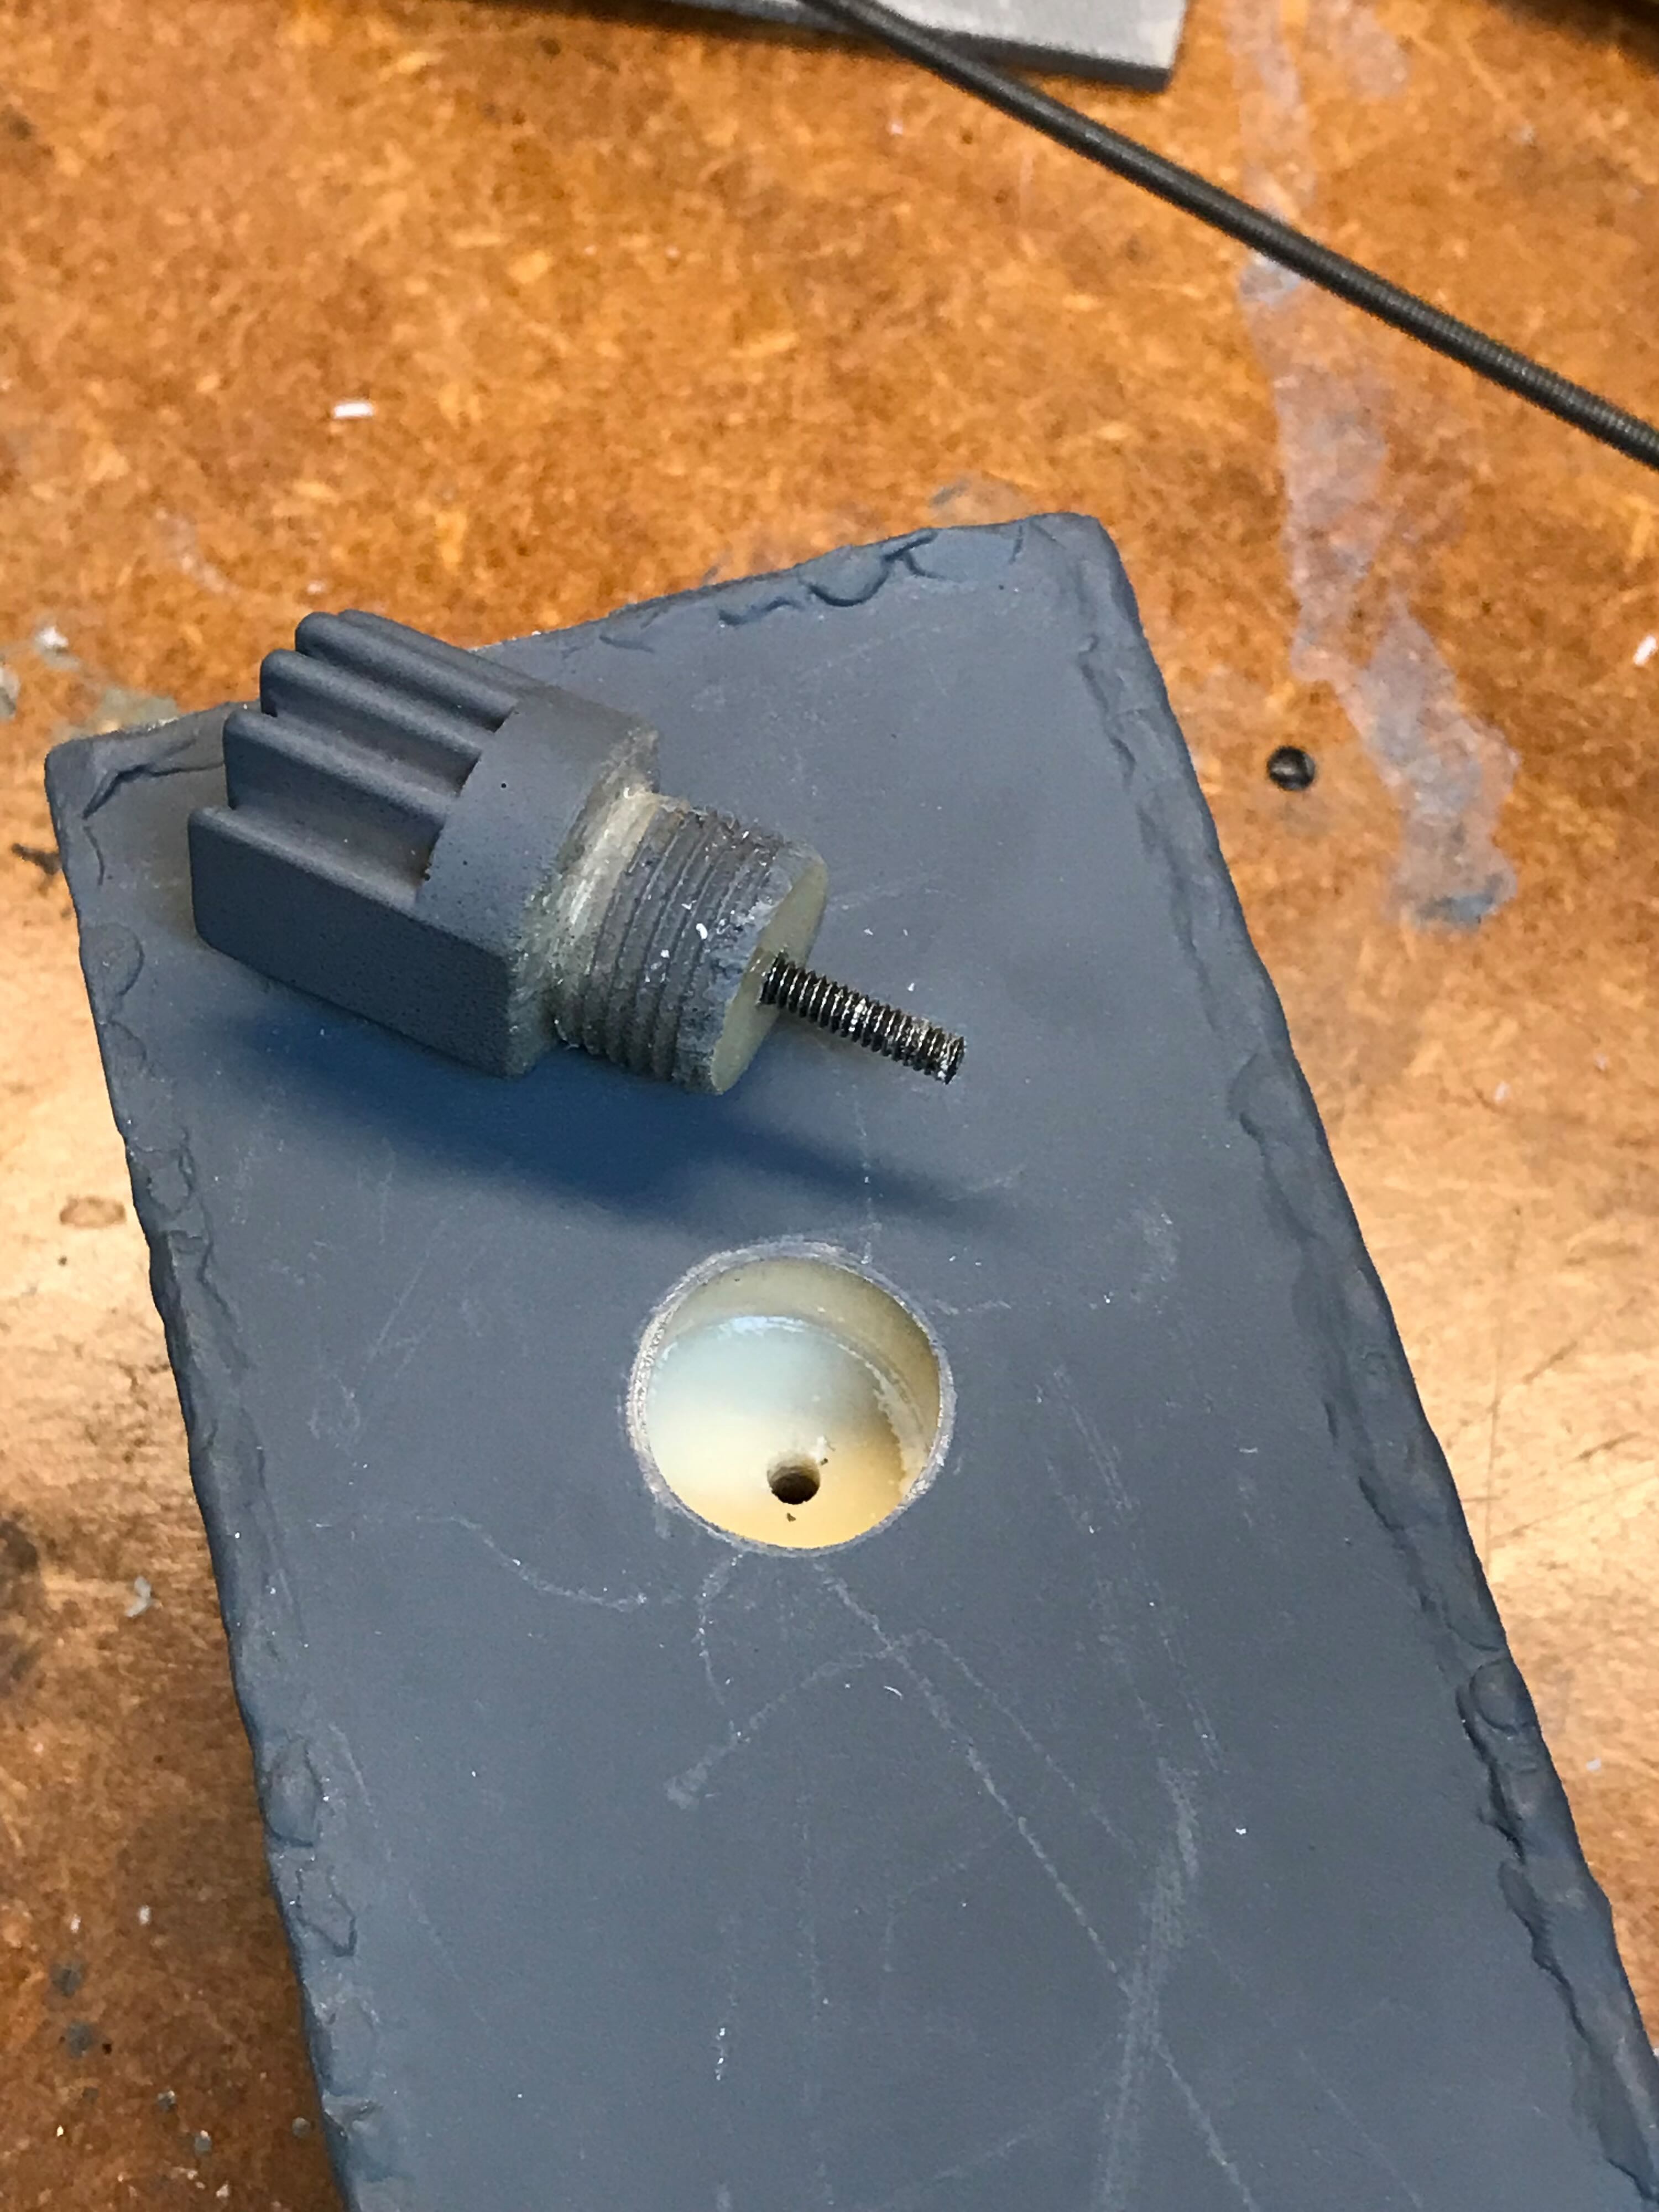
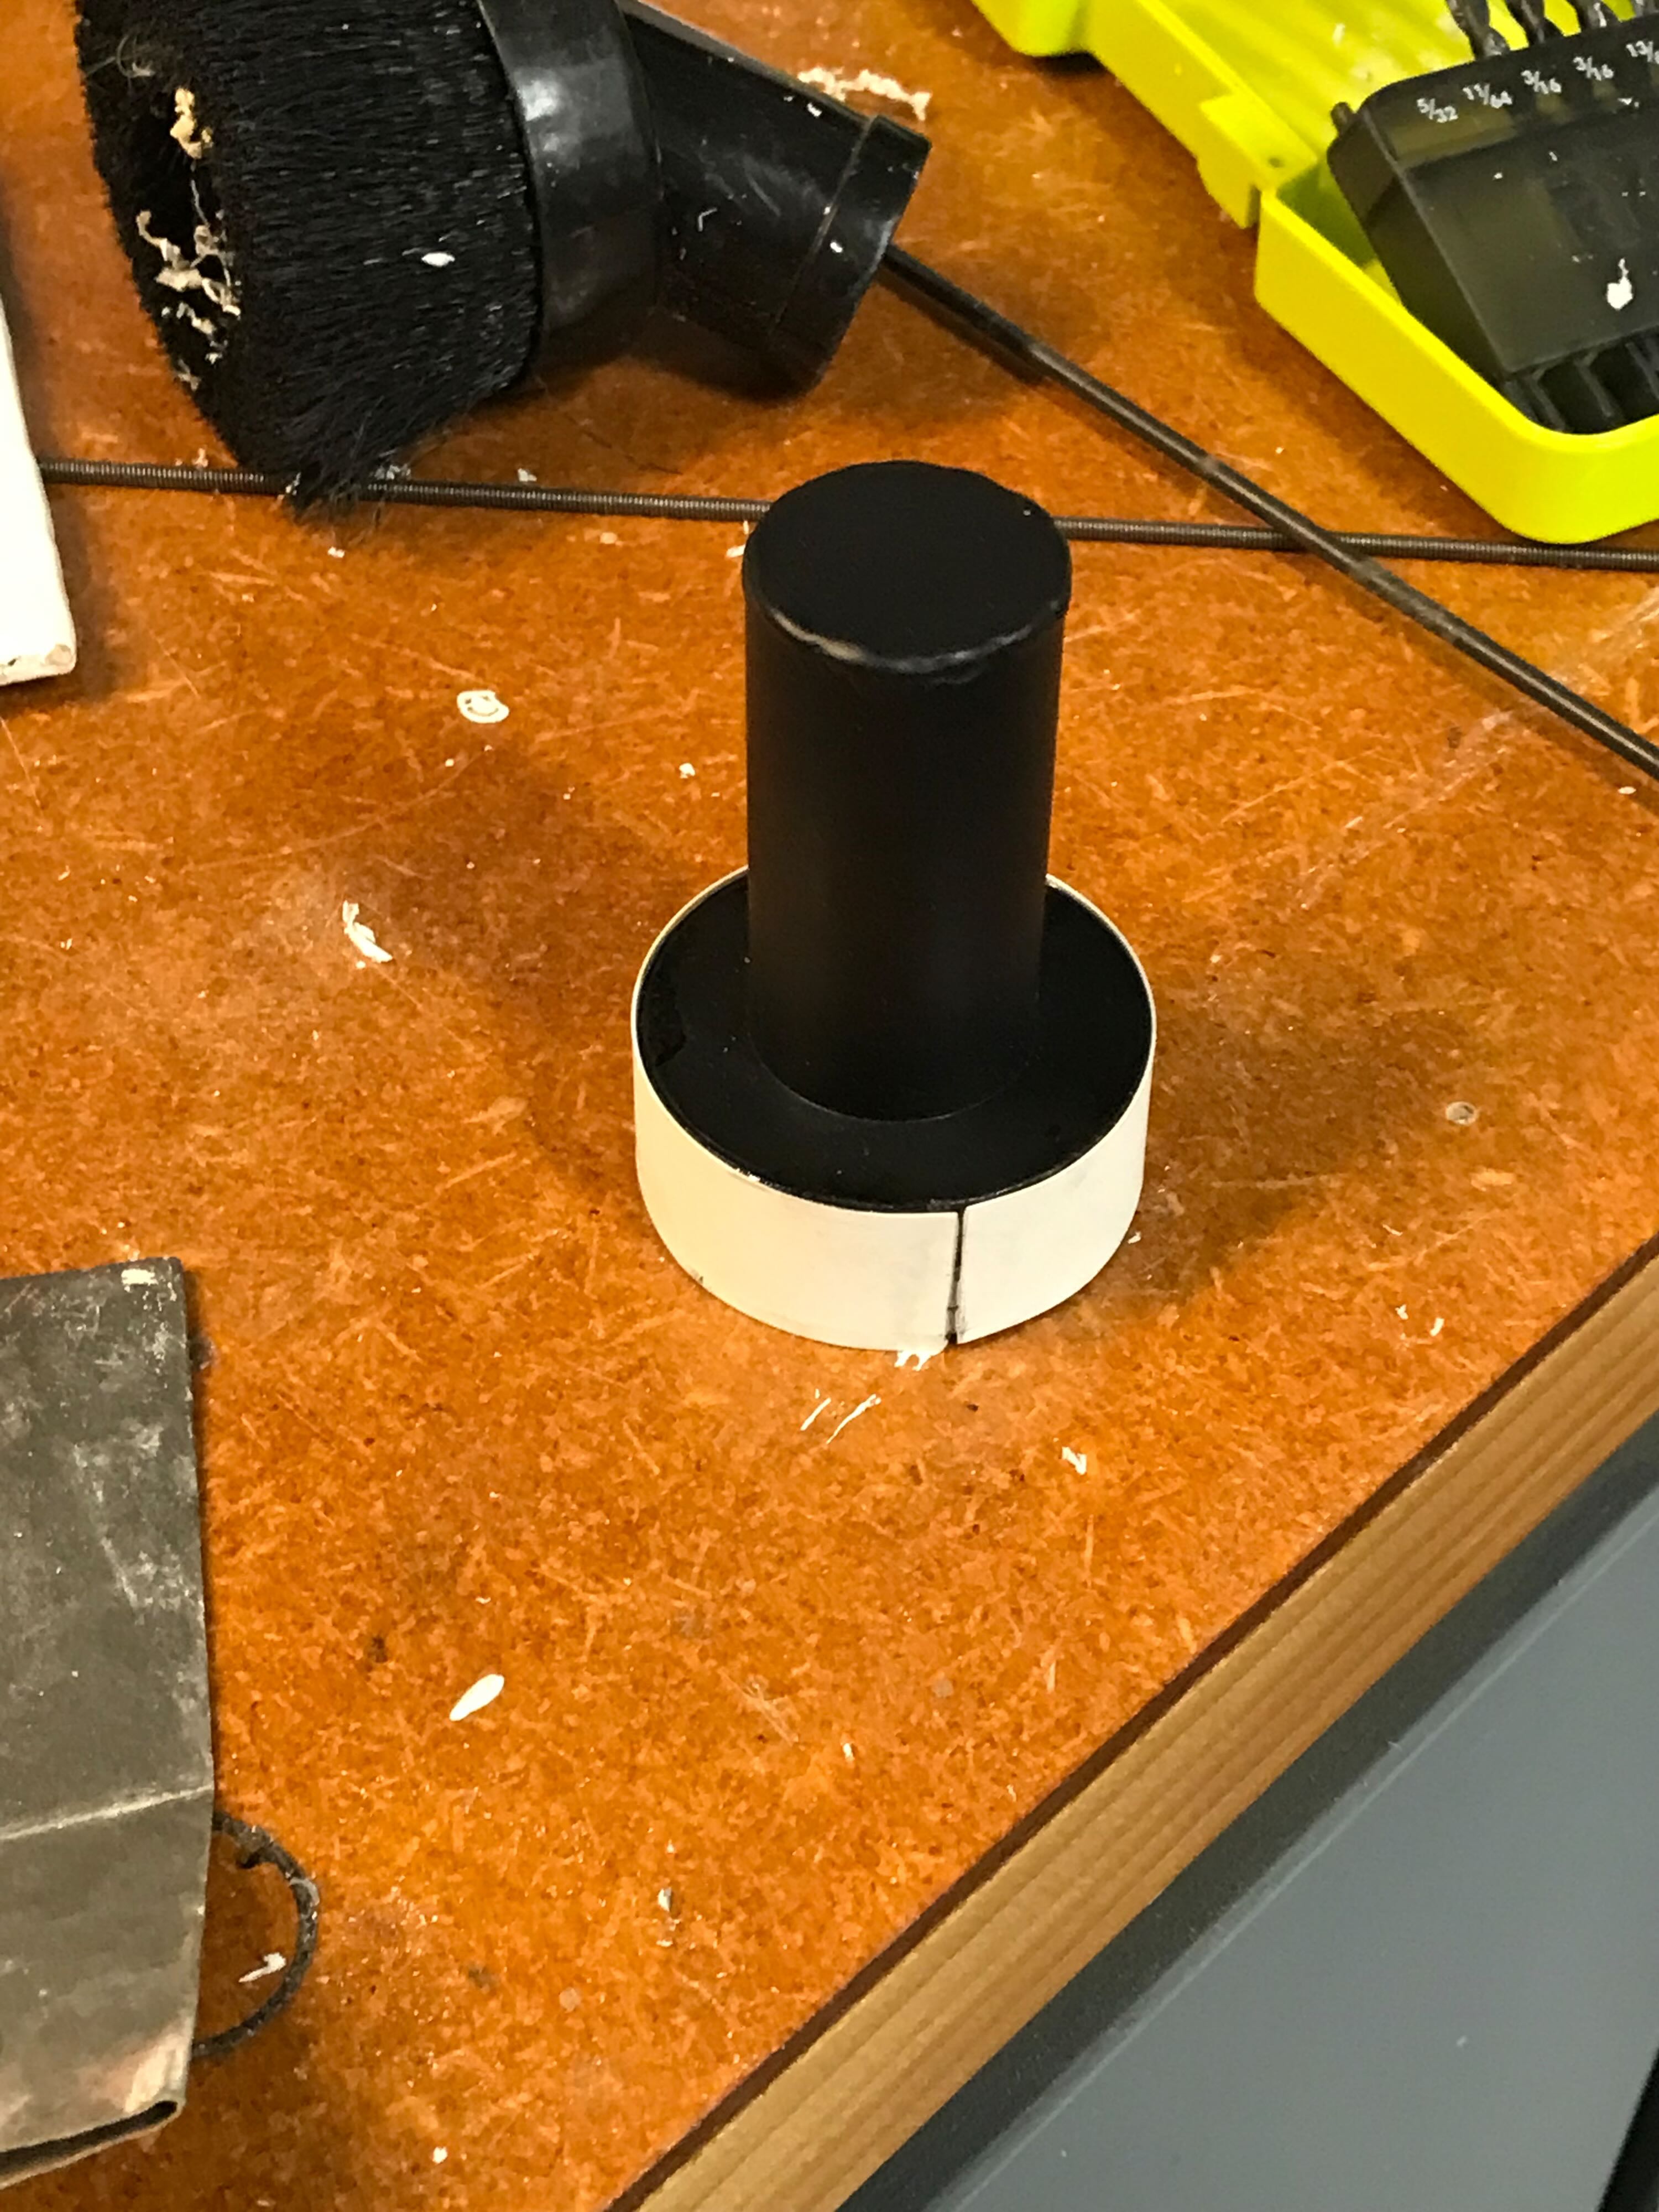
The resin booster tube plug was very wobbly inside the aluminum tube, so I epoxied some thin plastic around its circumference to create a tighter fit. I would epoxy this into the tube with the top mounting bolt going into it too.
Re: Building a Benofkent Props Proton Pack for fellow 'Buster
Posted: July 27th, 2022, 11:57 pm
by WShawn
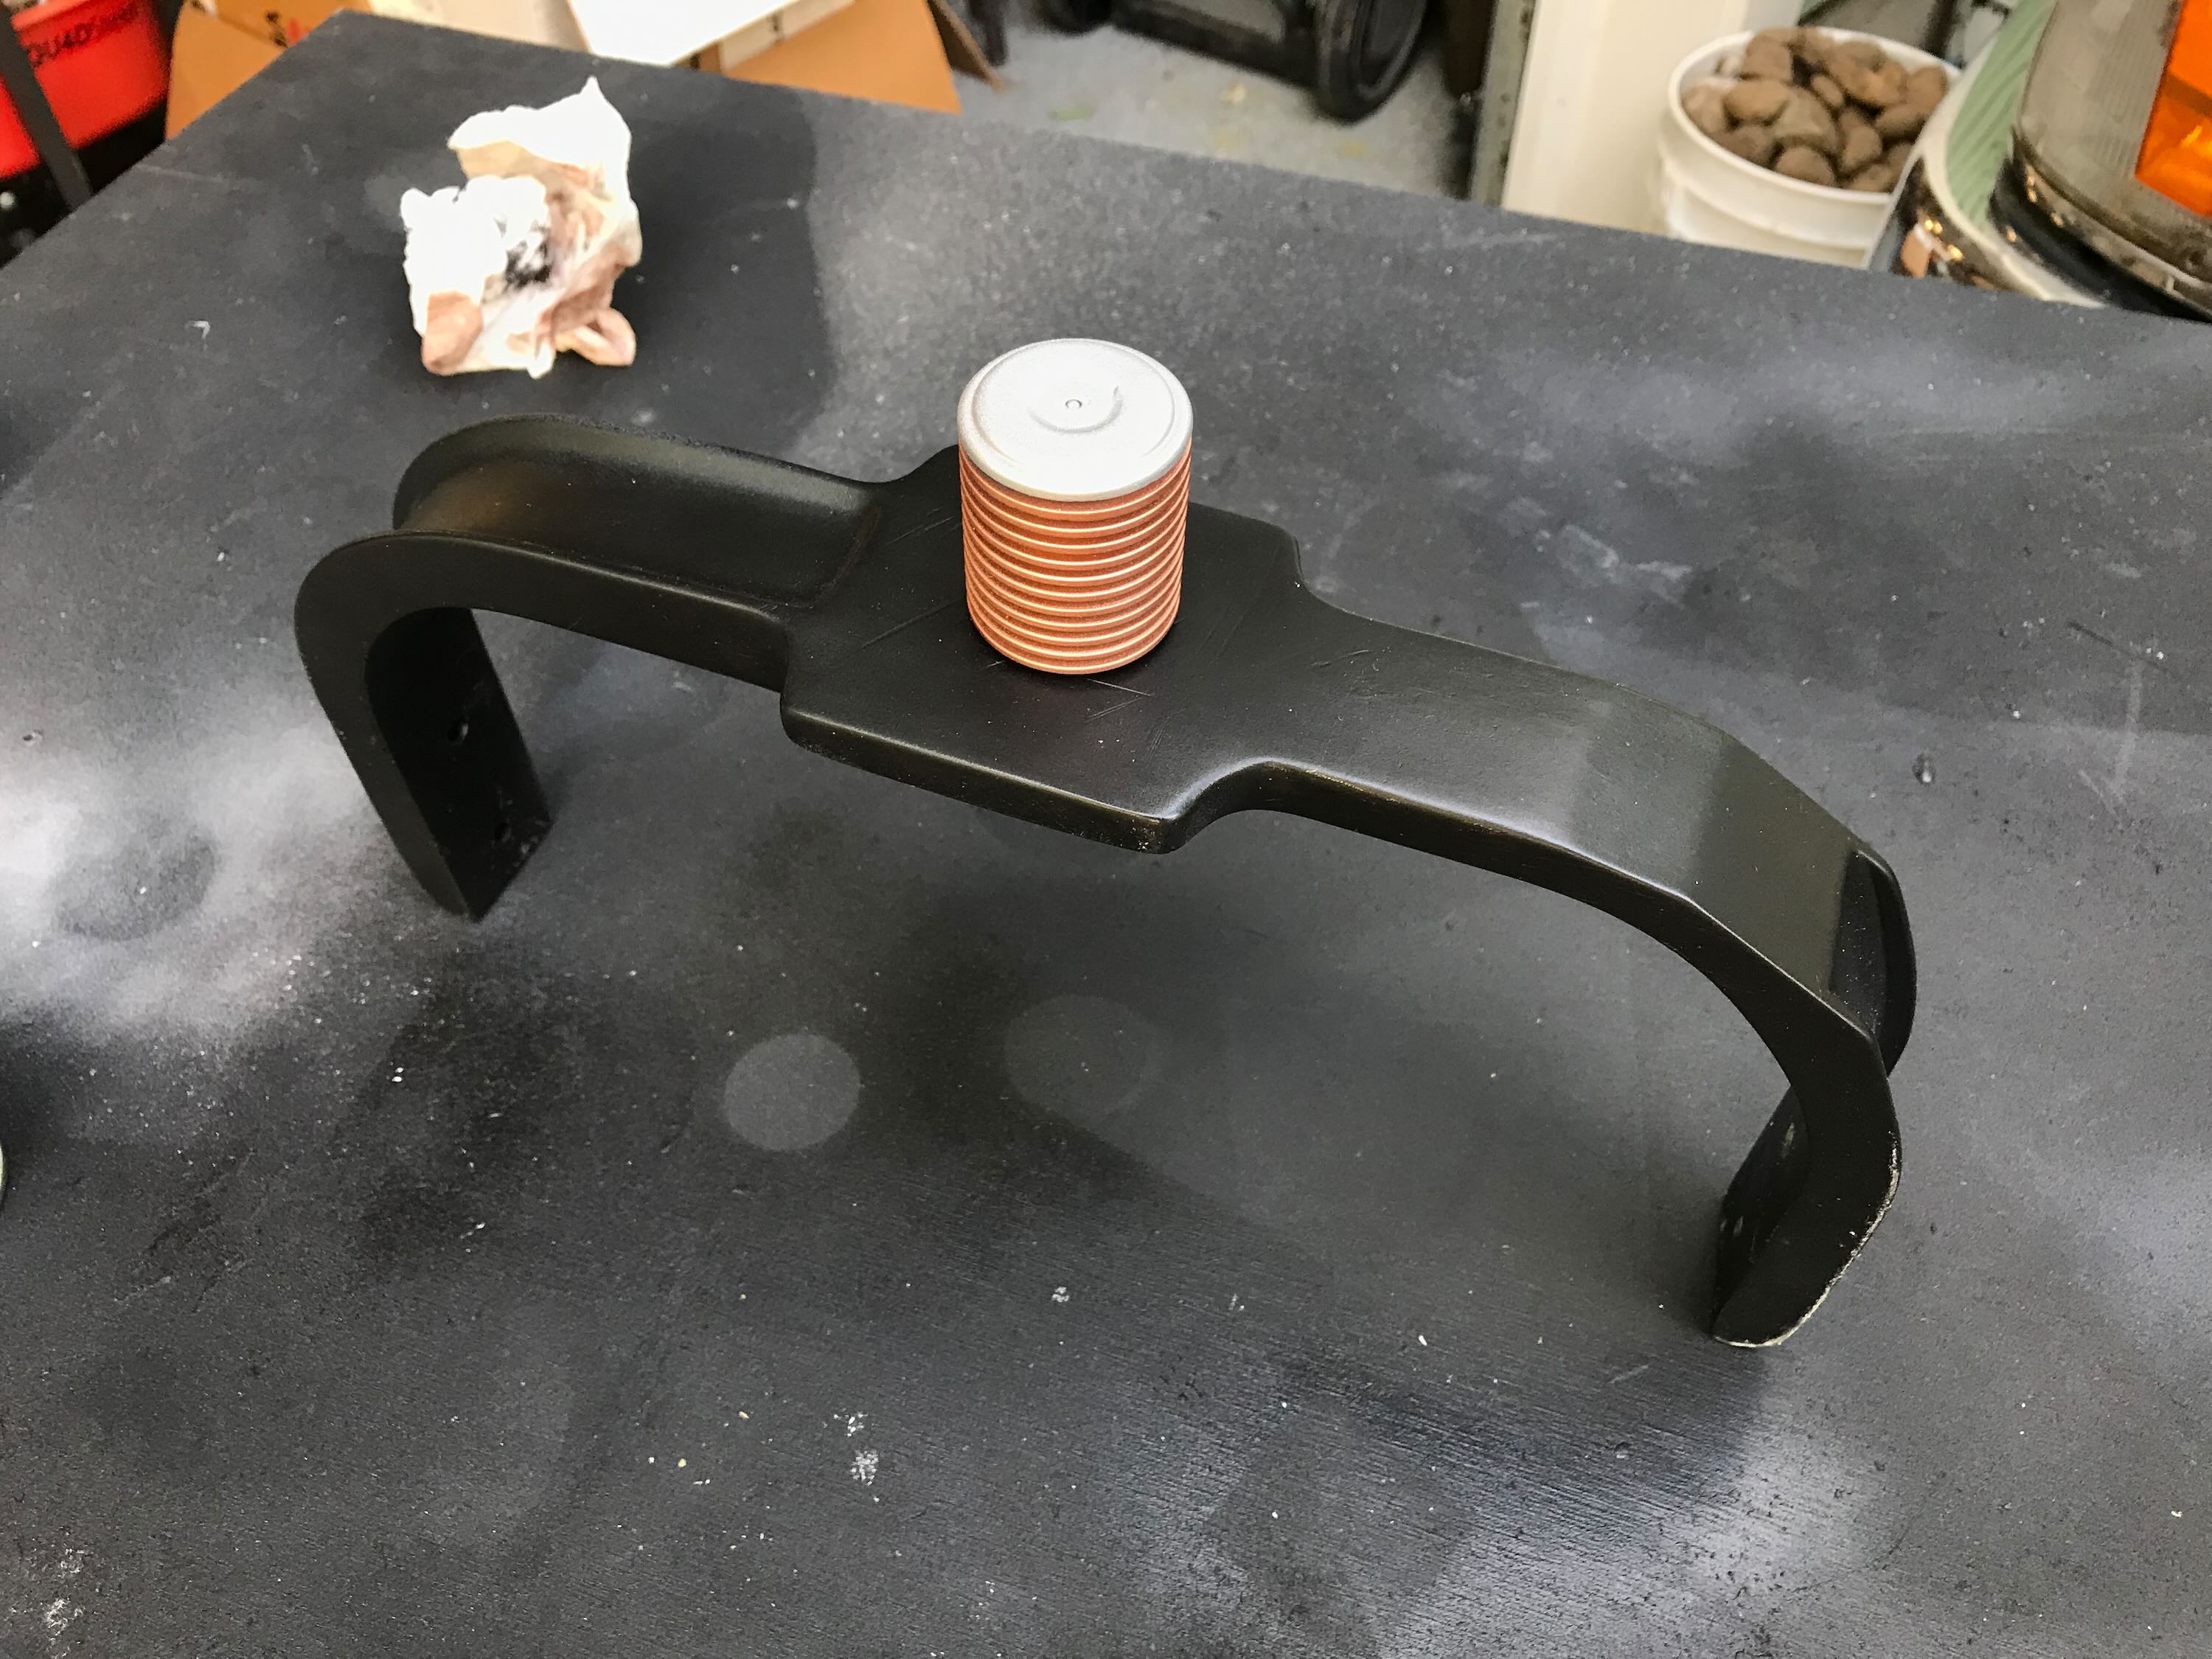
6/27/22 - The aluminum brackets came as four separate pieces which I glued together with epoxy to make two parts.

The hole for the hose pipe was a little too small, so I had to drum sand that out a bit.
I used two pieces of copper wire from some scrap Romex to keep the blue tube on the Ion Arm from kinking (mostly).

Re: Building a Benofkent Props Proton Pack for fellow 'Buster
Posted: July 28th, 2022, 12:02 am
by WShawn
6/28/22 - I bought some Testors enamel copper paint, thinned it down, and airbrushed it onto the shock mount.
Once dry, I masked that and painted the end with a rattle can of aluminum.
Temporary assembly of the bumper.
I painted the main shell with Rustoleum Satin Black. I had a lot of trouble getting an even finish, so I later oversprayed this with Krylon Clear Satin. This helped even out the sheen, especially the very glossy areas.
Re: Building a Benofkent Props Proton Pack for fellow 'Buster
Posted: July 28th, 2022, 1:24 am
by WShawn
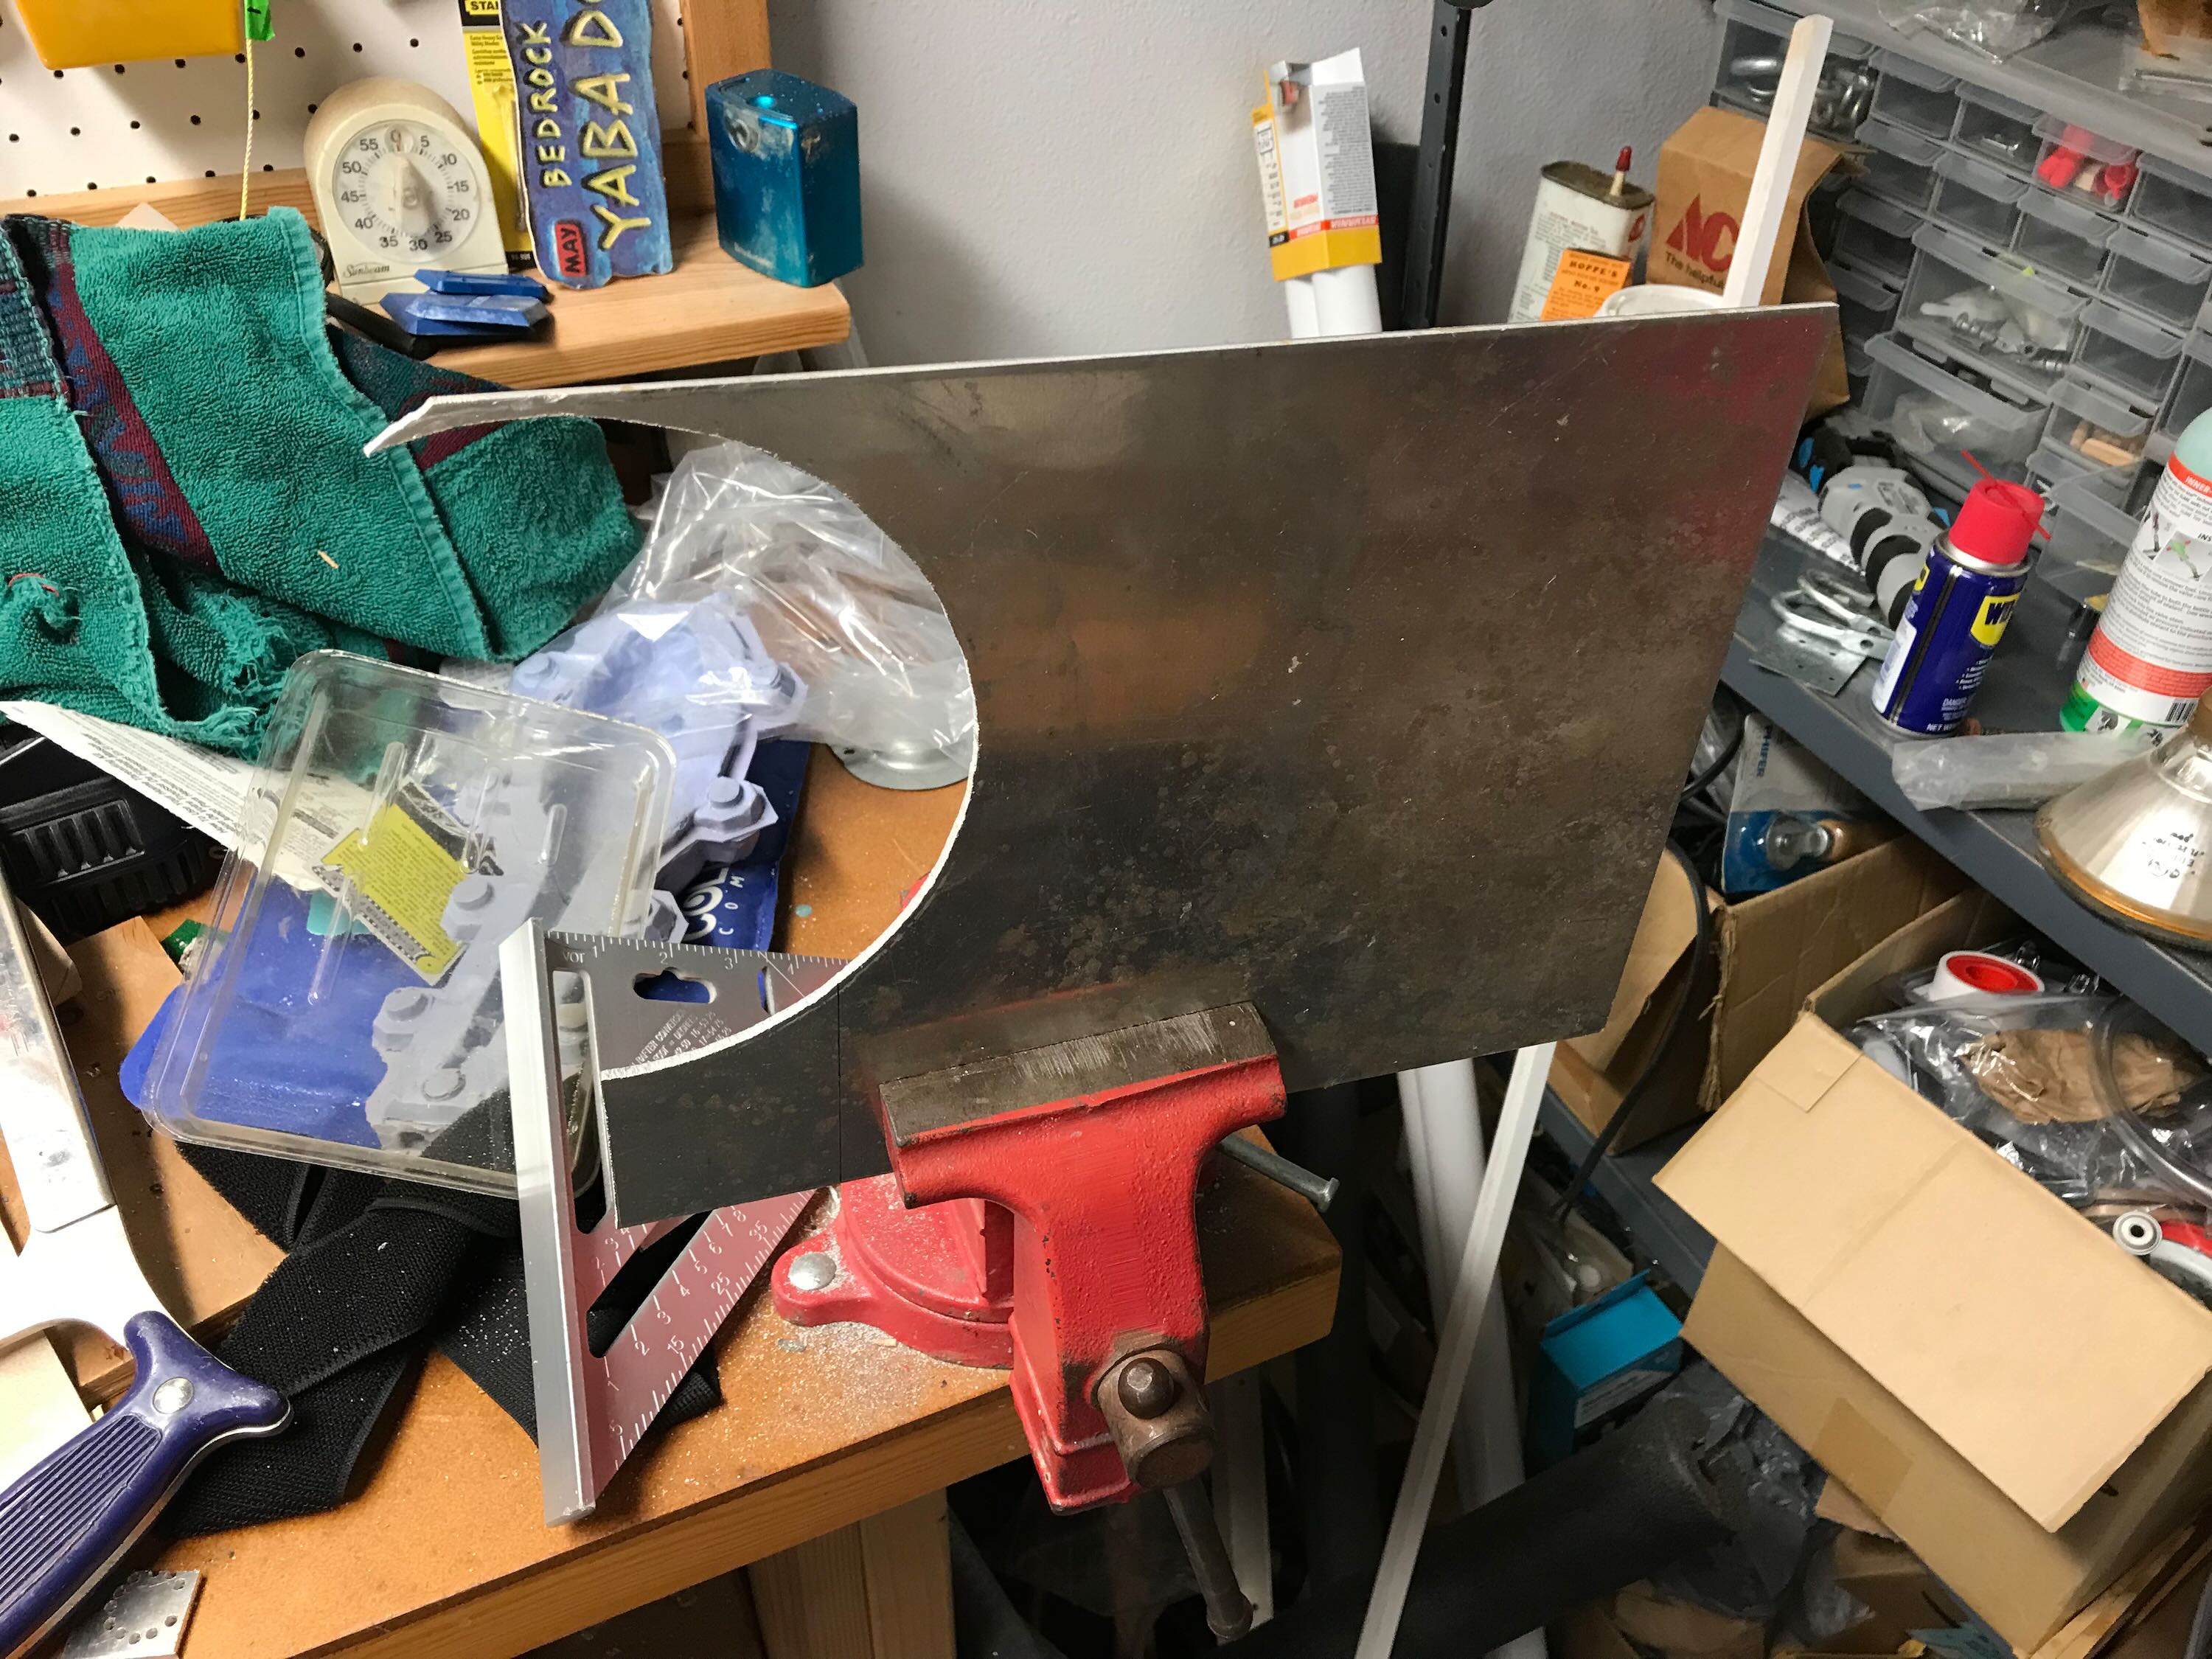
The V-mount kit Wes bought didn't include the aluminum support plate, so I hacksawed that out of a 1/8" piece of aluminum I've had kicking around since the early 90s.
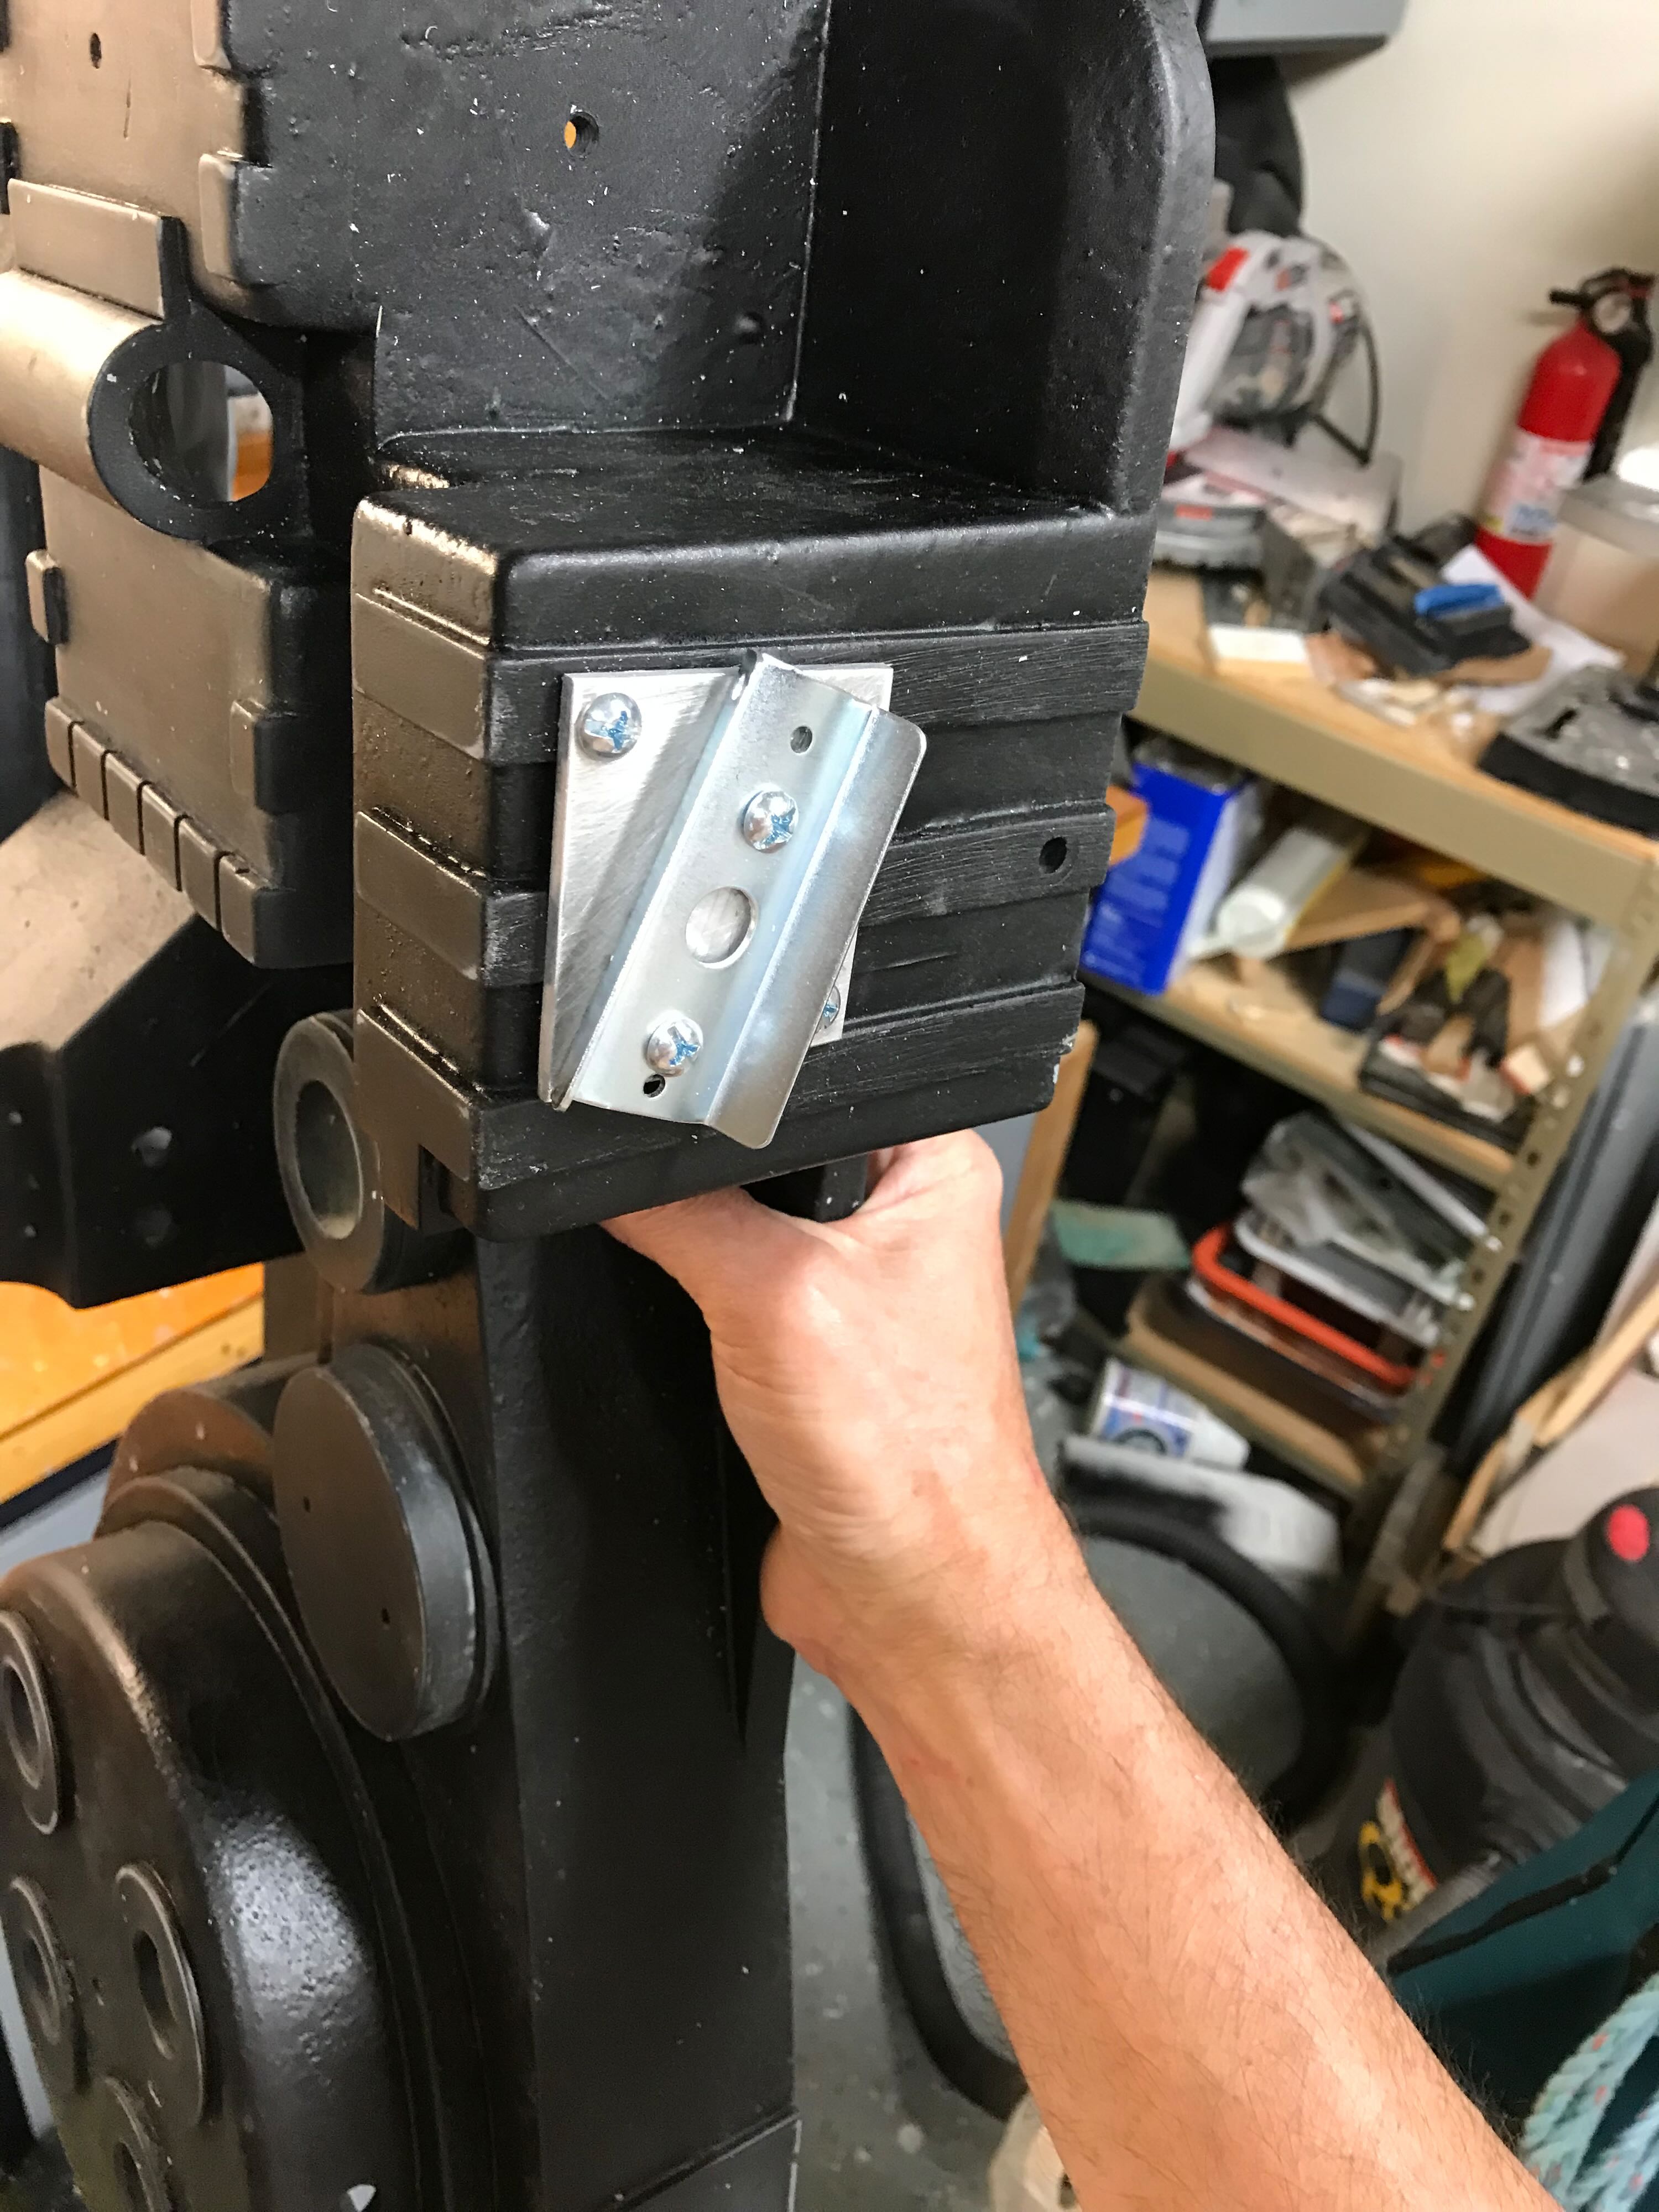
I was able to secure the outer plate to an inner plate with three bolts. The resin was too thick to fully anchor all four bolts, so the top left doesn't go through the inner plate or bolted to a nut. It seems pretty secure.
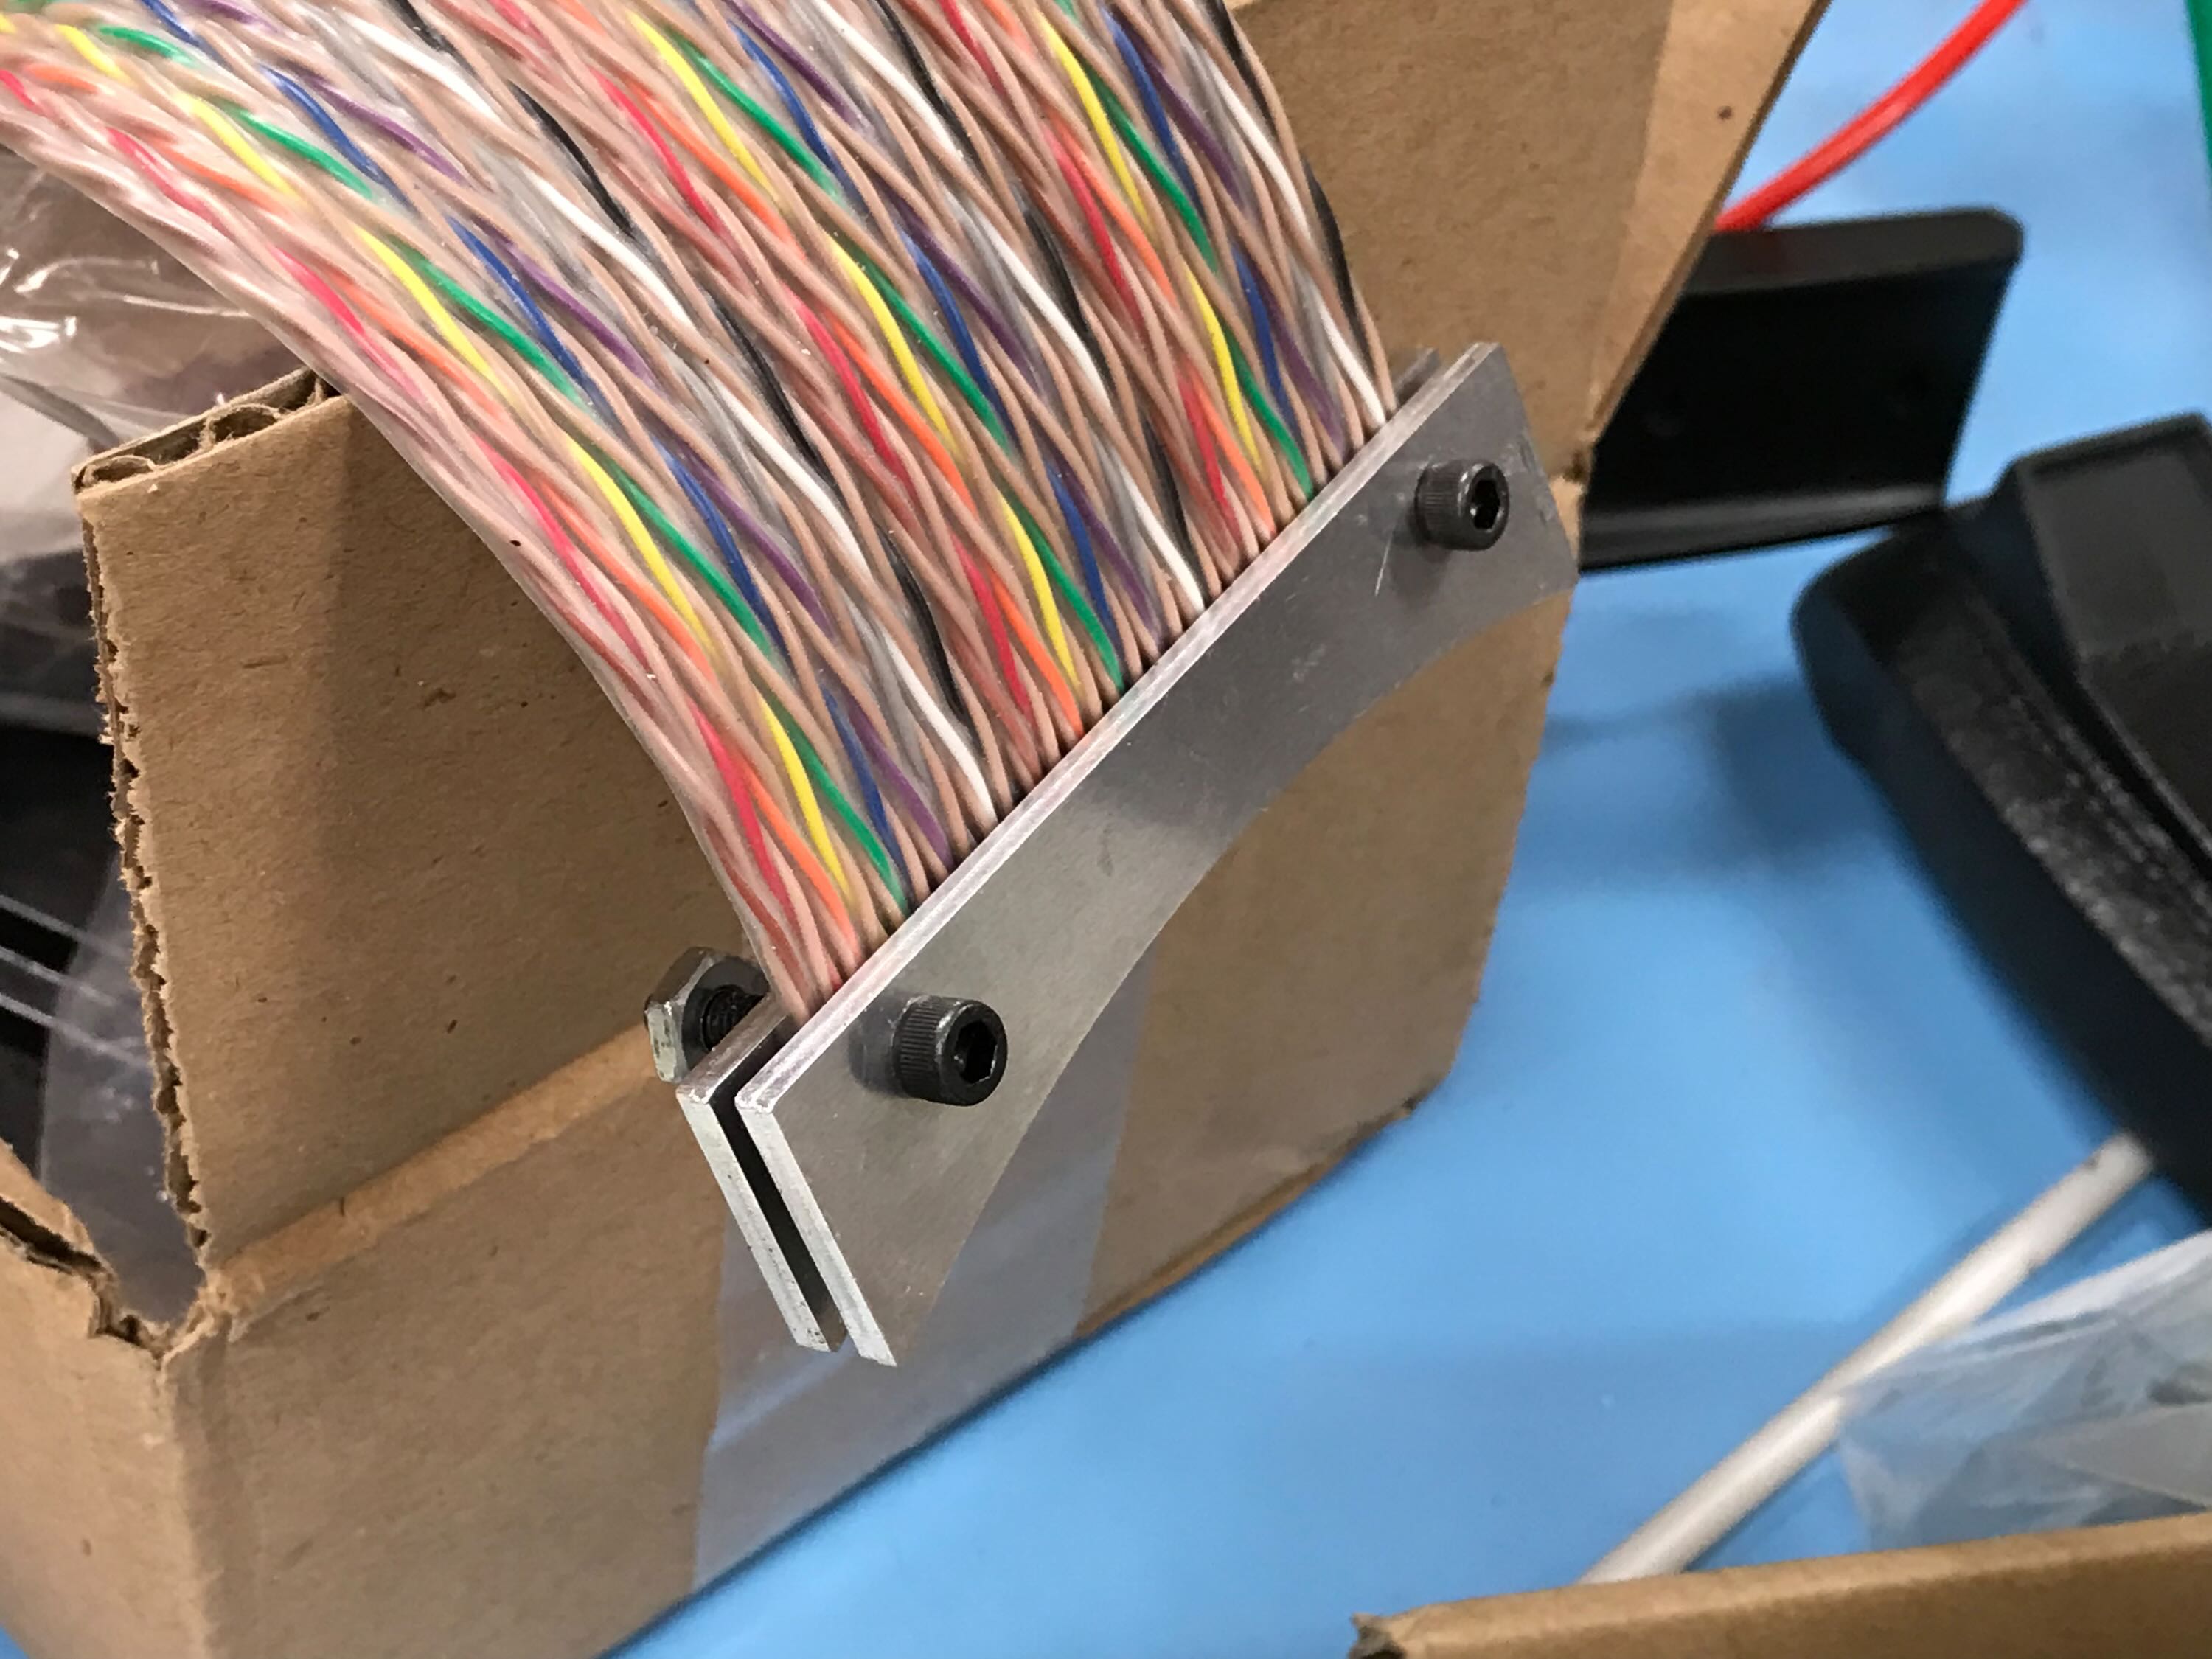
I had to trim the end of the ribbon cable a bit to clear the bolts in the aluminum bracket.
Re: Building a Benofkent Props Proton Pack for fellow 'Buster
Posted: July 28th, 2022, 1:32 am
by WShawn
Re: Building a Benofkent Props Proton Pack for fellow 'Buster
Posted: July 28th, 2022, 1:48 am
by WShawn
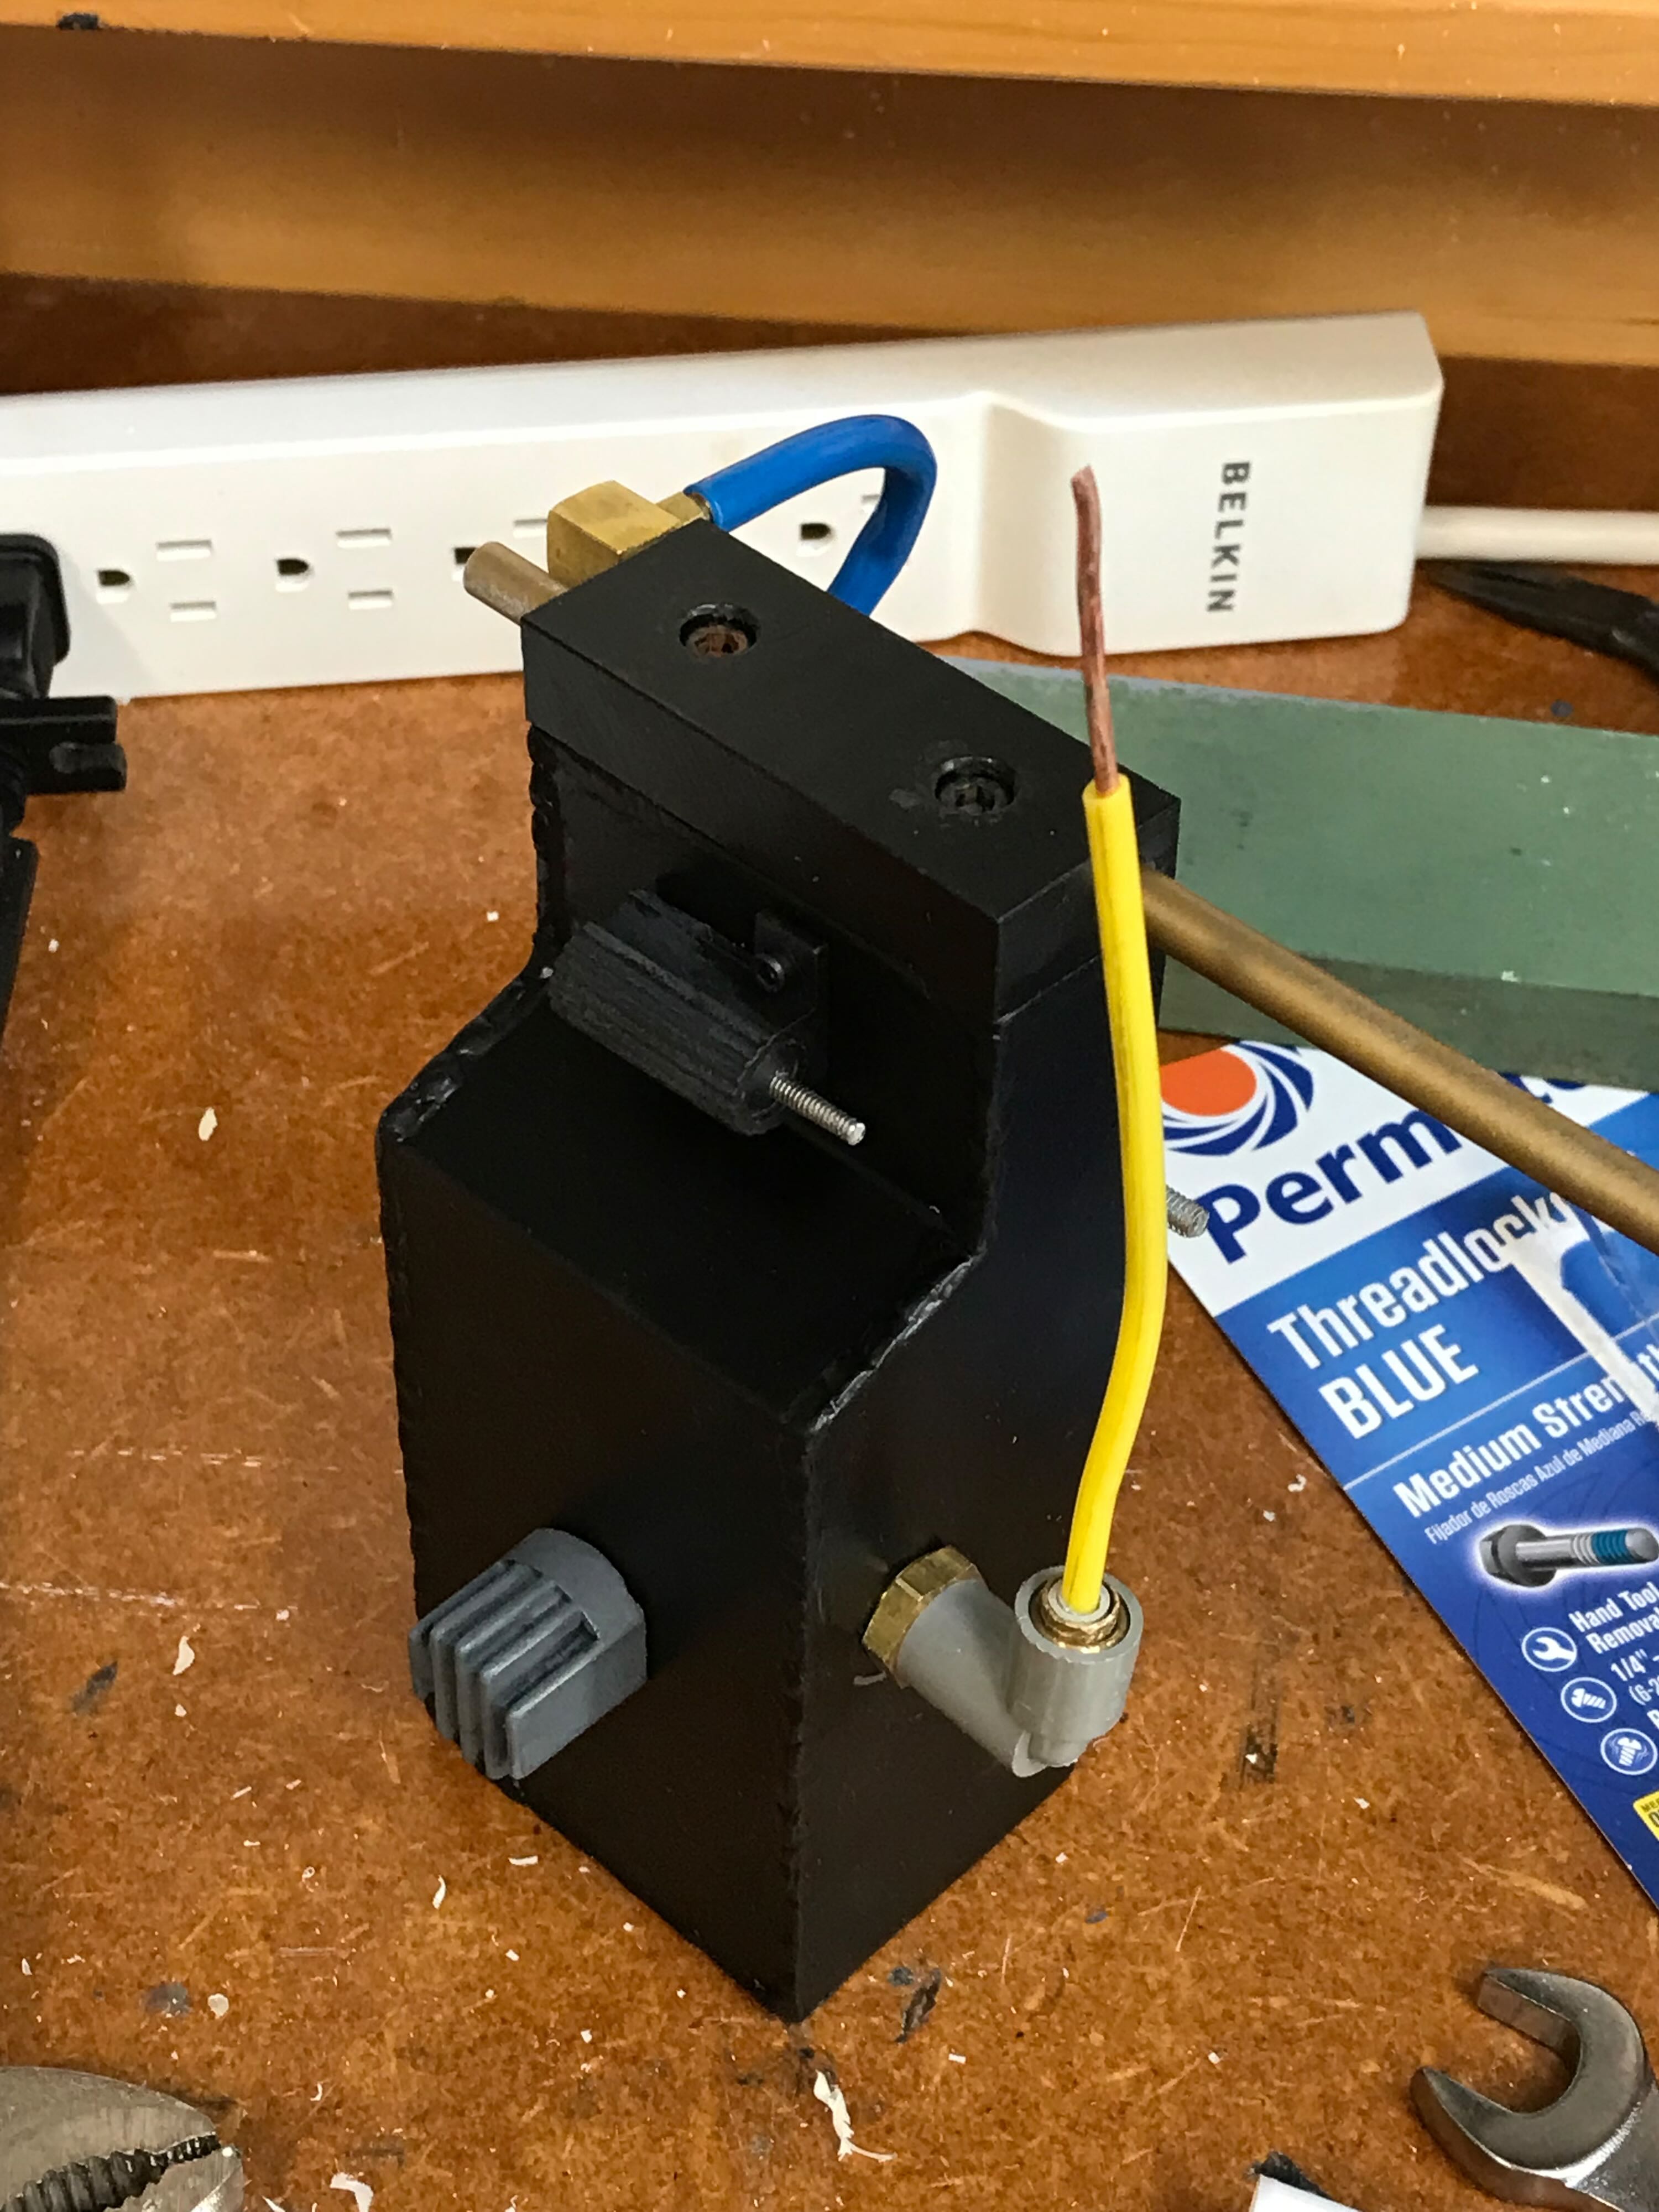
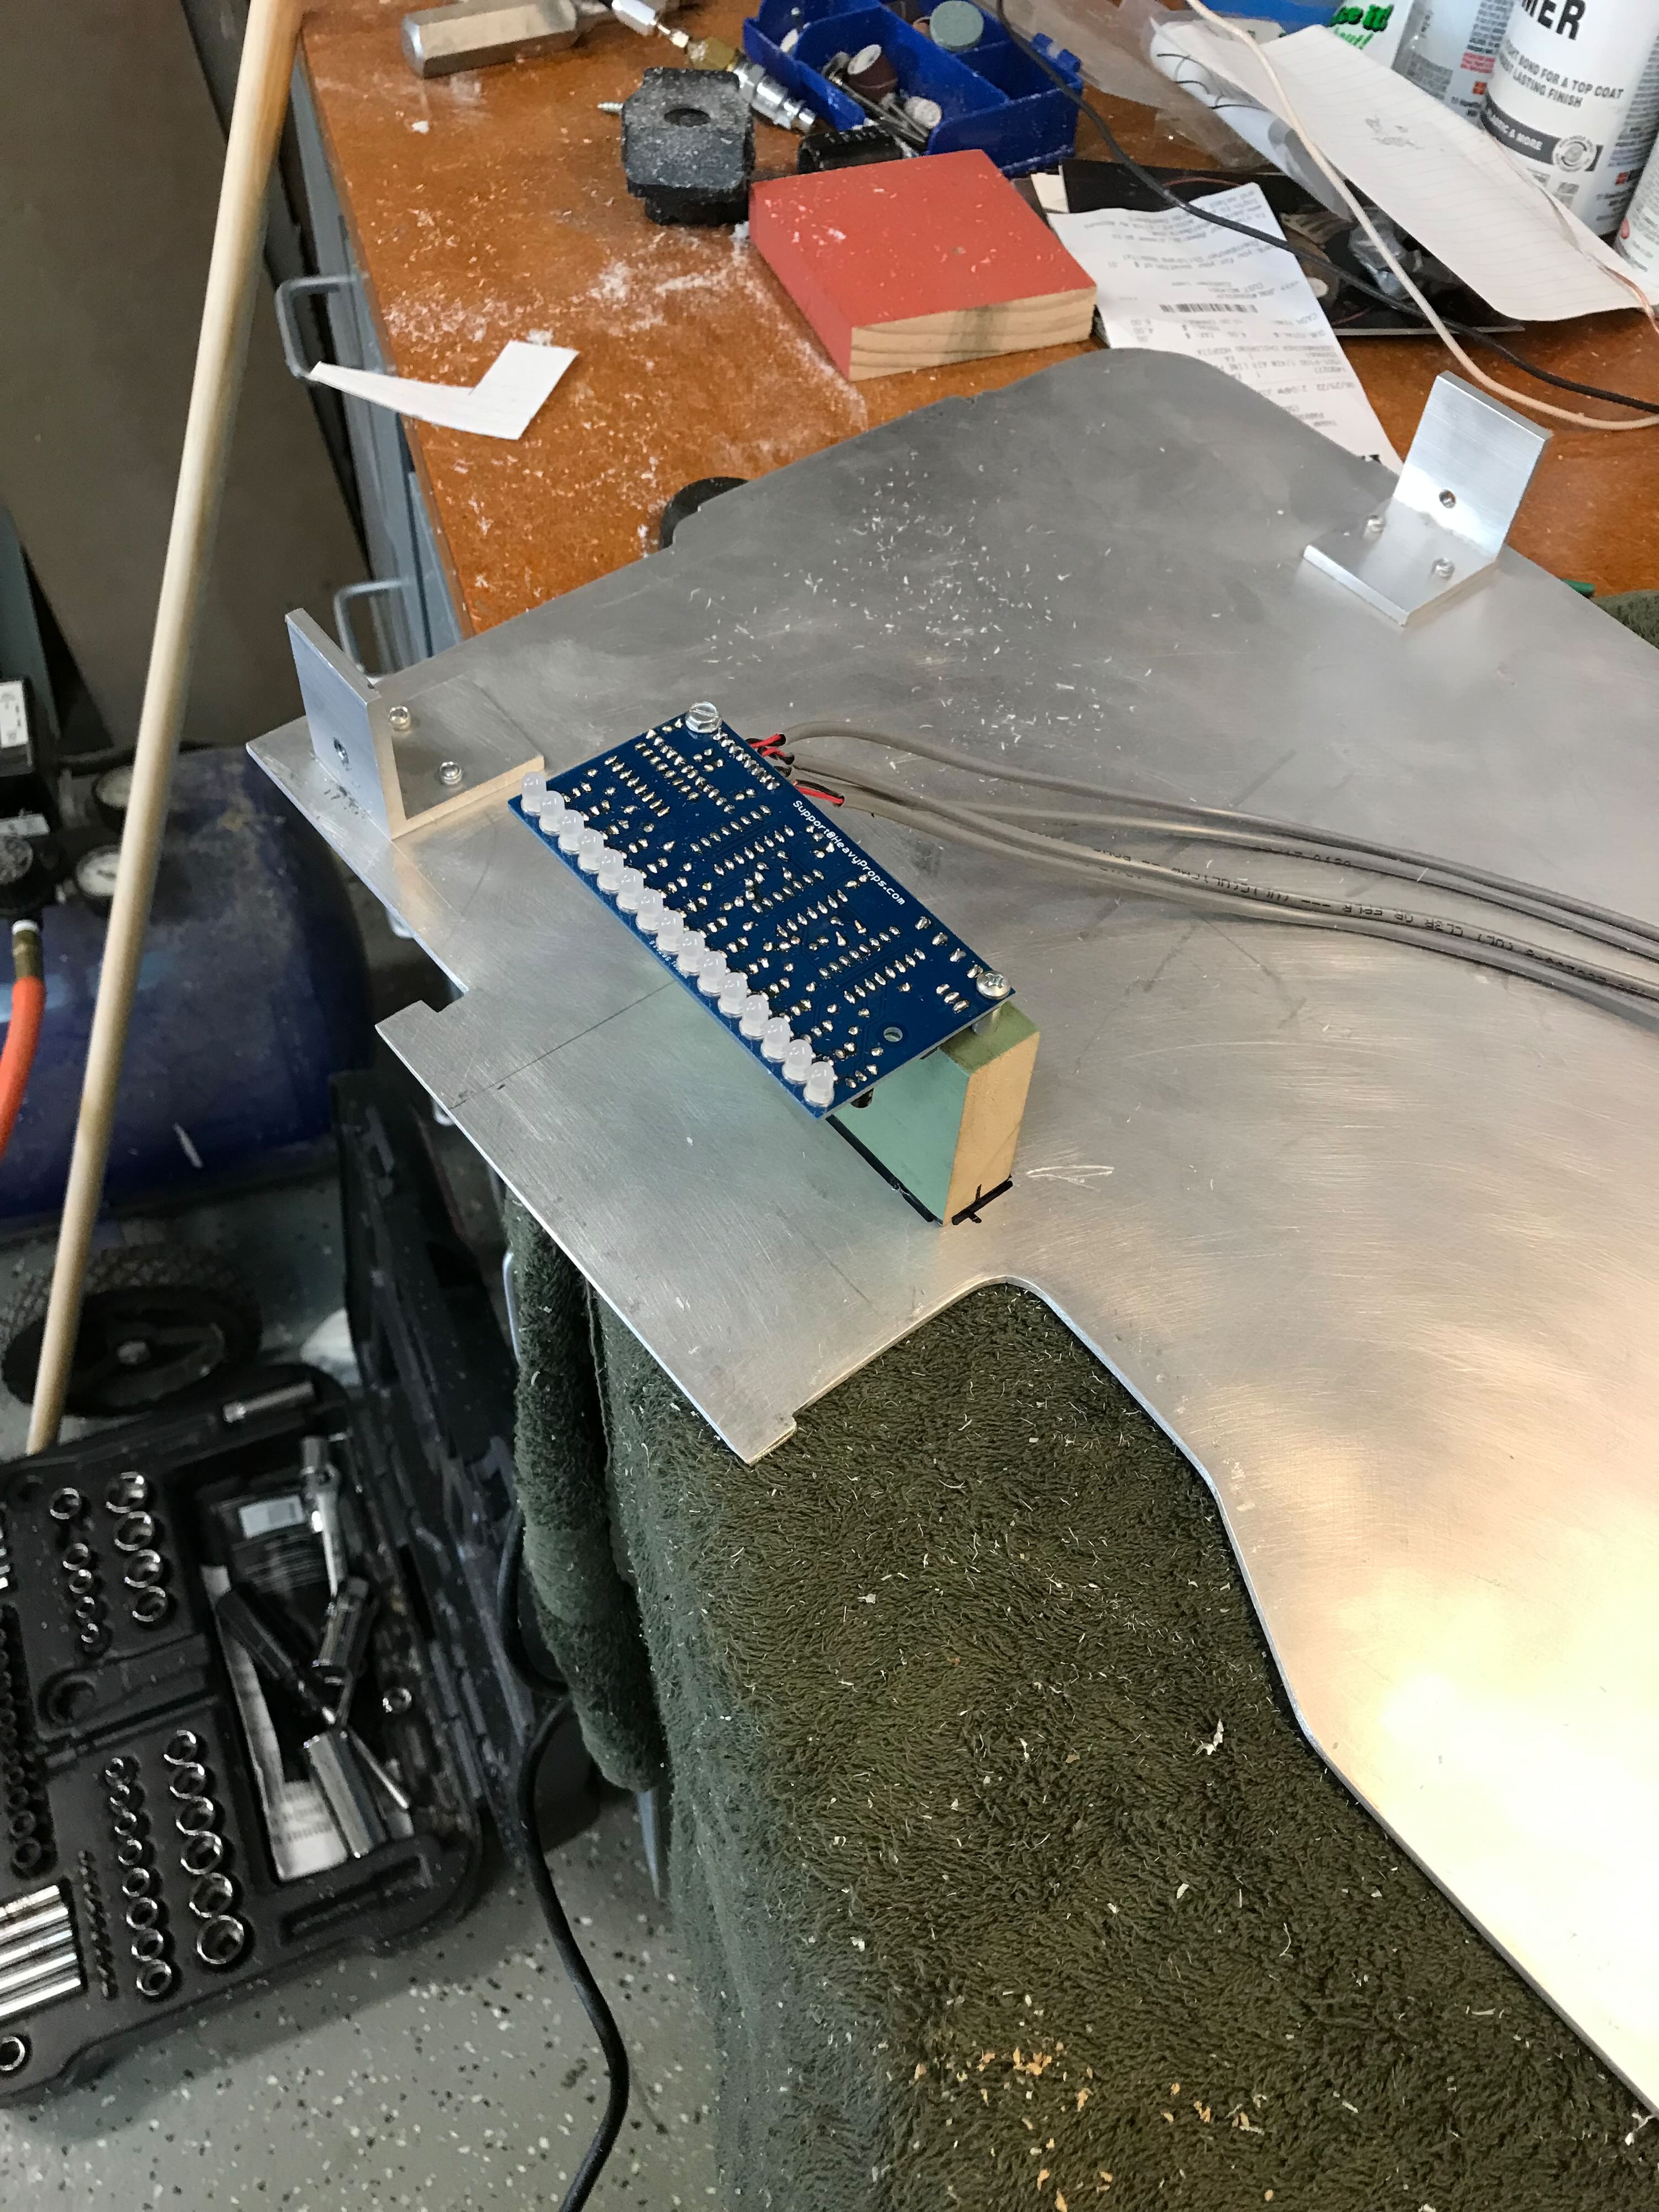
6/30/22 - The design of the PCB for the Power Cell lights left a little to be desired. The board was too wide to allow the LEDs to snug up close to the blue window. So unless you were looking almost straight into the power cell the LEDs would be obscured by the edges of the rectangular opening.
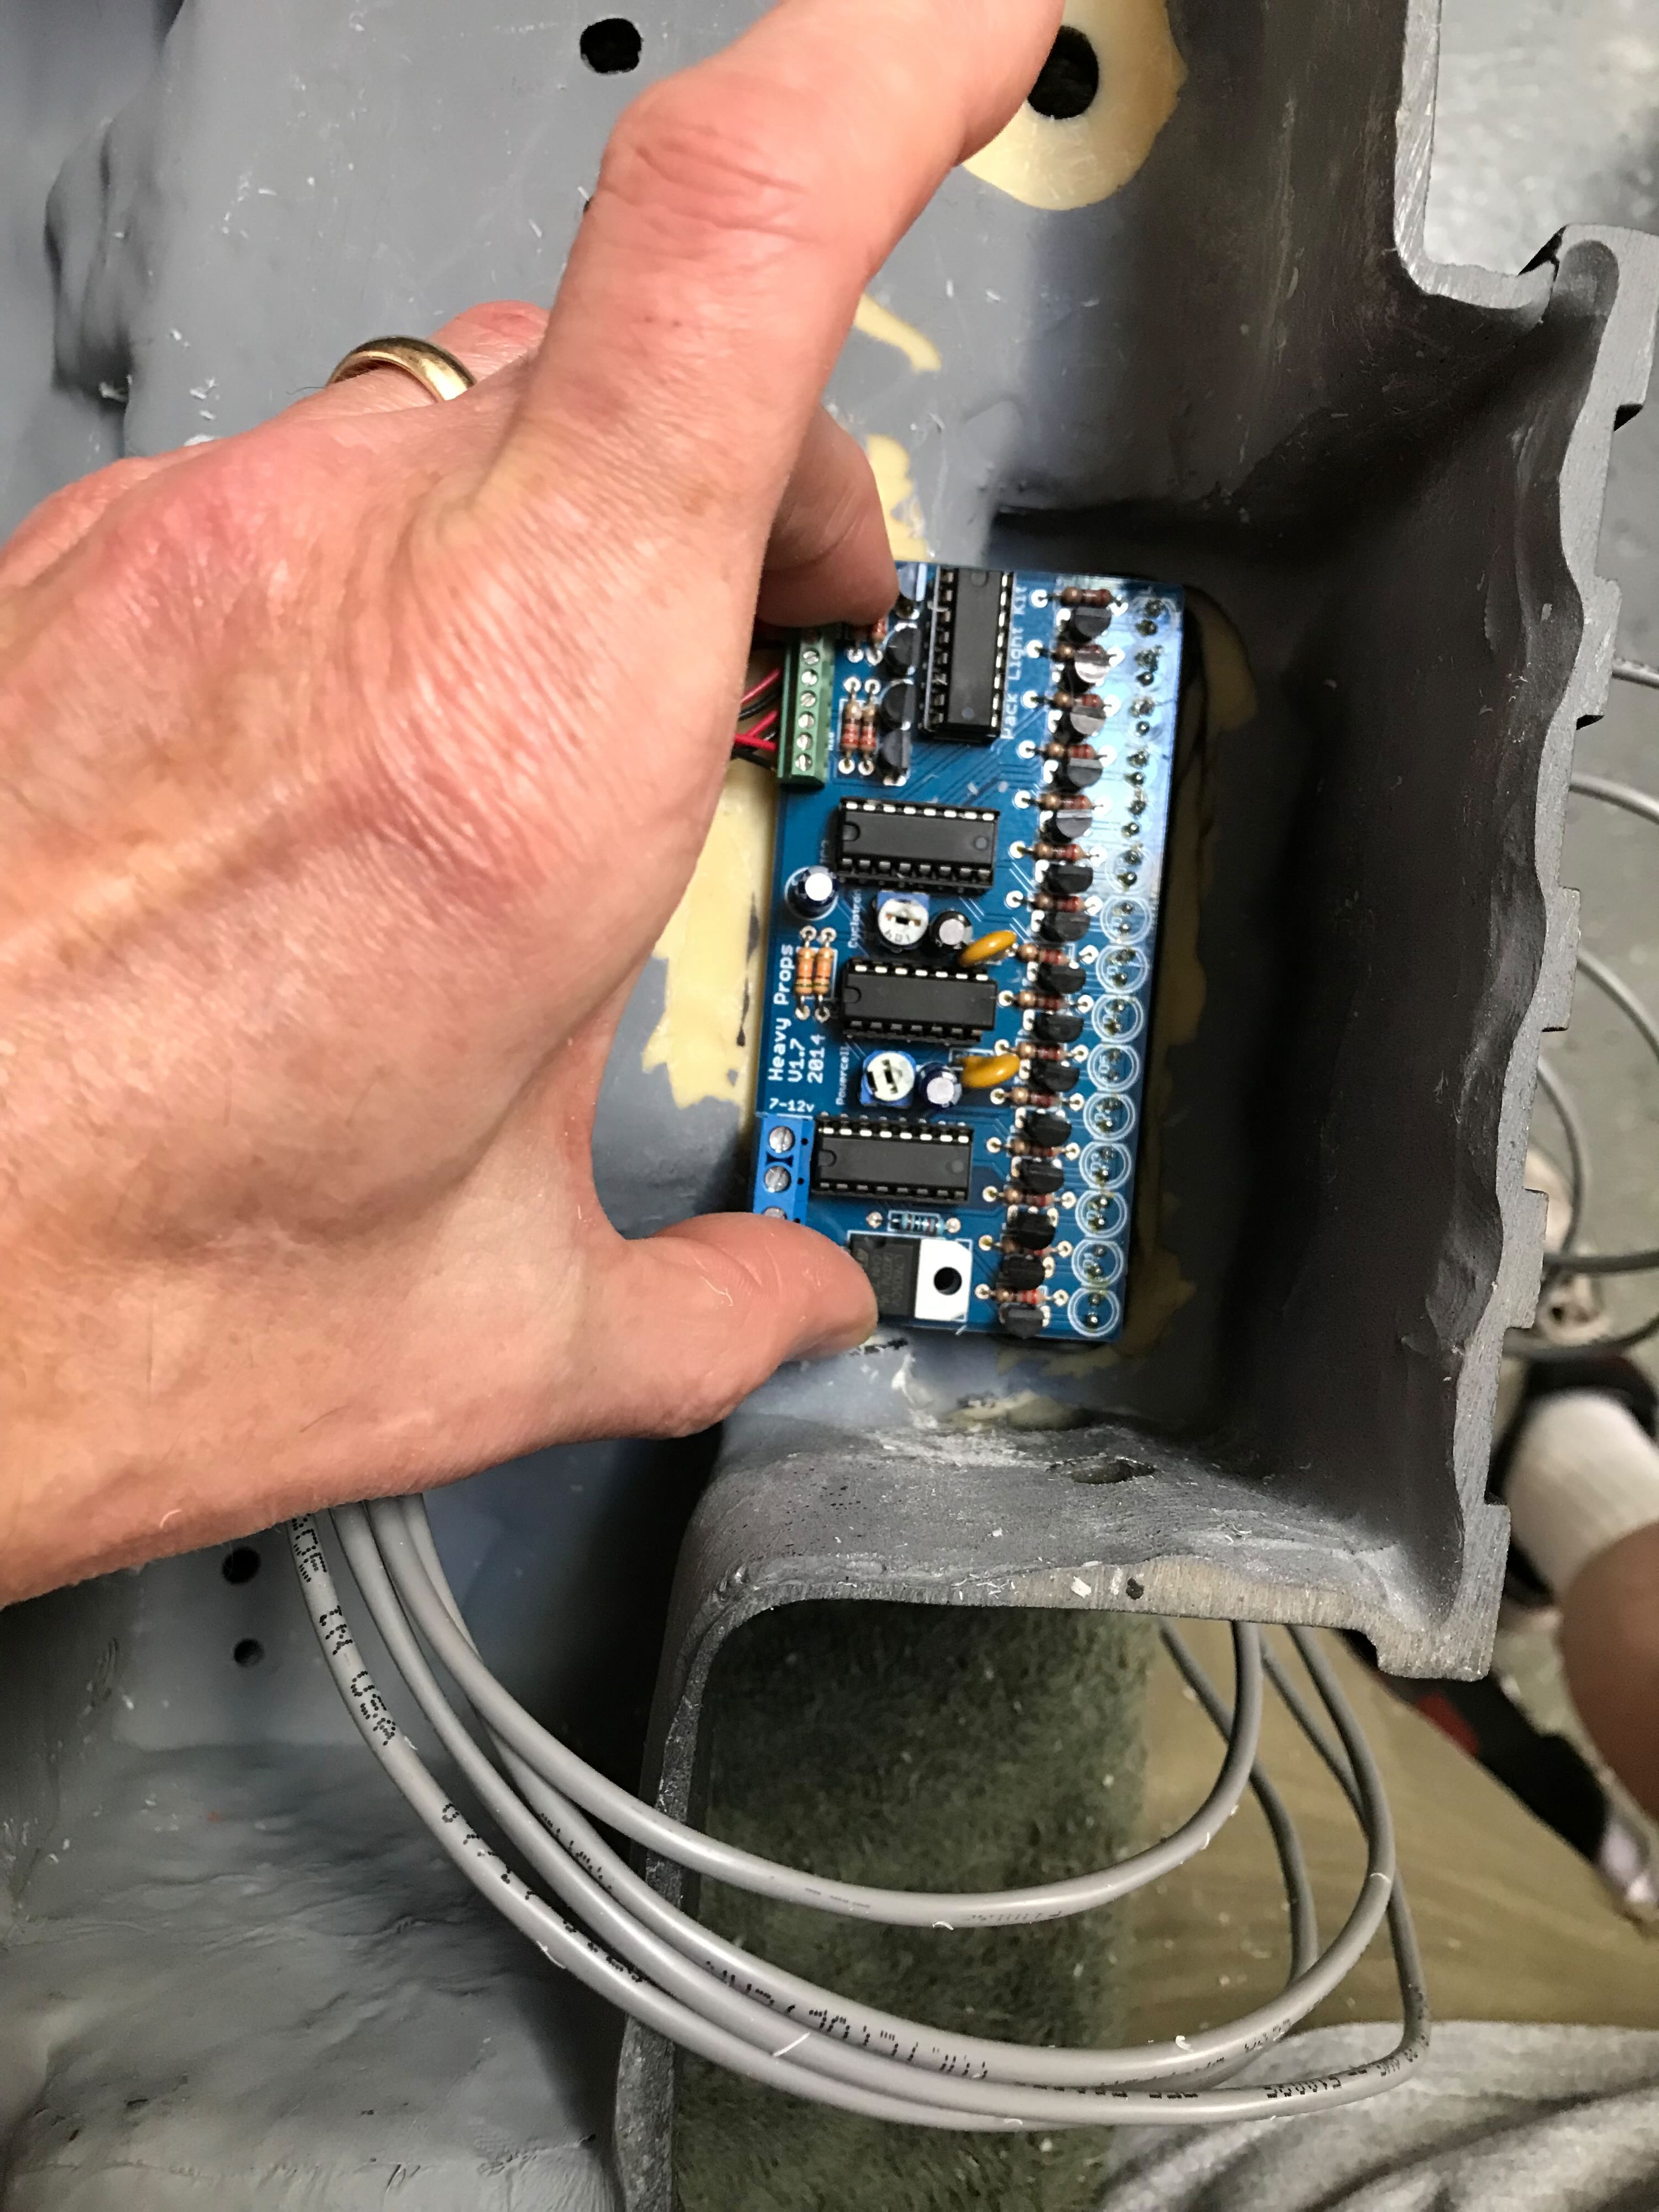
Most builds mount the Power Cell lights to a shaped piece of metal. As I was looking to save costs (and labor) I salvaged a piece of wood from my front porch bench I'd recently rebuilt to support the LEDs and PCB. I used a bit of aluminum tubing as spacers to clear the components on the PCB. Getting the LEDs to line up with the window took a fair amount of effort.

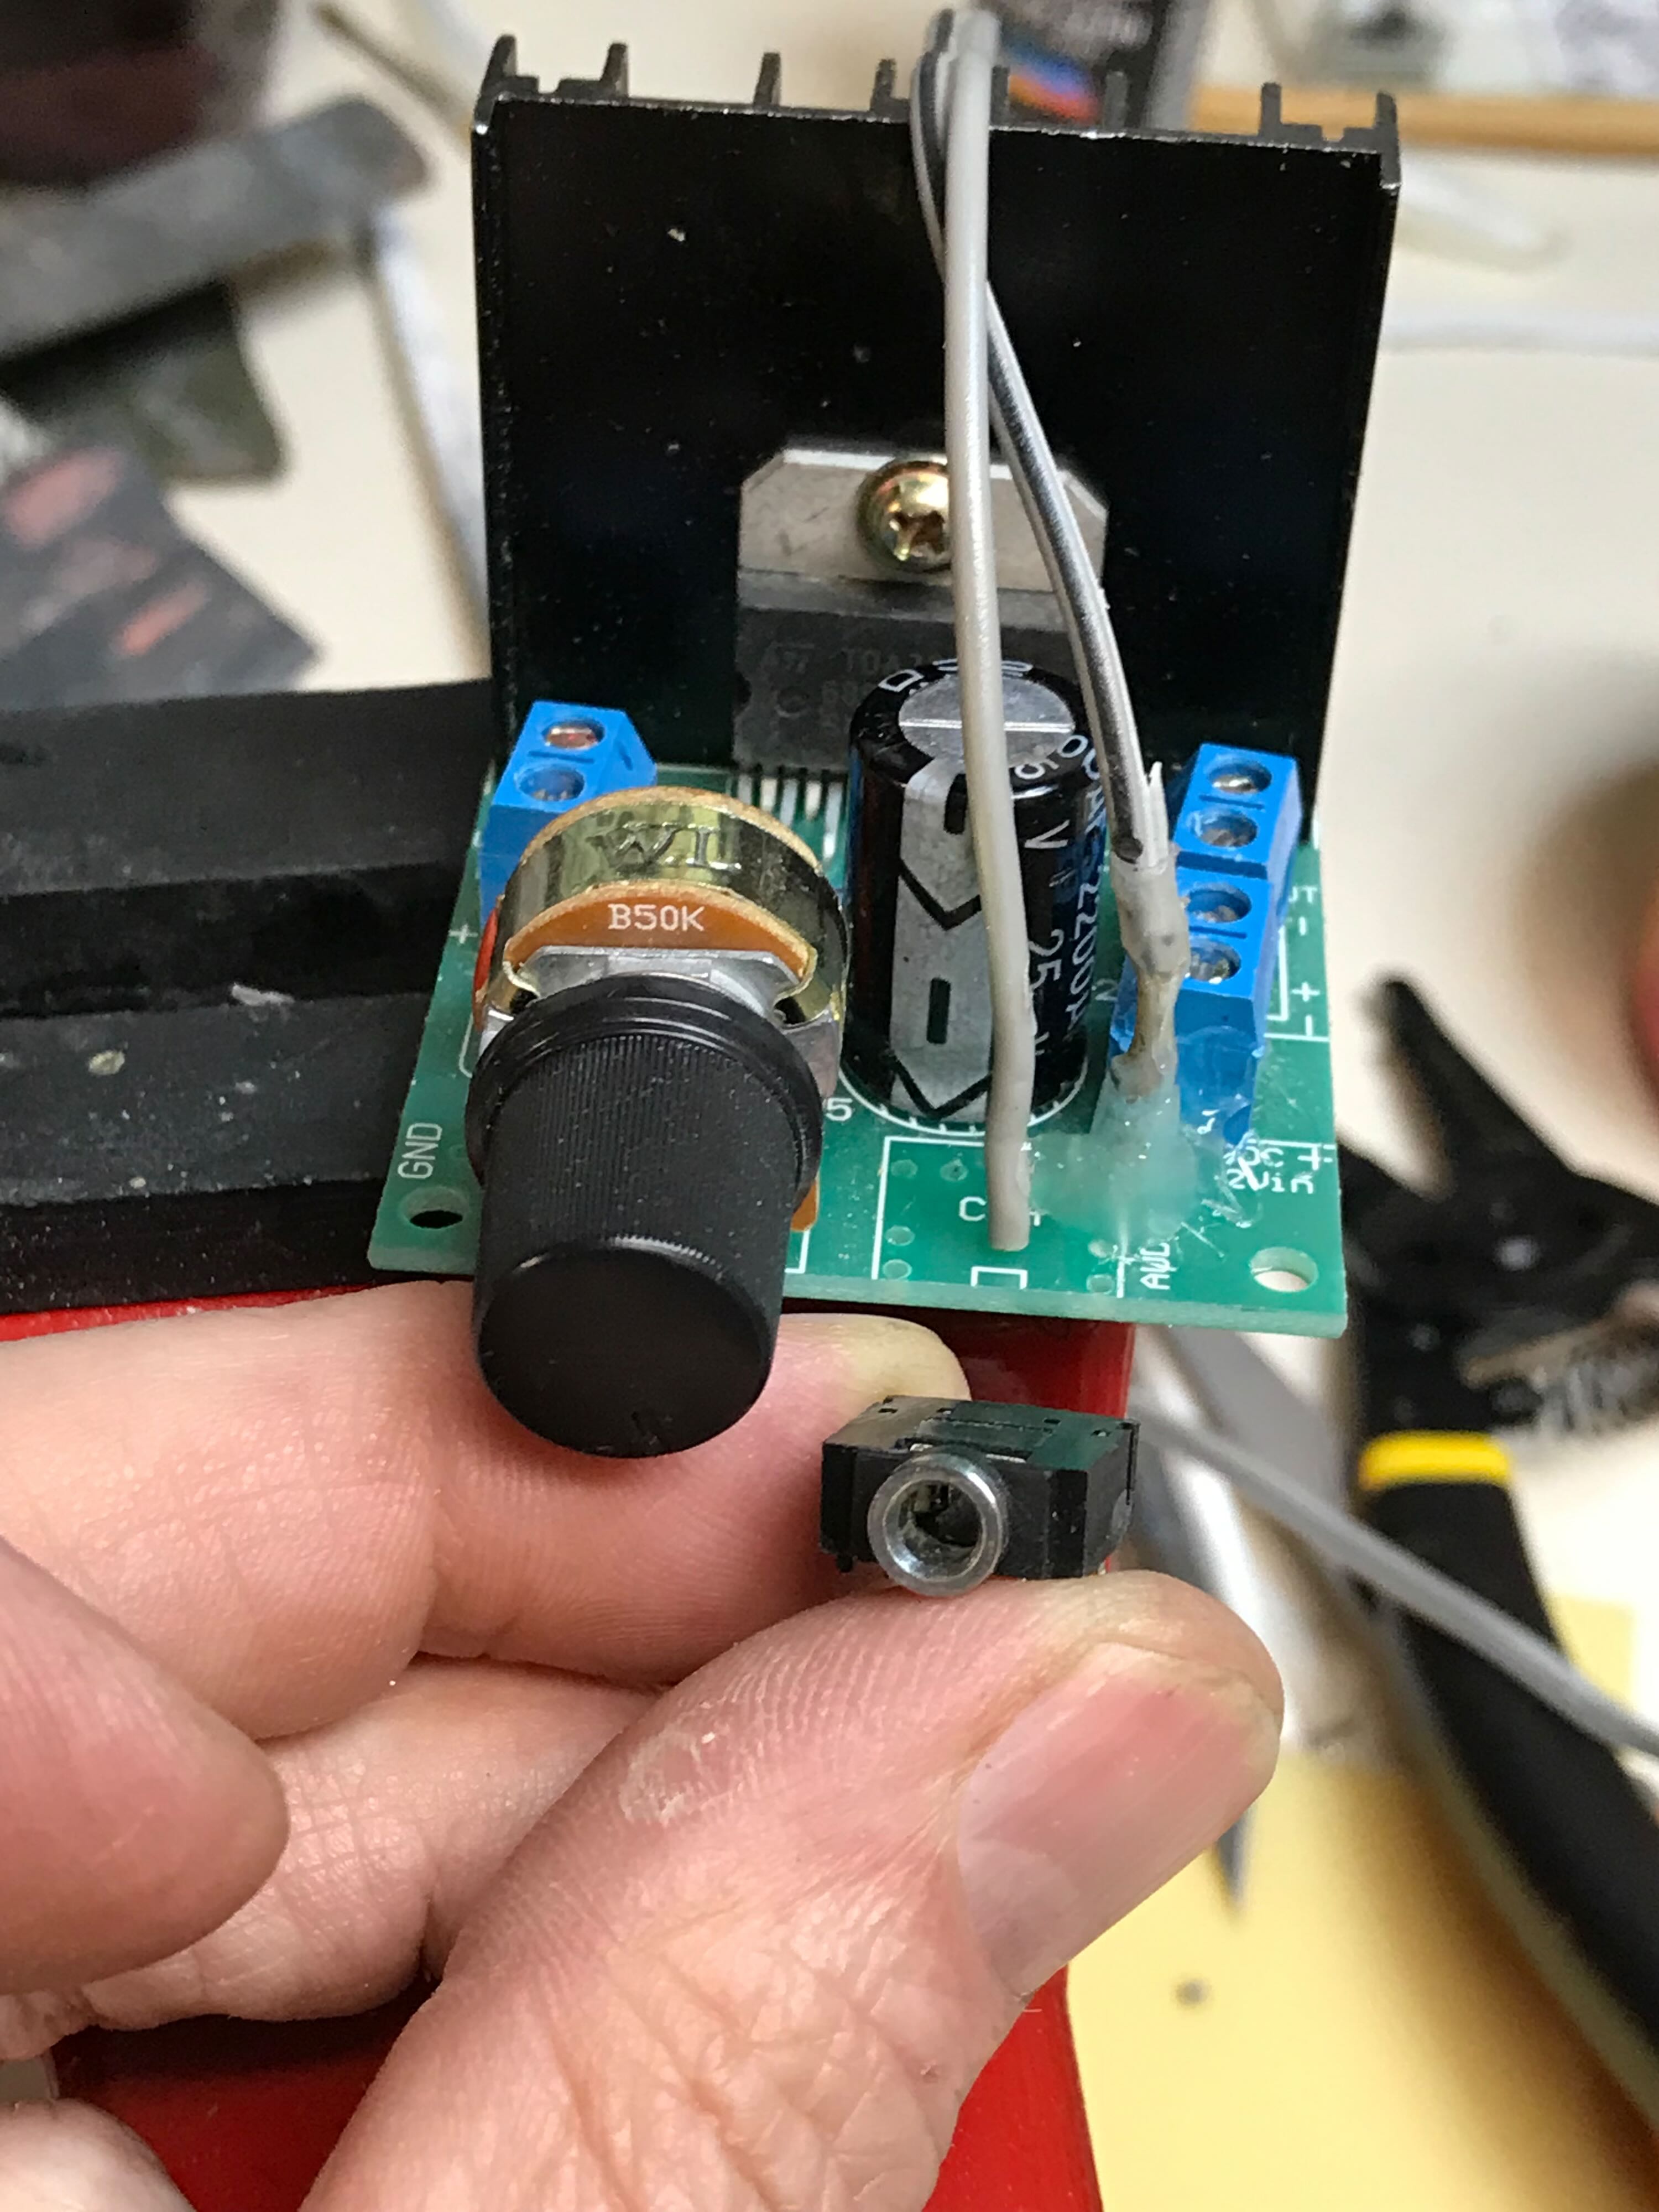
I removed the analog jack from the small amplifier Wes bought and soldered the wiring directly to the PCB. Connecting the Heavy Props sound board directly to the amp input created a lot of distortion. After a lot of research and experimentation I ended up adding a 50K ohm resistor into the line to mitigate the distortion. It's not perfect, but it's acceptable.
Re: Building a Benofkent Props Proton Pack for fellow 'Buster
Posted: July 28th, 2022, 2:00 am
by WShawn
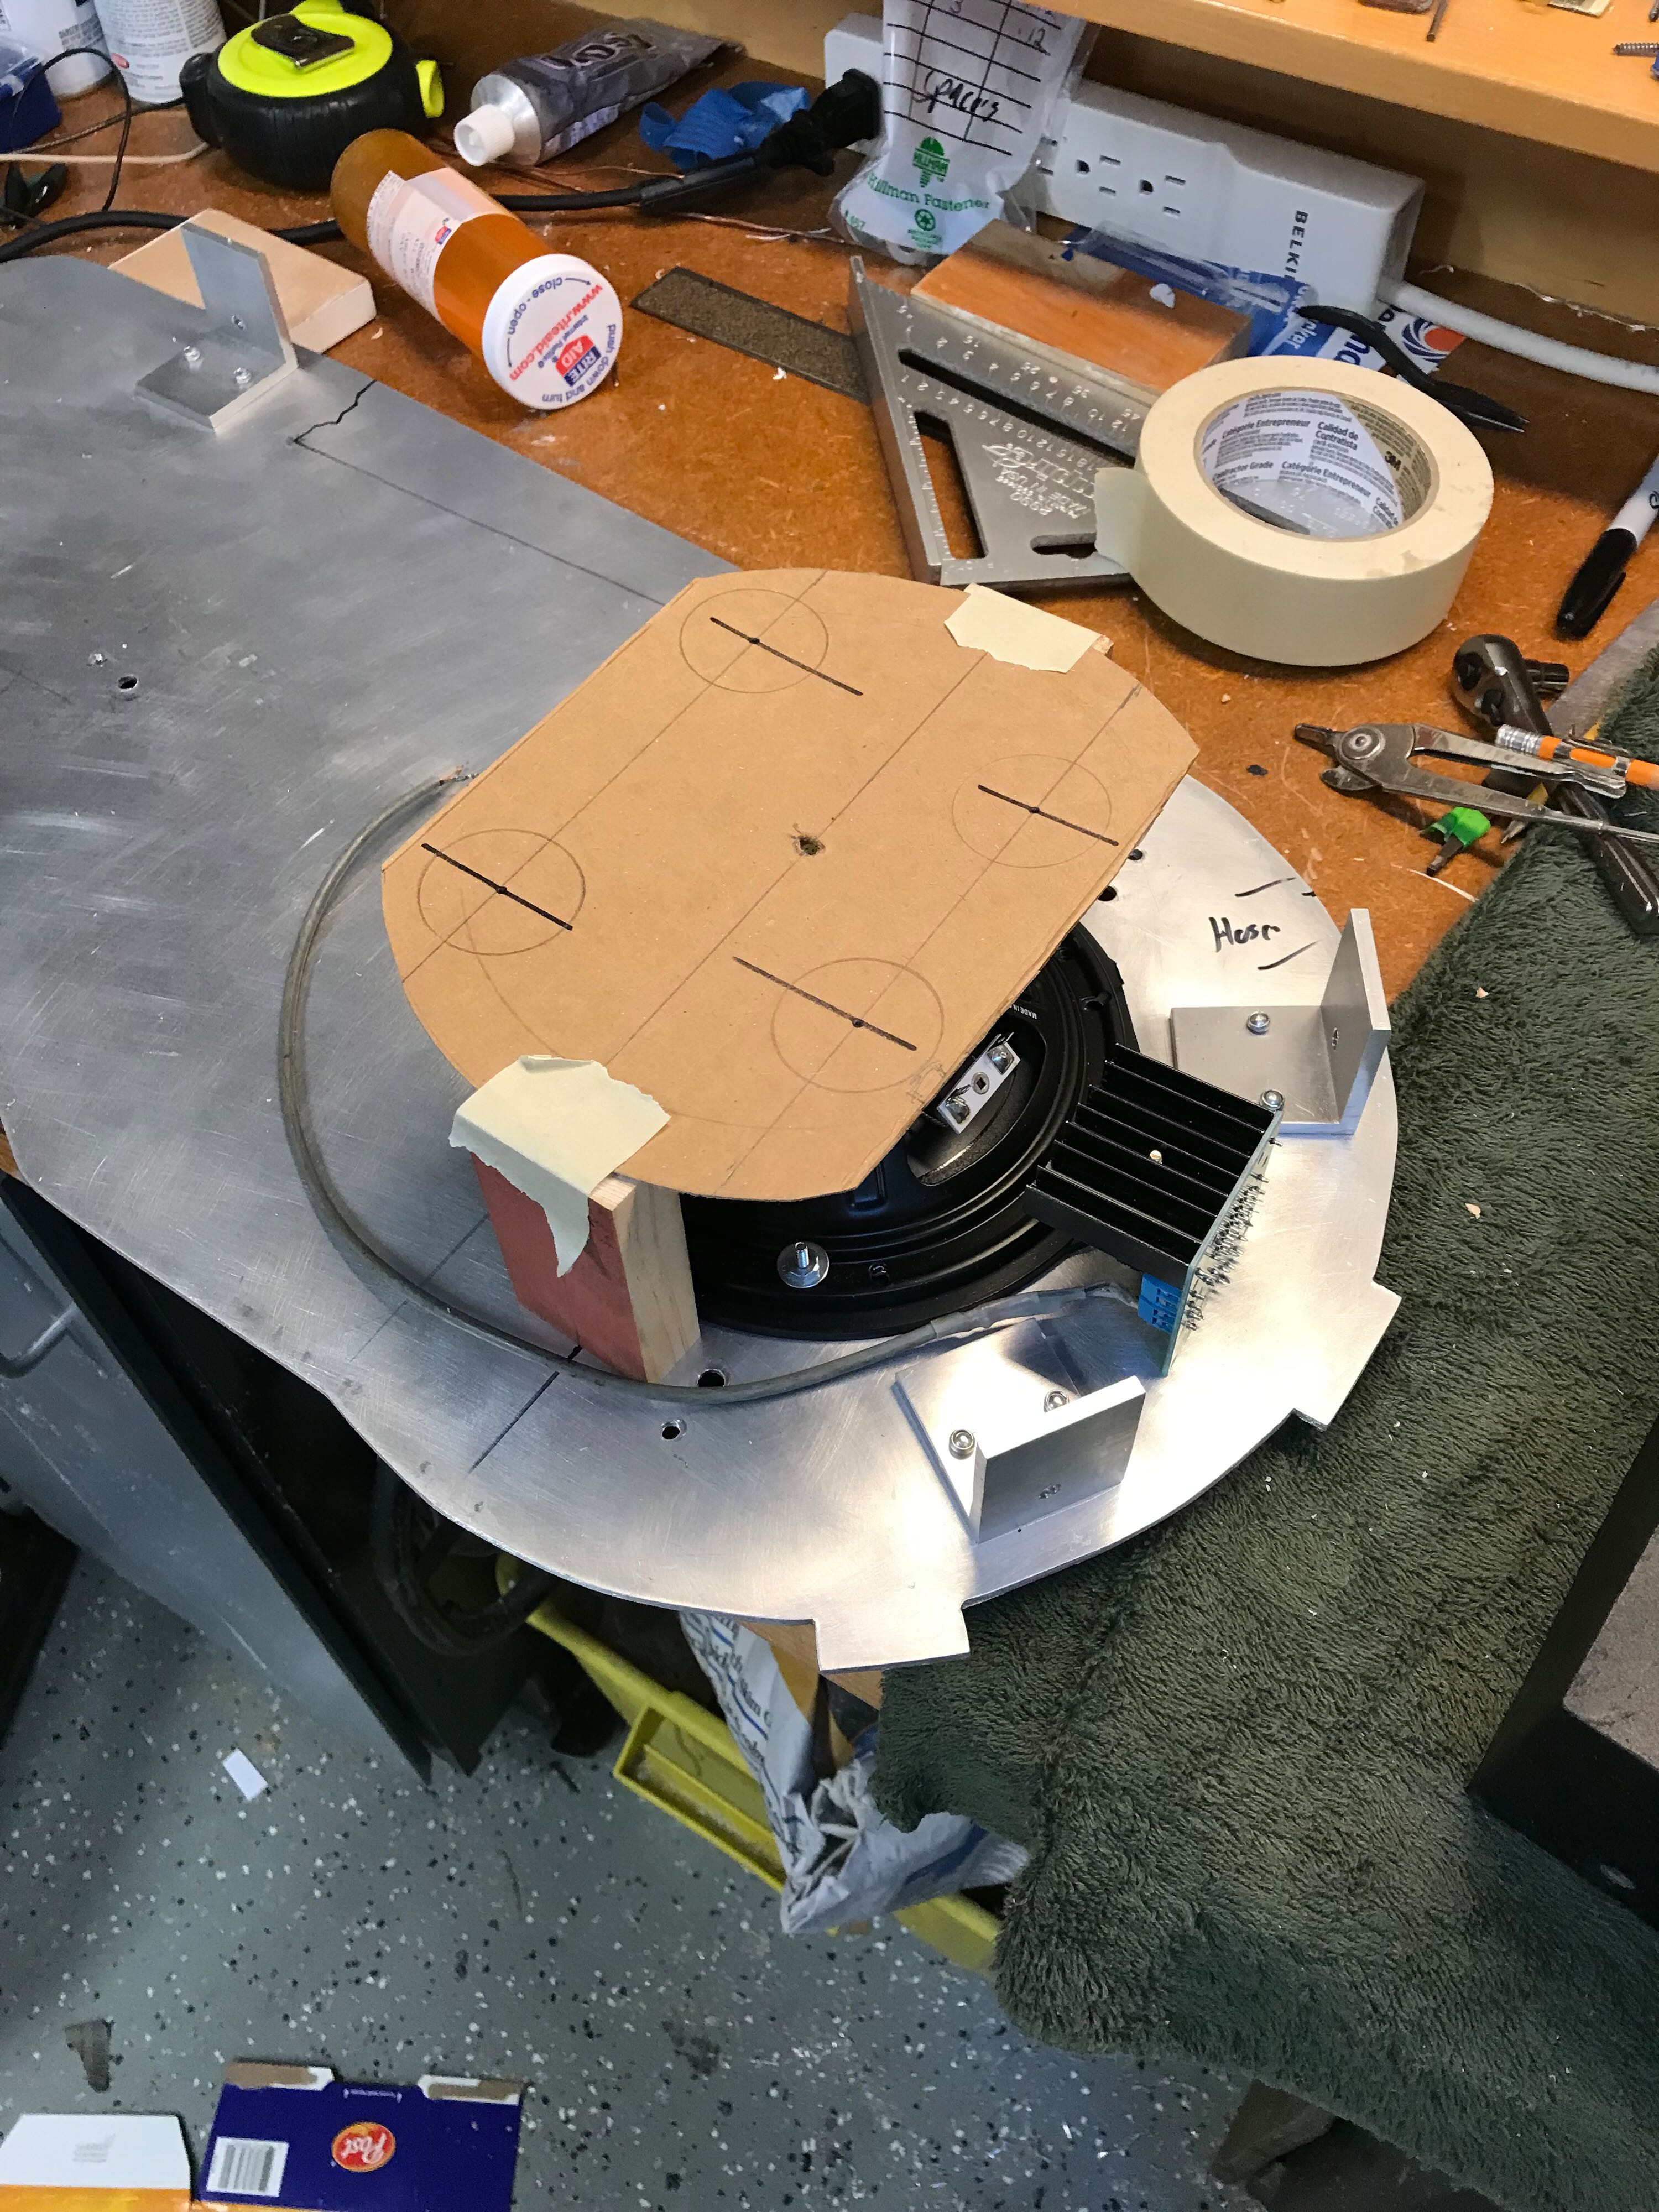
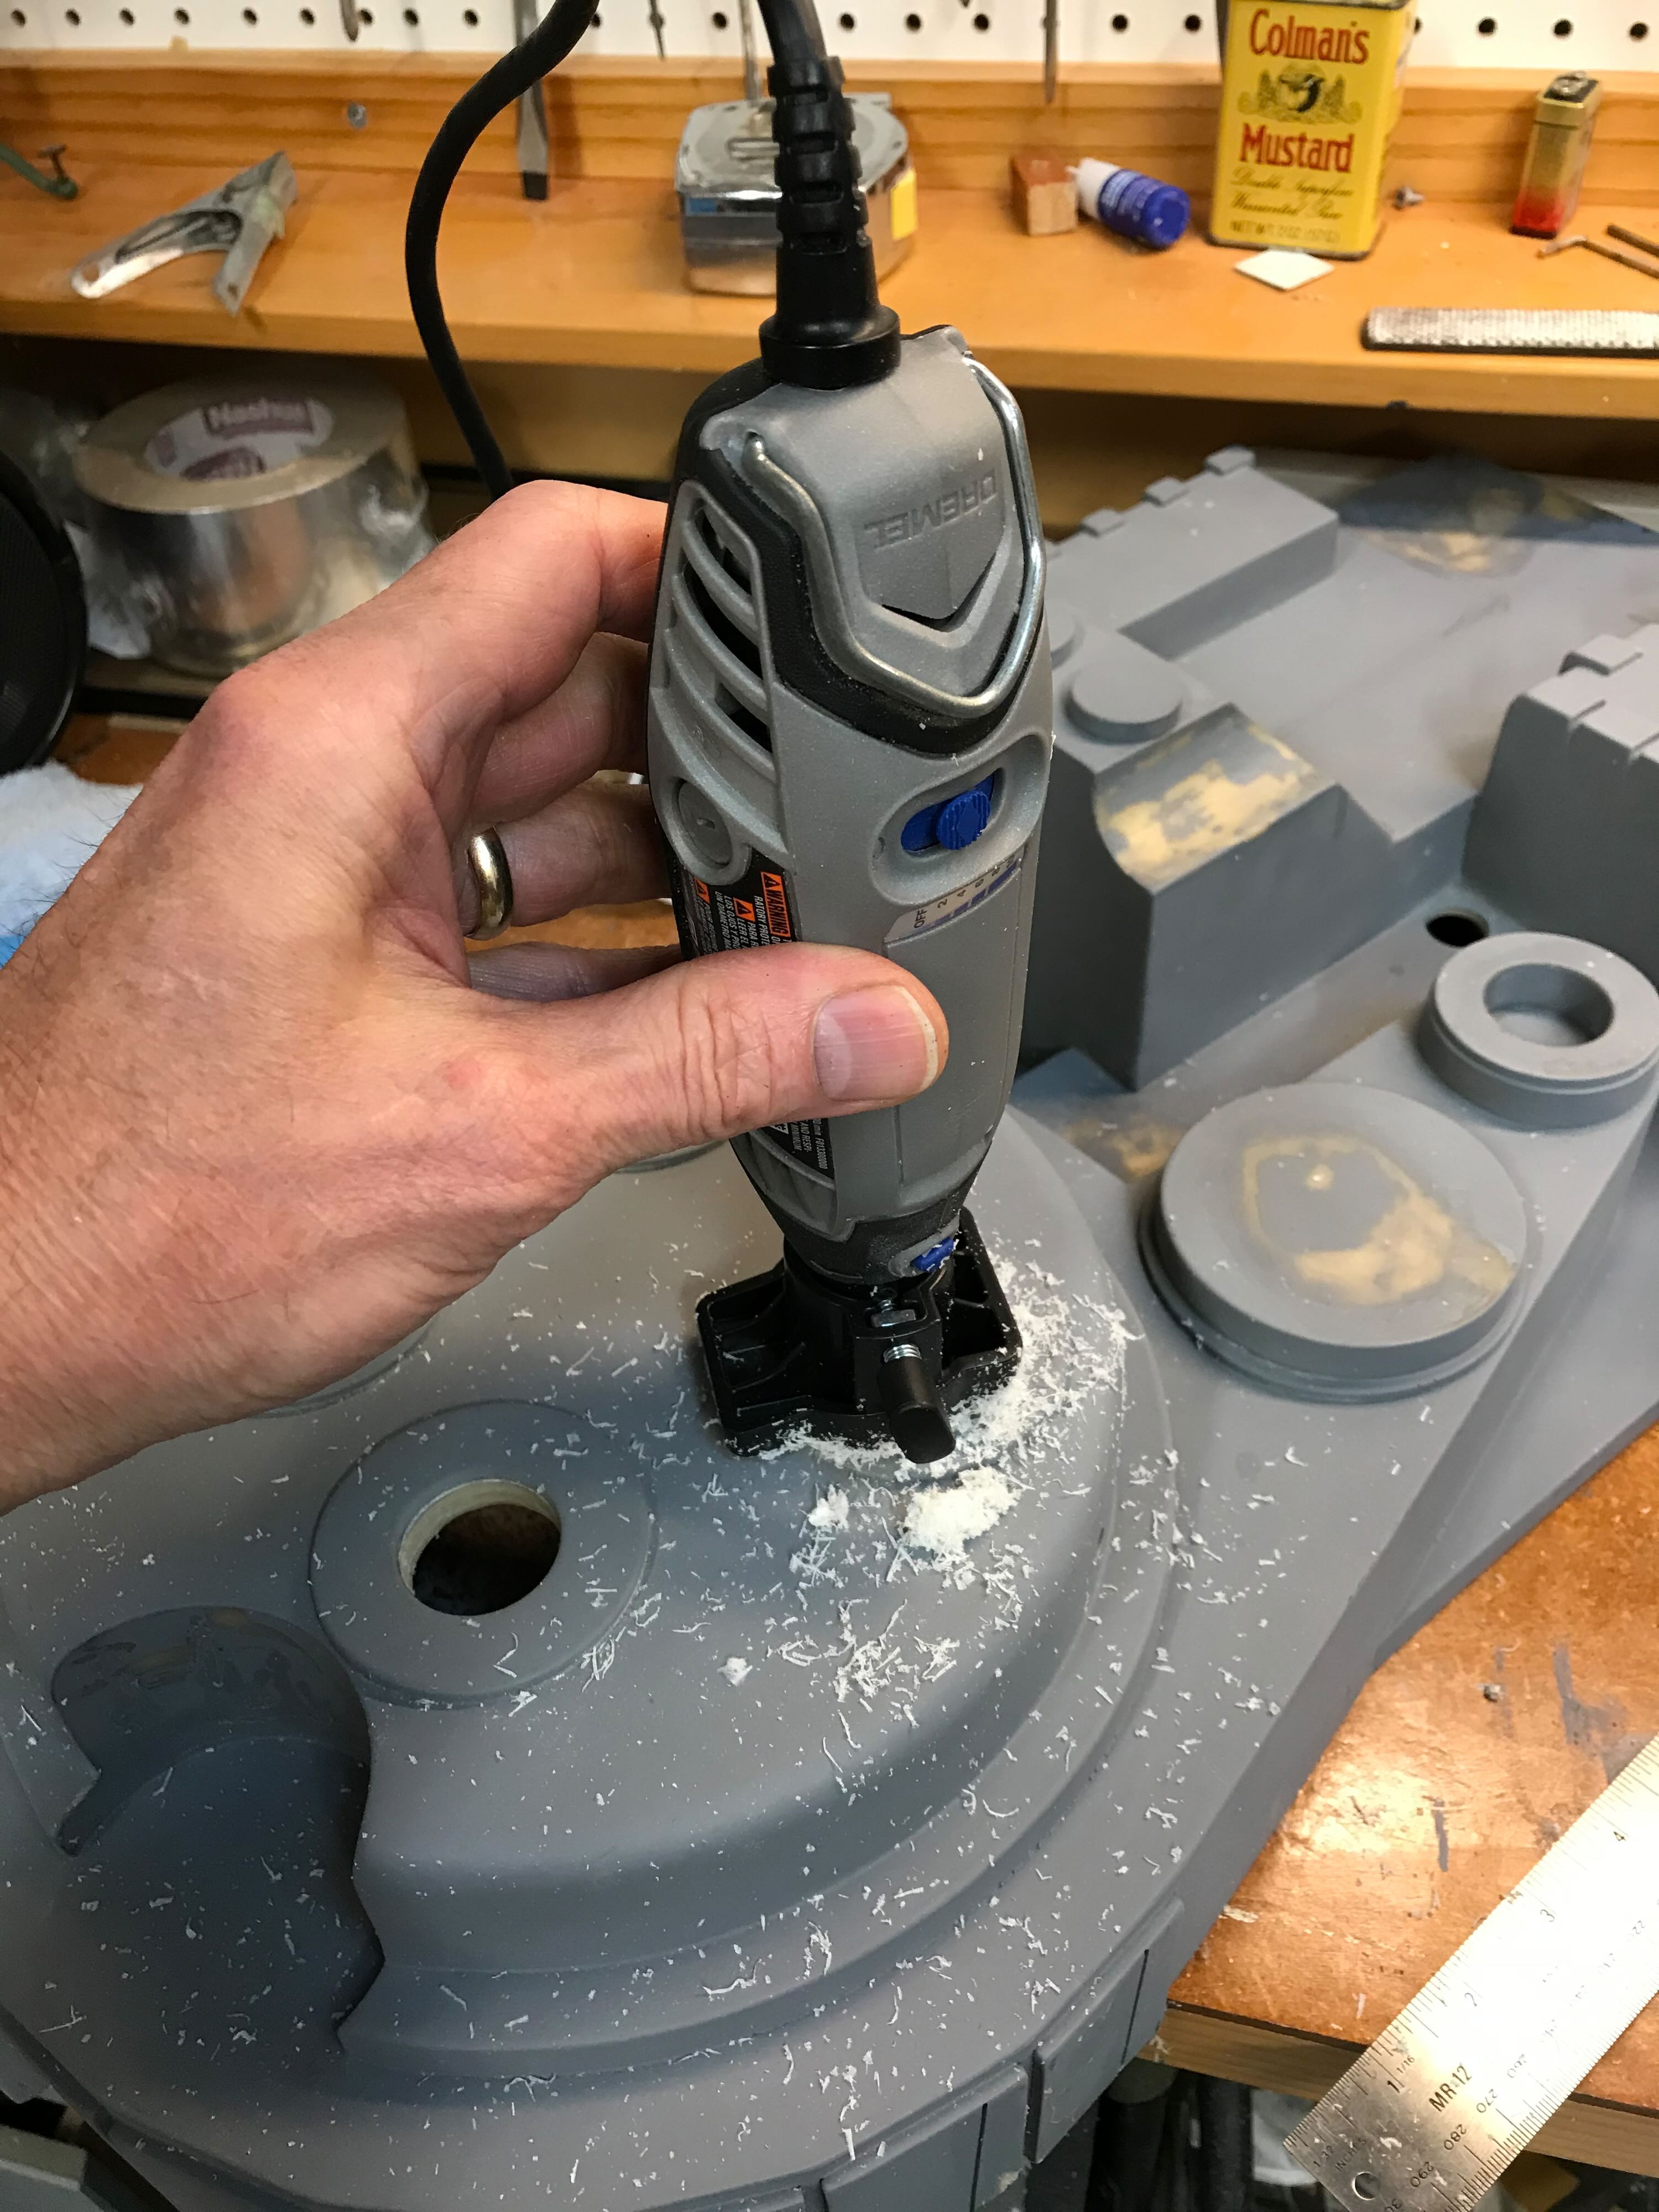
7/1/22 - The Cyclotron LEDs that came with the Heavy Prop kit weren't super-huge (5mm) or bright. To pump up the light a bit I reused our 1984 approach of using reflective metal foil inside cardboard tubes.
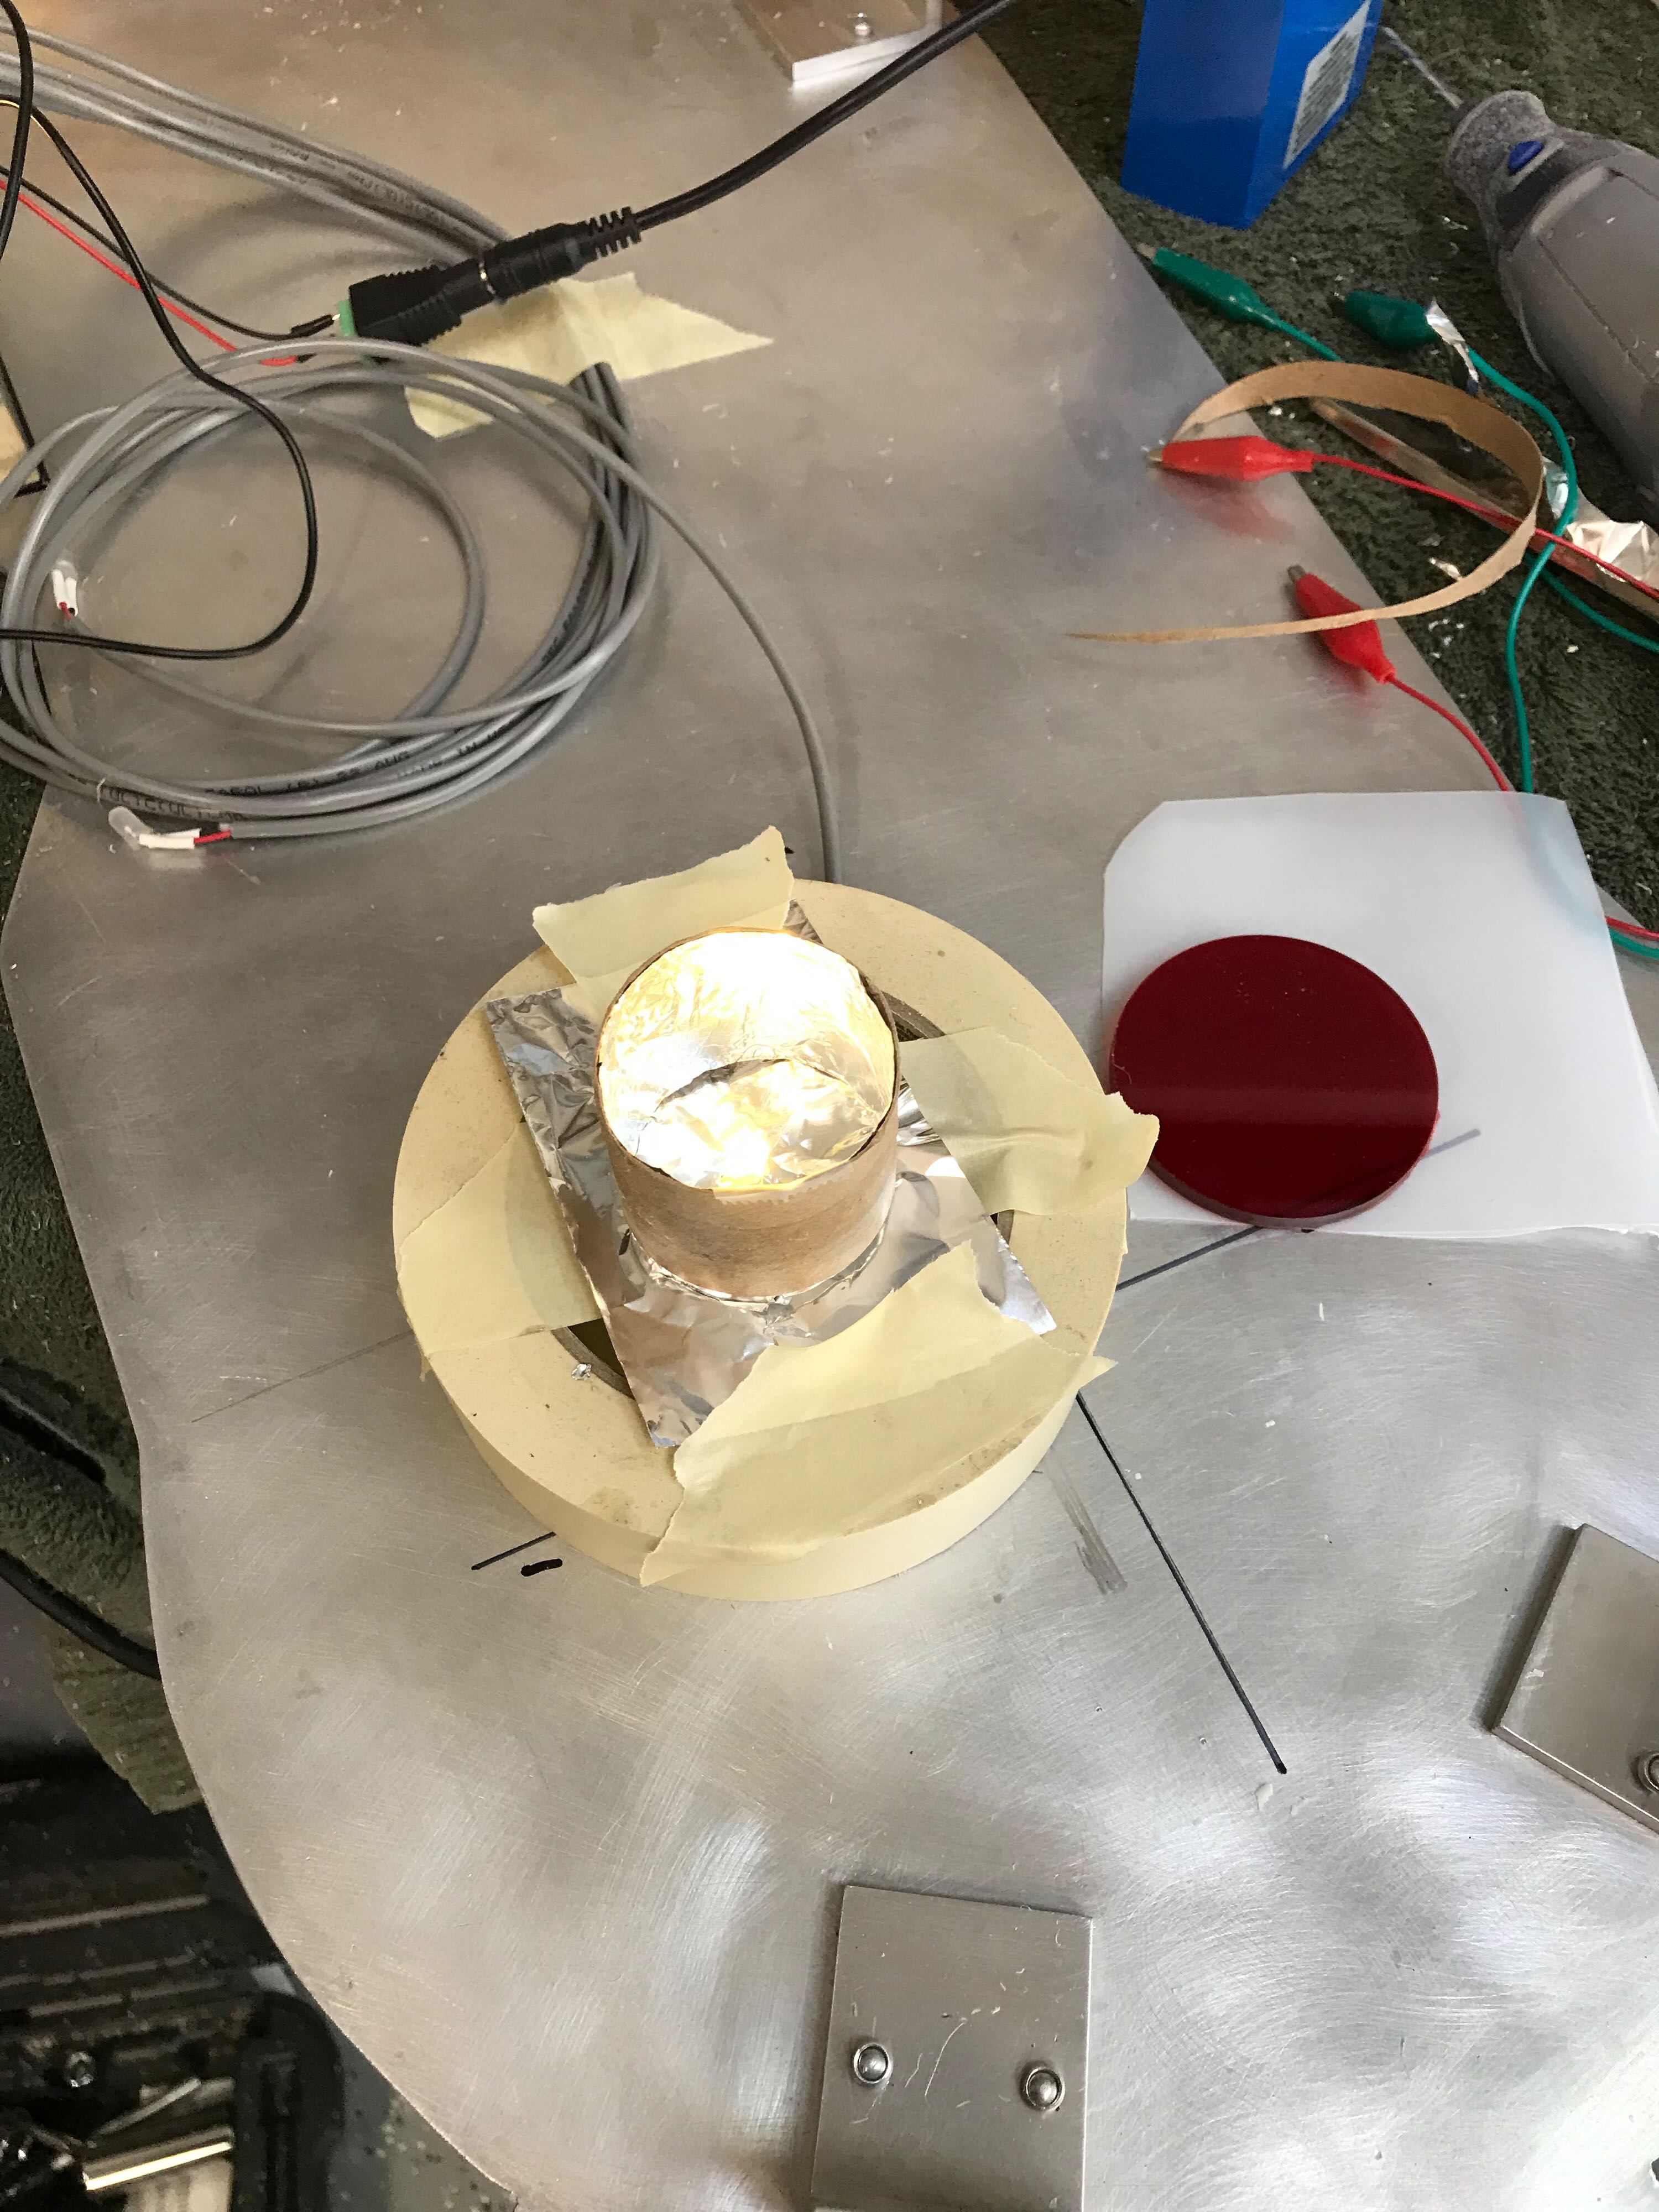
I wanted to obscure the LEDs and reflectors a bit through the red lenses, so after a bit of trial and error I found that a piece from a plastic gallon jug added a nice bit of diffusion.

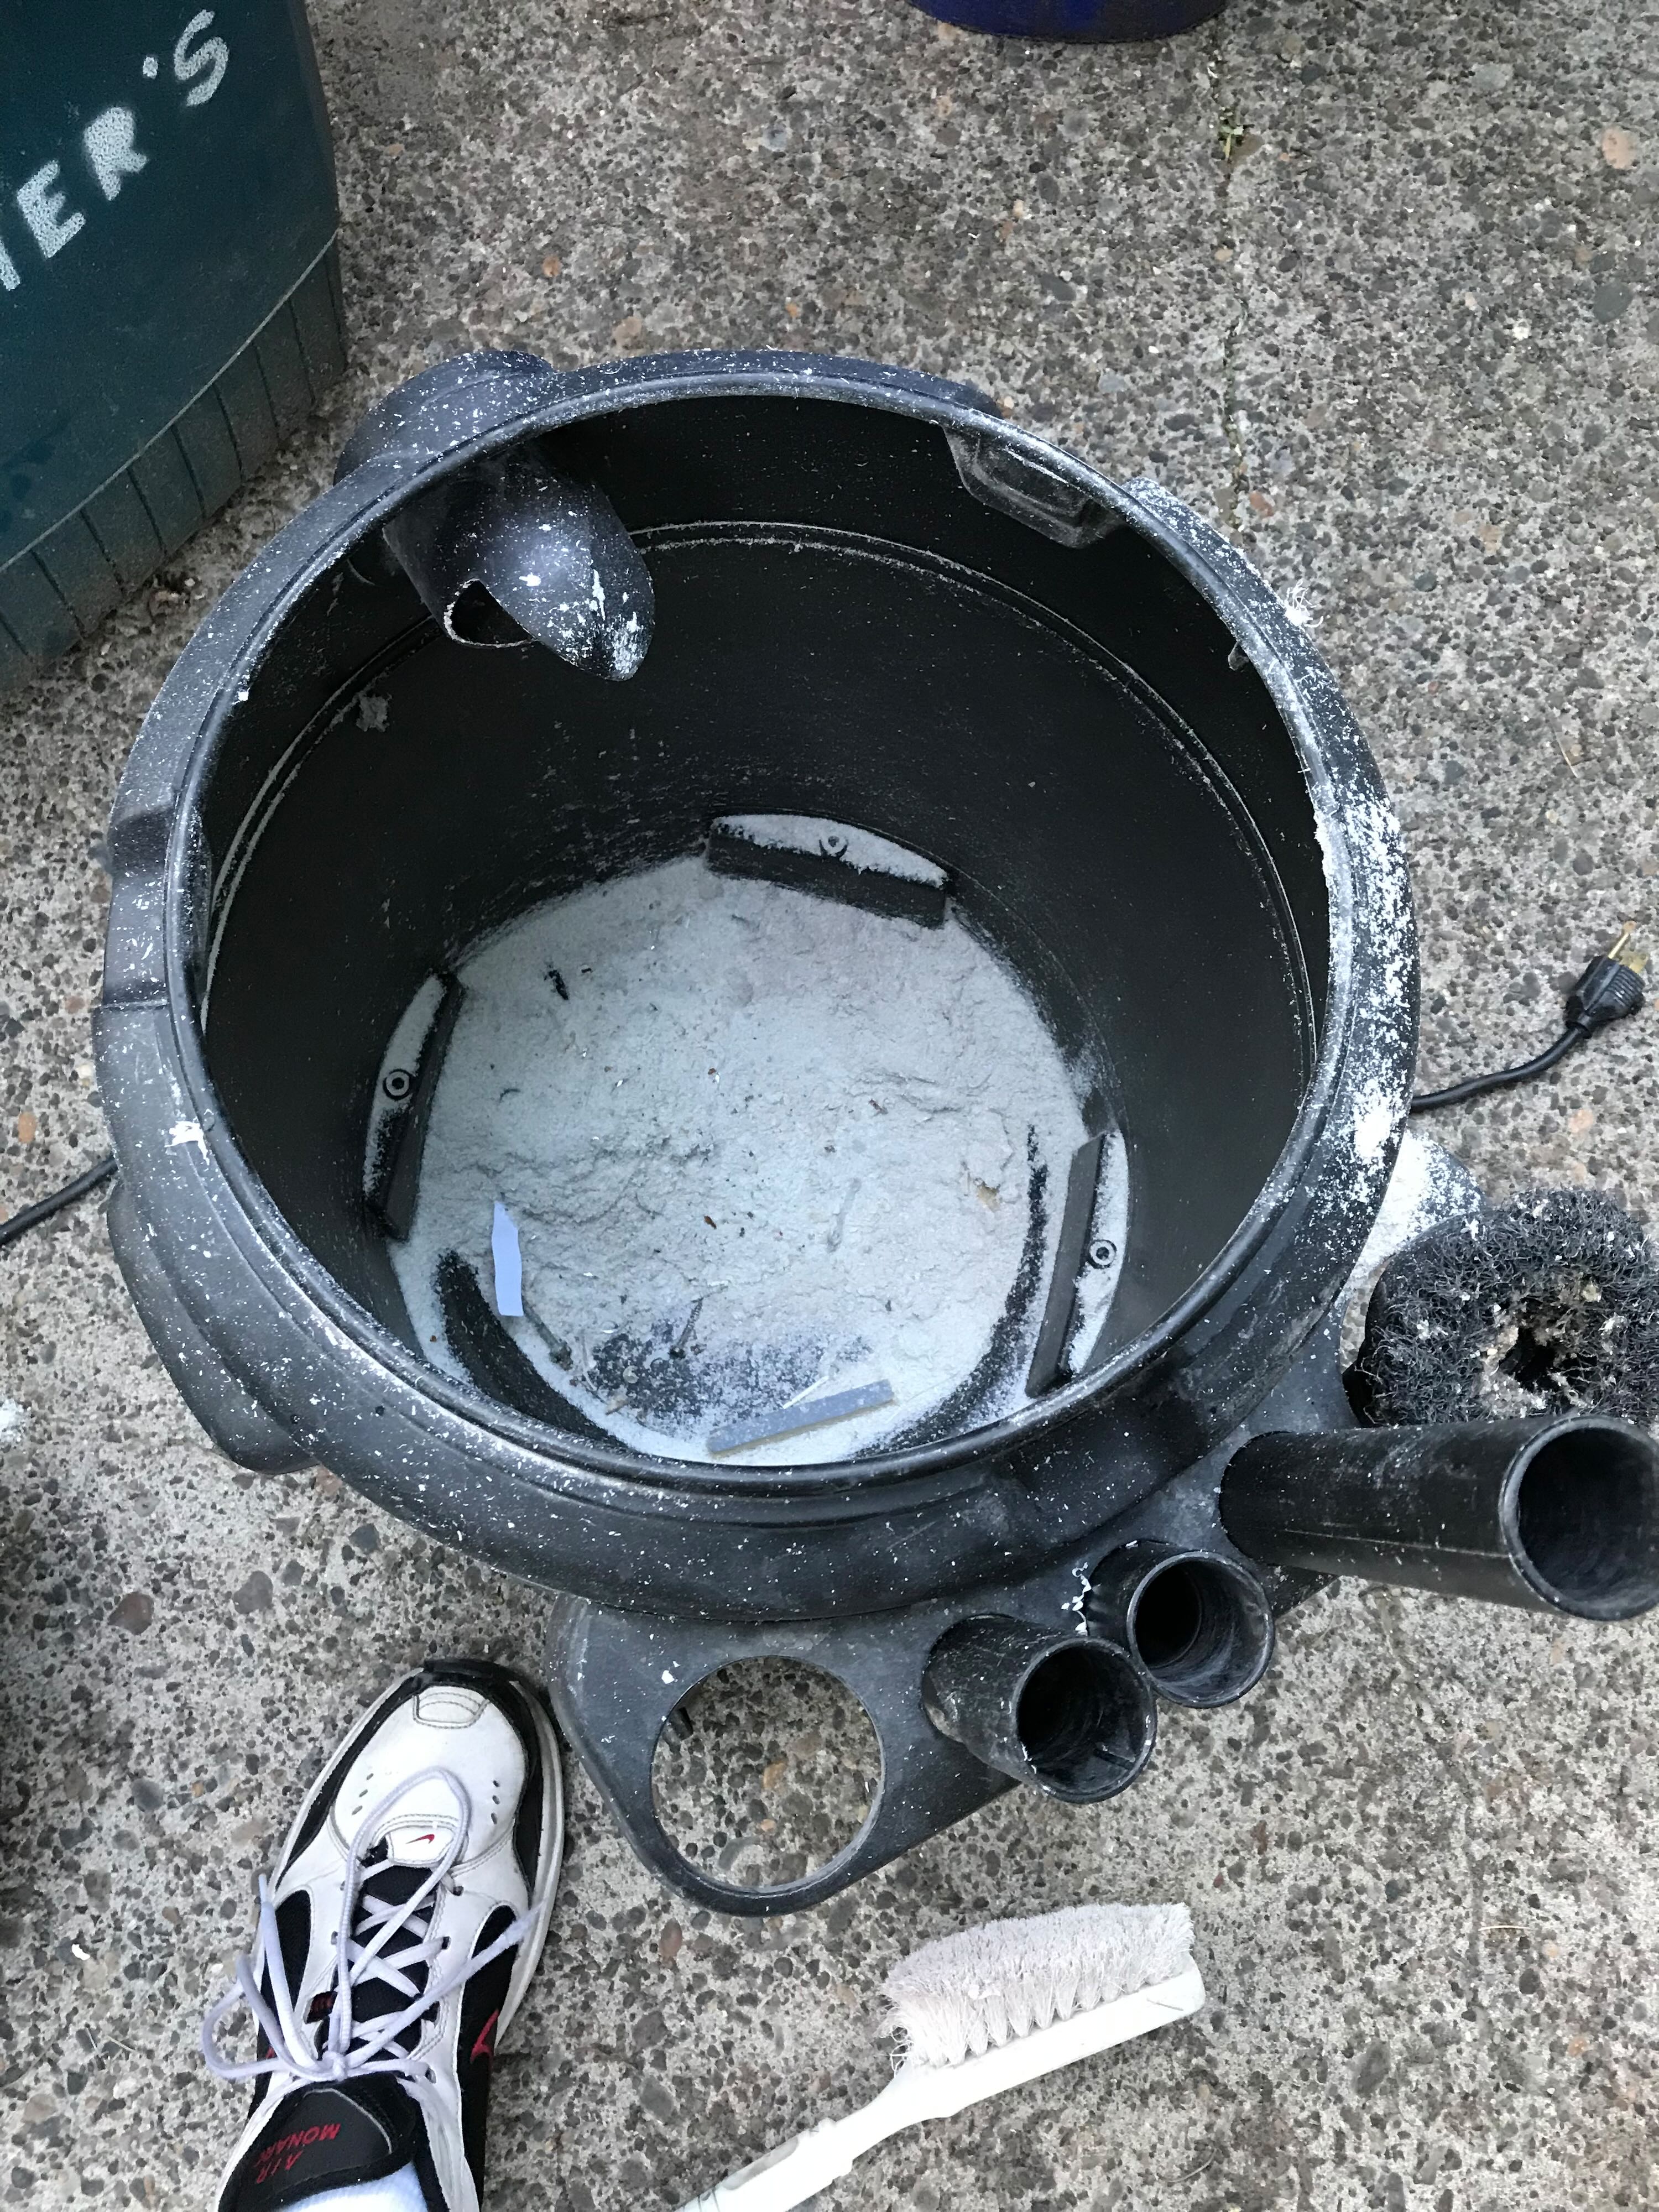
My Shop Vac with shavings/dust from all of the resin I Dremeled out.
Re: Building a Benofkent Props Proton Pack for fellow 'Buster
Posted: July 28th, 2022, 2:12 am
by WShawn
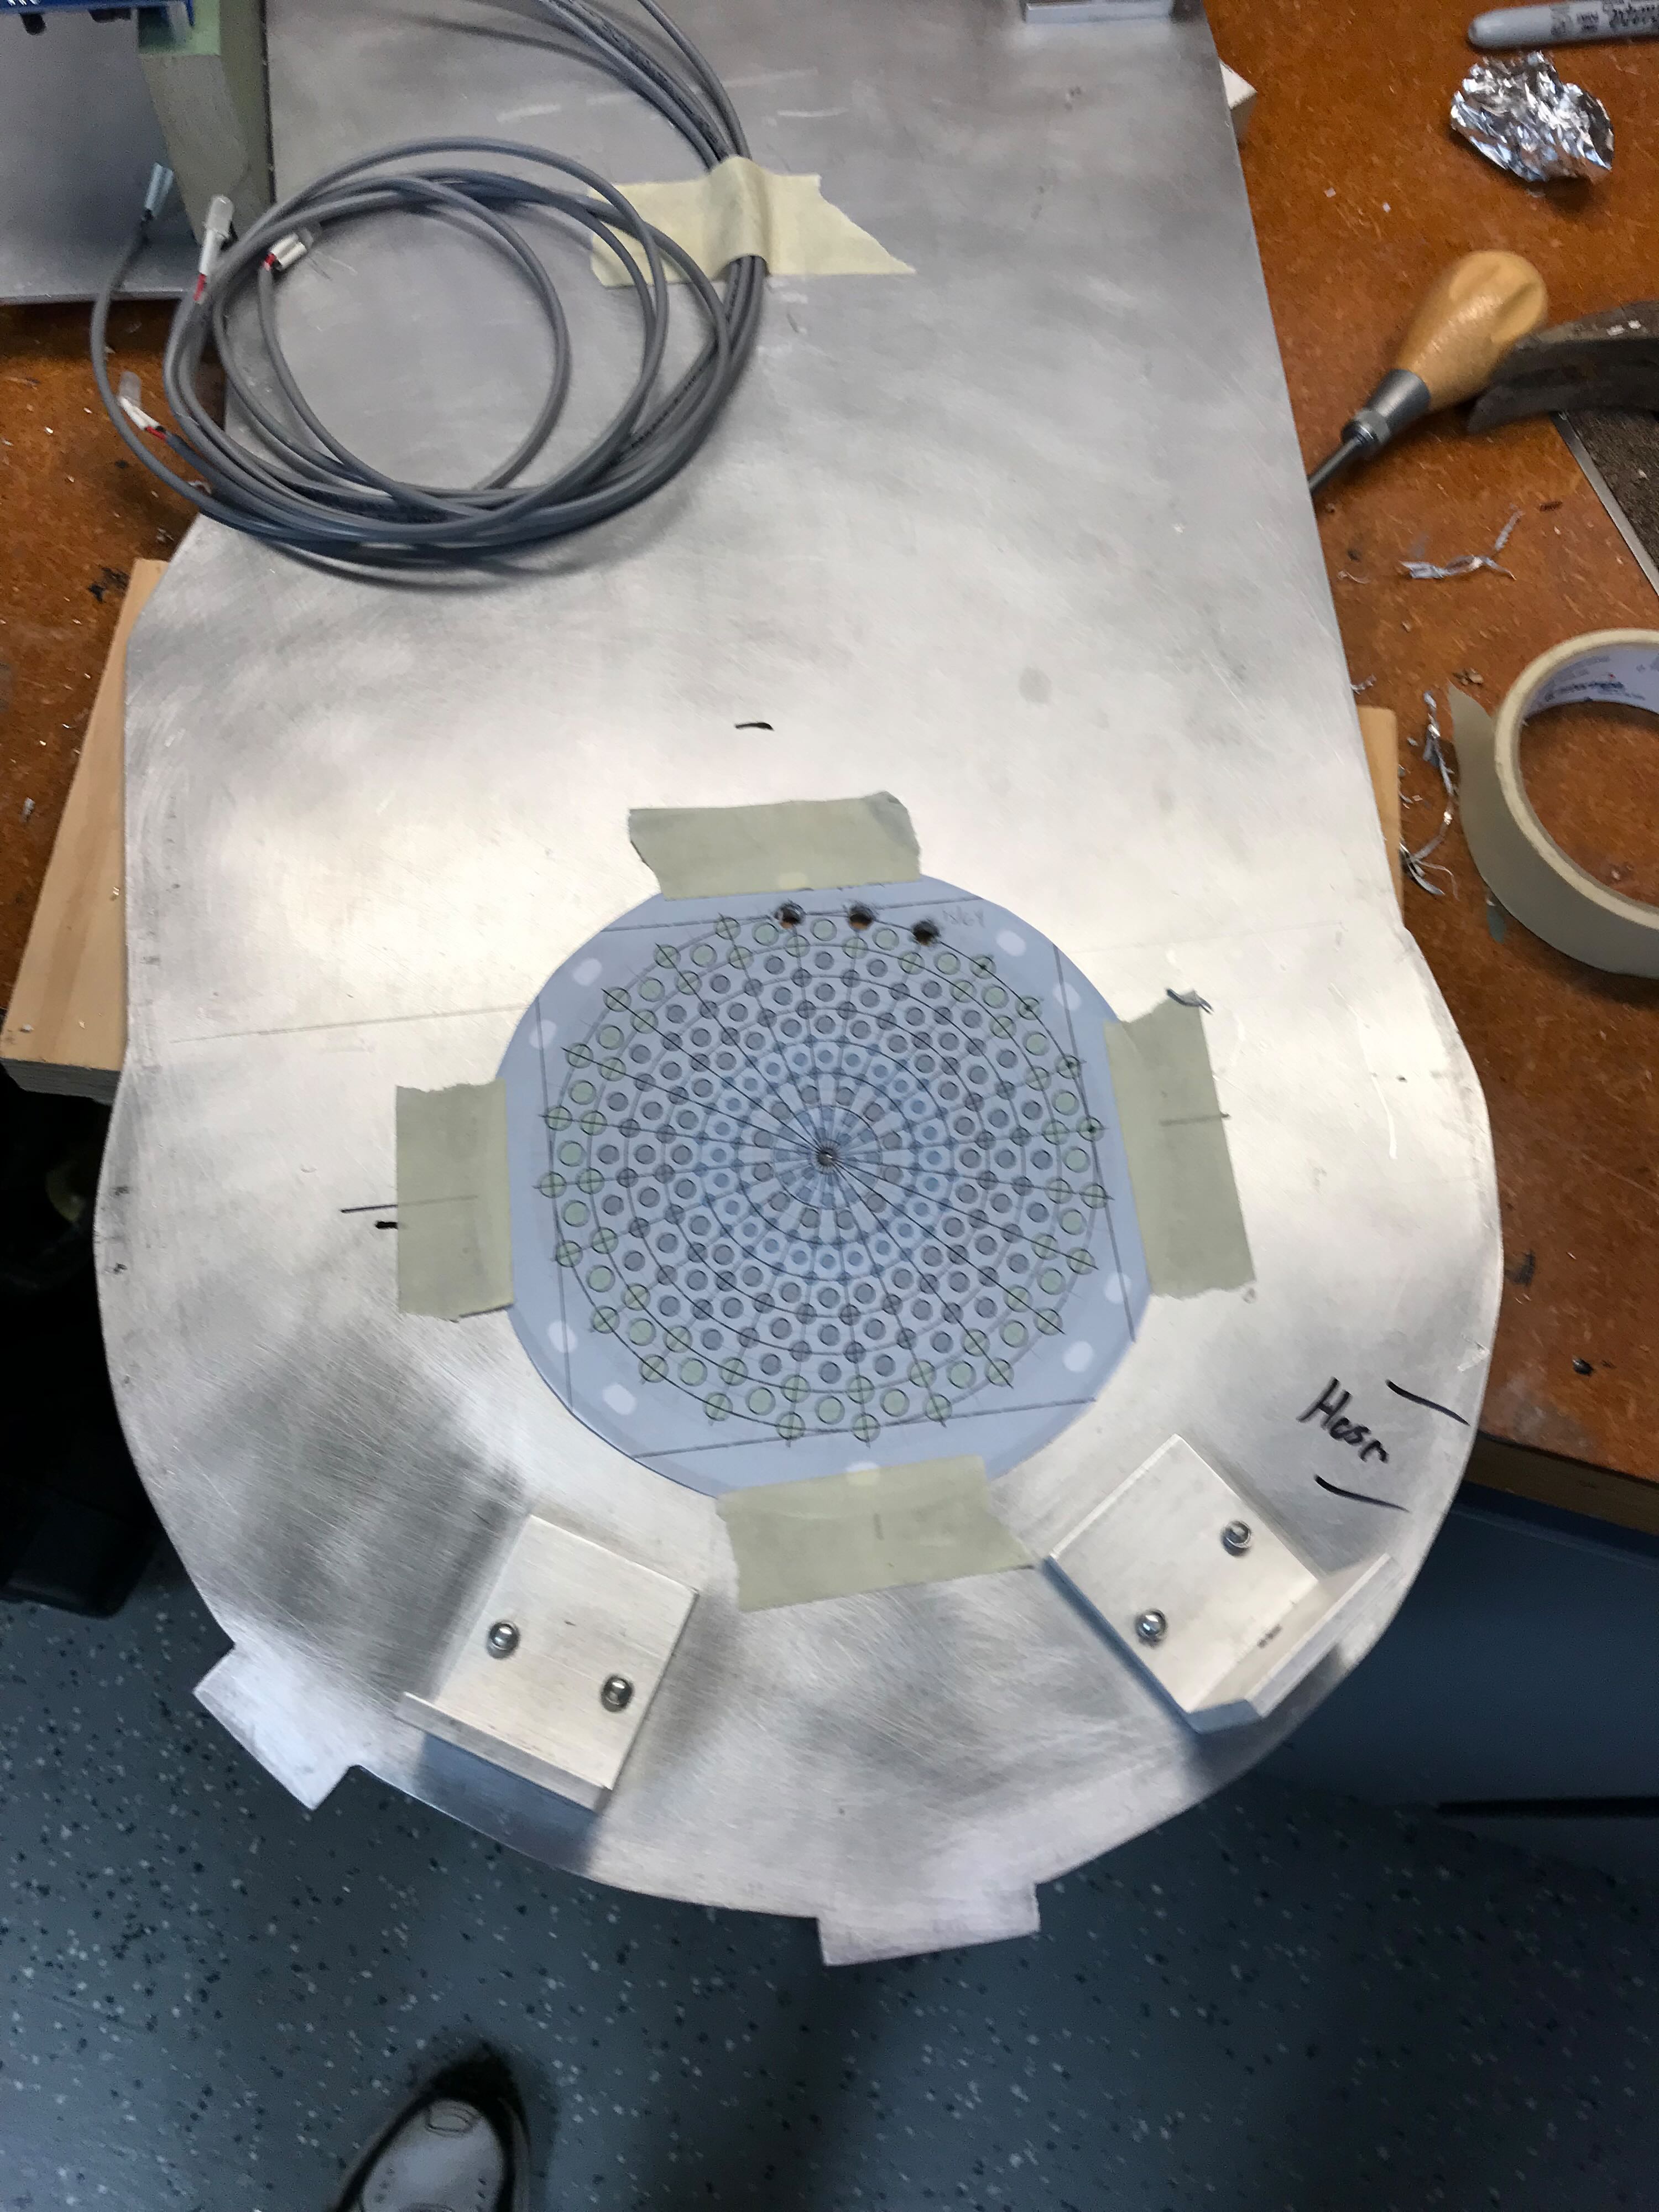
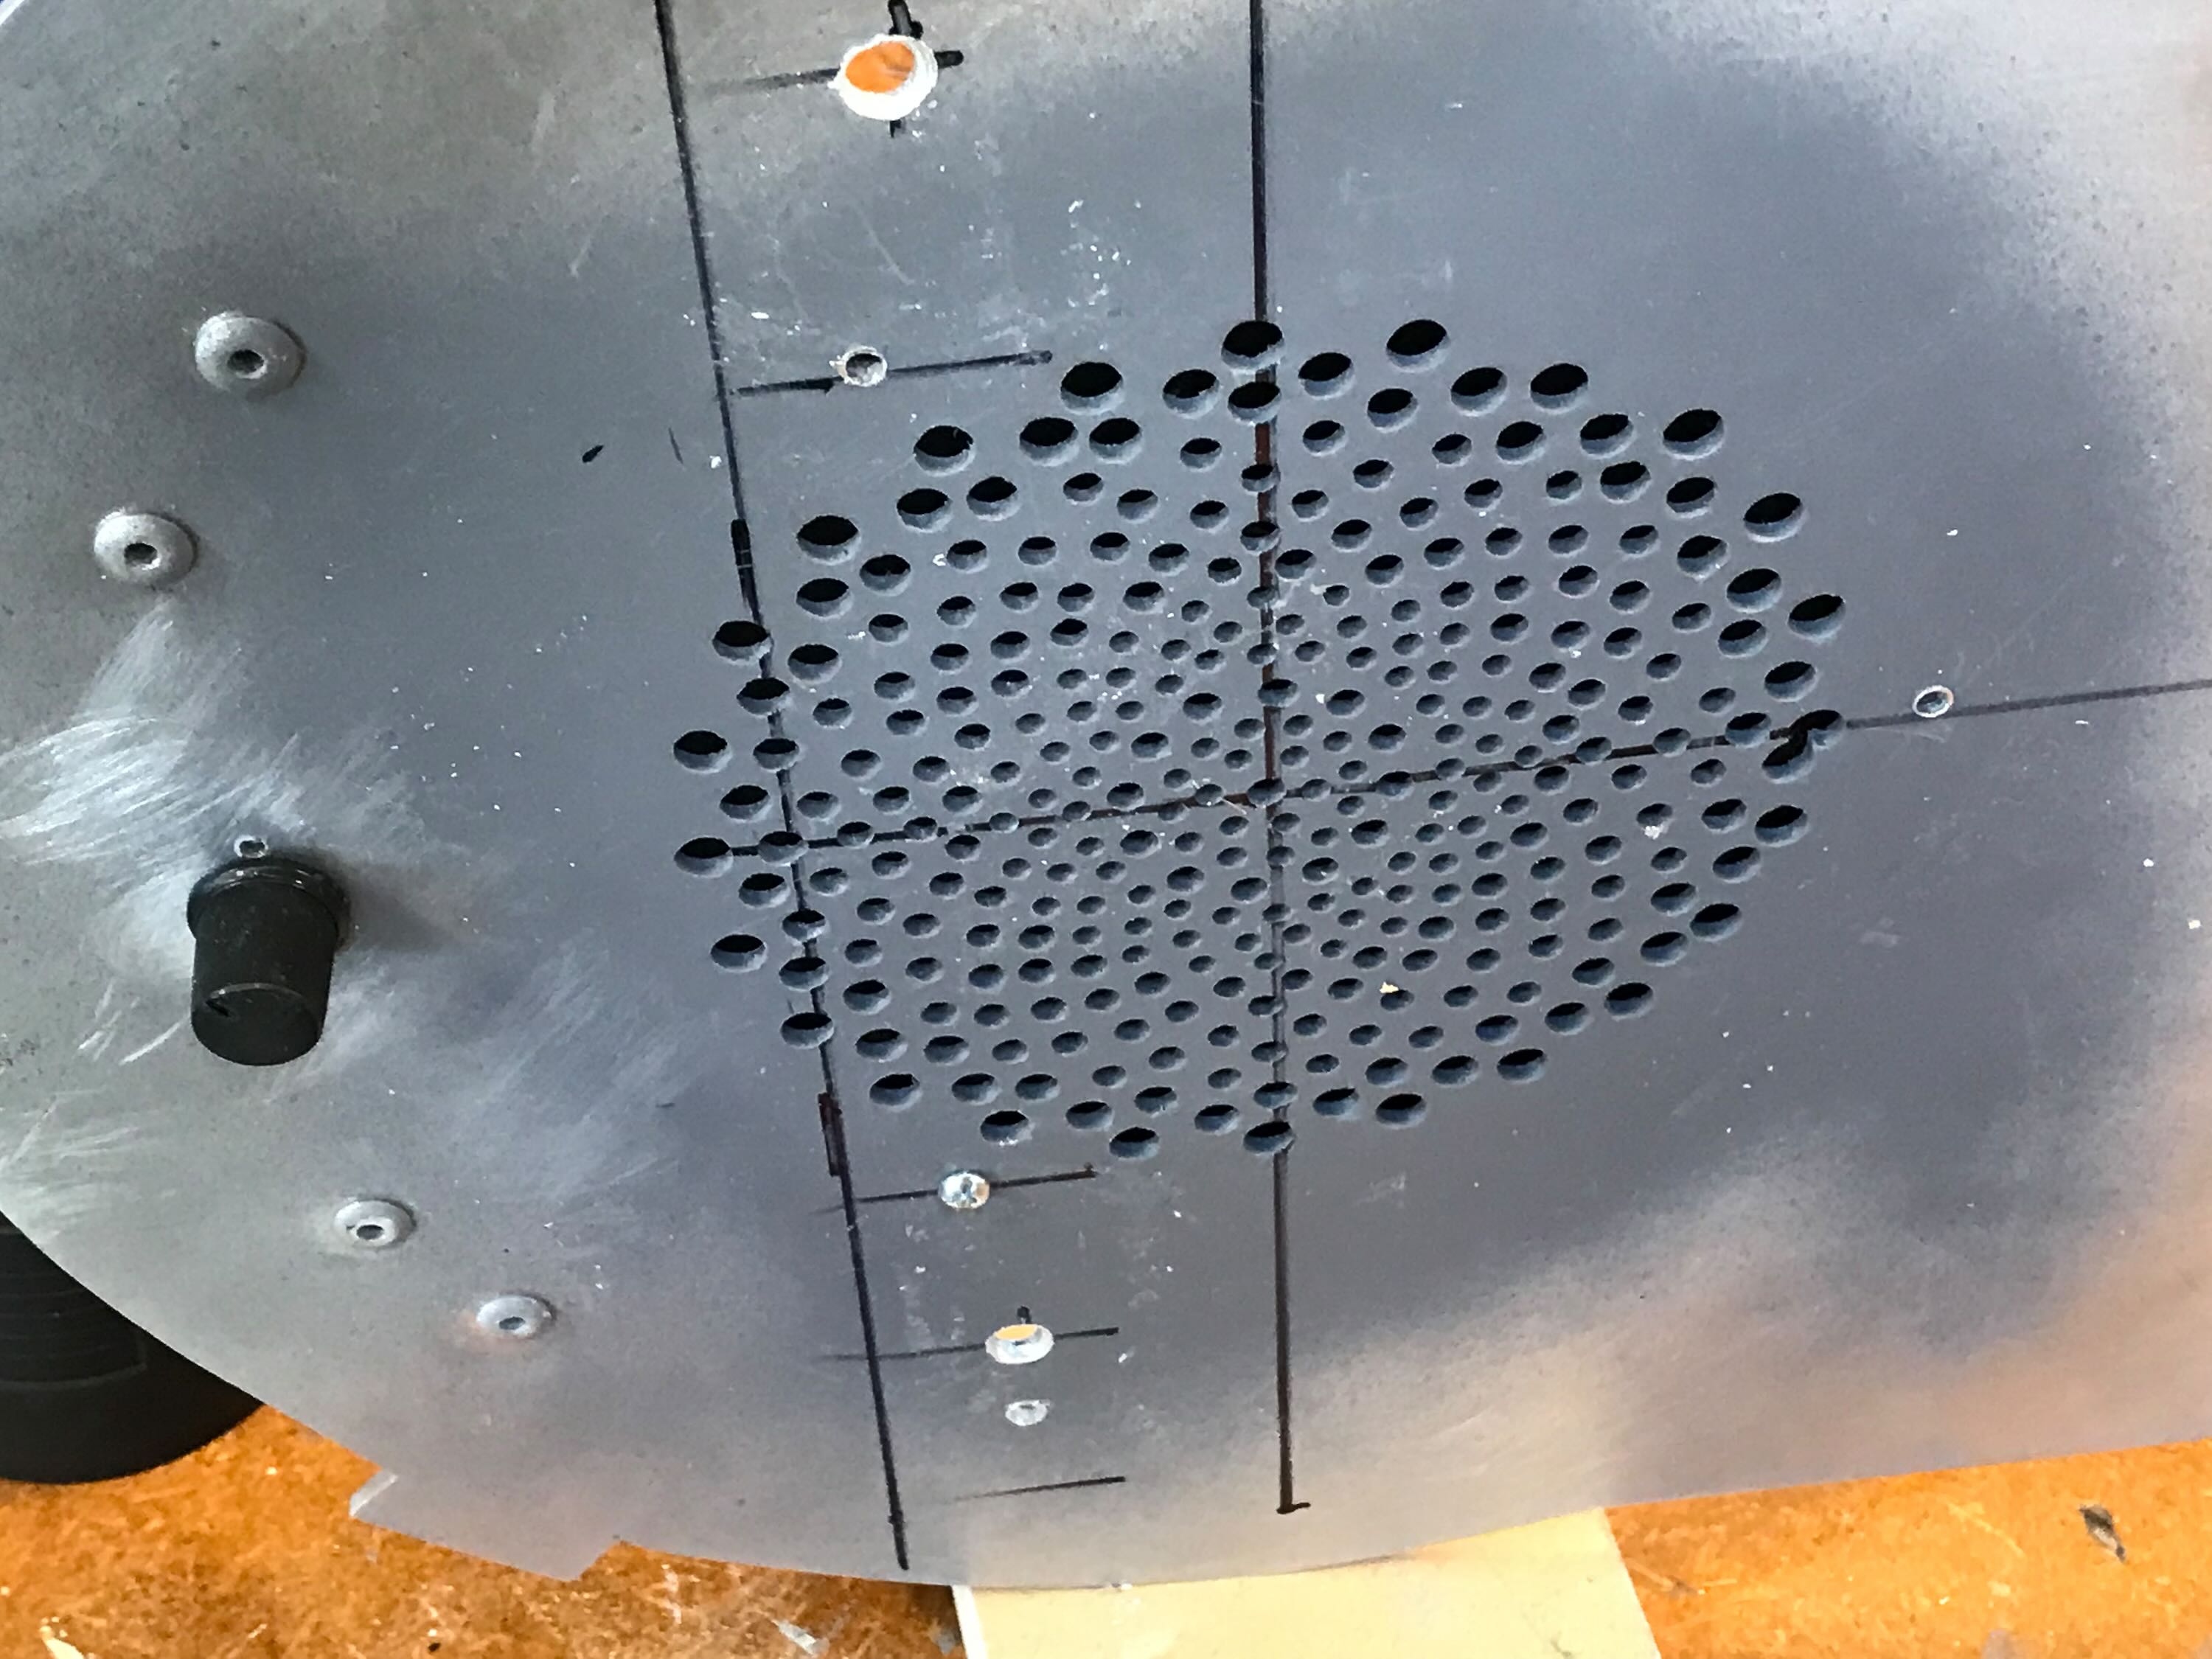
My friend Patrick (@GohstTarp) sent me a copy of the speaker grille template designed by @bishopdonmiguel. I scaled it to match the 6.25" speaker we had and proceeded to punch and then drill the 300+ holes. It took 2-3 hours. It's not my best work. I started with a bit that was too big, so a few of my early holes ate into each other. As it will be pretty much impossible to see these holes while the pack is being worn I wasn't too concerned about the error. I ground and sanded the burrs, somewhat crudely.

Re: Building a Benofkent Props Proton Pack for fellow 'Buster
Posted: July 28th, 2022, 2:20 am
by WShawn
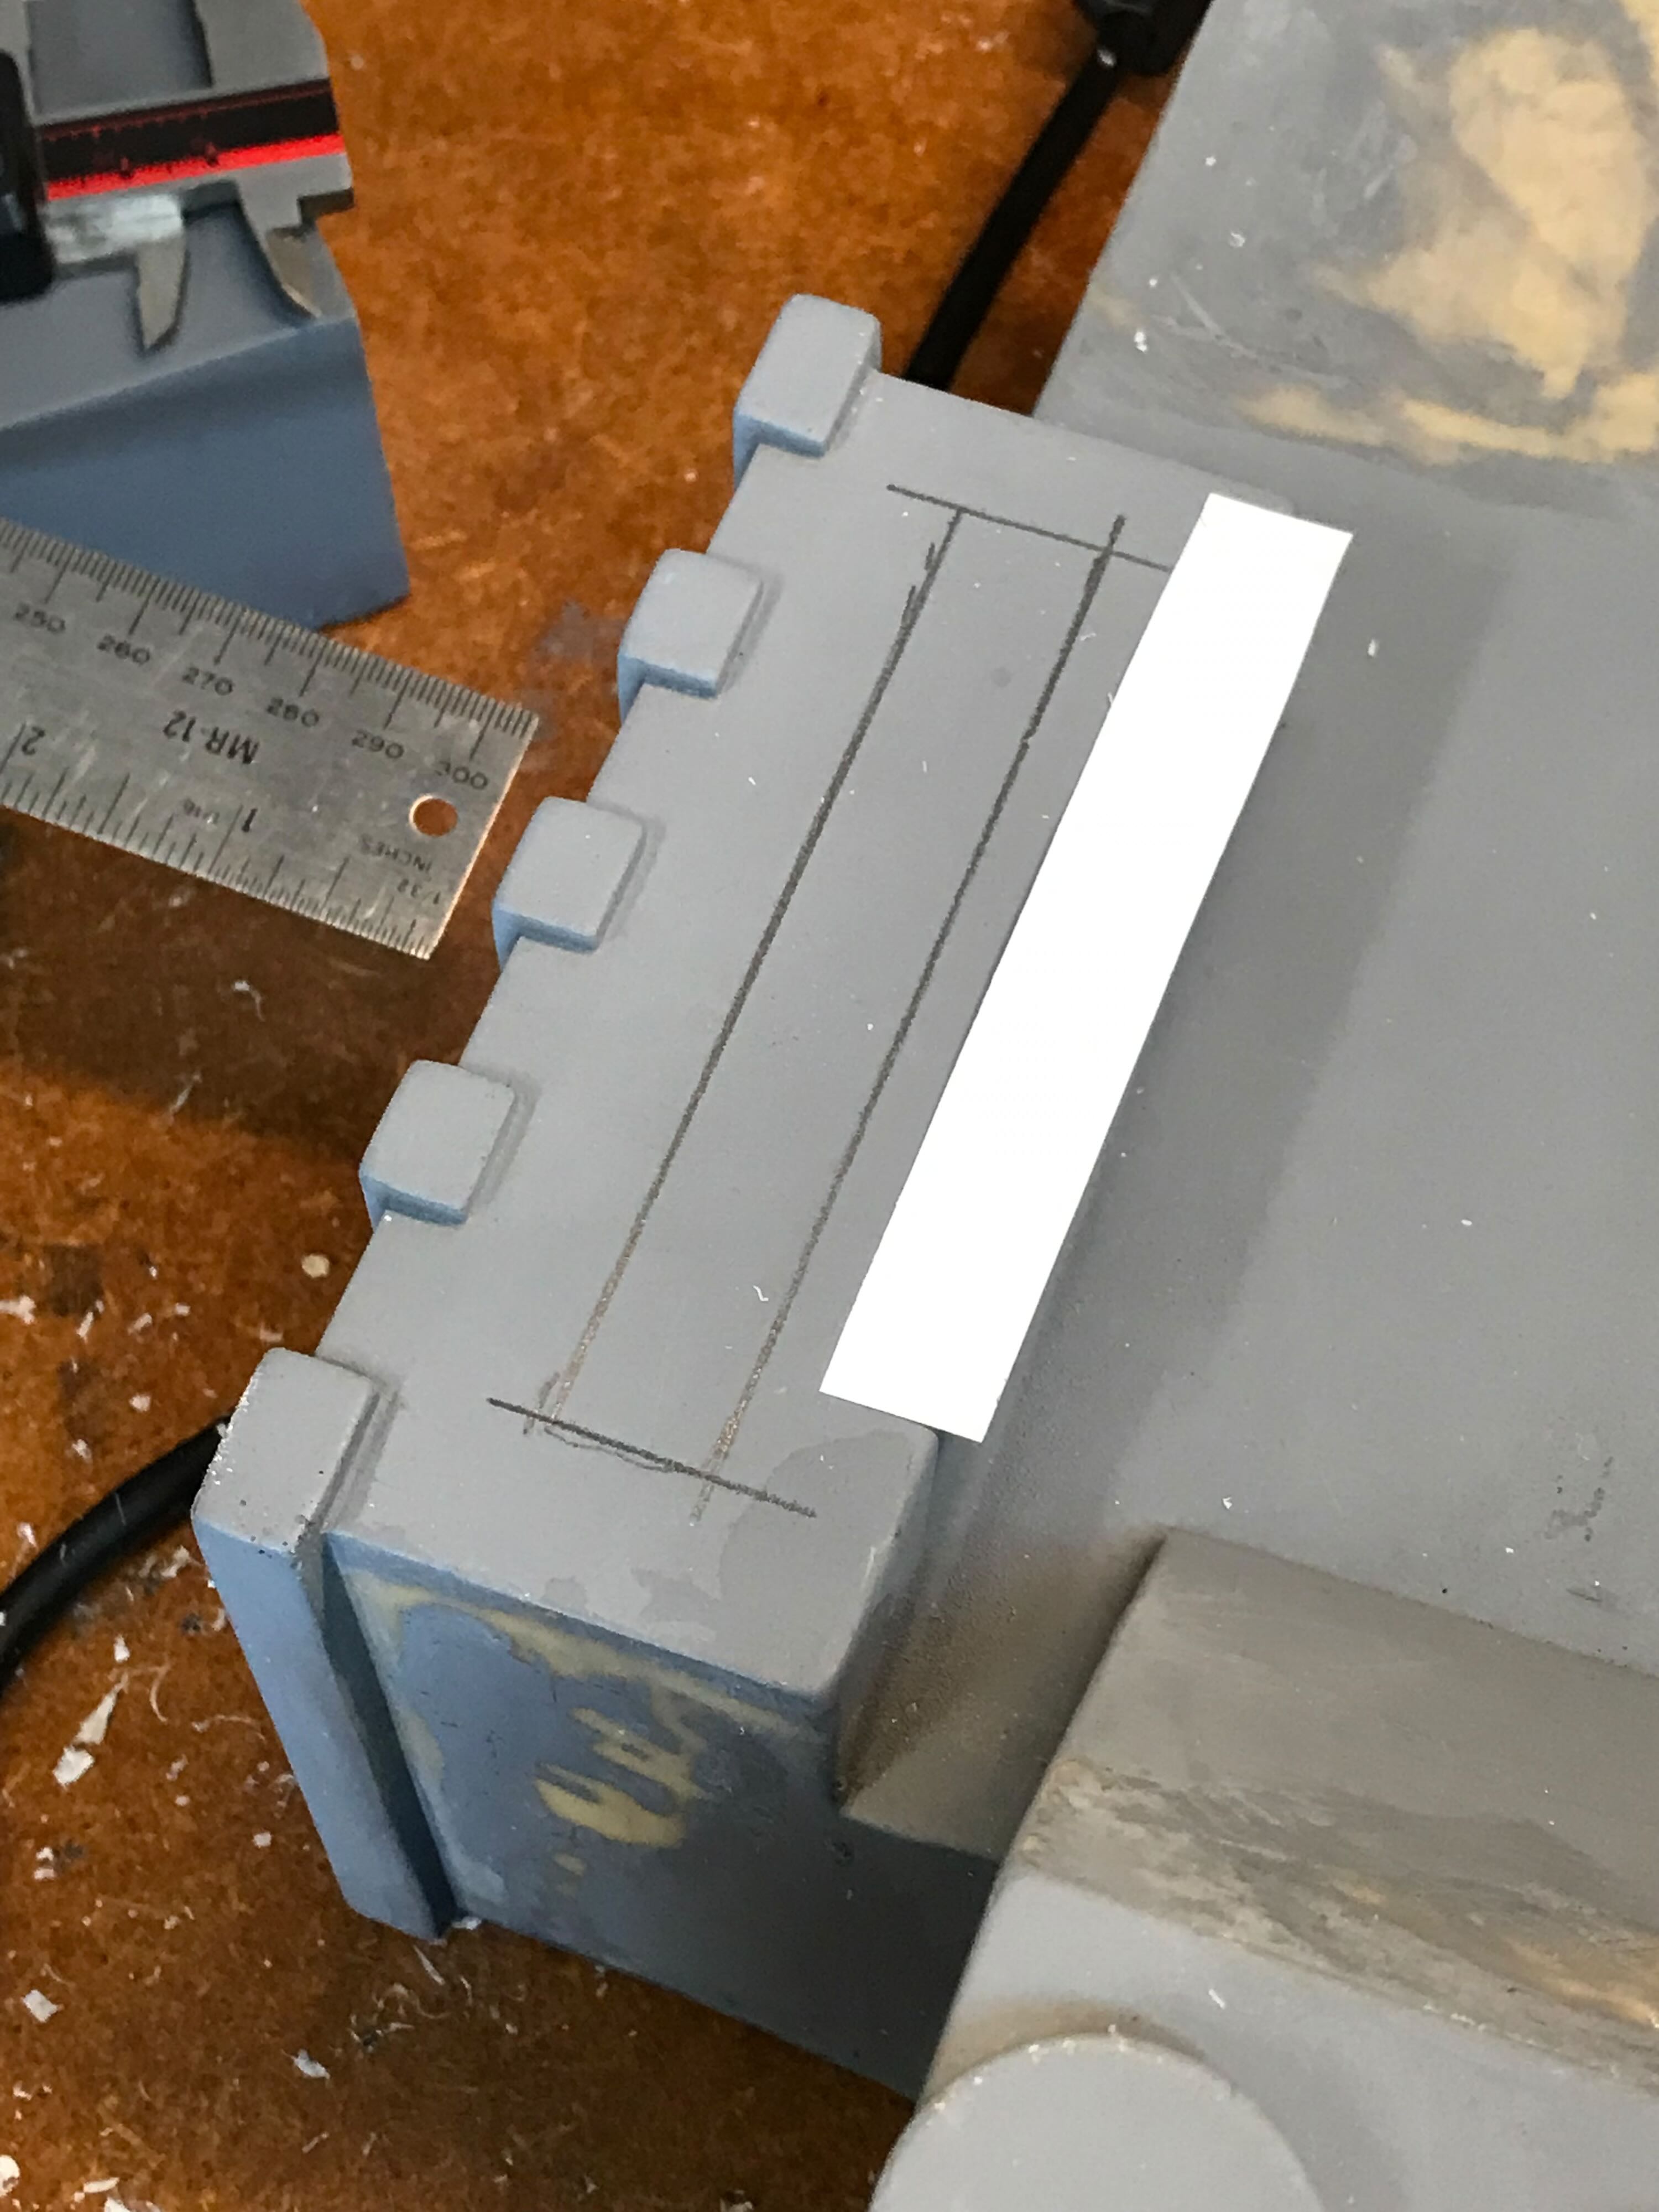
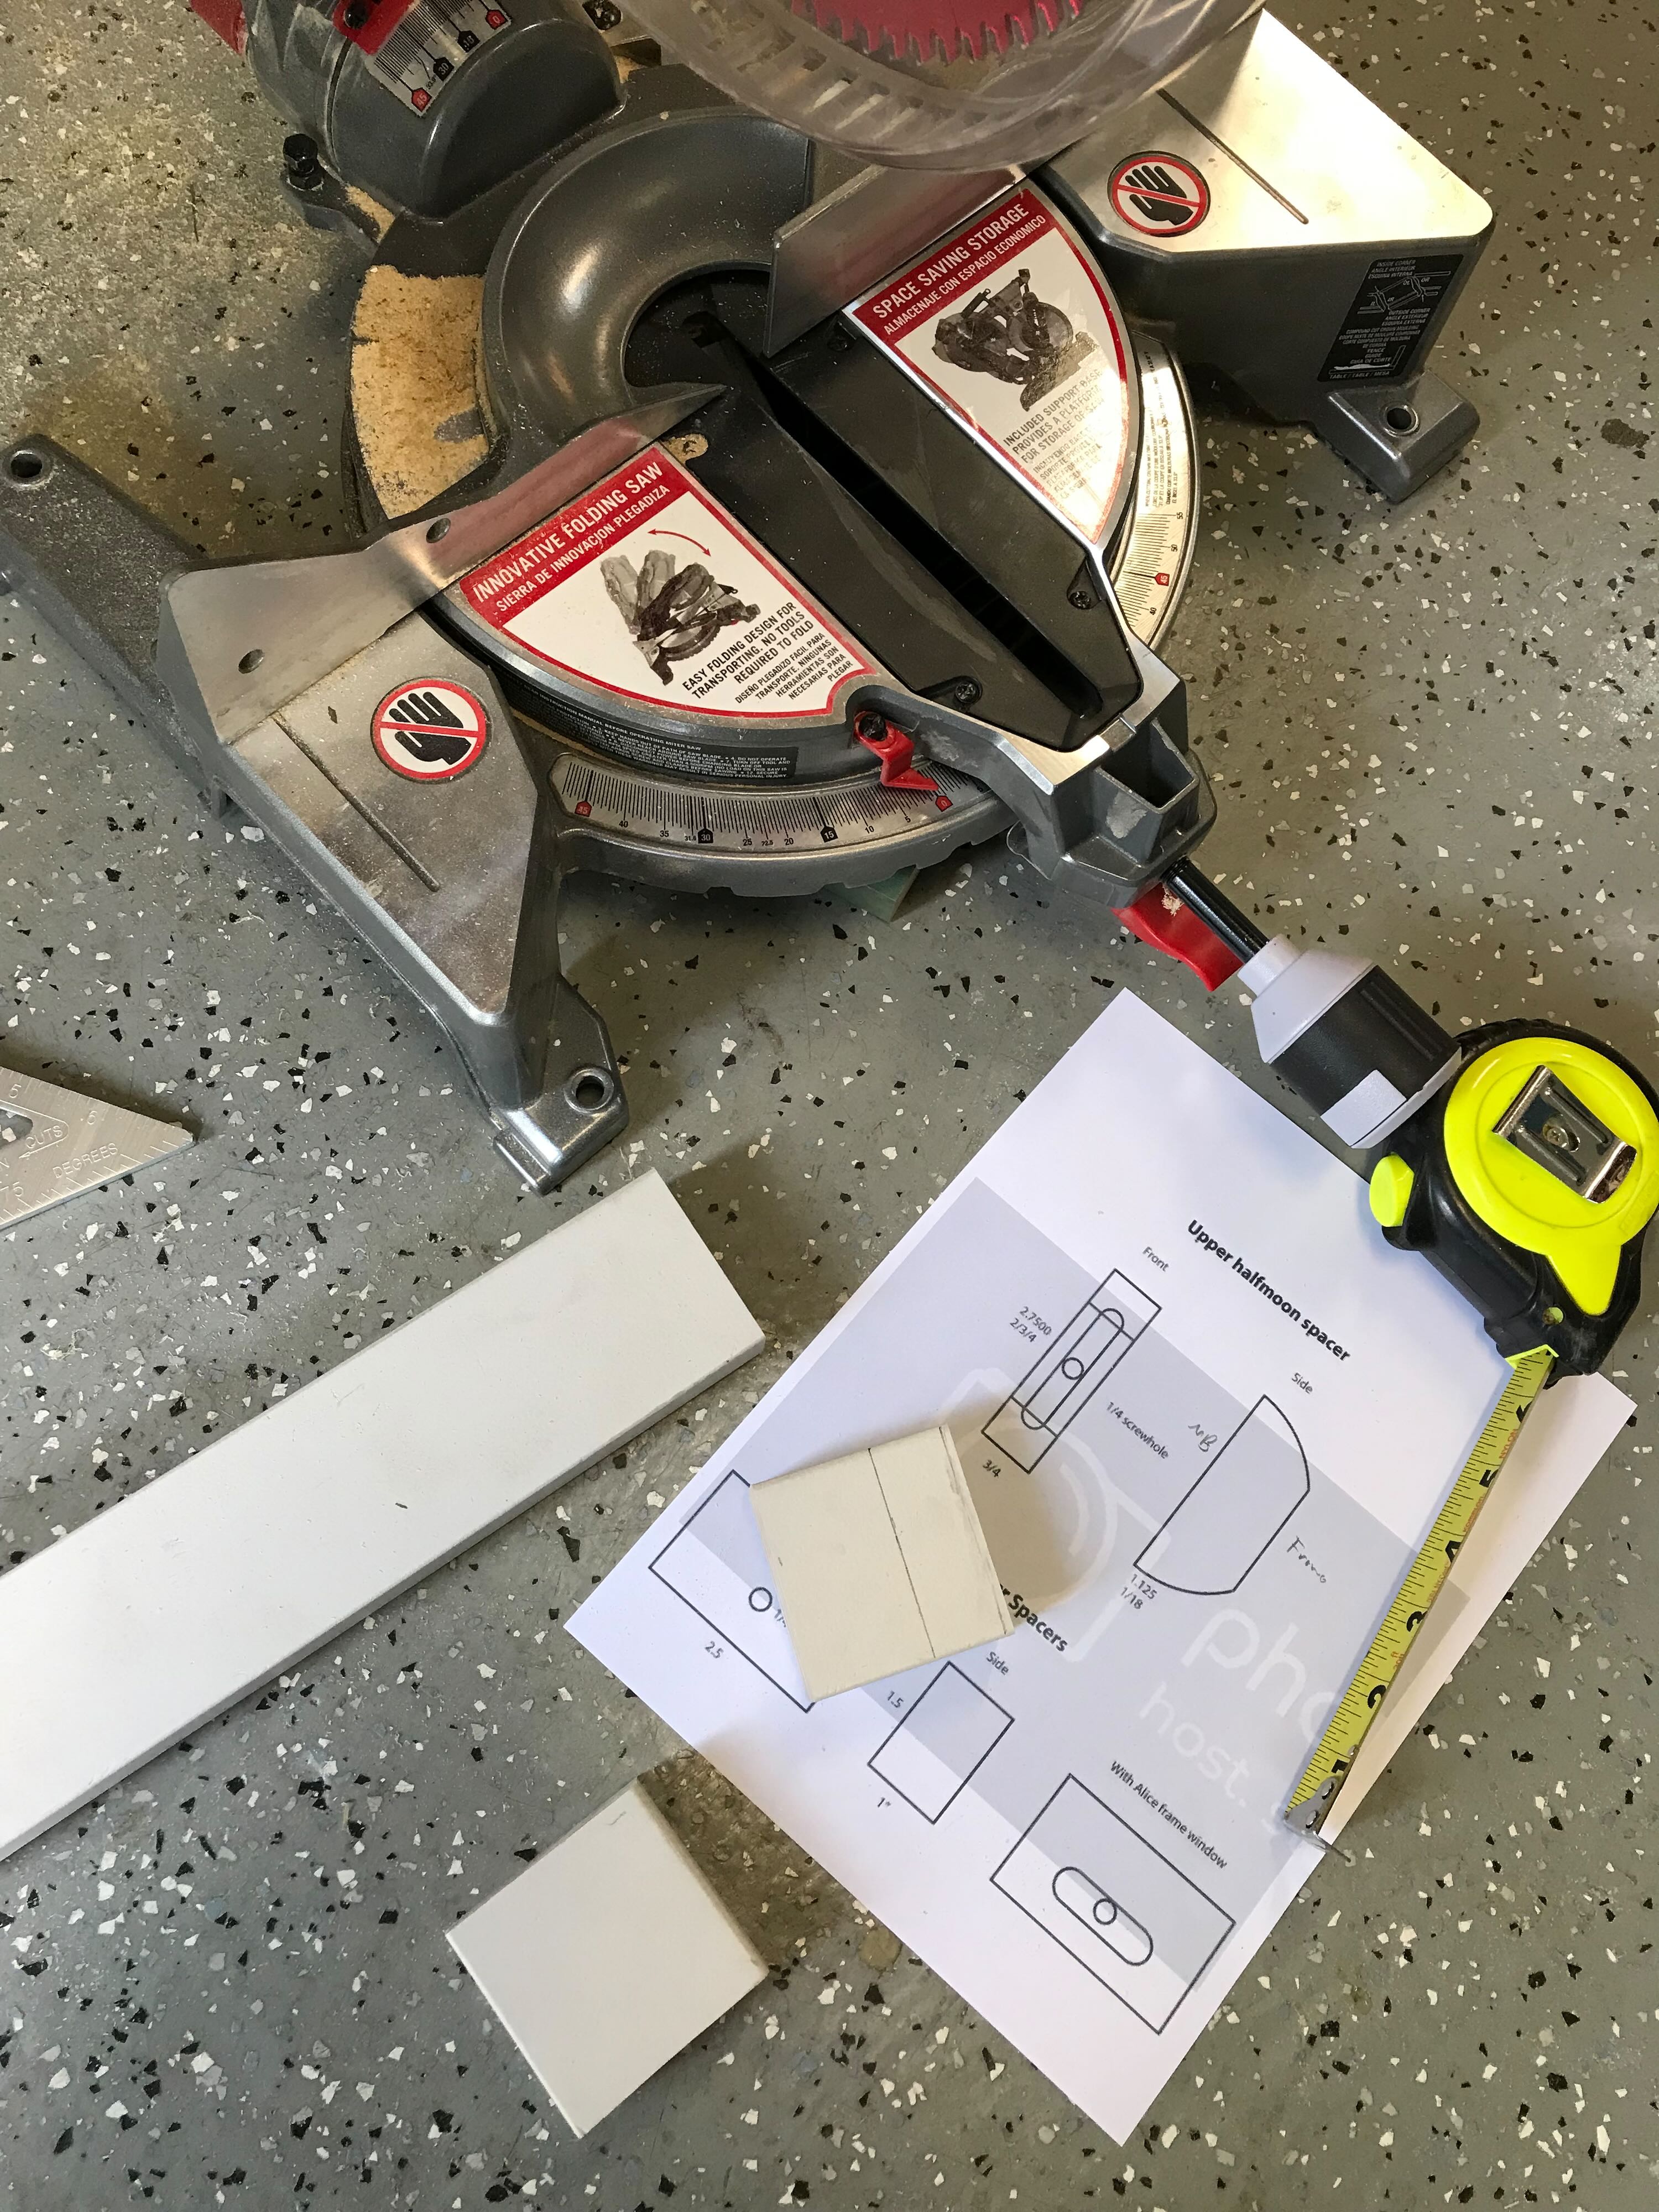
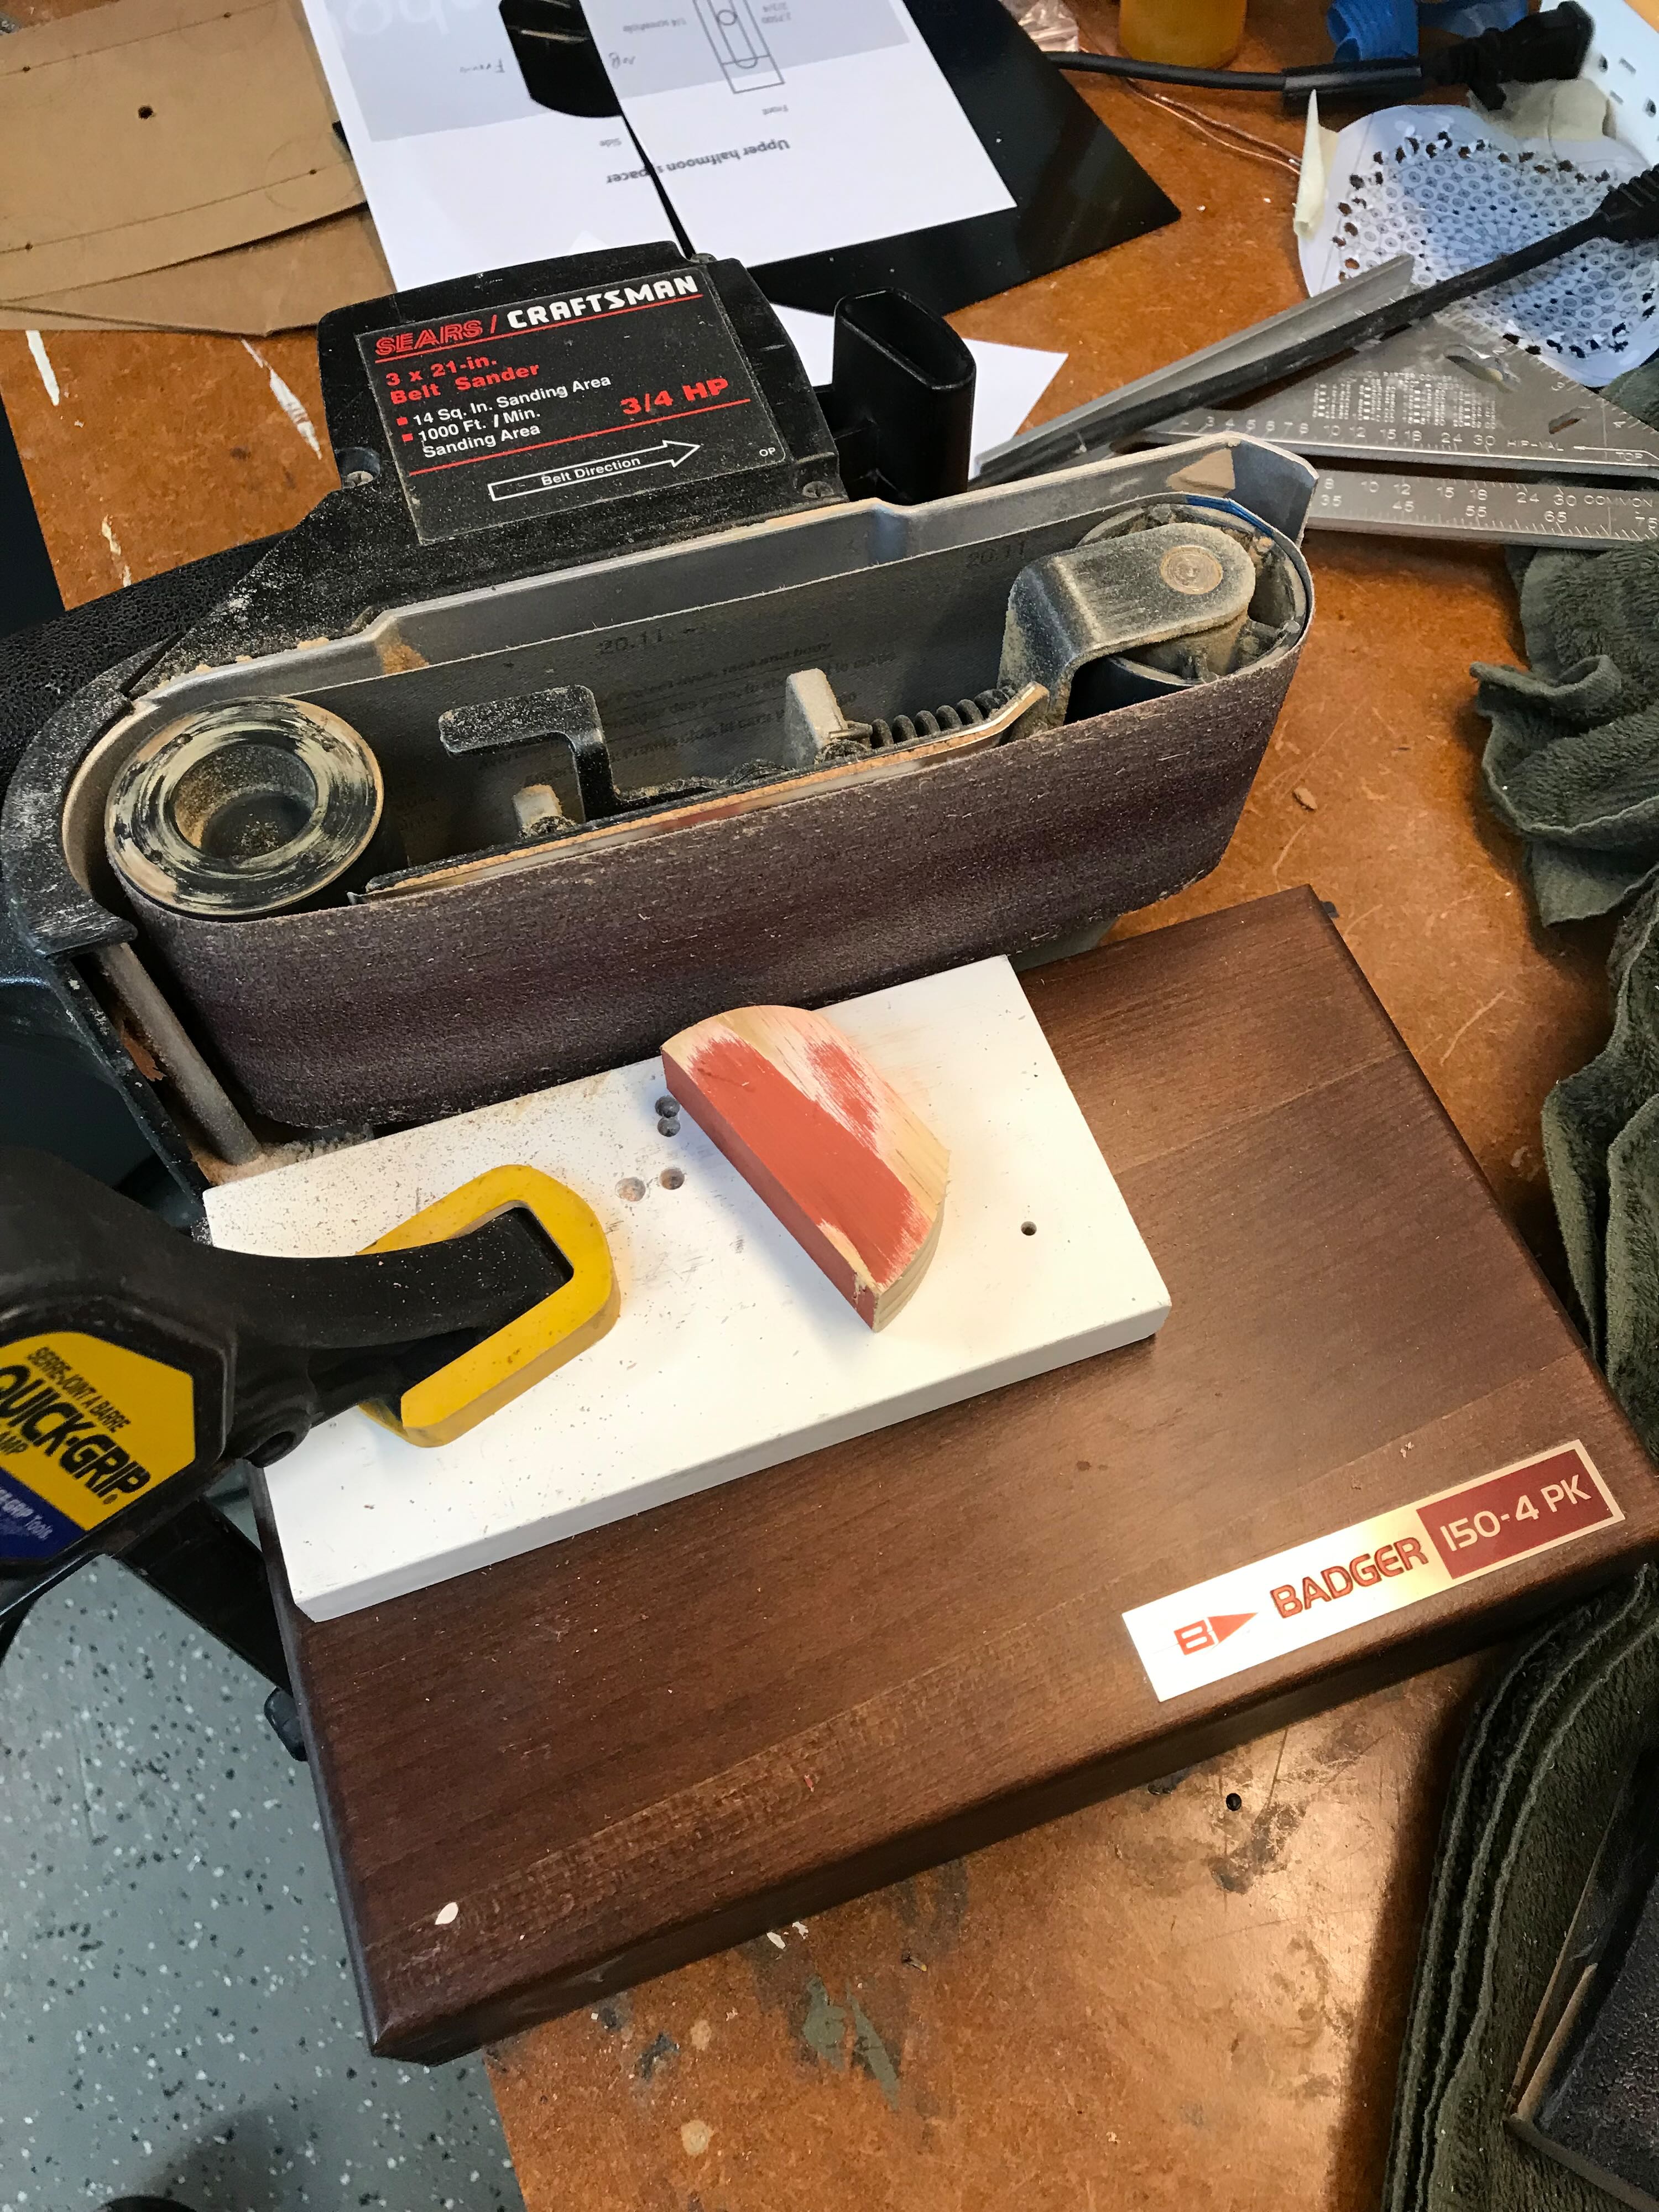
7/2/22 - Using a template I found on GBFans I used scrap 3/4" wood to fabricate the spacers. I cut the bottom ones with a chop saw and the top with a coping saw. I assembled a crude little sanding station around a belt sander to clean up the rounded edges. Again, as these would be barely visible I didn't spend a ton of time making them perfect.
Re: Building a Benofkent Props Proton Pack for fellow 'Buster
Posted: July 28th, 2022, 2:24 am
by WShawn
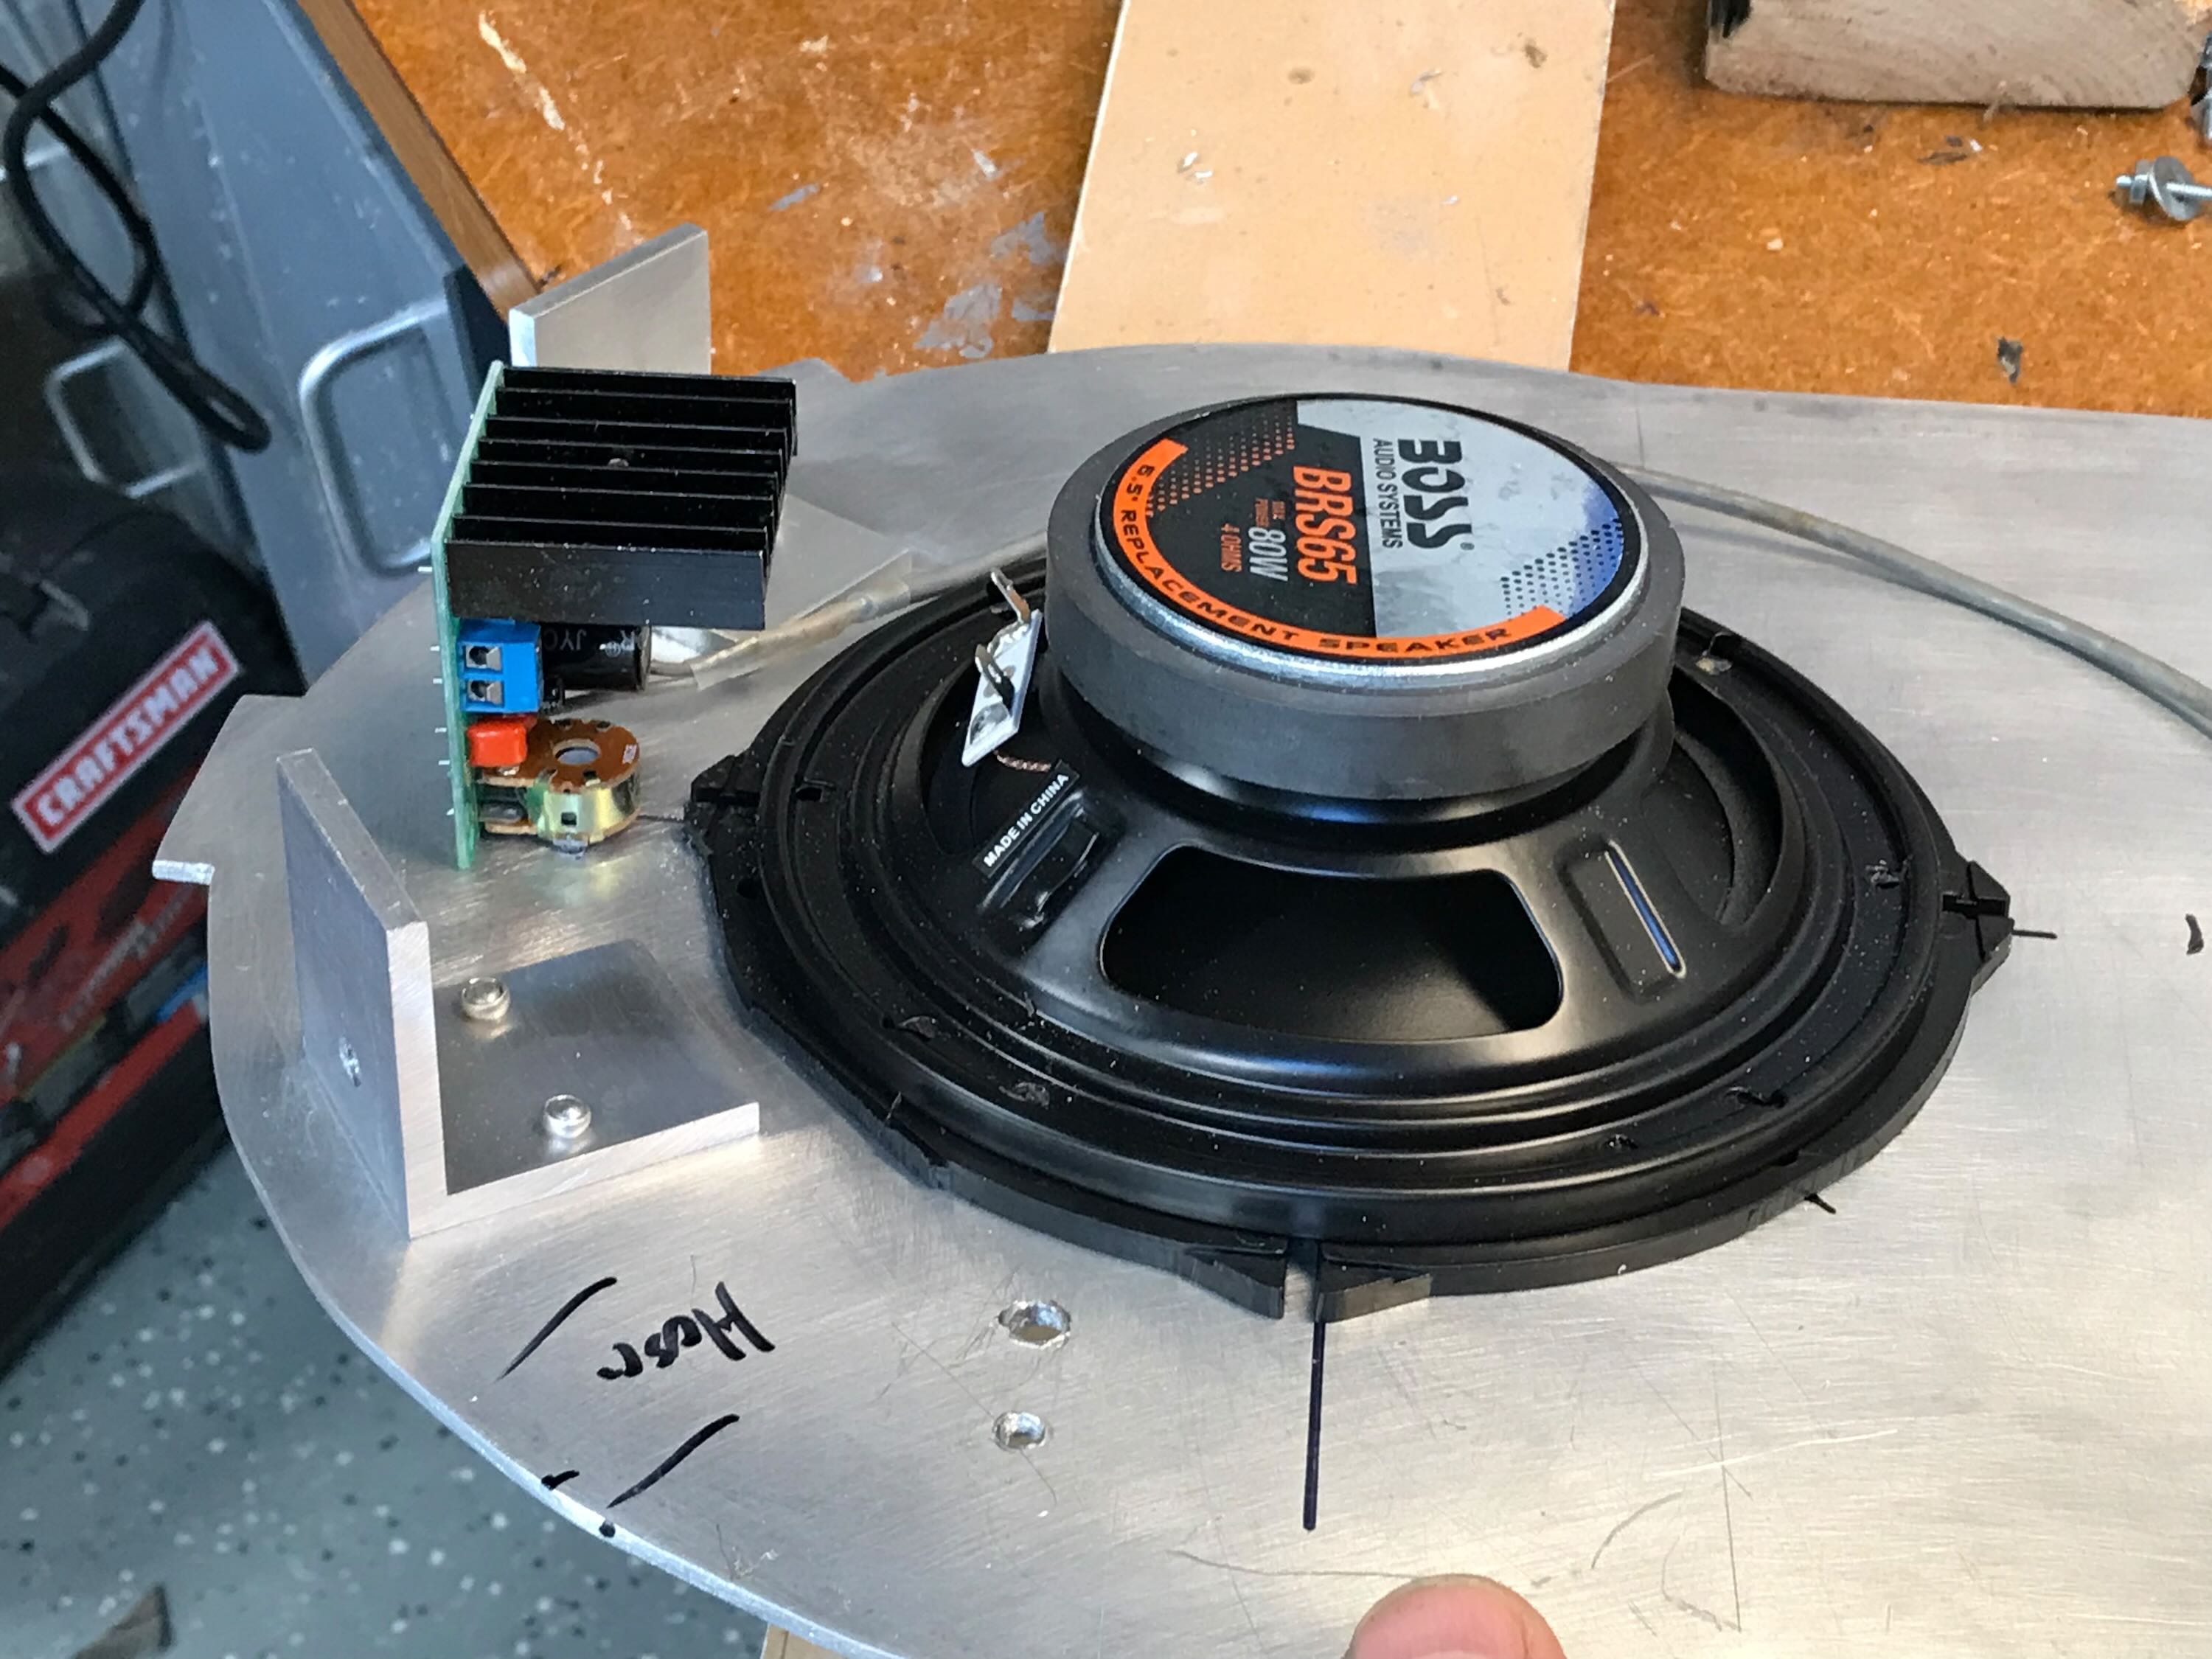
7/3/22 - I mounted the amplifier directly to the motherboard, just below the speaker.
Re: Building a Benofkent Props Proton Pack for fellow 'Buster
Posted: July 28th, 2022, 9:26 am
by mburkit
First of all, I want to say you're doing a really good job with this build. I do have a question though: are bentofkent proton pack shells only resin and no fiberglass? If so, does it feel brittle? I'd almost suggest doing a layer of glass inside it just to be safe.
Re: Building a Benofkent Props Proton Pack for fellow 'Buster
Posted: July 28th, 2022, 12:14 pm
by jonogunn
I very much enjoy following these highly detailed posts. Keep up the good work! Look forward to seeing more
Re: Building a Benofkent Props Proton Pack for fellow 'Buster
Posted: July 28th, 2022, 1:11 pm
by WShawn
mburkit wrote: ↑July 28th, 2022, 9:26 am First of all, I want to say you're doing a really good job with this build. I do have a question though: are bentofkent proton pack shells only resin and no fiberglass? If so, does it feel brittle? I'd almost suggest doing a layer of glass inside it just to be safe.
Thanks for commenting on my build thread; I appreciate it.
AFAIK Benofkent only makes resin kits. The guy I'm building this for bought this kit in 2015 IIRC.
The resin used in this kit seems somewhat pliable. It doesn't seem as brittle as something like unreinforced fiberglass resin would be. That said, if you dropped this pack it
would almost certainly fracture. Repairing such a fracture probably wouldn't be that hard. In the almost 40 years I've had my scratch-built pack I've never outright dropped it; it's tipped over a few times.
As I've noted in the build thread, the resin in parts of this pack is REALLY thick, requiring a lot of cutting with a Dremel to make openings or room for bolts. That wouldn't be as much of an issue with fiberglass. A bunch of parts, like the Ion Arm, are pure resin (not hollow), so that adds to the weight.
If I was ever going to buy a Proton Pack kit I'd probably opt for one laid up in fiberglass, like the original props. And if I had been building this Benofkent kit for myself I might have reinforced it with fiberglass cloth and resin.
Cheers!
Re: Building a Benofkent Props Proton Pack for fellow 'Buster
Posted: July 28th, 2022, 1:19 pm
by WShawn
jonogunn wrote: ↑July 28th, 2022, 12:14 pm I very much enjoy following these highly detailed posts. Keep up the good work! Look forward to seeing more
Thanks for taking the time to comment on my build thread. I'm glad you're enjoying it.
Building a pack is a pretty daunting task, so you have to break it down into as many individual little steps as you can. I made a punch list on my phone (that I was constantly updating, which kind of defeats the purpose) and ended up with 63 individual steps. I took over 200 photos over the course of the build. I'll probably share around half of them here.
BTW, I think your foam pack looks really good!
Cheers!
Re: Building a Benofkent Props Proton Pack for fellow 'Buster
Posted: July 28th, 2022, 7:20 pm
by WShawn
I made a rubbing of the Cyclotron windows to inform the placement of the cardboard tubes I'd mount on the motherboard.
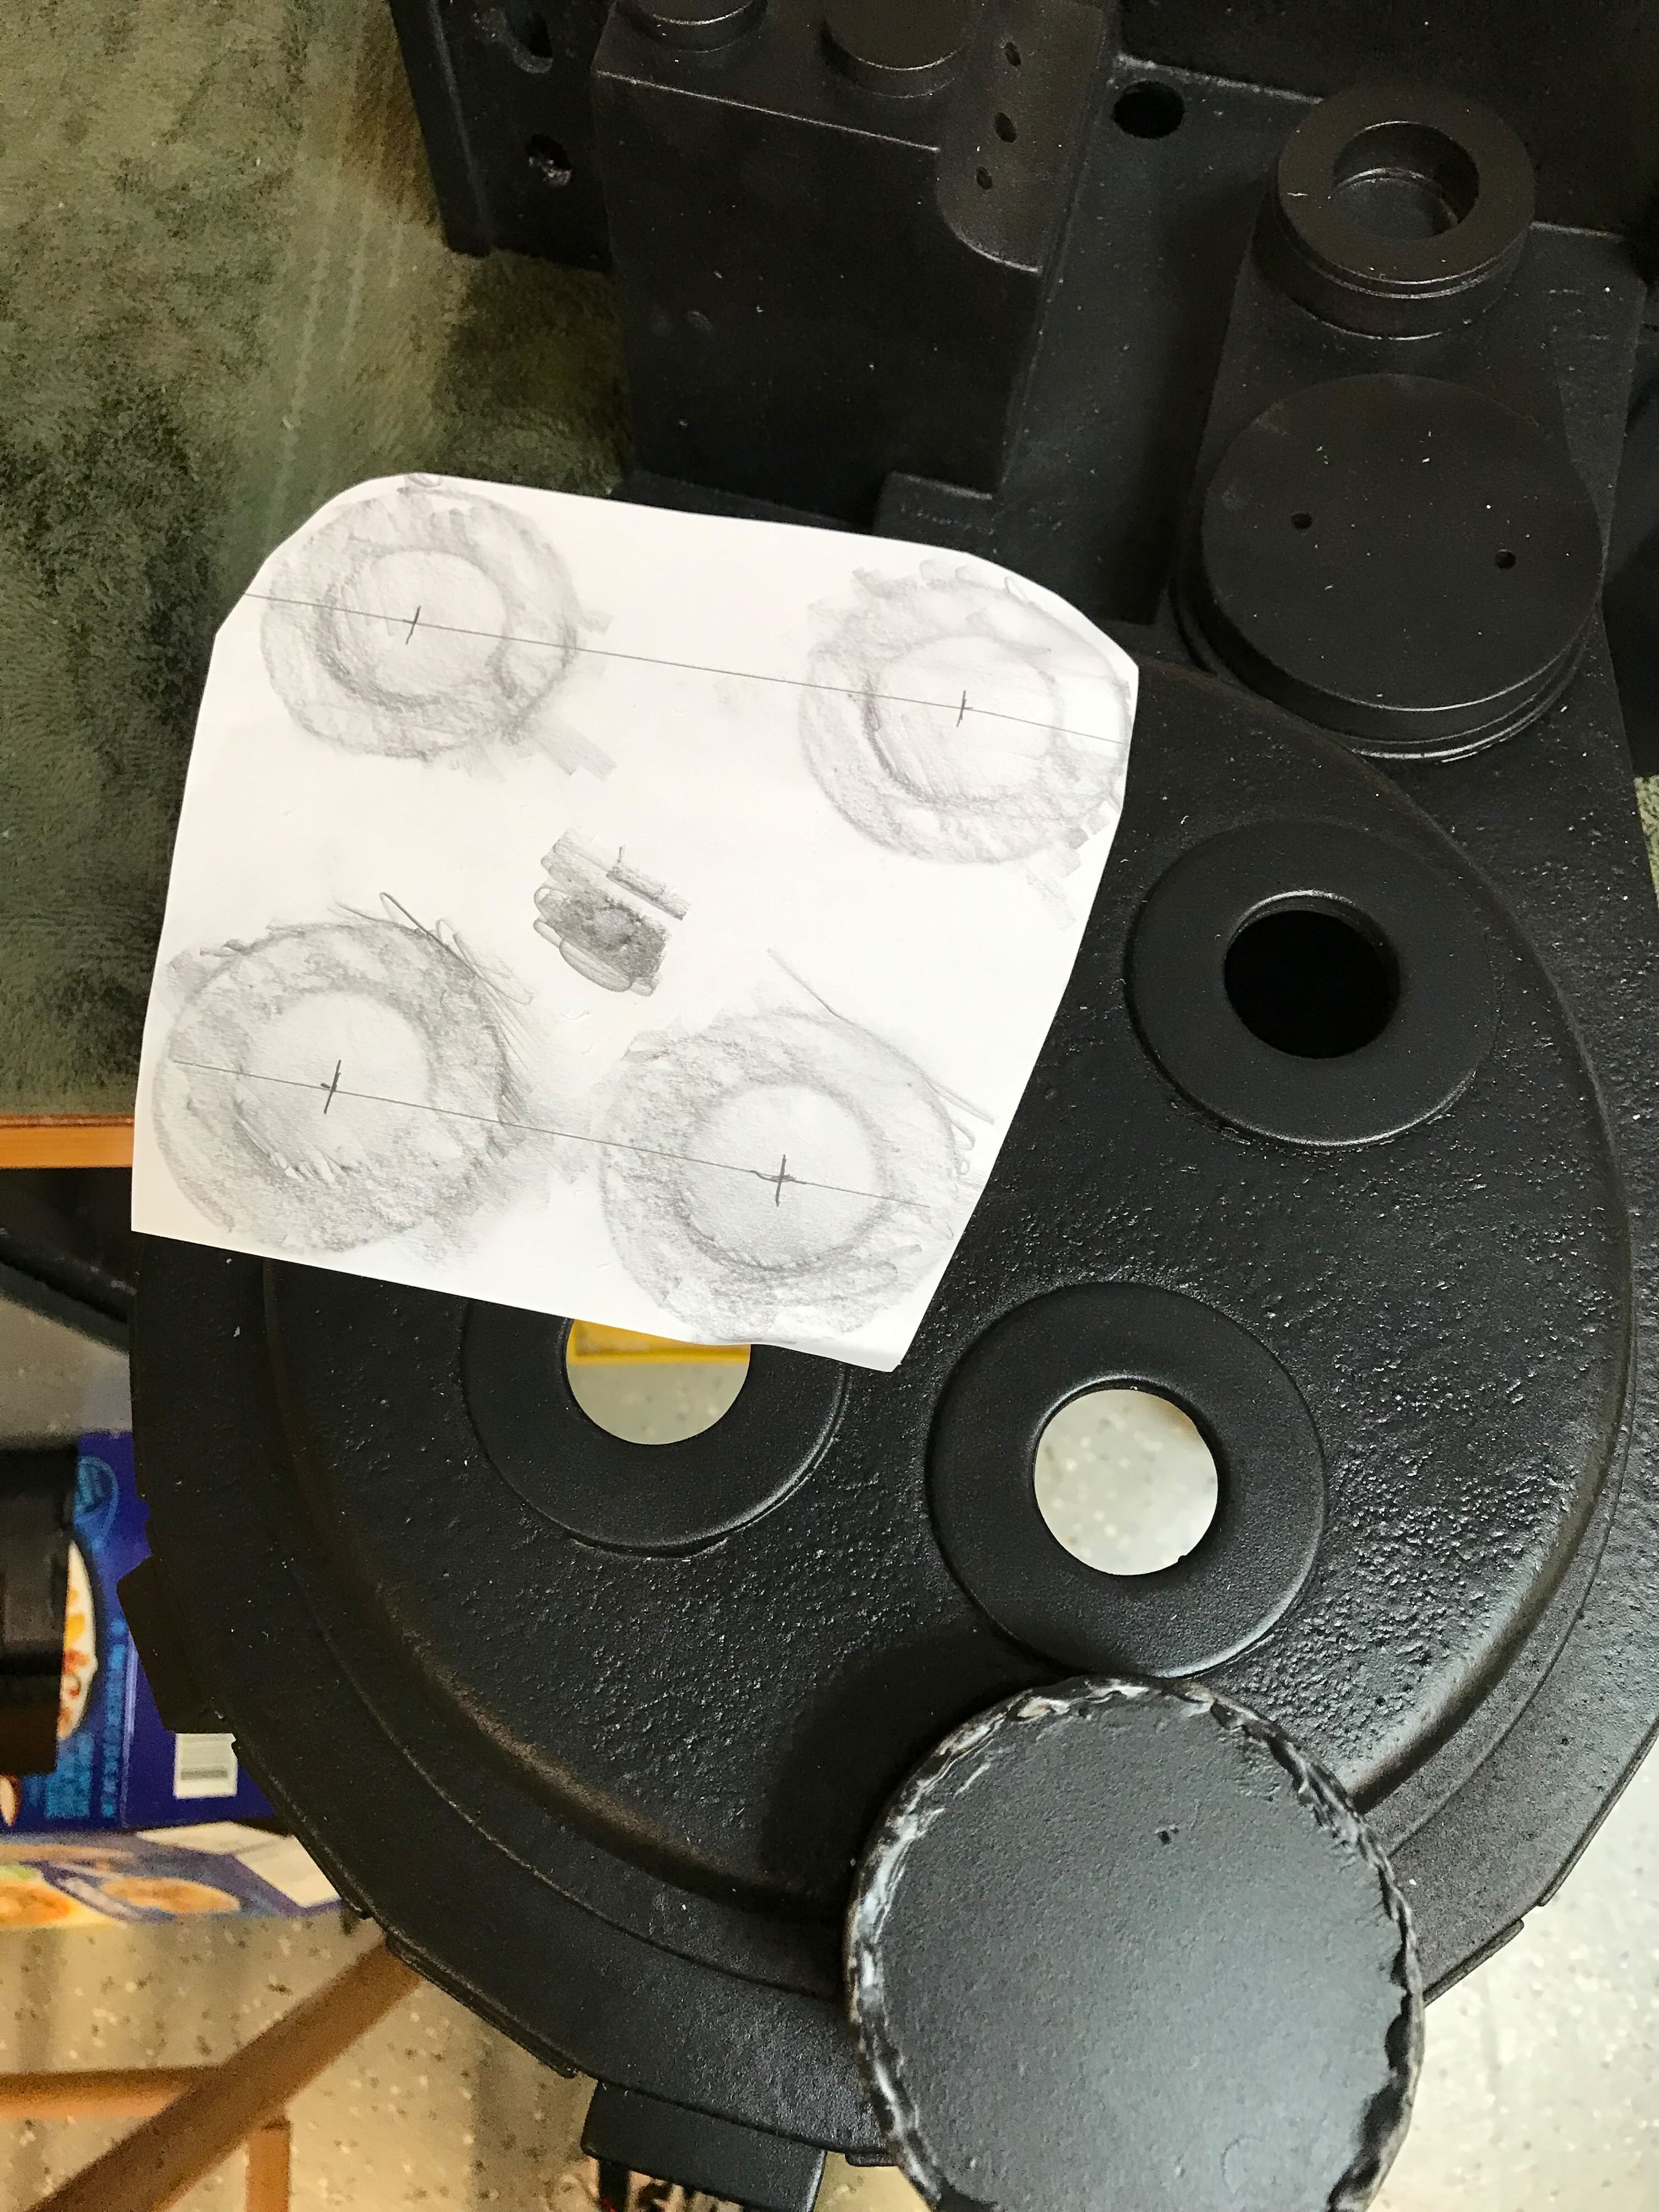
I transferred the pattern to the inside of a cereal box I used as a template for the final platform. I again used scrap wood to support the platform.